My key fob was having some problems... probably due to the amount of time I constantly flipping it out (playing with it).
However... you may also need this in a few years when one of the buttons won't press... or the flipping mechanism gets loose... or if you damage the shell and don't want to have a new key cut and programmed (put the internals in a new "shell").
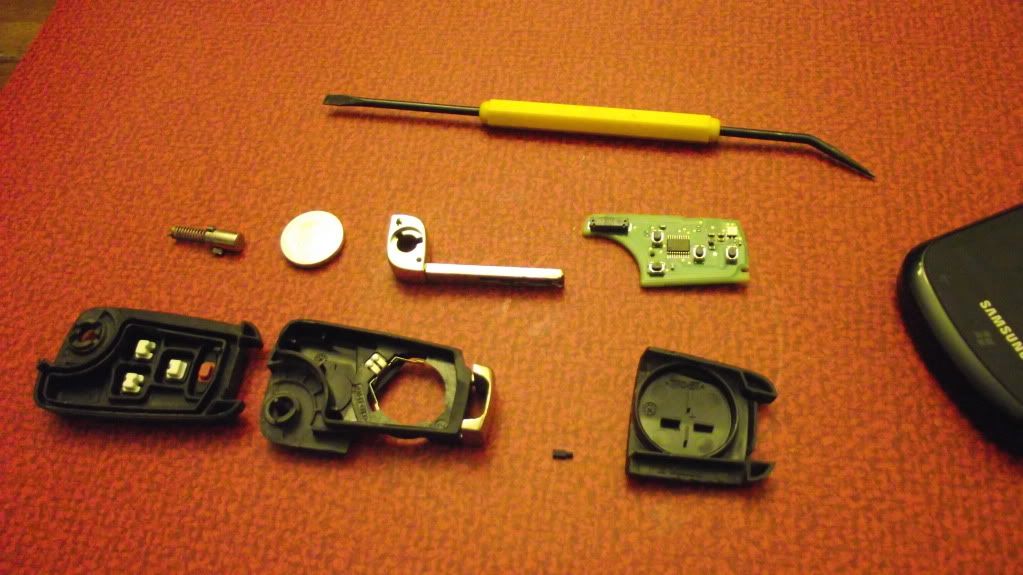
It pretty easy. You only need a small screwdriver for carefully prying the shell apart.
First pop the battery cover off and pull the battery out. To do this put the key in the open position and your thumb in the space where the key was... and just pop it right off (I did this out of order, thats why the battery cover is still on there).
Then pry lightly on the top side of the key fob with your small flathead like so (mine was easy because it was already coming apart there).
EDIT: if the links die again... use this link:
http://s601.photobucket.com/user/DBe...rary/Key%20Fob

Then do the same to the backside (next to the metal ring holder)... but slower this time to ease it off. You may be able to hold the remaining plastic part and push on the metal part.
When the front-face comes completely free from the back-face it will spin 2 revolutions from the spring force.
Then you can proceed to take out the key and the chip
Usually I would say... just do the disassembly in reverse for the assembly. But you need to put the spring force back into the key... don't worry it is easy.
-Put the push button back into the key (if you separated it from the key).
-Put the chip back in the front-face facing down.
-Put the key into its home in the "out" position
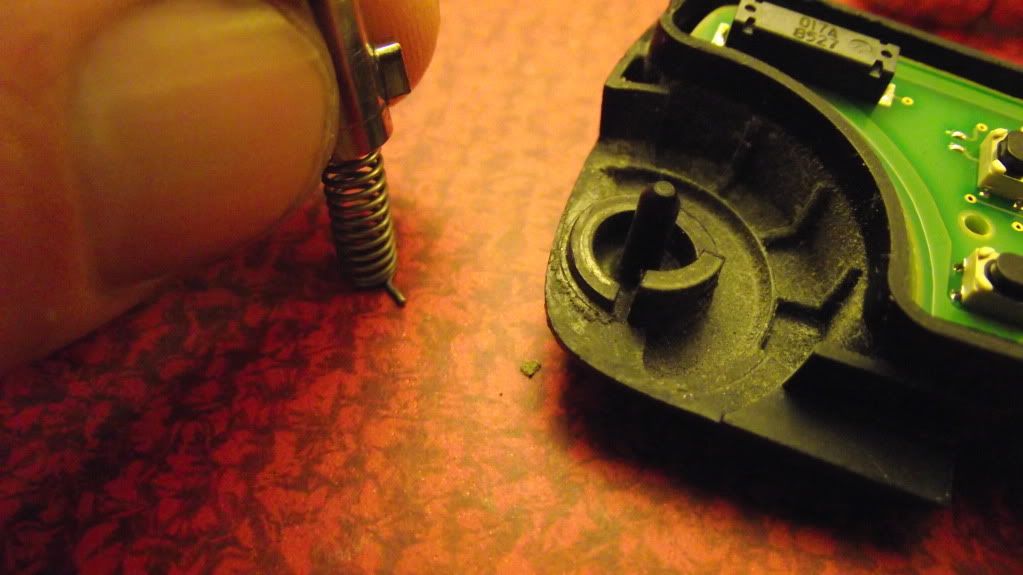
-Put the spring back into the push button (it will "seat" into a locked in position)
- put the back face onto the spring and make sure that the spring's little "foot" is in its home... this is what the foot looks like
you will be holding it like this...
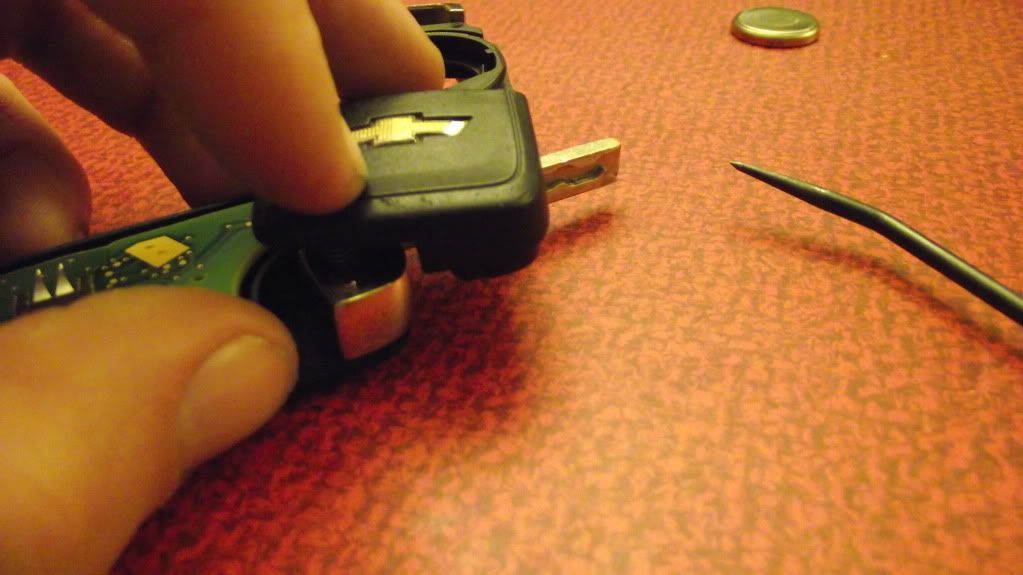
spin the back-face in a counterclockwise rotation, that will spring the key outwards.
rotate it 2 full revolutions and snap it back on.
the rest is cake... just make sure you press it together hard enough so it clicks (finger pressure should do it).
I took mine apart and put it back together in about 5 minutes. Just doing this made the key fit in there much better (no more play). So hopefully I wont need to replace my shell.
But if you ever need to replace the shell... at least you wont be dropping $120 on a new cut key, dealer programing, and a couple of wasted hours at the stealership.
There are a couple places to get an uncut, unprogrammed key (for swapping the internals):
http://americankeysupply.com/index.p...oducts_id=1282
and without the remote start...
http://www.amazon.com/gp/product/B00...A3GM12XFXQPQFV
.... Or email PatrickT at GM Parts House (forum sponsor):
patrick@gmpartshouse.com .... not sure how much they cost, but I think you can get one from him pre-cut.
Or you can get a used one on ebay for a couple dollars cheaper.