Yea I know. Been covered before. Nothing wrong with another informative thread. Occasionally I need to leave my phone in the car to charge and the outlet only works with the the key on. No good. I have seen some people splice into a wire in the console. I have noticed there is no wire in my console that is hot all the time (may vary by car and/or options ordered).
So, I had to add a circuit. This is how I did it! I have been doing electrical work on new emergency vehicles for 4.5 years now, so this is nothing special to accomplish.
I apologize as I missed some picture opportunities. I was preoccupied with other things as well.
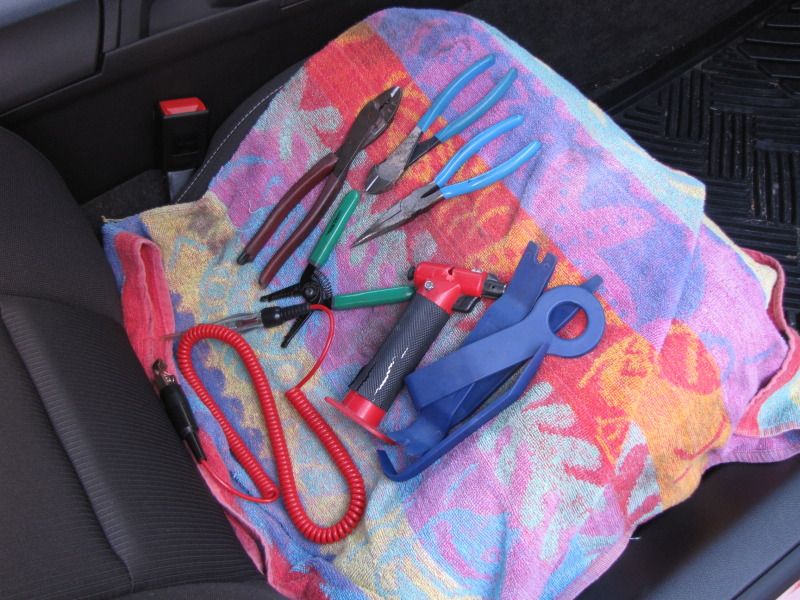
Laid a towel down on the seat and grabbed a few tools.
Strippers (For stripping)
Crimpers (For crimping)
Side Cutters (Cutting zip ties and wire loom)
Needle Nose (Grabbing Stuff)
Torch (For heat shrink tubing and butt connectors)
Interior panel tools (Doesnt scar up plastics like a metal screw driver can)
Test light (For checking power - be careful where you stick these things in modern cars!)
The all in one electrical tools that are at WalMart and auto parts stores would work fine, as would regular non-heatshrink connectors but this is how I do things at work so that's how they get done in my car. You can even solder and heat shrink if you wish but I find that unnecessary on things like this (outside of radio work and such).
Now, you have to remove the trim piece around the shifter. You may be able to pull it up by hand, but I used a plastic interior tool. If you plan on doing more interior work and care about your car, go to Harbor Freight and buy a set of interior panel tools. Less than $10 for a set of 5 various shaped tools that are plastic and won't scar up your panels. Just slide it under the back and gently lift. Then slide it around one side of the panel and it will pop right up. You will have to pull the shifter back to squeeze the panel out past the radio/AC controls.
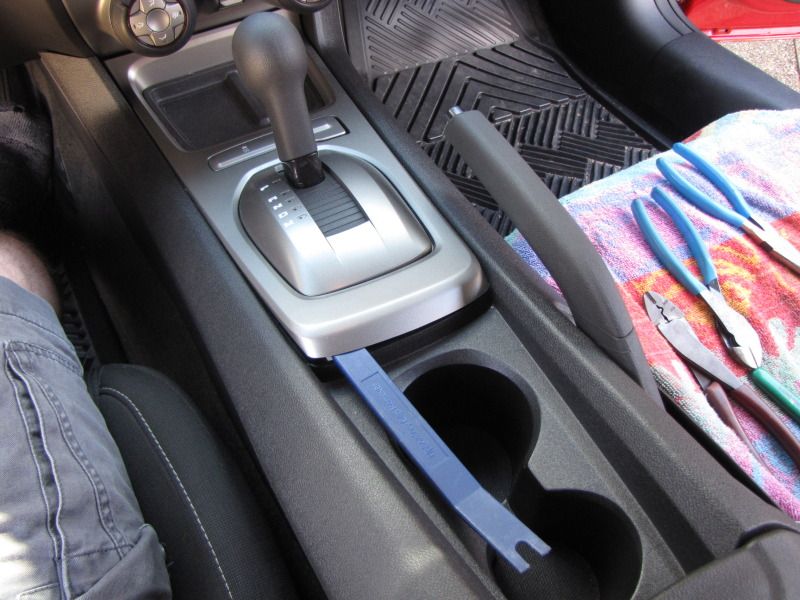
Un plug the panel so you can easily work with it. The plugs are simple. Just push the tab in and pull it out of the making connector.
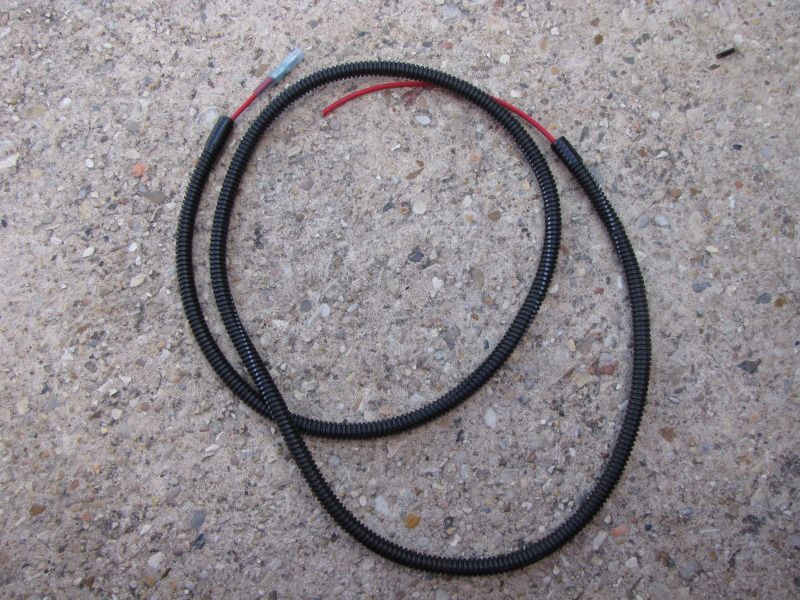
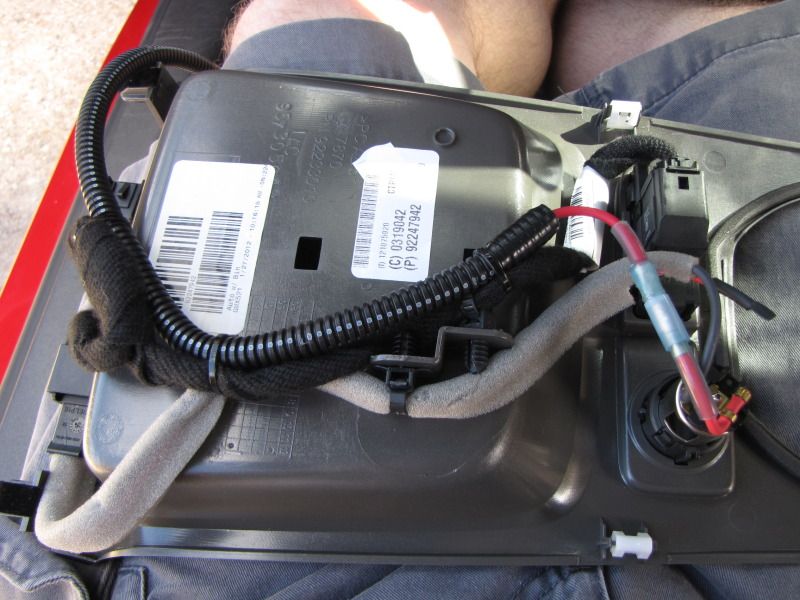
Alright, I do not like running wires in cars without some form of protection all willy nilly through the dash board, etc. I have done it in old beater trucks but I think a $27K car that's 7 months old deserves better. This stuff I had laying around from other projects. I used a piece of 14g red wire and some 1/4" split wire loom. You can get small bits of it from auto parts stores but if you are going to do a bit of work on your car go to Summit Racing or someone similar and buy a roll of it and save yourself a TON of money. Same with the wire. I also used a bullet connector so I can easily disconnect the cigarette outlet in case I take the panel off to work on something. Put the FEMALE END on the wire, the MALE END on the outlet. This way if you unplug it there is no exposed metal contact to touch something and short out.
If you run bare uncovered wire through the car, be certain to not let it rub on metal parts, or get into pinch zones.
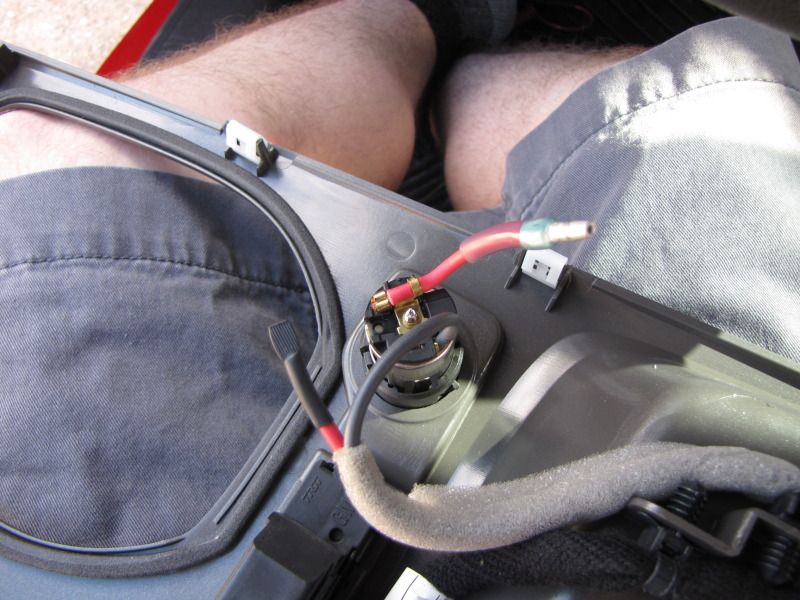
Alright. I simply cut the wire to the outlet, put heat shrink on the bare end, and but the MALE bullet connector on the outlet.
Then I secured everything nice and neat to put it back in.
Alright. Pull the trim panel off the left side of the console. Just grab it anywhere and give a little tug. It will start popping right loose. Feed your wire through one of the small openings against the carpet, under the radio. Pull it out under the dash. Run your wire under the dash panel across to your fuse box. I zip tied mine in a few places to keep it secure. Slide your panel back into place and gently snap it back down and put your console trim back on.
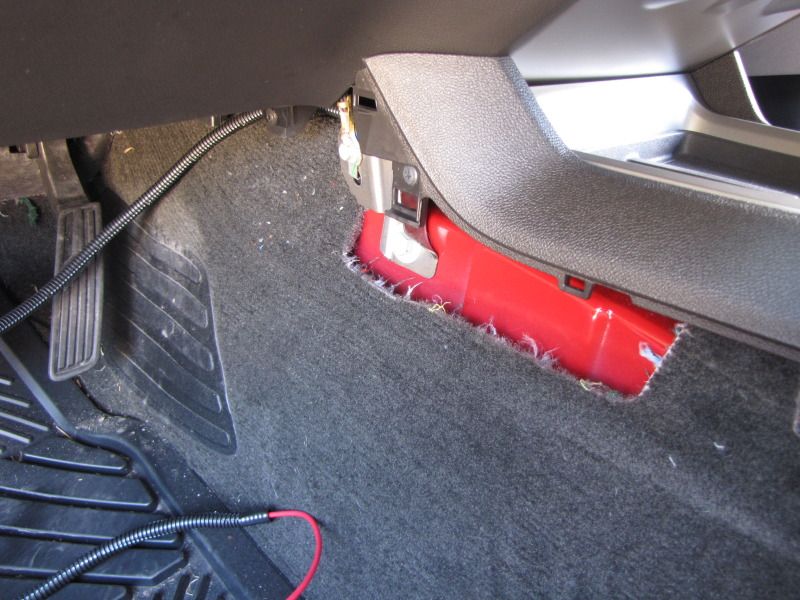
Oh, you may want to pull the driver side end dash cover off to get your wire out! It's easiest to grab the bottom corner by the door gasket and start popping it loose there.

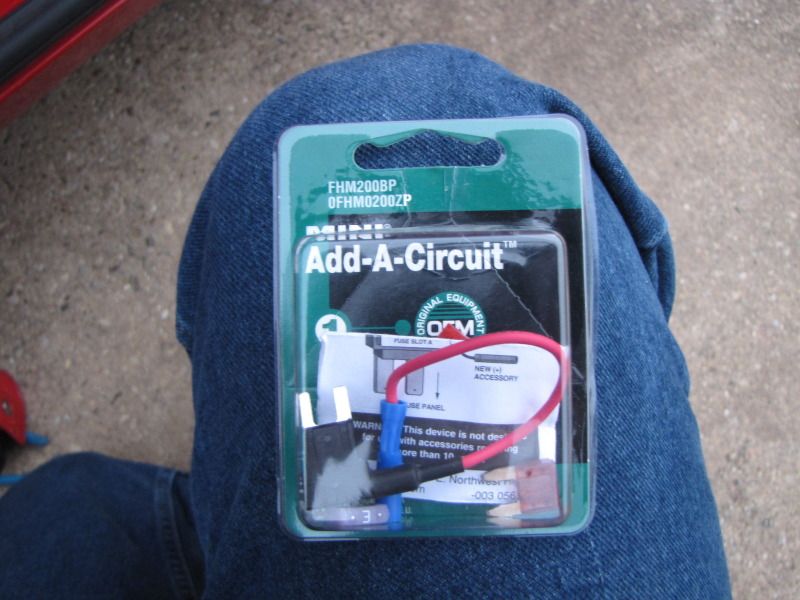
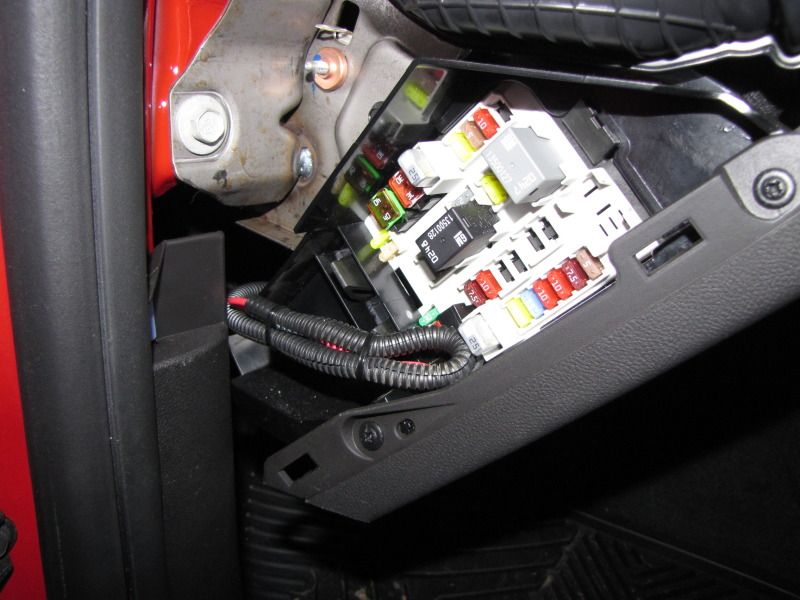
I used an 'Add A Circuit' and plugged into the '30A Battery' slot at the bottom corner of the fuse box. It's tight squeeze to put it in because it's so close to the edge of the box. Just fold the wire over gently and push it in. Put a 30A fuse into Slot A (to protect the original circuit) and a 10A fuse into slot B (to protect your new circuit). I tied it up with a couple small zip ties and was done! My outlet now works all the time like it has in every other vehicle I have ever owned.

Eventually I will be removing this as I'm going to make a custom wiring harness that will start at the battery in the trunk and provide power and fuse protection for the front power outlet plus cup holder lighting, glove box and foot well lights, and upper and lower grille lights. Some of that will be controlled by remote control. I still have to start drawing it all up
