Thanks Edrock....
I used the 15" Blue LED from Advanced Automotive Concepts - I had 2 inverters
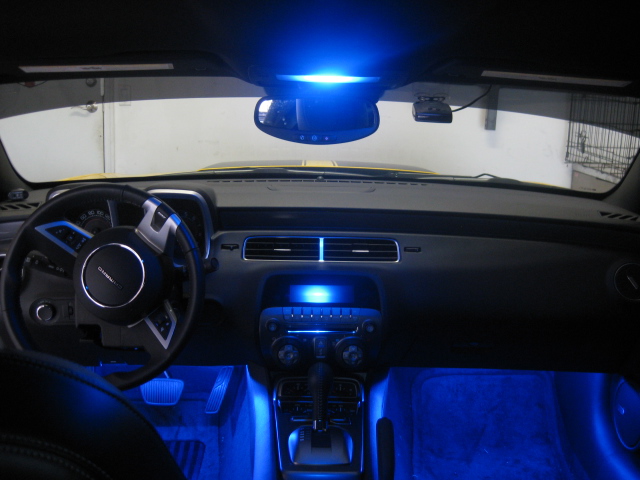
I also took the opportunity to wire in the Escort Radar detector - alas its on permanent power from a spare in the fuse box, can't find any that operates on the ignition... anyway
First remove the Door Pillar post cover - I found removing the seal gives you easy access. Once removed you can grab the door pillar cover and it actually comes away pretty easily

Next is to remove the dome light assy. There are other threads on this, but gently - take a flat head screwdriver and remove the lens cover and the silver reflector. they basically just need easing out all round. The main 'white' piece is a little tricky. Two spring clips hold it in place and they toward the front of the car

I used a long nail to push clip up while using a screwdriver behind to leverage it out, bit awkward to explain but I think you'll see what I mean - Don't let go---it will spring back - It does come down easily when they are released.
Next take out the wire harness, it has a clip so depress that first.
The dome light wire is the one on the left -

Don't ask what color - im color blind....but it is the one with a space between it.
You should be able to see at the front of the headliner a small hole. I fed a wire through this from the windshield side -- i.e toward you

you can just about see the cutout in the picture. Once fed through the headliner, go ahead and run behind the headliner over to the post - you will feel a small gap between the headliner and wind shield. Once over to the post run it down to the fuse box. At this point I spliced it to the dome light - but you may want to do this last - just in case of a short

Now secure the inverters:
Drivers side is perfect fit in the fuse box:

Next - the passenger side - you will need to extend the power wires to these - bit of solder and heat shrink...Placement of the inverter is not too bad either

Next secure the LED strips. Passenger side - drill 3 holes - its ok, they don't go through to he inside, use tie wraps to lightly secure the LED - plug in to the inverter

Drivers side has existing holes that you can use to secure the LED tube:

Next step is to secure the ground wire - There is a convenient black colored bolt just above the bank of fuses that i used a ring terminal for both inverters, - you can see this in the pictures below
Connect both +ve wires from the inverters to the wire you ran from the dome lights previously - i soldered and insulated them
At a later date i may add switch so i can have them on without the Dome light - pretty easy mod to do....
I think that sums it up - probably 90 minutes work.
JOB DONE
And I have no idea where these next pictures came from --- so please ignore!!