Purchased:
www.bigwormgraphix.net
(If you search for their site you may find a second url:
www.bigwormmotorsports.com This is the WRONG site)
Contact:
bigworm90@gmail.com
Matte Black Side Spears $169.95
Matte Black Hood Spears $40.00
(Only $40 because added to Side Spears ordered Regularly $50.00)
Matte Black Gill Inserts (style #2) $29.95
Ordering from Big Worm Graphix was a pleasure. After ordering and installing the stripe kits on my car I have had a few follow up questions all have been responded to promptly. They use Hexis vinyl which I found superior to the vinyl which I received from both Phastek and Rider Graphix. I would recommend Big Worm Graphix to anyone.

Earlier this year found me on work travel for two months. Needless to say, in between the training sessions, I found myself with too much time on my hands so I started looking up striping options for my car.

I was looking for something unique. I did not want to have the same stripes that 90% of Camaros have. I also was considering painting versus vinyl; however, for the price differential, I opted to go with vinyl. Vinyl also gave me the flexibility to easily modify my stripes down the road should or the ability remove the stripes altogether. After changing my mind several times on the stripes I decided with the matte black side/hood spears combo from Big Worm Graphix.
Installation Prep
The stripes sat for about five months as I waited for the warmer summer weather to arrive. I finally slotted out a day for the install and my grandfather and I started the process. This was the first time either of us had installed vinyl decals and the process went surprisingly smooth. To prep the car I used rubbing alcohol to remove the wax from the application areas. After an initial rub down, I sprayed the areas with water to see if it was still bubbling or running off smoothly. It was still bubbling (indicating wax was still present) and I rubbed everything down again, this time much for vigorously. I started the installation off easy and installed the hood spears first. One nice thing about working with the Hexis vinyl is that it only requires water during the application process rather than the soap mixture required by Phastek and Rider Graphix.
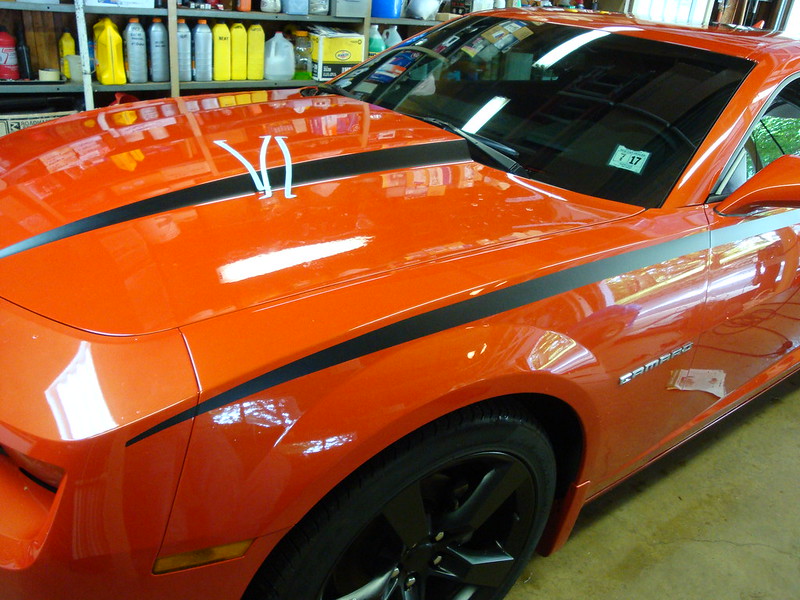
Hood Spear Installation
I sprayed the surface and the sticky side of the vinyl with plenty of water and then lined it up on the car, leaving excess hanging over the front and rear of the hood. Making sure plenty of water is applied is key as this allows the vinyl to be picked up and re-applied easily. After lining up the vinyl, I used the supplied squeegee to remove as much of the excess water as possible. I then used a blow dryer to gently go over the entire surface of the decal. A blow dryer is preferable to a heat gun as a heat gun can melt the decals if you are not careful. After leaving the decal sit for about thirty minutes I peeled off the front backing and re-squeegeed the decal. I then tucked the excess under the rear and front of the hood. This I held in place for about a minute which was sufficient for the decal to stay in place.
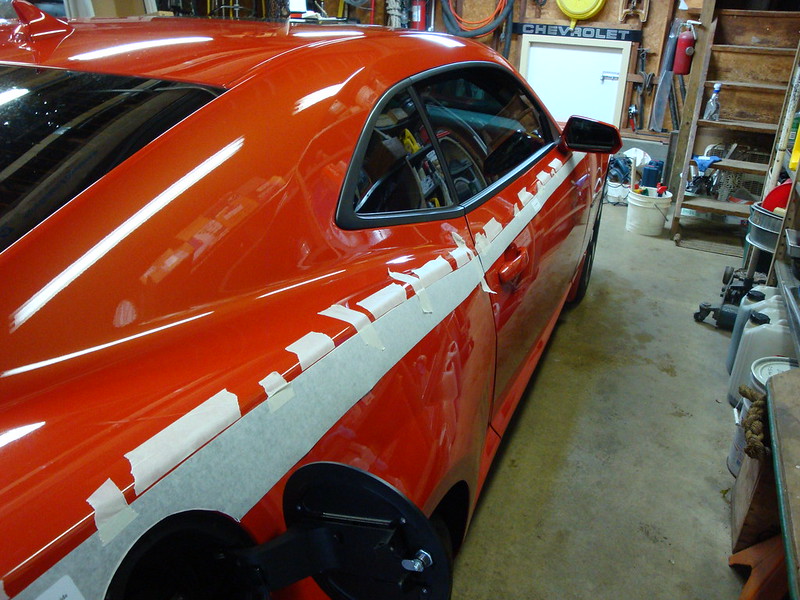
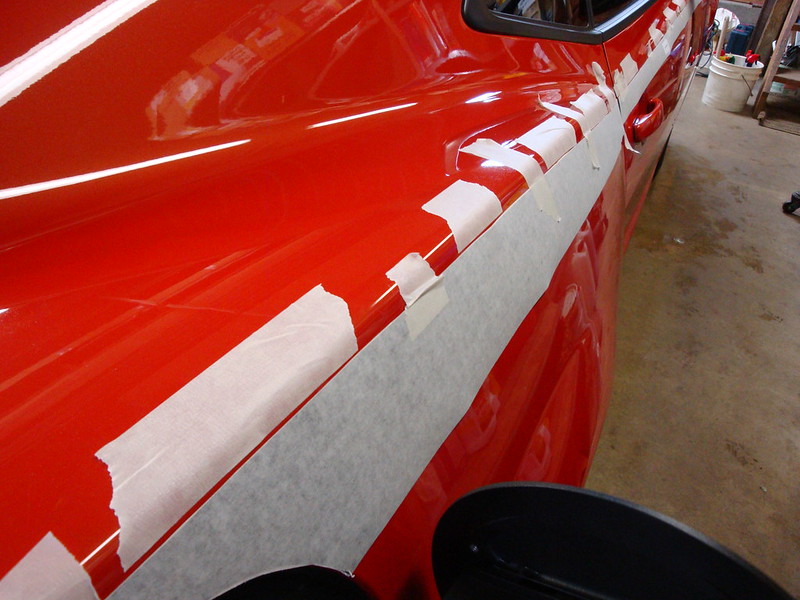
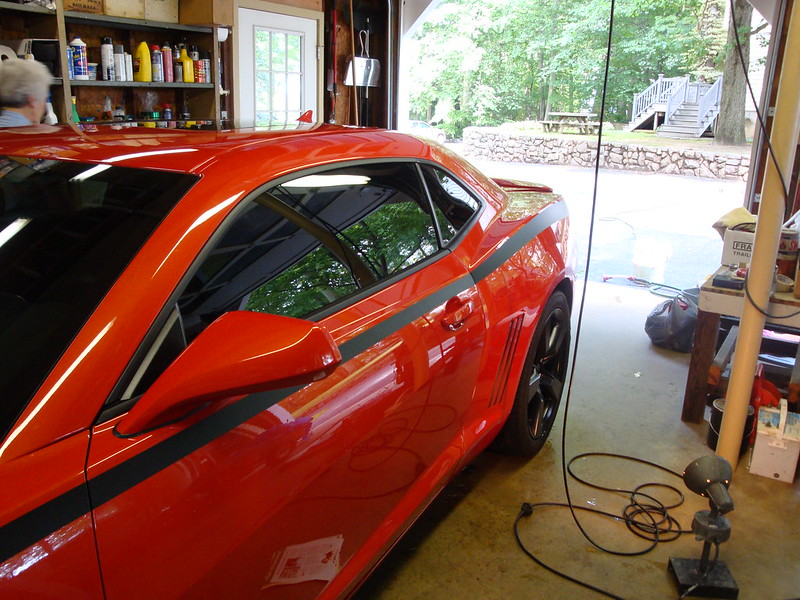
 Side Spear Installation
After installing the hood spears, we moved onto the side spears. This was the most daunting challenge of the install. To begin, we taped the spears in place on the passenger side of the vehicle with masking type until a satisfactory alignment was achieved. We choose to do the passenger side of the vehicle first because the fuel door dictated the exact placement of the spears. We then matched the height on the driver side. Moving from the rear quarter panels to the door it is important to make sure the spear sits above the door handle indentation or you will have difficulty molding the stripe to the curvature. After taping the stripes to both sides, masking tape was placed just above the stripes to serve as a guide once the stripes were taken down. The same process of spraying, adjusting, squeegeeing, blow-drying, and re-squeegeeing used for the hood spears was repeated for each section. After the final step, I used the blow-dryer to push the decal around the edges of the fuel door for a nice finished look. The spear section on the front fenders continues over the gap between the fenders and the front fascia. I just to use a box cutter to slice the decal AFTER it was installed. I then used the blow dryer and pushed the edges into the gap. I chose to do this to prevent the decal from lifting over time.
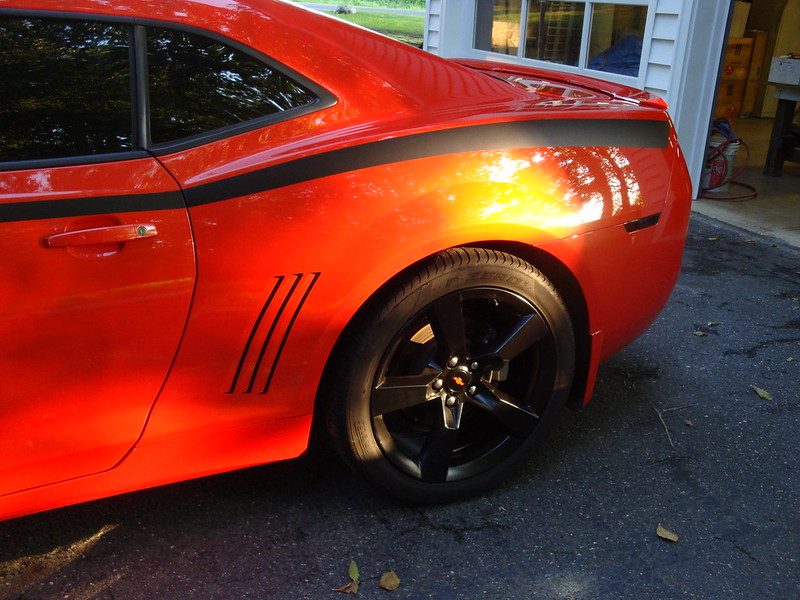
 Gill Insert Installation
While one would think this would be the simplest of the install, they proved to be the most troublesome because of the exact fit required. To ease the process, I cut the backing paper as close to the decals as possible. I found that even with cutting the paper back, it was preferable to remove the front backing paper as soon as the decal was applied. This allowed me to make sure the decal was applied correctly. With much frustration and reapplication, the decals were successfully installed and look great! I was on the fence with these inserts but could not be happier with the results. They are not obnoxiously present but add a nice subtle feel, not looking like decals unless closely inspected. I do not know if this was a mistake or intentional but Big Worm Graphix included a second set of gill inserts at no cost. This is very nice because it would be extremely easy to stretch out the vinyl during the application process. The only issue I have noticed is that small air pockets are present in the corners of some of the inserts. These are not apparent and I am not sure what to do differently during the application to prevent this from happening.
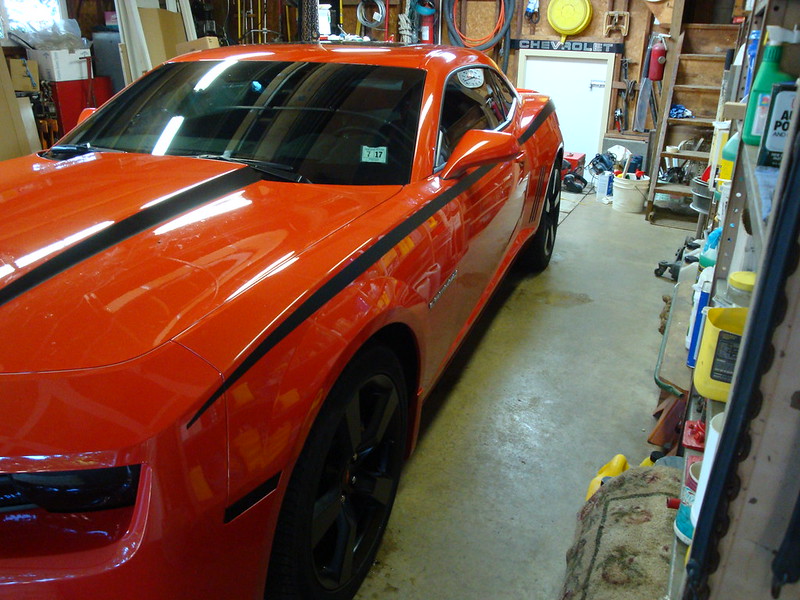
 Post Installation
After installing the decals, which took about four hours, I left the car in the garage for the recommended 72 hours. All decals were still in place. I will update this down the road with how well they have held up.
Care
After installing the decals I contacted Big Worm Graphics asking if the decals could be waxed. Their response is below:
You have to be careful with what type of wax you use. We have been using Maguires Ultimate Quik Detailer for several years with no negative long term effects. It is a spray wax instead of a paste wax, the paste waxes will leave a hazy residue on vinyl & trim.
I searched around a little further and found the following on the Rider Graphix FAQ page
Can I wax over the decals?
Most Liquid Detailing sprays and waxes are fine to use on decals. We have asked Sal Zaino to comment on this further, you can visit his
website at www.zainostore.com
Zaino Show Car Polish works great on all vinyl decals. It is non-abrasive, leaves no white residue or wax buildup and actually makes the decals last longer. It's UV40 protectant will keep the decals from shrinking, fading and drying out. Plus it will make the decals look like they have a clear coat over them. Try it on all the decals you'll love it.
You can use Z-2, Z-5, Z-6 or Z-8
NOTE: For Flat Black or Matte Decals.
Try a test spot on the Flat Black decals and see if you like the look.It will make the decals have a slight gloss to them. It boils down to a matter of personal preference.
After two coats of Z-2 and one coat of Z-6 the car and decals are looking amazing! It has been a week since the wax was applied and one day since Z-6 shine enhancer was applied. The decals are still looking great
