Polishing
First off, what is polishing?
Polishing is, by definition, the use of ever-diminishing sized abrasives to level clear coat, eliminating scratches/swirls and restoring a smooth surface from which shine is derived. Polish is NOT something you apply to the car like a wax- even though a few car care companies sell products labeled as such (Turtle Wax, Nu Finish, even Zaino).
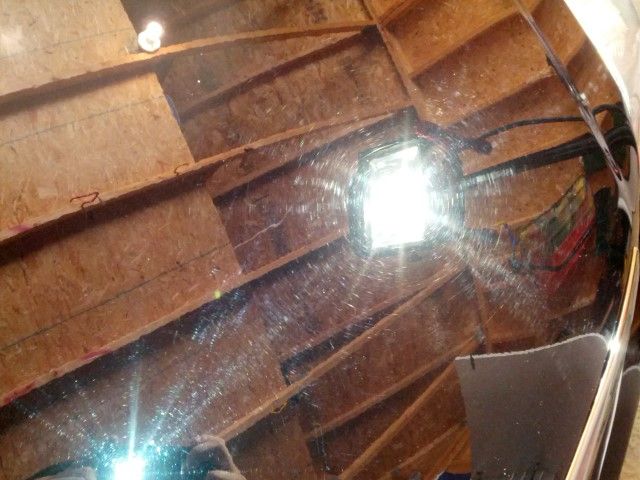
So when would polishing come in handy? I like to think of polishing as having two uses. The first is to remove swirls and scratches that you can see in the paint. The second is to restore luster to the paint. Each is actually doing the same thing, just on a different scale. They’re both leveling the clear, the first just does it more to remove visible scratches, the second does it less to remove microscopic scratches, known as marring or haze. For paint to reflect perfectly, it must have a completely smooth surface. So, really, it’s all scratch removal, just on different scales.
I’m going to completely skip hand polishing because it’s useless. Yep, I said it. For you to get any sort of noticeable results in any sort of reasonable timeframe, you need a machine polisher. Essentially, you need a polisher, pads, backing plate, and polishes. Please check the product guide linked above for specifics.
So you’re all geared up and ready to go, how do you do it? Well, the first thing you need to do is get over your fear. I understand you’re standing over your brand new $30k+ investment with power tools and you’re feeling like those swirls aren’t such a big deal. I know it’s scary, but knock it off. With modern DA polishers and polishes, you’d really have to actually try to harm your paint. They are incredibly safe and remove miniscule amounts of clearcoat with each pass.
Once you’ve convinced your balls to descend again, it’s time to get to work. You’ll have to experiment with polisher speed, arm speed, etc. dependent on your paint, your equipment and your surroundings, but here are a few general starting points:
-
Always make sure you've properly washed, clayed, and dried paint prior to polishing.
-
Don’t work too big of an area. Work in 2’x2’ sections. Focus on getting each one perfect before you move on. Baby steps
-Prime your pad first. Apply about 6-10 pea-sized drops of polish to the pad and work in with your hands
-For each 2’x2’ section, generally you want to use about 3 pea-sized drops of polish.
-With a PC, generally you want to stay around speed 5 for most polishing.
-Use light to moderate pressure. On a PC, I like to use just enough pressure to where the machine just starts to slow down, but still spins freely. Pressing hard and engaging the clutch is not only dangerous, but also actually results in less OPMs.
-Work in cross-hatch patterns. Go back and forth horizontally, then vertically.
-
Use very slow arm speed. Something like 1’’ per second is about where you want to be. It’s not a race.
-
Relax, and take breaks. This is a long process and you’re often in uncomfortable positions. Step back often and let your hands get feeling back in them and your back to stop breathing fire. Failure to do so will result in you subconsciously rushing to get finished.
-
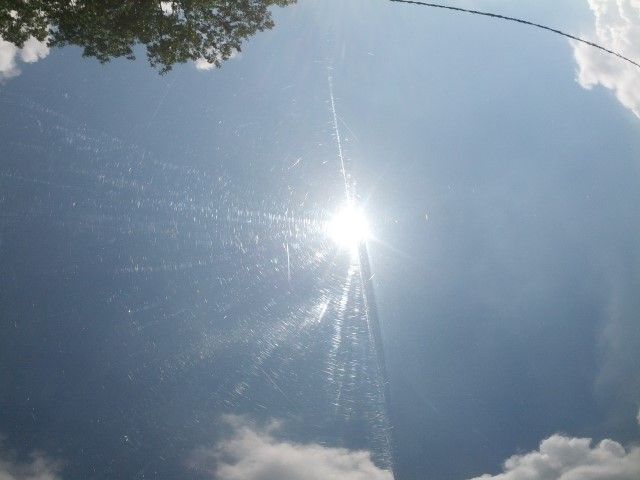
Check your work early and often in sunlight. What looks good in the garage might not be good in the sun.
-Make sure your pads are clean. When they get clogged with polish, it’s time to grab a new one.
-Most importantly,
don’t expect perfection the first time around. Don’t get discouraged. This takes time to dial in your technique and really perfect it. I’ve logged hundreds, if not thousands, of hours on my polisher and I still don’t always get it right the first time. Your first time, shoot for something like 70% correction.