Removing the rear diffuser on my car today to install a body color painted one... The install/removal is slightly different than the 10-13 diffuser, so I thought I would take some pictures and random notes.

As you can see on the pass side, my diffuser already had some "scuffs" and appears dried out. It was this way when I bought it brand new off the lot. The dealer's detail guys "tried" to fix it with some Armor-all type of plastic cleaner/treatment, but once it dried out again it was back... I'm convinced once the plastic starts to look dingy after a few years, it will just look like crap unless some kind of treatment is applied to it once every couple weeks or so. I opted to paint it and call it a day.
TOOLS NEEDED
T15 Torx head socket
Ratchet wrench
Flat blade screw driver (or some kind of trim tool with a flat edge)
Soft rag
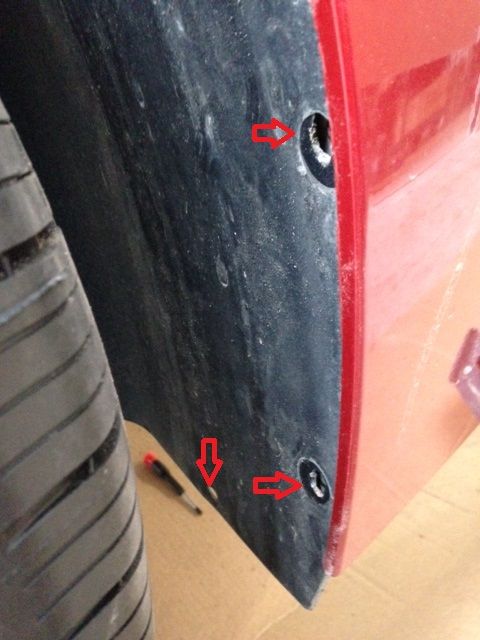
The red arrow on the bottom left is necessary to remove the diffuser. The other two noted MAY be optional if you have small enough hands to get access to reach the one torx screw that goes down vertically through the rear fascia into the diffuser... I had to remove the other two torx screws noted by the arrows to pull the fender liner back far enough to get my hands in there to reach it...
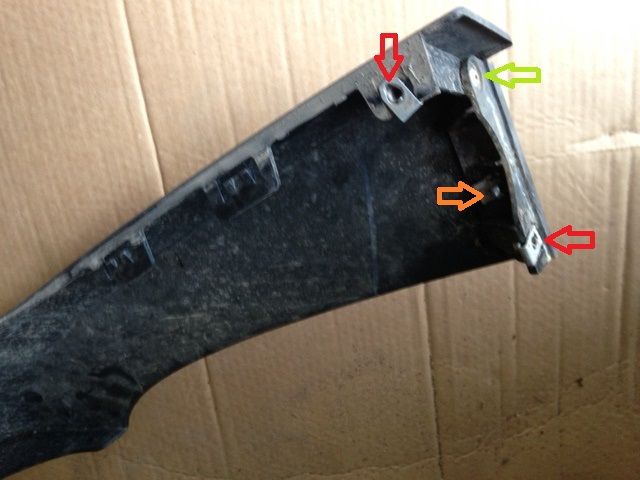
The top left arrow (red) is the vertical torx screw that goes through the rear fascia into the diffuser that I noted above. The other red arrow is the torx on the front side (through the fender liner into the diffuser) that must be removed... The orange arrow is a torx that goes up through the bottom of the diffuser into the bracket that is rived on (green arrow), if you are not replacing your diffuser, you should not have to need to remove either of these. If you have purchased a new diffuser and it did not come with these side brackets pre-attached, you will have to remove the torx screw, and drill out the rivet to attach them to your new diffuser. Note the two tabs in this picture... You can easily release them by sticking your hand up to them from the back side and pushing the locking section of the tab down while pulling outward.
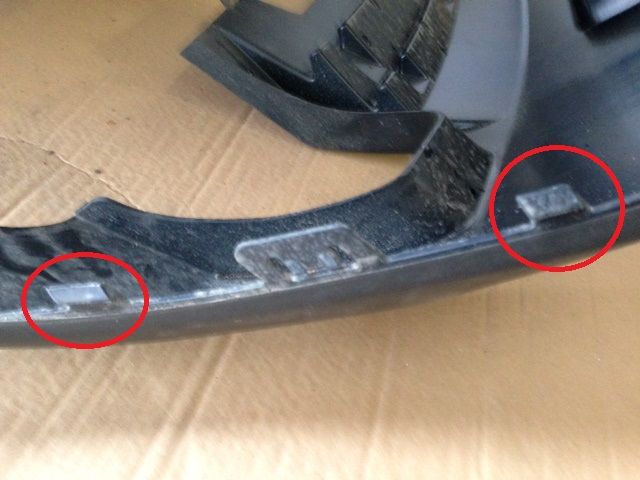
Once the necessary torx screws are removed from the sides, you will have to pull on the diffuser to release the tabs from the rear fascia... One ones circled in red are the hardest to remove... I couldn't find any real trick to getting them to release aside from pulling... While pulling the diffuser, all three of these tabs came loose at the same time on each side.
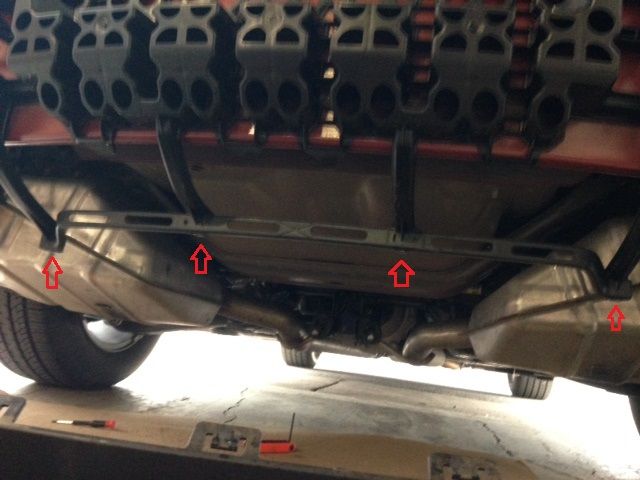
There are 4 torx screws noted by the red arrows here that go through the diffuser into this plastic bracket. They must all be removed.
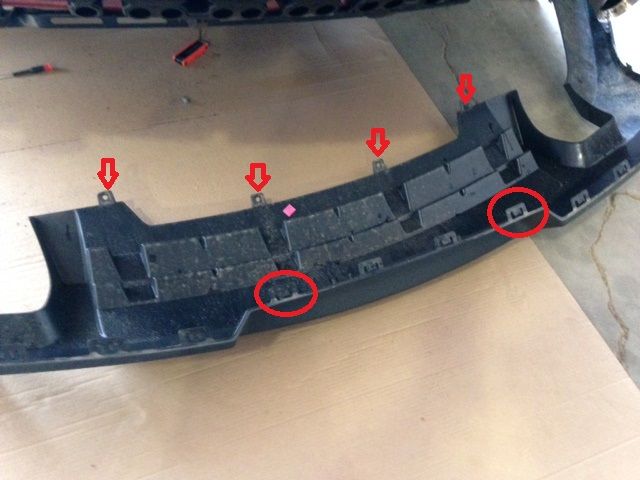
The four red arrows here are the same locations as the picture above for the torx screws that go into that plastic bracket. From this point, it's just a matter of getting the tabs released... I found it easiest to pull the diffuser out and down. This allowed me to get access to the part of the tab holding the diffuser to the rear fascia. Using the flat head screw diver with the soft rag, I just inserted it into the little slot in the tab and turned the screw driver slightly to get the tab to release. The two tabs that are circled in red were the hardest to get to release as I couldn't get the diffuser to pull out/down far enough to "easily" get the screw driver into pop the tabs loose. The two tabs in the center are easily released by sticking your hand/finders into the rectangular holes and pushing the tab loose.

And the diffuser falls loose once the last tab is released...
All in all, I counted 22 tabs that need to be popped loose, and I had to remove 12 torx screws (4 on each side, and 4 on the bottom). Total time to remove the diffuser was about 45min to 1hr.