You are browsing camaro5 

|
 06-29-2014, 07:42 PM
|
#1 |
|
'It's an experiment'

Drives: [COTW 2/09/15] '11 GPI LSA SC Z/LE Join Date: May 2014
Location: Dallas TX
Posts: 8,694
|
DIY L99 Catch Can -- Using Stainless Steel Thermos
Well, having watch several folks build a 'DIY' catch can, I took a little bit different way.
I'm using a Stainless Steel Thermos from Crate N Barrel and various parts from Lowes and Autozone to build my own. The parts are: 3/8 x 4 ft fuel hose (not injector hose) $6.00 from AutoZone 2 PCV grommets 42058 from AutoZone ($6.50 for both) 2 1/2 Elbows (Brass) from Lowes ($3.50 for both) 1 6" x 1 1/4" Stanley Angle Bracket from Lowes ($4.00) 1 H# 884633 Rubber Grommet for Angle Bracket from Lowes ($1.00) 1 1/4 x 5 ft Hot/Cold PVC water tube from Lowes ($2.00) 1 Copper Scotch Scour Pads from Target ($2.00) 1 Stainless Steel Thermos from Crate N Barrel ($12.00) (this has a screw on top with seal). This can with-hold temps to 270 degrees. It also really holds a SEAL! So, for about $37 I was able to create my own catch can. Now, this is not a 'show car' so it served my purpose -- I wanted something simple. So, here are the steps I took: First, I measured 1/4 inch from the sided and, using the PCV grommets, measure a 'pilot hole' point: 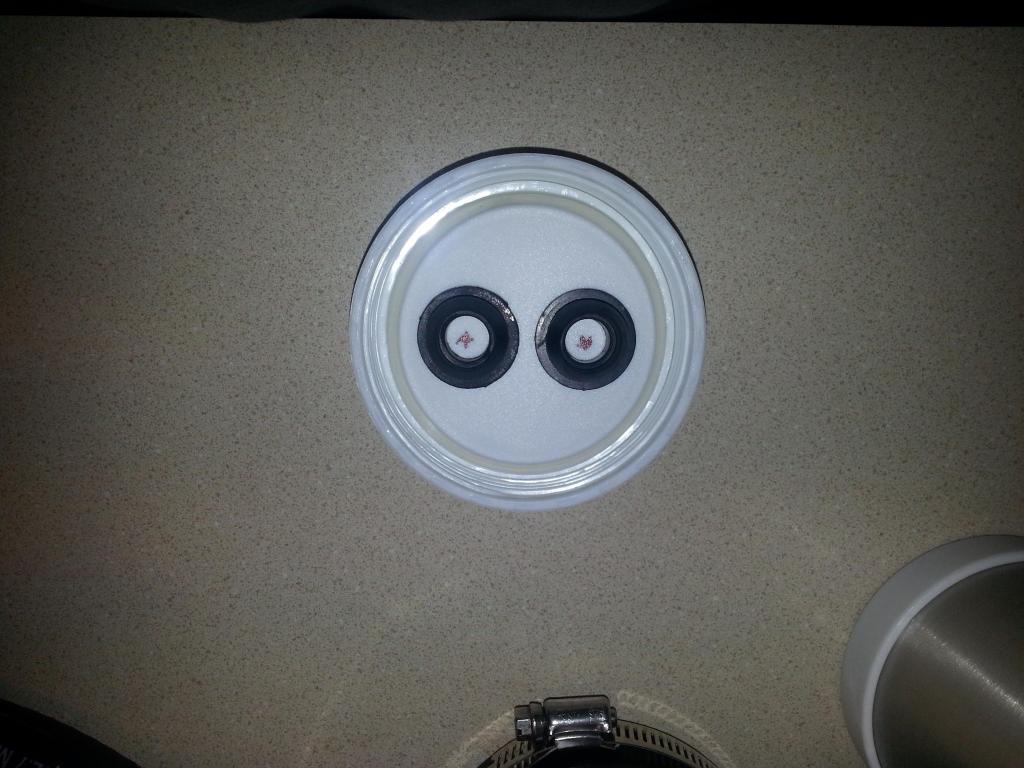 I then drilled the pilot with a 1/8" bit and then drilled the hole larger using 11/32 bit. Once that was drilled, I opened and cleaned out the hole until the grommet fit nice and snug: 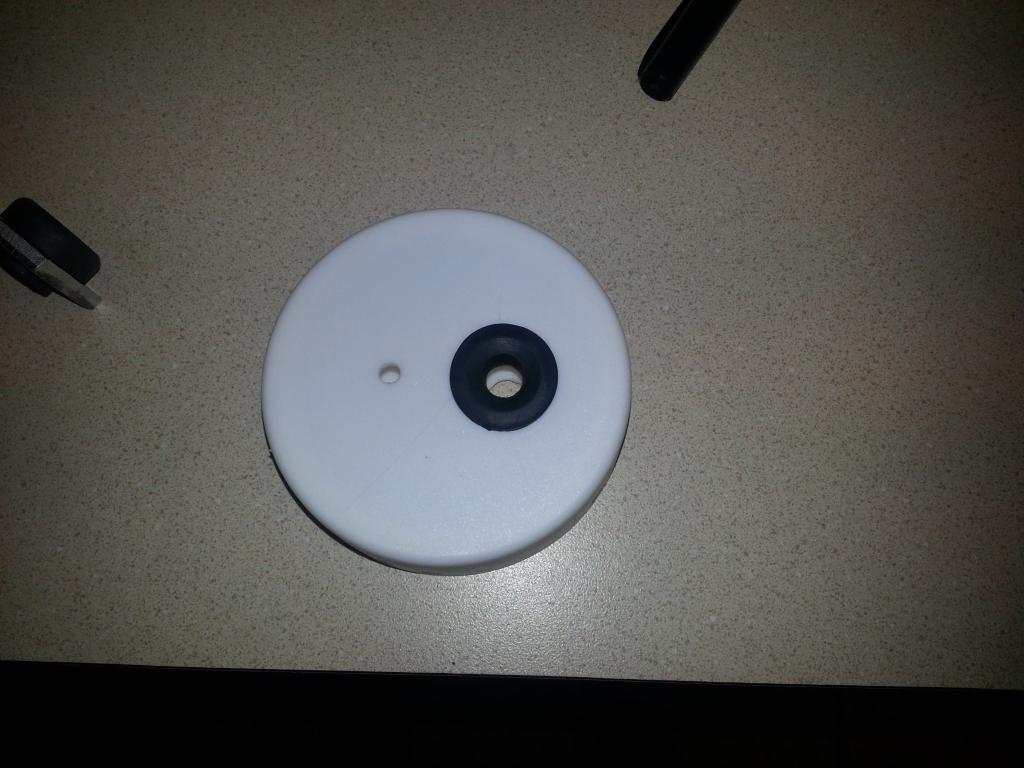 Once that was done, I put in the first elbow: 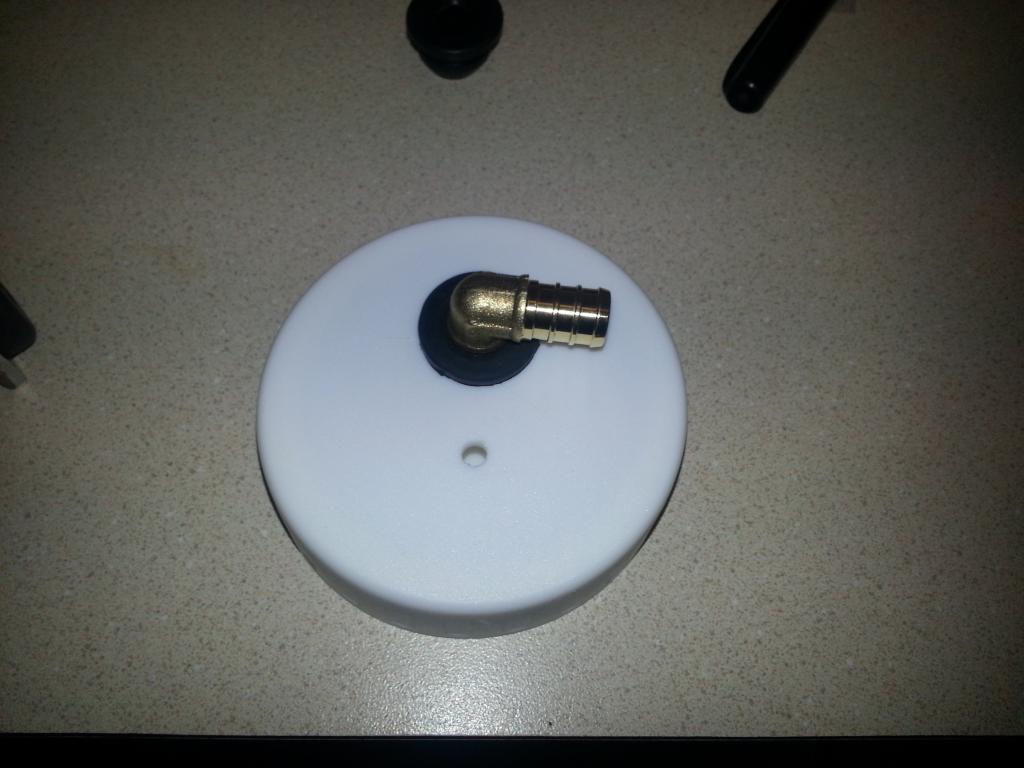 Once I confirmed that worked, I did the second one and then I test fitted the cap: 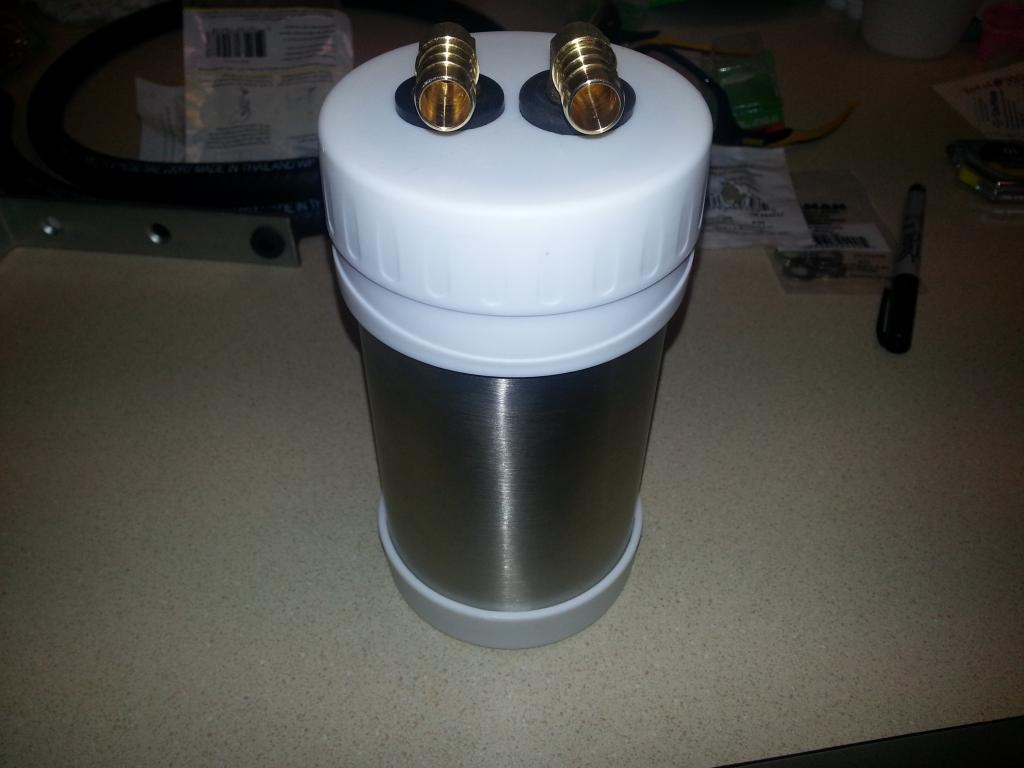 Next, I drilled out the outer end of the bracket for the 'bracket' grommet. I used the 11/32 drill for this also (noticed I used the stock grommet metal washer from stock airbox): 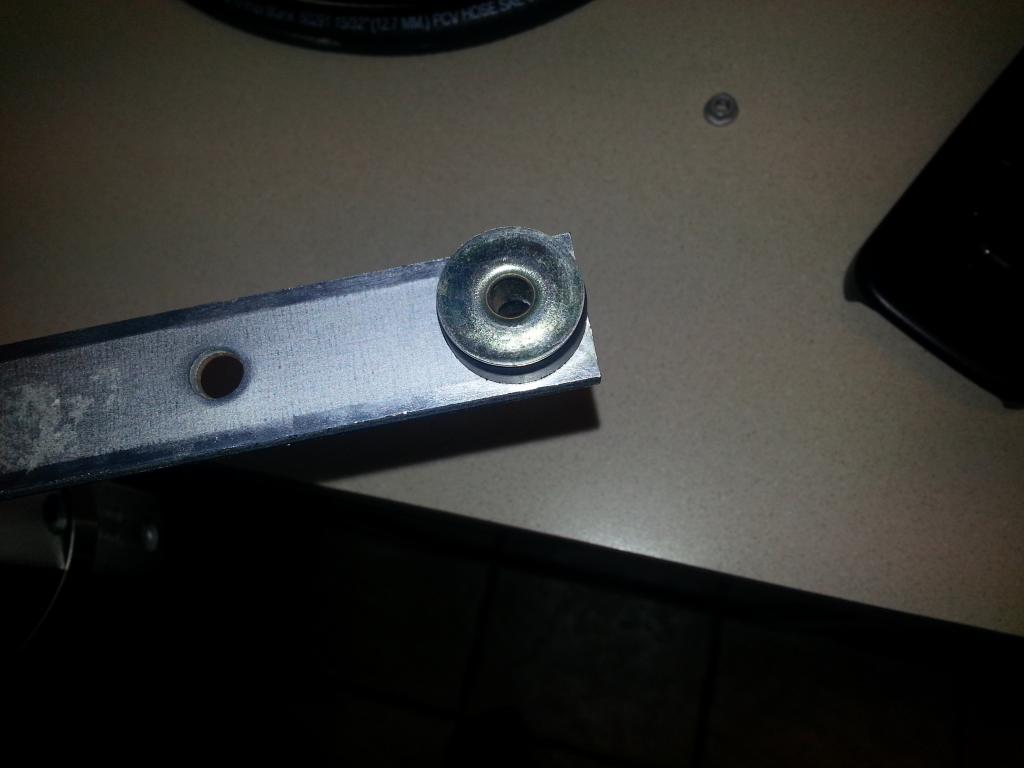 Once I did that, I used the 3" x 3" rubber coupler to attach the Thermos and bracket together: 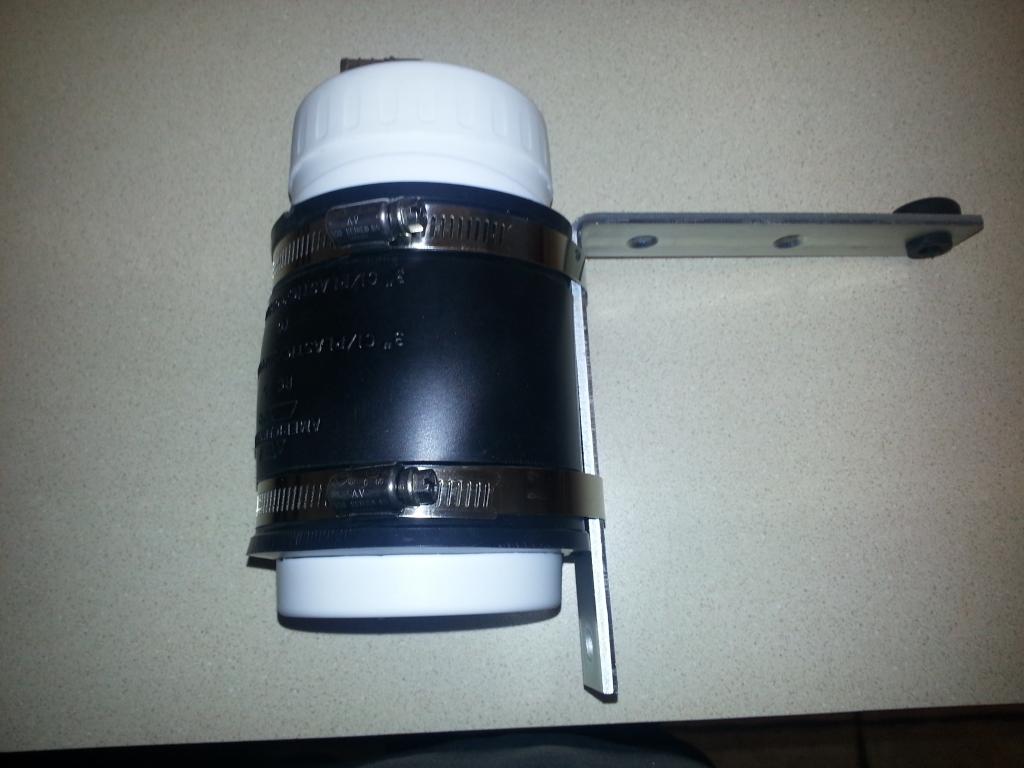 Then, I took off the lid, put in the copper pad, and re-test fitted:  I then, added 'felt pad' to the lower part of the bracket so it could rest on the interior panel in the engine compartment (no rattling!): 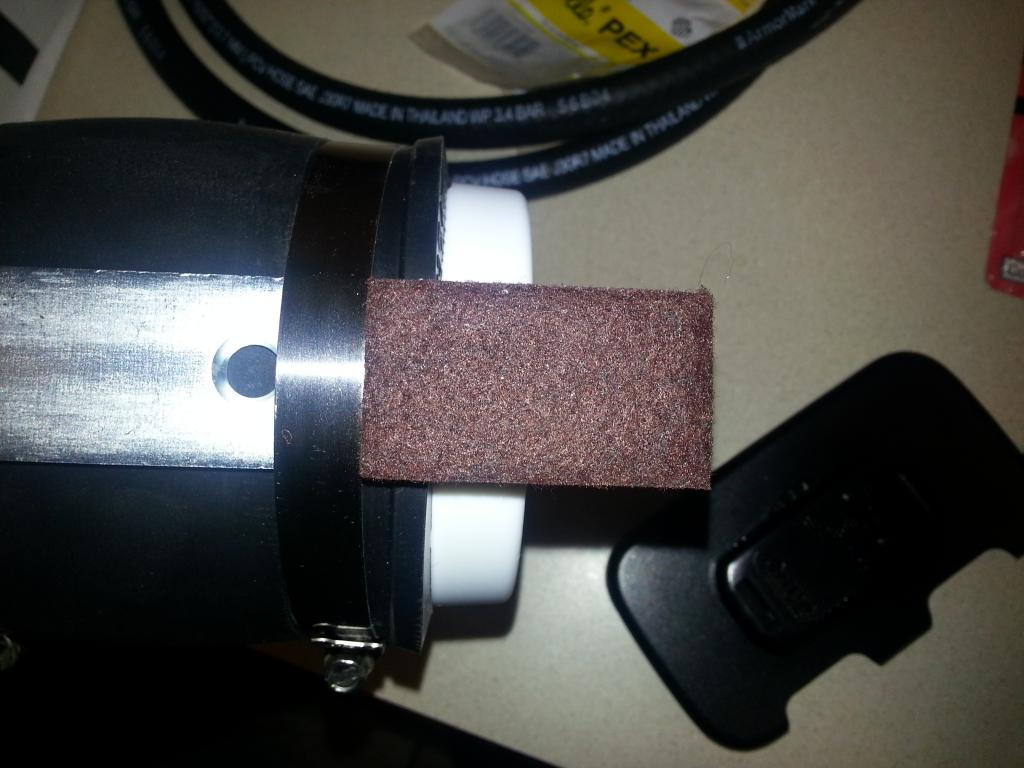 Next, I had to create a 'tube' for the oil to drain. I cut the 1/4 hot/cold pvc line to 4 1/2". I then drilled 1/16 holes in the side of the tube to allow oil to 'drip' as needed. I did this on the lower 3" of the tube -- NOTE: It goes on the 'red arrow' side elbow): 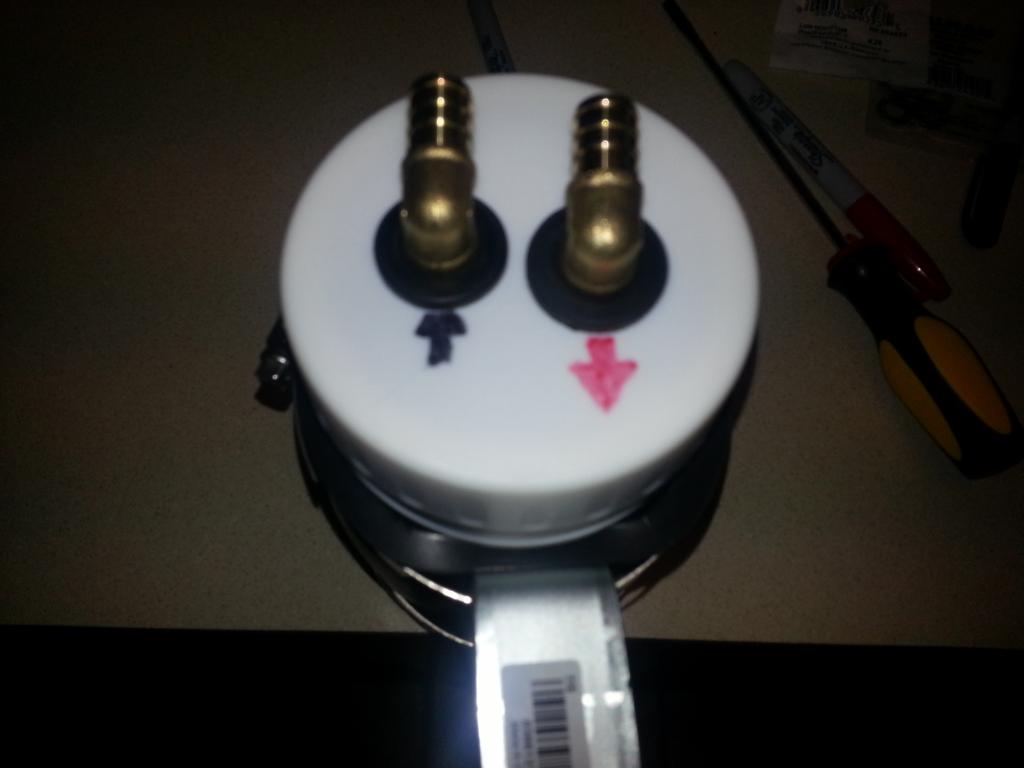 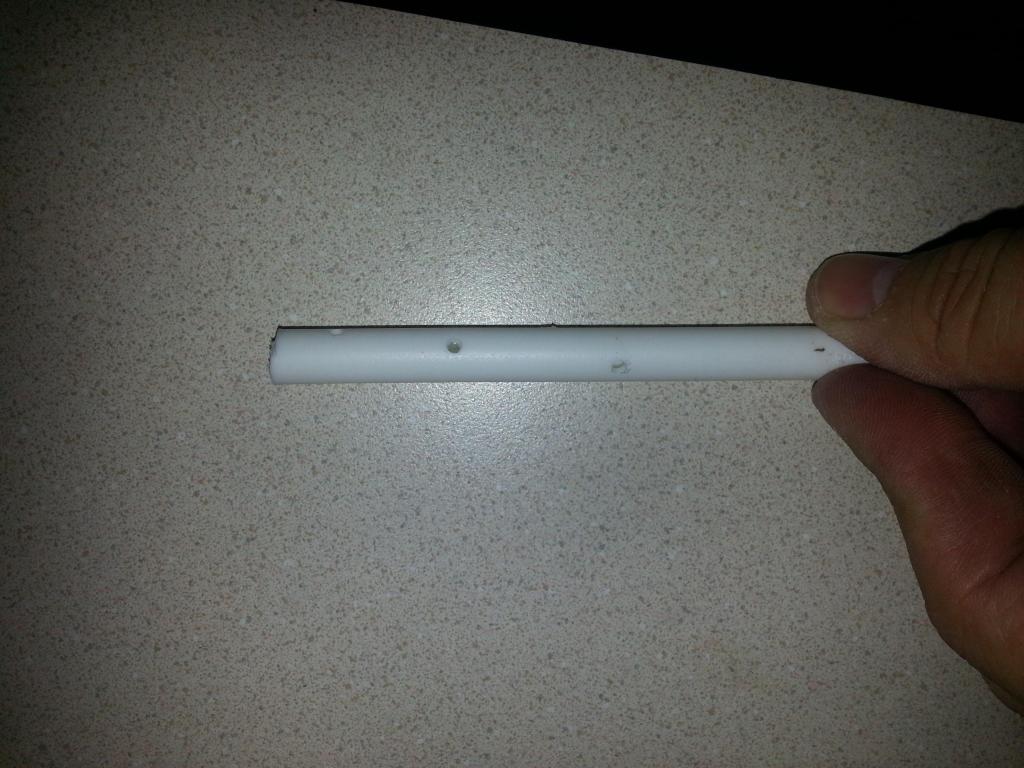 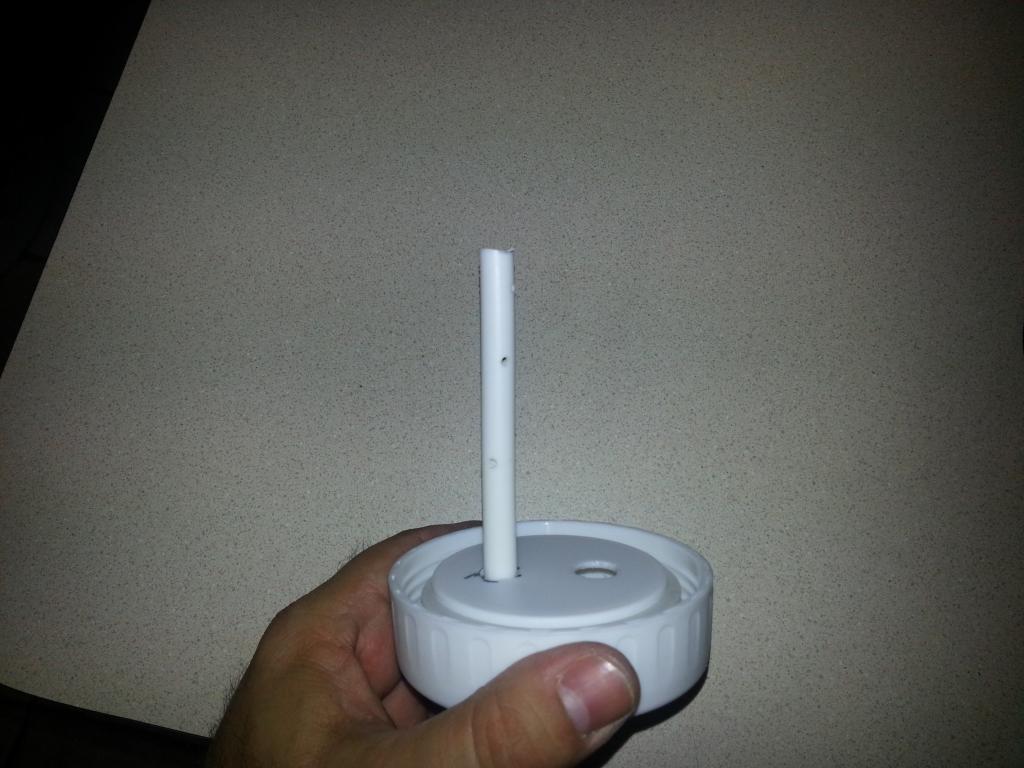 I then attached the lid and verified everything was right. Next, under the hood, I located the line (for the L99 it runs from the Left Back Cover) and just cut the elbow from the line so I could slide the 3/8" fuel line: 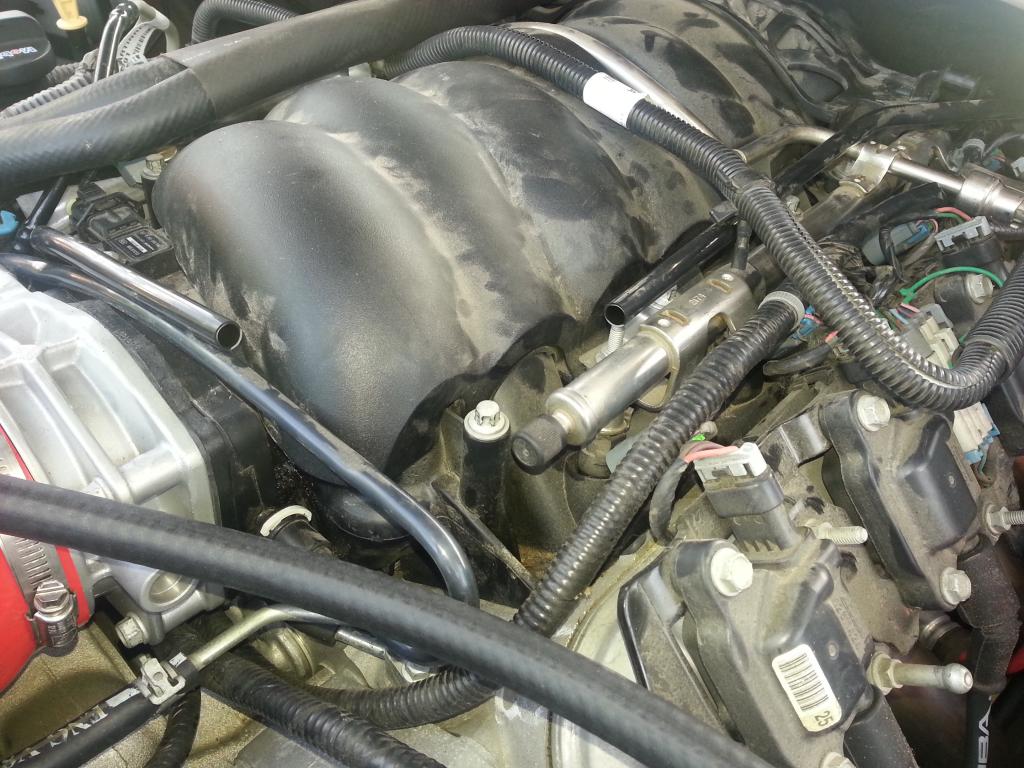 Now, attach the 3/8" fuel line from the real of the valve cover to the 'red' arrow I put on the lid and then attach the 3/8" fuel line to the black arrow and route it to attach to the line going into the intake:  Verify everything lines up and test run to verify no leaks! Attach cover and take it for a drive! I did notice the 'lid' of the thermos would sink a little due to the strong vacuum pull from the engine! So, I drilled a small hole (under the lid) and filled it with great stuff expanding foam (that will fill in any 'gaps' between the cap). Overall, worked nice! Final setup: 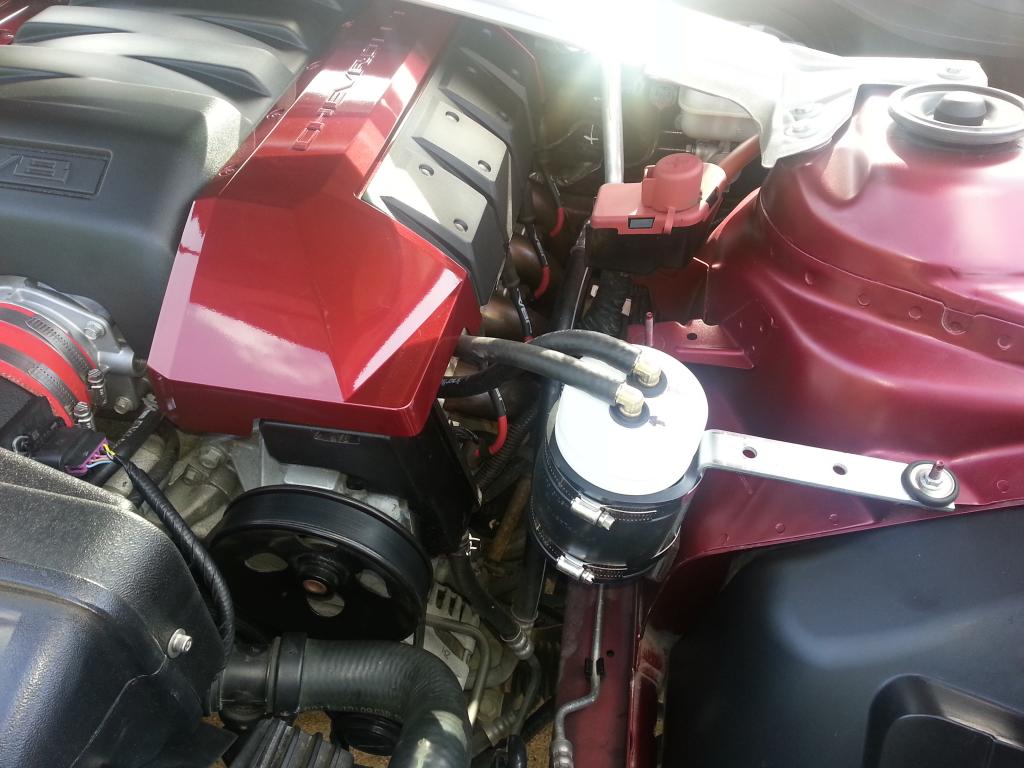  -Don Last edited by hammdo; 07-01-2017 at 03:29 PM. |

|

|
|
06-30-2014, 10:17 PM
|
#2 |
|
'It's an experiment'
Drives: [COTW 2/09/15] '11 GPI LSA SC Z/LE Join Date: May 2014
Location: Dallas TX
Posts: 8,694
|
Found 3/8 fuel injector hose cures the hiss from the cheaper fuel hose...
|
|
|
|
|
07-10-2014, 02:21 PM
|
#3 | |
|
What's this button do?

Drives: 2019 Black 2SS Join Date: Apr 2013
Location: Wylie, Texas
Posts: 1,364
|
Nice write up Don.
 Quote:
__________________
2019 Black & Red & Silver 2SS - Bone Stock
 |
|
|
|
|
|
07-10-2014, 05:26 PM
|
#4 |
|
'It's an experiment'
Drives: [COTW 2/09/15] '11 GPI LSA SC Z/LE Join Date: May 2014
Location: Dallas TX
Posts: 8,694
|
Thanks!
The fuel injector line has a similar 'plastic' inner hose like the original breather lines. $4 a foot @ Autozone -- worked like a champ. It was REALLY loud hiss with the cheaper stuff. REALLY LOUD ;o) 3/8 worked fine on mine... |
|
|
|
|
07-10-2014, 06:47 PM
|
#5 |
         
Drives: 2011 2SS 6.2L W/RS package Join Date: Jan 2011
Location: Colorado
Posts: 3,008
|
Nice job!! But I'm very anal about aesthetics, and it wouldn't work for me as I have my engine bay detailed so a chrome elite it was..
__________________
 KooKs LT Headers, Borla S-Type cat back, RotoFab CAI, Bo White PTB, RMCR tune... |
|
|
|
|
07-10-2014, 07:45 PM
|
#6 |
|
'It's an experiment'
Drives: [COTW 2/09/15] '11 GPI LSA SC Z/LE Join Date: May 2014
Location: Dallas TX
Posts: 8,694
|
True, I could use a Stainless coupler and bracket -- will do that eventually -- the coupler was used due to heat near the headers -- but there are better options out there! The thermos is really nice looking too -- there are those that are all stainless for a bit more. Don't recall any chrome ones though...
|
|
|
|
|
03-12-2015, 06:26 AM
|
#7 |
 
Drives: Black 2018 Camaro ZL1 auto Join Date: Nov 2012
Location: Atlanta GA
Posts: 282
|
LOL!! I love it!!
__________________
2018 ZL1 A10 with PTB, ROTOFAB, Pulley and tune from
Vengeance. 607 rwhp/647 rwtq |
|
|
|
|
03-21-2015, 11:00 AM
|
#8 |
|
'It's an experiment'
Drives: [COTW 2/09/15] '11 GPI LSA SC Z/LE Join Date: May 2014
Location: Dallas TX
Posts: 8,694
|
It worked! I still have it -- simple and cheap ;o)...
Now with the SC, I had to use a different one -- but for about $20 it did the job for 4500 miles... -Don
__________________
747 RWHP 794 RWTQ
"Horsepower sells cars, torque wins races." - Enzo Ferrari See My Build: http://www.camaro5.com/forums/showthread.php?t=385577 Last edited by hammdo; 03-27-2015 at 07:39 PM. |
|
|
|
|
|
|
|
 |
|
|


