You are browsing camaro5 

|
 12-27-2010, 06:13 PM
|
#71 |
 
Drives: 2009 Dodge "Cuda", 2010 Camaro Join Date: Nov 2010
Location: St. Pete, Fl.
Posts: 120
|
Thank you for the video. I did it the hard way in that I didn't jack the car up or remove the wheels. If you remove three of the five push pins in the fender well they can be pulled down far enough to get the job done. Also, while you're undoing the four bolts on the passenger side, it's a good time to disconnect the light harness. If you do forget to plug it back in after you get done, you can pull the iner fender well back enough to reach up and plug the harness back in. It is a reach though! Thank you again for the video.
|

|

|
|
12-28-2010, 09:52 AM
|
#72 | |||
|
Blessed

Drives: 2013 Sonic RS MT Join Date: Dec 2007
Location: Saint Augustine FL
Posts: 28,444
|
Quote:
Quote:
Quote:
 Yeah doing it on the ground would be tricky for sure.
__________________
Click image to see build thread. PQ - "the love of cars. It's a boys first step toward manhood and a mans last hold on boyhood." Fbodfather - "We do not want to use the Z28 moniker on a car that does not deserve this hallowed name." The_Blur - "Let's not confuse competitors with equals." |
|||
|
|
|
|
12-28-2010, 11:12 AM
|
#73 |
       
Drives: Varies Join Date: Dec 2009
Location: Costa Mesa, CA
Posts: 2,182
|
Awesome vid and will be very helpful for all the DIY'ers here. Your car looks amazing as well.
|
|
|
|
|
12-28-2010, 11:32 AM
|
#74 | |
|
Blessed
Drives: 2013 Sonic RS MT Join Date: Dec 2007
Location: Saint Augustine FL
Posts: 28,444
|
Quote:
__________________
Click image to see build thread. PQ - "the love of cars. It's a boys first step toward manhood and a mans last hold on boyhood." Fbodfather - "We do not want to use the Z28 moniker on a car that does not deserve this hallowed name." The_Blur - "Let's not confuse competitors with equals." |
|
|
|
|
|
12-28-2010, 03:42 PM
|
#75 | |
    
Drives: a M6 LT1 ordered From Becky!!! Join Date: Jan 2010
Location: NJ
Posts: 7,520
 |
Quote:
|
|
|
|
|
|
12-28-2010, 03:53 PM
|
#76 |
|
Drives: a M6 LT1 ordered From Becky!!! Join Date: Jan 2010
Location: NJ
Posts: 7,520
|
This was so easy! Do yourself a favor and take off the wheels first and fold away the fender liners to get easy access to all the bolts. That 7mm needs to be a 1/4 socket.
If you are new to putting the Camaro on jackstands. Read the threads on the topic. Really. Took the opportunity to throw on the CAI, ADM scoop, and do the washer bottle relocation mod. No badges on mine. I like the clean look. And I took off the ugly gold bowtie in the rear. I did leave the little red SS on the right rear. Thanks again Op. 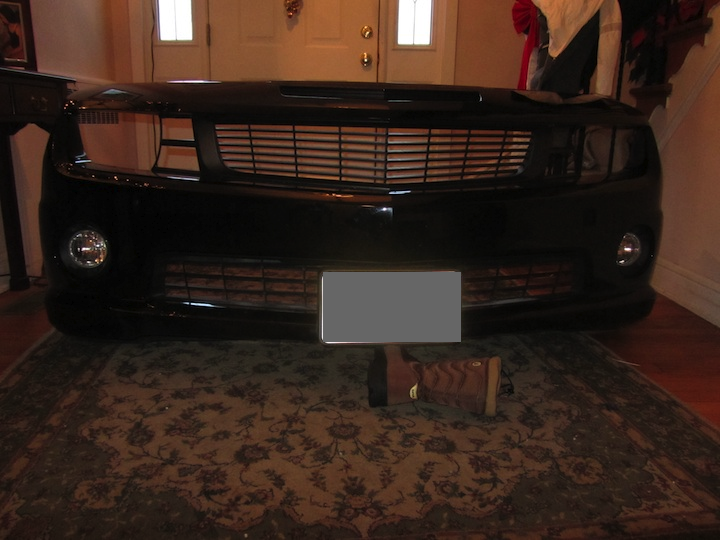
Last edited by Fraxum; 12-29-2010 at 05:55 PM. |
|
|
|
|
12-28-2010, 04:43 PM
|
#77 |
|
Blessed
Drives: 2013 Sonic RS MT Join Date: Dec 2007
Location: Saint Augustine FL
Posts: 28,444
|

__________________
Click image to see build thread. PQ - "the love of cars. It's a boys first step toward manhood and a mans last hold on boyhood." Fbodfather - "We do not want to use the Z28 moniker on a car that does not deserve this hallowed name." The_Blur - "Let's not confuse competitors with equals." |
|
|
|
|
01-07-2011, 05:19 PM
|
#78 |
 
|
Thanks for this DIY, due to having a special ratchet I was able to easily complete this without even jacking up the car. thanks again!
__________________
 |
|
|
|
|
01-07-2011, 10:00 PM
|
#79 | |
|
Blessed
Drives: 2013 Sonic RS MT Join Date: Dec 2007
Location: Saint Augustine FL
Posts: 28,444
|
Quote:
Nicely done!
__________________
Click image to see build thread. PQ - "the love of cars. It's a boys first step toward manhood and a mans last hold on boyhood." Fbodfather - "We do not want to use the Z28 moniker on a car that does not deserve this hallowed name." The_Blur - "Let's not confuse competitors with equals." |
|
|
|
|
|
01-18-2011, 12:08 PM
|
#80 |
|
Drives: 2002 Camaro SS Join Date: Jul 2009
Location: Quitman, LA
Posts: 609
|
Awesome vid, I have no worries about doing this myself now.
__________________
 2015 1LE - CAI intake, TSP longtubes, 2015 1LE - CAI intake, TSP longtubes,NPP, Futral Motorsports tuned, BMR 1"lowering springs, BMR trailing arms |
|
|
|
|
01-18-2011, 12:33 PM
|
#81 | |
|
Blessed
Drives: 2013 Sonic RS MT Join Date: Dec 2007
Location: Saint Augustine FL
Posts: 28,444
|
Quote:
Glad I could help out.
__________________
Click image to see build thread. PQ - "the love of cars. It's a boys first step toward manhood and a mans last hold on boyhood." Fbodfather - "We do not want to use the Z28 moniker on a car that does not deserve this hallowed name." The_Blur - "Let's not confuse competitors with equals." |
|
|
|
|
|
01-28-2011, 09:37 PM
|
#82 |

Drives: 2011 CGM 2SS/RS L99 Join Date: Jan 2011
Location: Edison NJ
Posts: 115
|
Just installed my heritage grill and the video was a big help. I would have had a hard time finding those 7mm bolts without it. Thanks for the help.
|
|
|
|
|
01-28-2011, 09:46 PM
|
#83 |
|
Blessed
Drives: 2013 Sonic RS MT Join Date: Dec 2007
Location: Saint Augustine FL
Posts: 28,444
|
Cool!
You are very welcome!
__________________
Click image to see build thread. PQ - "the love of cars. It's a boys first step toward manhood and a mans last hold on boyhood." Fbodfather - "We do not want to use the Z28 moniker on a car that does not deserve this hallowed name." The_Blur - "Let's not confuse competitors with equals." |
|
|
|
|
01-28-2011, 10:08 PM
|
#84 |
|
Camaro SS Lover

Drives: 2010 Camaro 2SS/RS Black IOM Join Date: Jun 2010
Location: Toronto, Ontario (Canada)
Posts: 2,863
|
This is a great DIY. Personally, I like the stock grill on black SS, but if I were going with something different this thread would surely be very handy.
Thanks, for sharing the knowledge.
__________________
2010 Camaro SS, P1SC SuperCharged Livernois LSX429ci., 1 7/8" LT Headers, full 3" MBRP exhaust, SPI built/tuned, a total
 |
|
|
|
|
|
|
|
 |
|
|
 Similar Threads
|
||||
| Thread | Thread Starter | Forum | Replies | Last Post |
| DIY : Install headers on 2010 Camaro SS | Nine Ball | Camaro DIY & HOW-TO instructions & discussions | 70 | 06-25-2020 06:40 PM |
| Camaro Heritage Grill DIY install (now with official GM install instructions). | vuduman67 | Camaro DIY & HOW-TO instructions & discussions | 216 | 12-03-2014 05:18 PM |
| Bowtie Modification for the Heritage Grille with SS emblem | cerberus | Cosmetics and Lighting Modification Discussions | 19 | 11-08-2011 08:26 AM |
| Heritage Grille install - How tough is it? | IndyDave | Cosmetics and Lighting Modification Discussions | 10 | 04-03-2010 05:18 PM |


