You are browsing camaro5 
|
|
 05-08-2012, 12:28 AM
|
#85 | |
 
Drives: 2017 2SS 50th Anniversary Edition Join Date: Jan 2012
Location: Battle Ground, WA
Posts: 448
|
Quote:
I don't think having a larger hole size than the light bar would look very clean. I really think a redesign is in order either move the center over one more LED to the right or mount the ir sensor dead center which seams like that would not be too difficult but IDK. |
|

|

|
|
05-08-2012, 09:03 AM
|
#86 |

Drives: a Panty Dropper Join Date: Feb 2012
Location: Dehi
Posts: 478
|
Just like this guys it does not take an engendering degree to figure it out its not hard. Look at the video and youll get the idea. You do not need to cut a larger hole in order to get it to fit just take your time and use a hair dryer to soften up the plastic and it will slip right in
__________________
 |
|
|
|
|
05-08-2012, 10:32 AM
|
#87 | |
 
|
Quote:
nice install by the way.
__________________
 |
|
|
|
|
|
06-09-2012, 03:20 PM
|
#88 |
 
Drives: 2010 Camaro 2SS/RS Whipple Join Date: Jun 2010
Location: Titusville, FL
Posts: 83
|
Does anyone know where there yellow wire goes?
__________________
2.9L Whipple Supercharger, Kooks Long Tube Headers w/ high flow cats, CAI w/ scoop, APEX water bottle relocation kit, RX oil catch can, Borla ATAK cat-backs, Ultra 431 Rims w/ orange accent (20x9 front, 20x10 back), SPL gill stripes, Hurst short throw shifter
|
|
|
|
|
07-05-2012, 02:05 PM
|
#89 |
|
Drives: 2010 Camaro SS L99 Join Date: Apr 2012
Location: usa
Posts: 180
|
Can I install the scanner using the parking lights only, not directly from the +?????
so this will turn on when my lights go on in night ore when I go in the sub parking lot???? thanks for the help |
|
|
|
|
07-09-2012, 10:24 AM
|
#90 | |
 Drives: 2012 2SS Join Date: Feb 2012
Location: Dayton, Ohio
Posts: 5
|
Quote:
...oh, and thank you for answering the original question about the yellow wire.....you saved me a phone call as I have this same configuration on the set I got last week. |
|
|
|
|
|
07-09-2012, 12:03 PM
|
#91 | |
|
Drives: 2012 2SS Join Date: Feb 2012
Location: Dayton, Ohio
Posts: 5
|
Quote:
|
|
|
|
|
|
09-10-2012, 10:42 PM
|
#92 | |
|
KNIGHT LIGHTNING

|
Quote:
 Can I send Just the remote back for a new one? Can I send Just the remote back for a new one?
__________________
 TRICOUNTYCAMARO TRICOUNTYCAMARO |
|
|
|
|
|
11-12-2012, 09:24 PM
|
#93 |
|
.........................
Drives: 45th anniversary edition v6 3.6L Join Date: Sep 2012
Location: Dunedin, Florida
Posts: 920
|
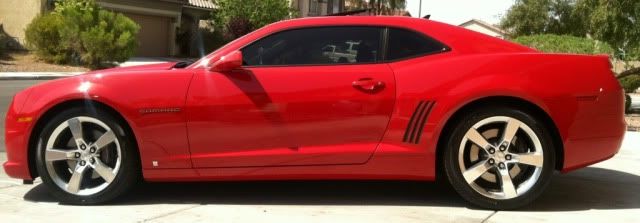
Just had my dual 15 rgb scanner installed on my 45th v6 grill. Looks awesome. Although I might go back and install toggle switch. Anyone who has it running off the fuse box bolt have a toggle hook up picks and or location would be awesome. Thanks. Haven't even gotten to play with it. Seems I can't get the remote functions down or to do all the stuff.
|
|
|
|
|
02-28-2015, 06:50 PM
|
#94 |
 |
KITT light install complete
Thanks for the detailed instructions, gave me the confidence to attempt it. I ordered V2 and the bar came pre-bent in the V-shape to fit perfectly. The wires were also in the middle of bar. So cut hole directly in the middle to pass the wire thru, and clipped right into exists slots. very easy install.
|
|
|
|
|
03-06-2015, 12:28 AM
|
#95 | |
|
Hmm...Something Clever

Drives: Blac on Blaq on Blak 2012 Camaro LS Join Date: Dec 2009
Location: Charleston, SC
Posts: 413
|
Quote:
__________________
 Adjustments: 20% tint all around, Emblem Pros Dash plaque, Rockford Fosgate P-300/12 |
|
|
|
|
|
03-06-2015, 12:30 AM
|
#96 | |
|
Hmm...Something Clever
Drives: Blac on Blaq on Blak 2012 Camaro LS Join Date: Dec 2009
Location: Charleston, SC
Posts: 413
|
Quote:
__________________
Adjustments: 20% tint all around, Emblem Pros Dash plaque, Rockford Fosgate P-300/12 |
|
|
|
|
|
|
|
|
 |
|
|
 Similar Threads
|
||||
| Thread | Thread Starter | Forum | Replies | Last Post |
| Need pics of Pedders Bushing install | jrpxxii | Suspension / Brakes / Chassis | 14 | 05-22-2012 12:58 PM |
| DIY: SIDE GILL FADE AND OUTLINE INSTALL | Milk 1027 | Wiki | 2 | 09-08-2010 09:59 AM |
| Roto-Fab CAI Install with Pics (5 Stars) | NVMY68SS | Camaro V8 LS3 / L99 Engine, Exhaust, and Bolt-Ons | 120 | 05-23-2010 01:51 AM |
| Night Rider LED | cyberbro | Cosmetics and Lighting Modification Discussions | 14 | 04-24-2009 08:57 AM |


