You are browsing camaro5 

 |
|
|
#1 |
|
Cone Killer
Drives: 2012 SS Join Date: Dec 2013
Location: St. Albans, West Virginia
Posts: 832
|
Cone Killer: My Camaro SS Build
I bought my Camaro four months ago with the intention of making it a jack-of-all-trades. It's a 2012 2SS manual car with every option except the sunroof and auto, as far as I can tell. It's also my only car, and therefore my daily driver, so it needs to keep its creature comforts, which include heated seats, the backup camera, the Boston sound system, etc. and maintain a certain level of ride comfort and sound mitigation, because I visit my girlfriend while she's at college, and that's two and a half hours of highway driving each way. I live in West Virginia, where we have actual distinct seasons, so separate sets of winter/summer tires are a must. Finally, it's going to get autocrossed frequently, and I can get anywhere I want to on a twisty back road, so consistent, neutral handling is a high priority, more so than outright grip or speed. My plan is to have the car be almost modular, so that I can change how the car is setup for street driving, autocross, track, road tripping, etc. This build is definitely on a budget, so I'm getting whatever parts I can used/on sale, and trying to get the best bang for my buck mods done now, and saving the big expensive stuff for later.
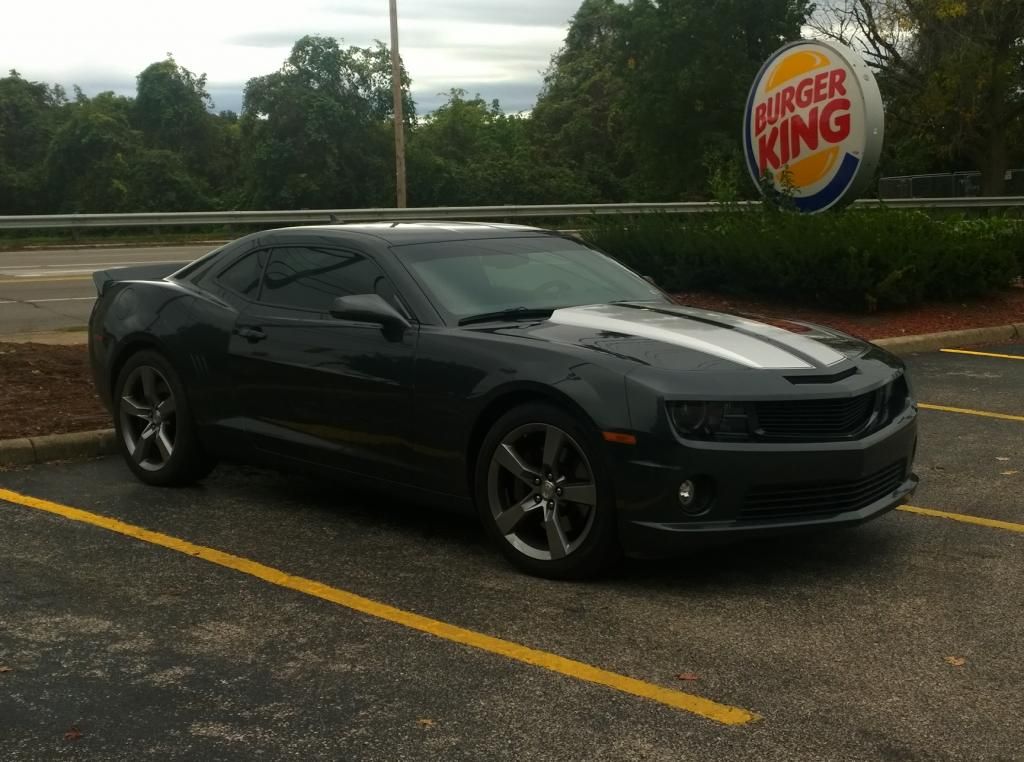 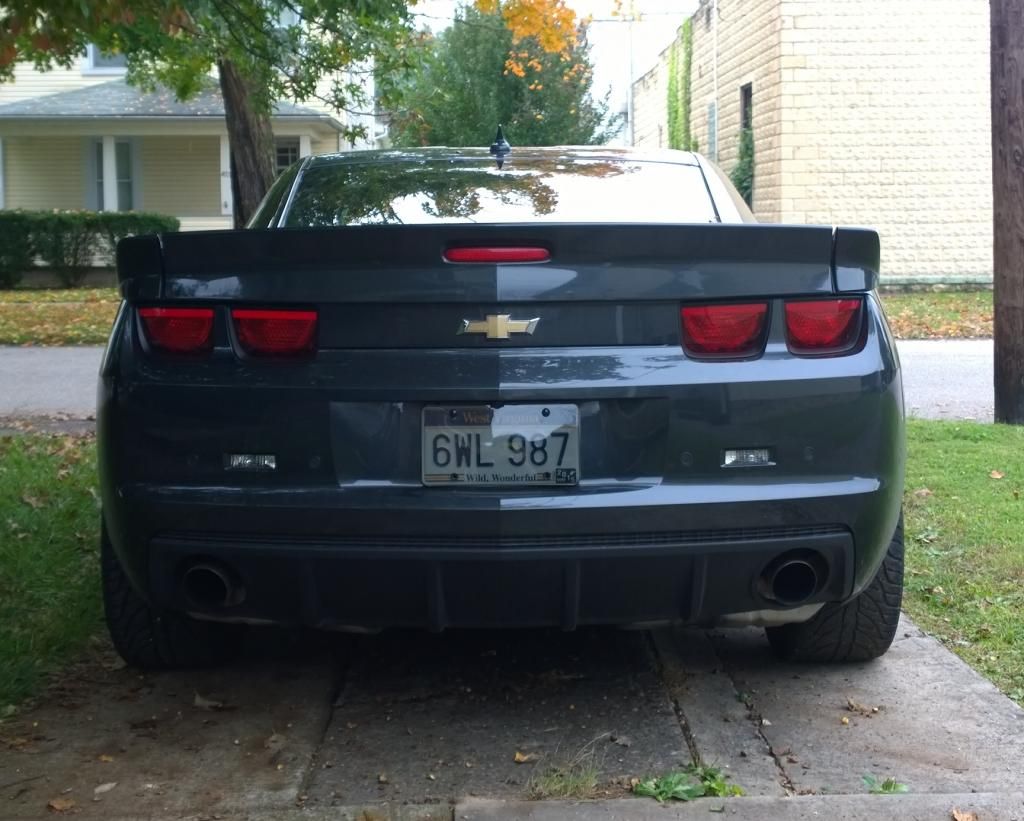  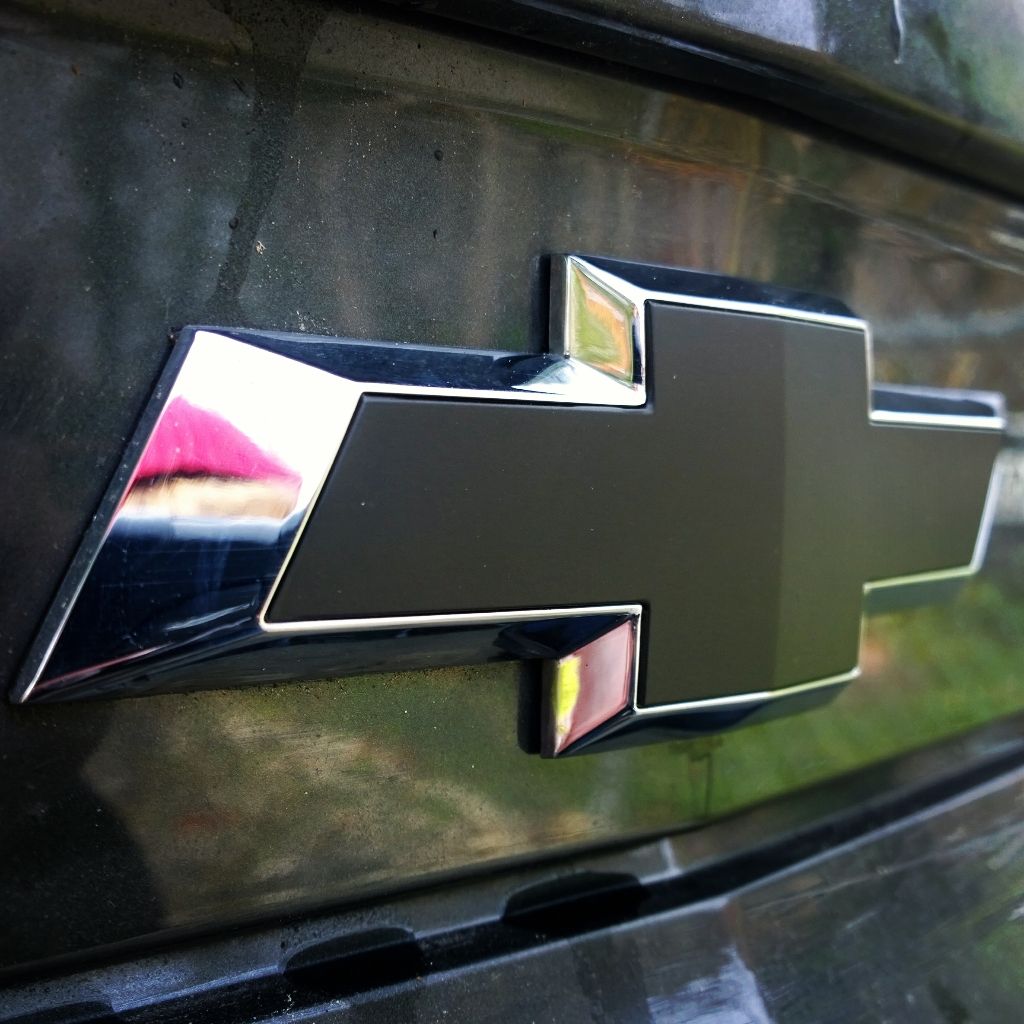 I'm adding a new section, because I feel like it's appropriate for this car. With all the help I'm getting from other members on the site between hard parts and expertise, I feel like a Thank-You section is in order to recognize everyone who's helping make this project a reality. -KaBoom1710, who hooked me up with 1LE sway bars, endlinks, and toe rods. -somewhatdamaged, who sold me my mint-condition MGW shift knob. -The Moreno Borthers, who set me up with their camber/caster plates, and were excellent to deal with. -JusticePete, who's been consistently answering my idiotic questions, getting me parts, will soon be tuning/further improving my suspension. -SSSoon. He's been an enormous help, passing along parts, tips, and being as helpful as possible. If it weren't for him, I wouldn't have my wheels, tires, or coilovers, and I probably wouldn't have sought out JP and gotten that process rolling. -And everyone else who has bought parts from me, and given me advice/tips on parts selection and installation.
__________________
2012 Camaro SS - Sold
Selling off my remaining wheels, tires, 27mm front sway bar, and MGW shift knob. Get them out of my house before my wife puts me out! Last edited by Burt; 06-16-2015 at 01:33 PM. |
|
|

|
|
|
#2 |
 Drives: 2014 Red Hot 1SS M6 Join Date: Jun 2014
Location: Daytona Beach, FL
Posts: 182
|
Looks good! Get those wheels on asap lol.
__________________
2014 Red Hot 1SS M6 aka Bernadette
ADM LSA Conversion, ADM FPCM, 2.75 pulley, ZL1 fuel pump, FAST 89lb injectors, NGK TR7IX, Roto-fab intake, Stainless Power 1 7/8" long tubes w/o cats, NPP, Elite catch can, LG G5 Coilovers, Hurst shifter, GM strut tower brace, 1LE steering wheel, MRR 228 wheels, Nitto Invo 275/315. Tuned by Lashway Motorsports 575rwhp 528rwtq.  |
|
|

|
|
|
#3 |
|
Cone Killer
Drives: 2012 SS Join Date: Dec 2013
Location: St. Albans, West Virginia
Posts: 832
|
Thanks! Right now it's about 16 F outside, so the wheels probably won't come out until the autocross in March, and I'm not sure if I'll leave them on after that, or give it another month. Believe me though, I really want to run them.
__________________
2012 Camaro SS - Sold
Selling off my remaining wheels, tires, 27mm front sway bar, and MGW shift knob. Get them out of my house before my wife puts me out! |
|
|

|
|
|
#4 |
|
Cone Killer
Drives: 2012 SS Join Date: Dec 2013
Location: St. Albans, West Virginia
Posts: 832
|
I got to do a couple of really small things to the car over the weekend, one of which was replace my factory shift knob with the MGW "gripper" knob, courtesy of member somewhatdamaged. While I like the factory Hurst setup well enough, the knob never really seemed designed for my hands, or human hands in general, and the shifter did seem notchy for the sake of being notchy. I know that knob and shift linkage swaps have been covered 8,904,376 times, but I have pictures, so consider this write-up number 8,904,377. I know this isn't a terribly involved thing to do (you need a trim removal tool, a knife, a socket, and the included Allen wrench) but hopefully if someone is new to modding and has a question about changing the knob on a '12 or older car, this will help them out.
Here's the stock knob, which I'm sure brought Mr. Legoman so much joy, and a comparison to the new MGW knob, to show the size difference. 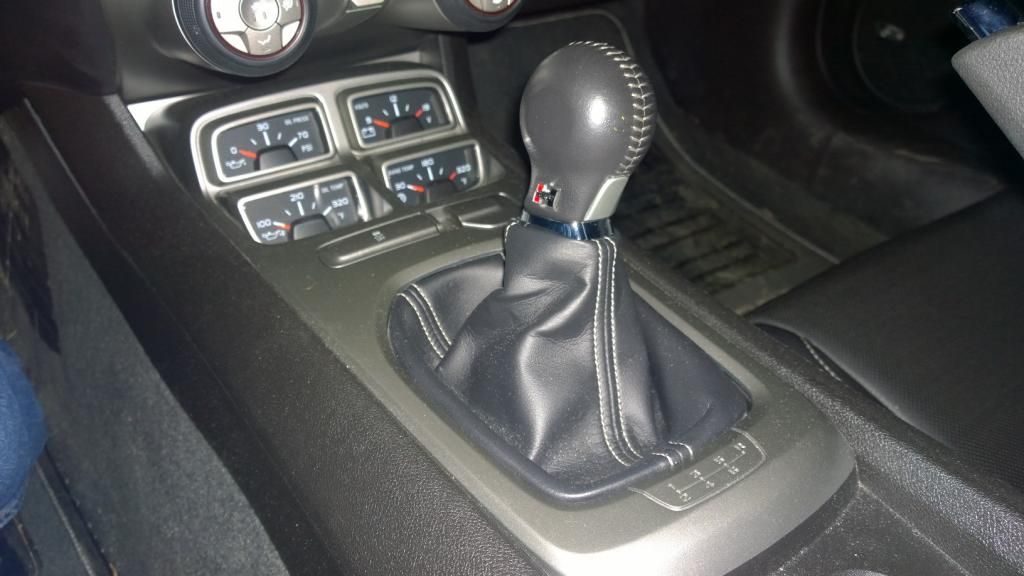 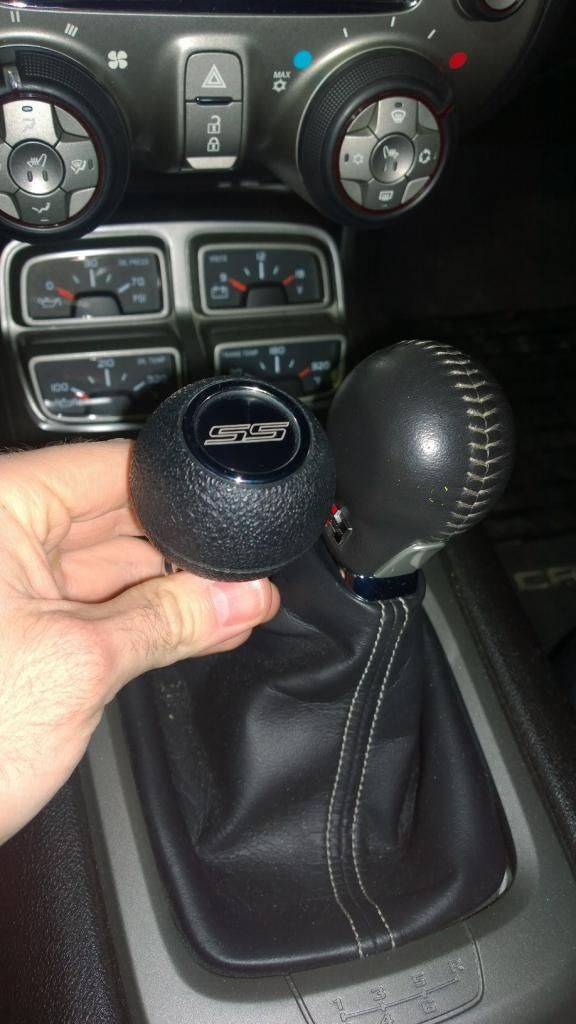 To begin, you need to remove the trim bezel around the shifter. A plastic trim removal tool will give you the leverage you need without marring the finish on the bezel or scratching the shift boot. They're cheap you can get them at any auto parts store, I got a 5-pack of different style trim removal tools at Advance Auto for less than $10, I believe. 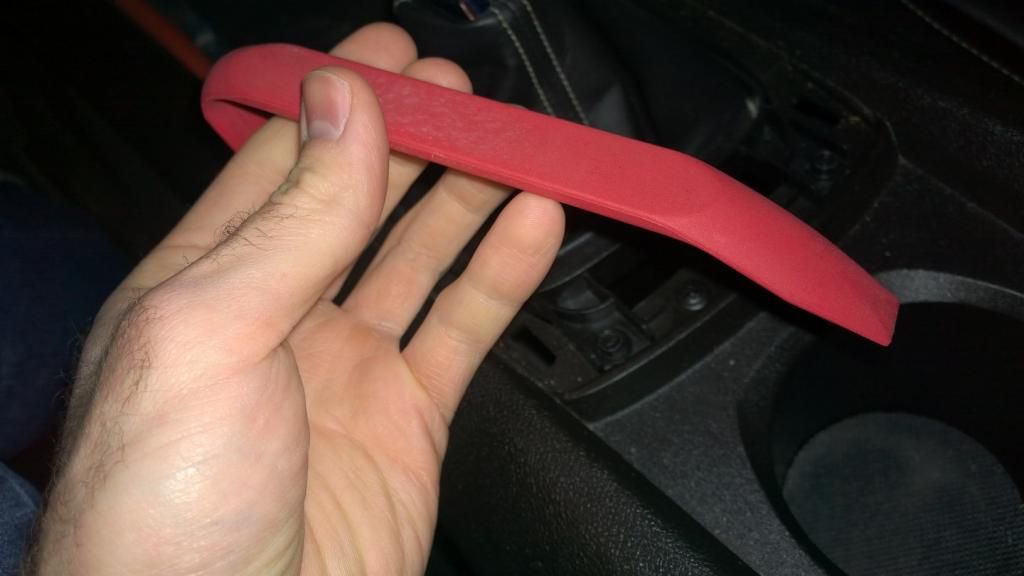 Remove the bezel by popping the clips out, starting from the pair of clips furthest toward the rear of the car, and working forward. There are six clips, which you can see below, and you'll want to pop them out one pair at a time, so rather than popping them out all on the left side then all on the right side, do each pair from back to front. Prying directly beside the clips is most effective, and prying halfway between clips, which could in theory get two at once, is more likely to deform or break the bezel. 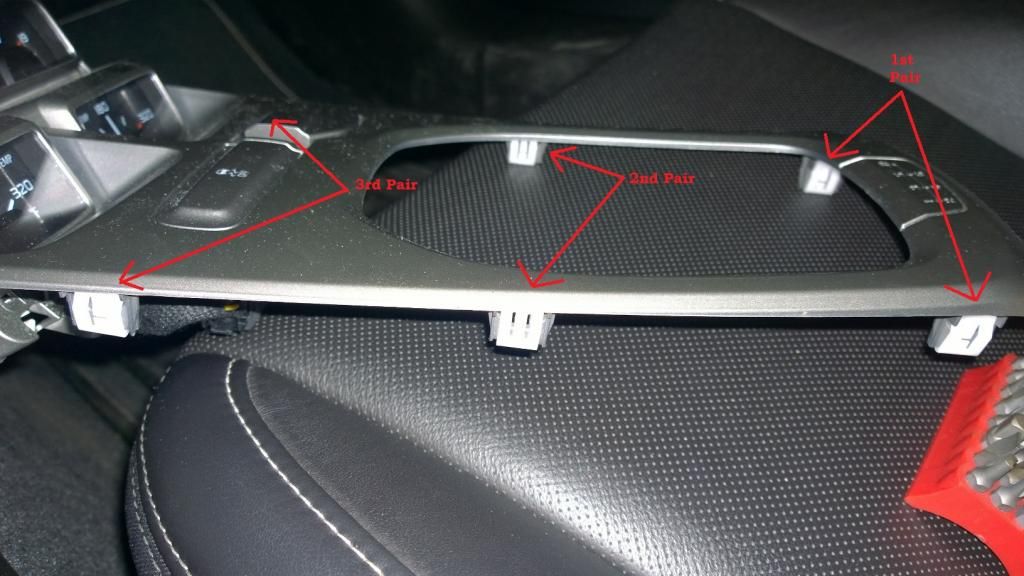 Once you've popped out the six clips, slot the shifter back into one rearward gears (second, fourth, or sixth) and the whole bezel pulls up and out, and there is enough slack in the wiring to set it on the seat, like I did above. Once the bezel is off to the side, you need to remove the four hex-head screws holding the shifter boot on. 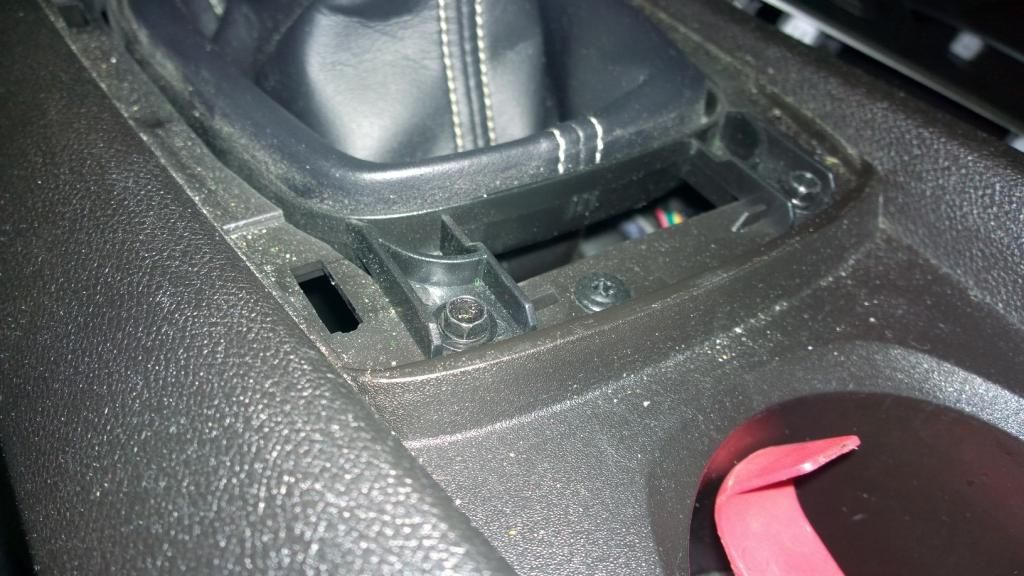 Everything on the car is metric, but I haven't gotten any metric sockets smaller than an 10 mm, and since these screws are barely snugged in place, a 9/32" socket will do the job without stripping the heads. A 7 mm socket would be the proper size to use.  Get those out, drop the in your cupholder so you don't lose them, and pop that shift knob off. I braced one elbow on the center console lid, the other on my knee, and pulled straight up, while twisting side-to side, and it came off pretty easily. Those are words I never expected to type out...anyway, now the hard part is done. 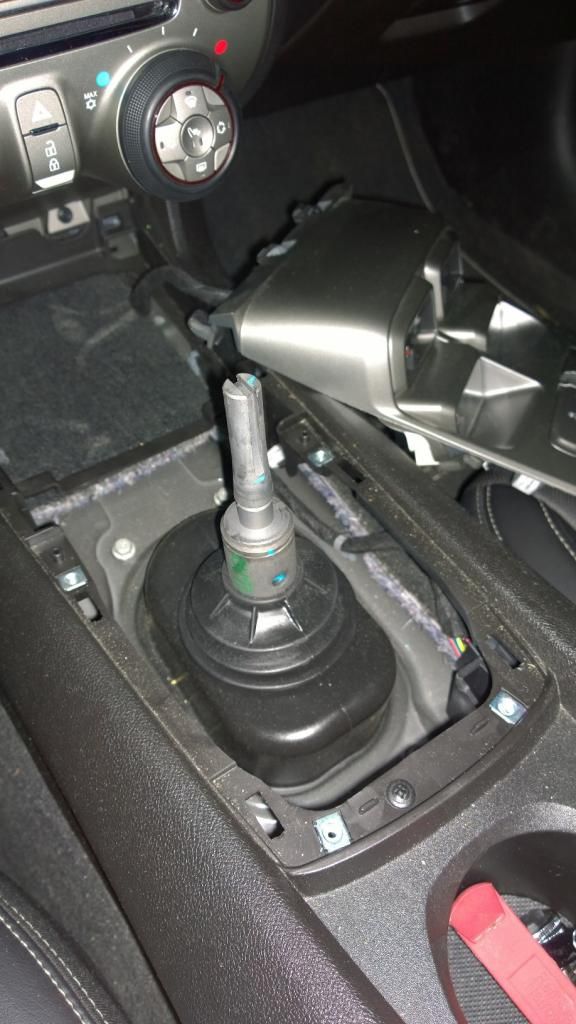 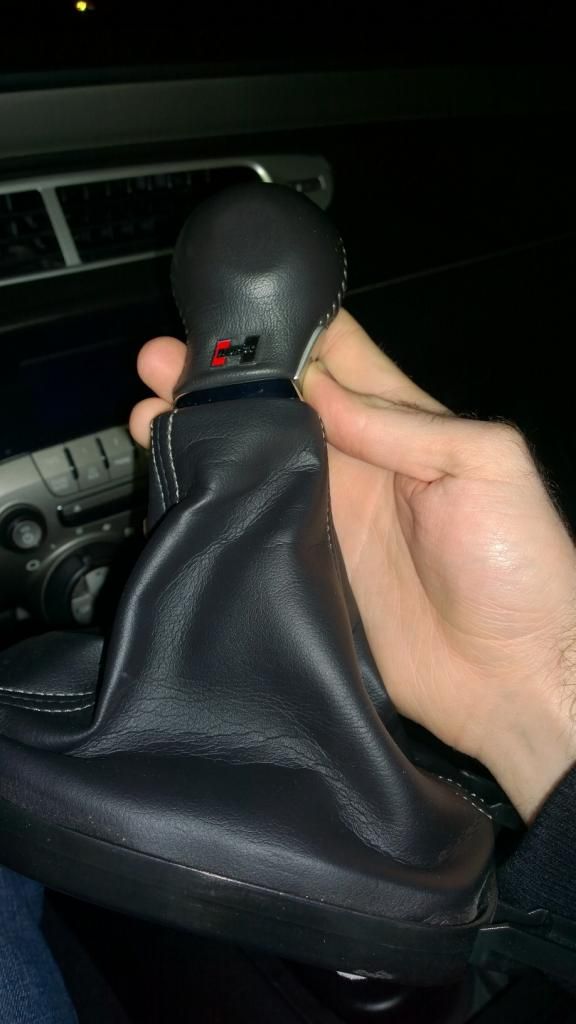 Your shift knob and boot are still tied together, so to separate them you need to flip the boot inside out, and cut this zip tie, being careful not to cut the boot itself. 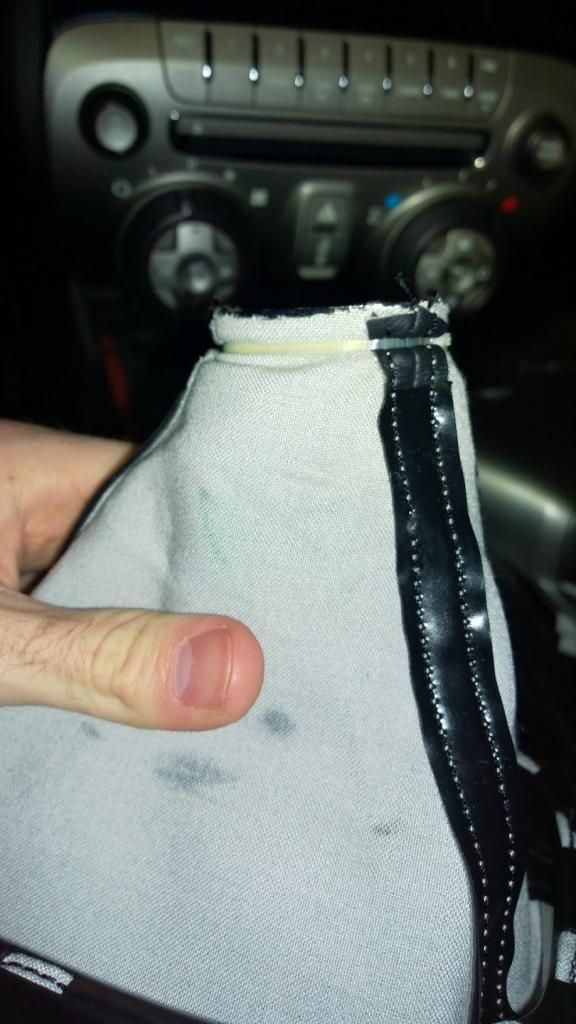 Leaving the boot inside out, use the zip tie in the kit to attach your new boot holder. I wanted to have the small side of the boot adapter facing out to make it less noticeable, so I put it in upside down, and zip tied it firmly in place. 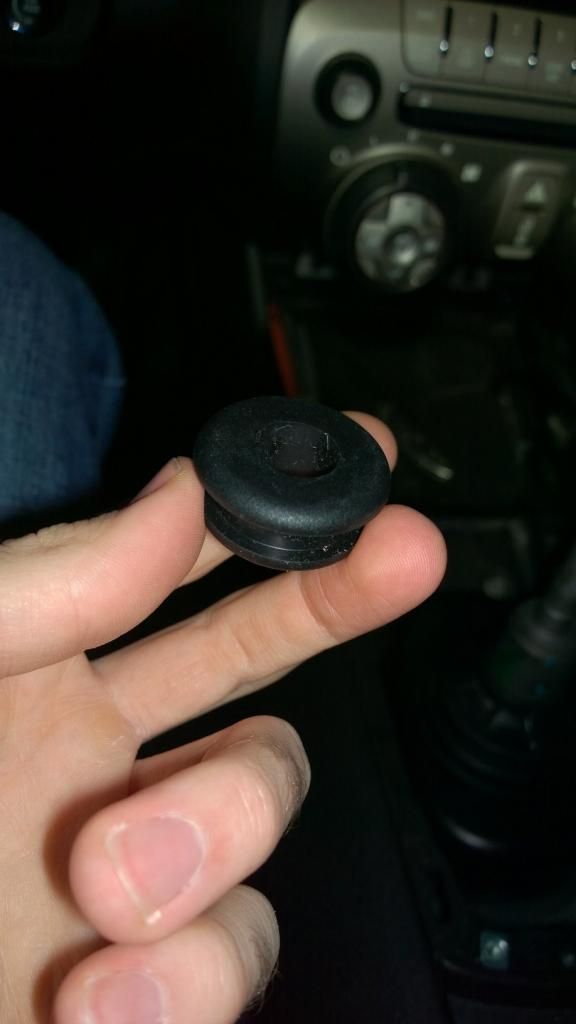 Flip the boot back around (this is a good opportunity to clean it, if yours is dirty like mine) and put it back on the shifter. 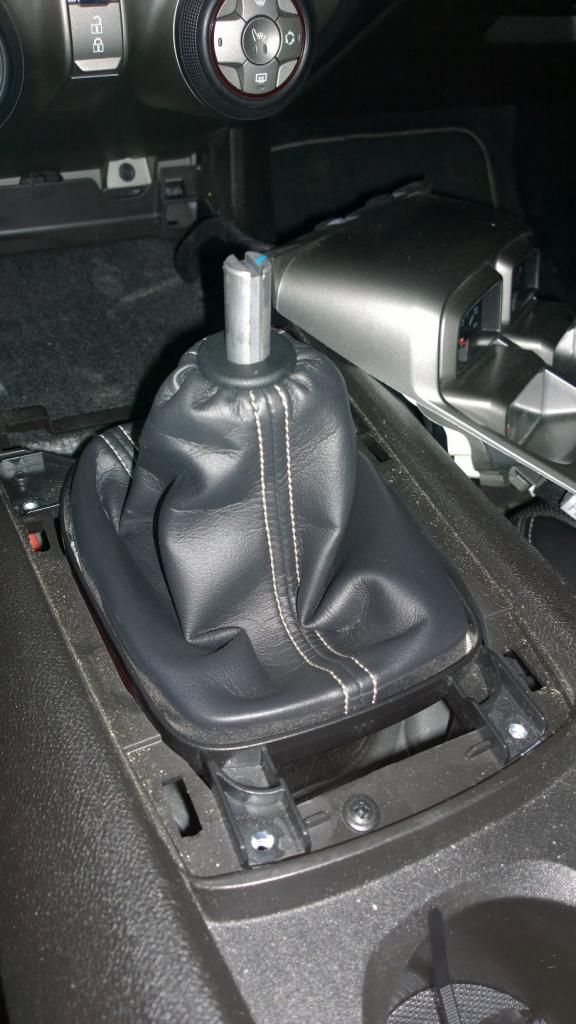 Put the screws back in, put the bezel back on (the clips just snap back into place using light-moderate pressure, as long as you've got the bezel lined up) and slide the shift knob on. There is a screw-type lock on the front the front of the knob that you tighten using the included allen wrench, and I tightened mine until I couldn't pull the knob off with a reasonable amount of force. It doesn't take much torque on the screw, which has the added bonus of fitting into a slot on the shift lever and eliminating any twisting-slop in the shifter. Once that's tightened, you're done! 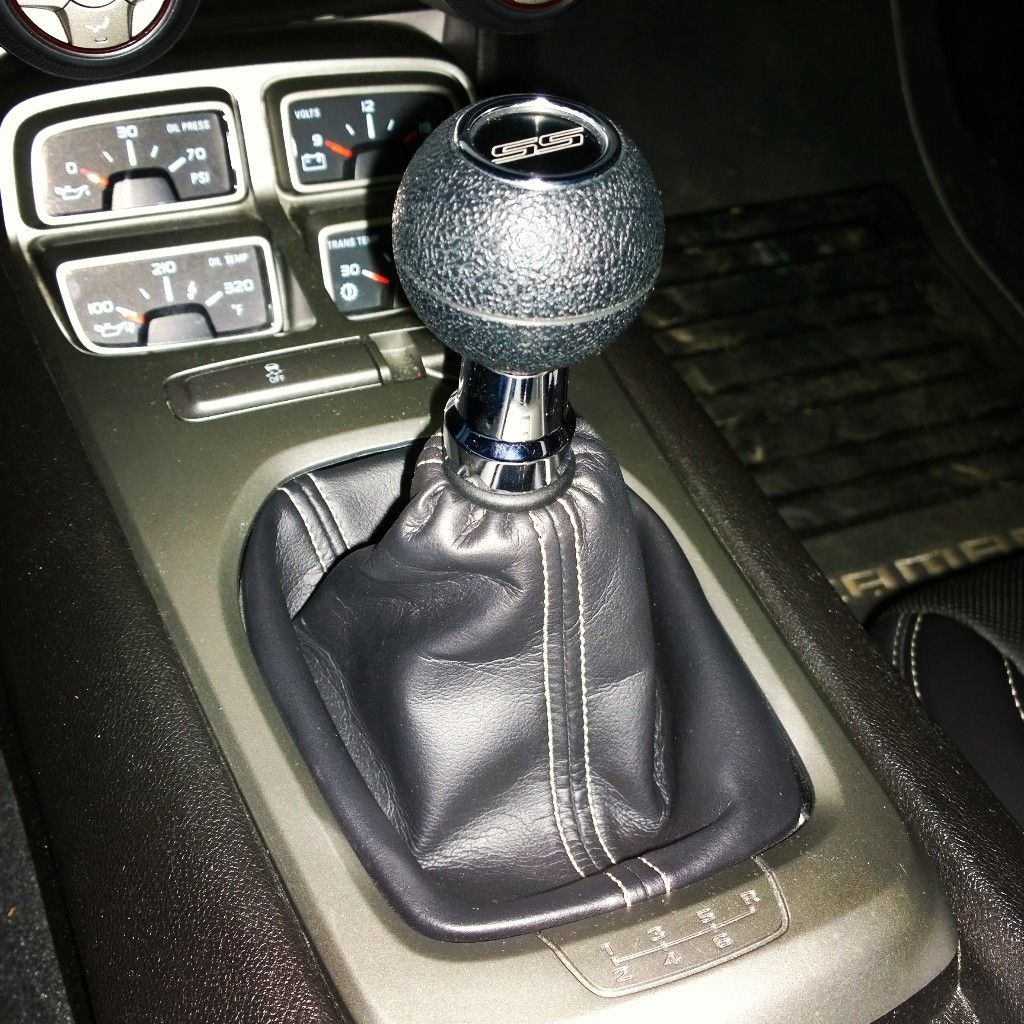 The knob turned out even better than I expected. Not only is it better to hold, and much grippier (shockingly) than stock, but it eliminated the twisting play, and also sits up higher than the stock knob, which I didn't realize. This not only puts the shifter closer to the steering wheel, but reduces the engagement effort while only marginally increasing throw length, and negligibly increasing lateral gear spacing. The only downside I've found is that having the solidly mounted knob on what is essentially a longer lever amplifies the sloppiness of the shifter in-gear. It's still better than most stock setups, but it is more noticeable, so now I want to look into getting firmer bushings for it. (the car has 37.5K miles, so the bushings are probably beginning to show a little wear as well) I like the throw lengths and spacing, so if anyone knows of a bushing kit for the factory Hurst shift linkage, let me know. Overall, the MGW knob improved one of the primary vehicle interfaces, and makes my driving better and more consistent. I'd recommend it to anyone with the factory Hurst setup.
__________________
2012 Camaro SS - Sold
Selling off my remaining wheels, tires, 27mm front sway bar, and MGW shift knob. Get them out of my house before my wife puts me out! Last edited by Burt; 01-28-2015 at 08:35 AM. |
|
|

|
|
|
#5 |
|
Boosted Moderator
|
Great start, enjoy the car... They are ton of fun...
__________________
If the car feels like it is on rails, you are probably driving too slow. -Ross Bentley
Horsepower is how fast you hit the wall. Torque is how far you take the wall with you. “If everything seems under control, you're just not going fast enough.” Mario Andretti If you can turn, you ain't going fast enough... |
|
|

|
|
|
#6 |
|
Cone Killer
Drives: 2012 SS Join Date: Dec 2013
Location: St. Albans, West Virginia
Posts: 832
|
Thanks! I've been loving every minute of having the car so far. My car certainly isn't up to the same caliber as yours or so many on here, but between the knowledge, help, and actual parts, the car is basically forum built, so I figure I should share what I learn, even if it's small.
__________________
2012 Camaro SS - Sold
Selling off my remaining wheels, tires, 27mm front sway bar, and MGW shift knob. Get them out of my house before my wife puts me out! |
|
|

|
|
|
#7 |
|
Cone Killer
Drives: 2012 SS Join Date: Dec 2013
Location: St. Albans, West Virginia
Posts: 832
|
A small aside, the other night I tried to do one of the smallest, easiest maintenance jobs you can do to these cars; change a corner marker bulb. It's so easy, you just undo three screws on the fender liner, pop the whole marker out, undo the connector, and change the bulb. I got up in the fender, popped the marker out, and saw my problem- nothing. No bulb, no connector, no wiring, just and empty hole and confusion. I fished around in the bumper, found the wire, pulled it back through the fender, and presto fixo! It still worked, the connector had just backed out of the marker somehow, and had been dangling in the front of the car. I'm still waiting for the day I do something to a car and have it go as planned.
__________________
2012 Camaro SS - Sold
Selling off my remaining wheels, tires, 27mm front sway bar, and MGW shift knob. Get them out of my house before my wife puts me out! |
|
|

|
|
|
#8 |
|
Cone Killer
Drives: 2012 SS Join Date: Dec 2013
Location: St. Albans, West Virginia
Posts: 832
|
I'm getting excited!
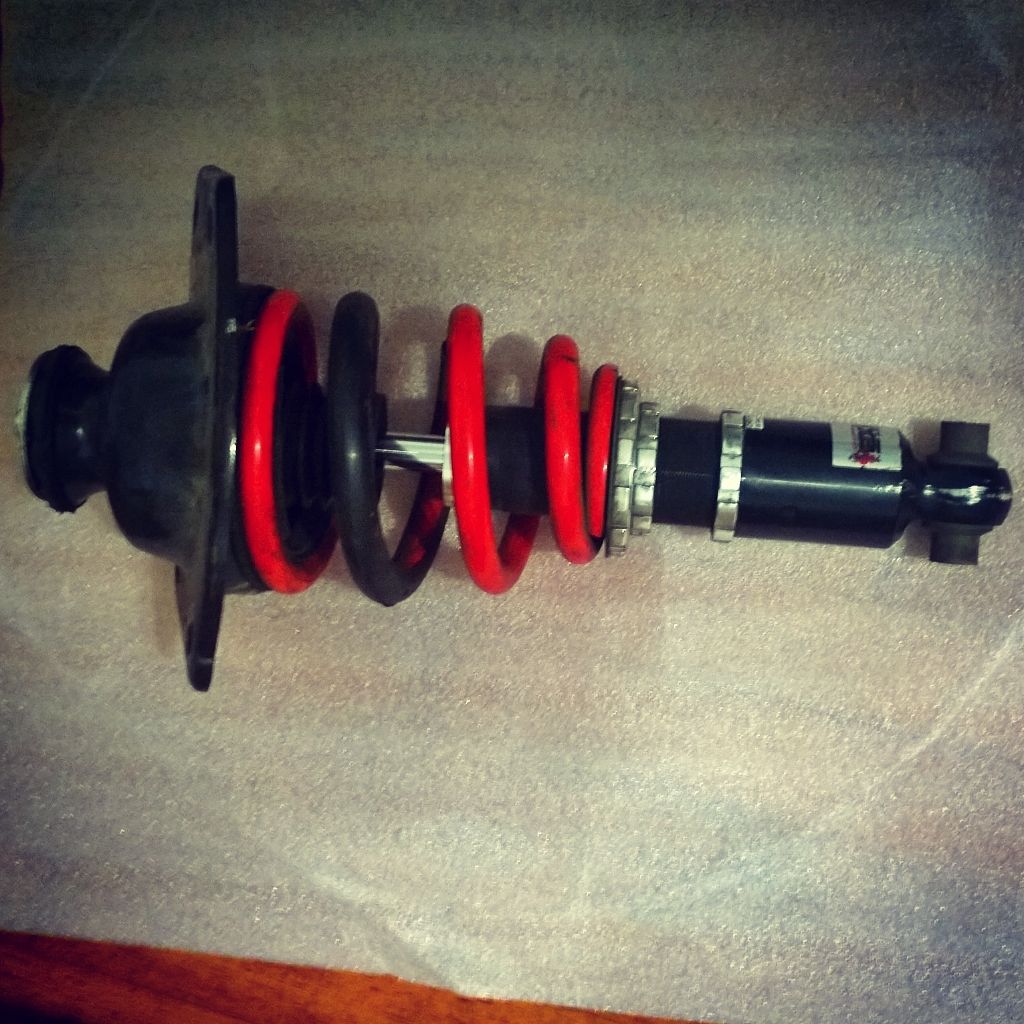 My coilovers are showing up in the mail now, I've got the rears and I'm waiting on the fronts. When I get the fronts, I'll pull them apart, put my Moreno camber/caster plates on and set pre-load and a preliminary ride height so the install is as quick and painless as possible. I've got a lot of stuff to do this weekend before the autocross, and I can't wait. I need to: -Install the coilovers and camber/caster plates -Install my 28mm O.D. 1LE rear sway bar and toe links -Swap on my Forgestars/Pilot Super Sports -Get a conservative alignment so that my tires will wear properly/the handling won't be wonky, this will be a hold over until I can get to Justice Pete and get the car dialed in. I'm going to try my hand at corner-balancing this weekend as well, getting it close if not perfect won't hurt, and it'll be fun. The car is definitely progessing more quickly than I expected. Once I get these parts on the car, I'll start throwing my money at Justice Pete as quickly as I can. My next plans are his radius rod bushings, beefing up the brakes enough to keep them together on the track, and sourcing the SRP racing pedals myself to make heel-toe shifting a bit easier. The Knuckle Drop is also on the list, I just have to afford it first. Granted, I'm young and healthy, I'm sure my kidneys are worth something... I changed the thread title the Forum Built, which I definitely feel is accurate. I've gotten literally every part for the car from members on here, and been given great help along the way. The car is teaching me a lot, like controlling over/understeer, and reminding me of others, like living on a tight budget after I blow past my monthly allotment for car parts.
__________________
2012 Camaro SS - Sold
Selling off my remaining wheels, tires, 27mm front sway bar, and MGW shift knob. Get them out of my house before my wife puts me out! |
|
|

|
|
|
#9 |
|
Cone Killer
Drives: 2012 SS Join Date: Dec 2013
Location: St. Albans, West Virginia
Posts: 832
|
The struggle with Murphy's Law is real. Last night I tried to install my Moreno Motorsports camber/caster plates on my front coilovers and set spring preload to make the install tonight quicker, and I'm glad i did, because I hit a snag.
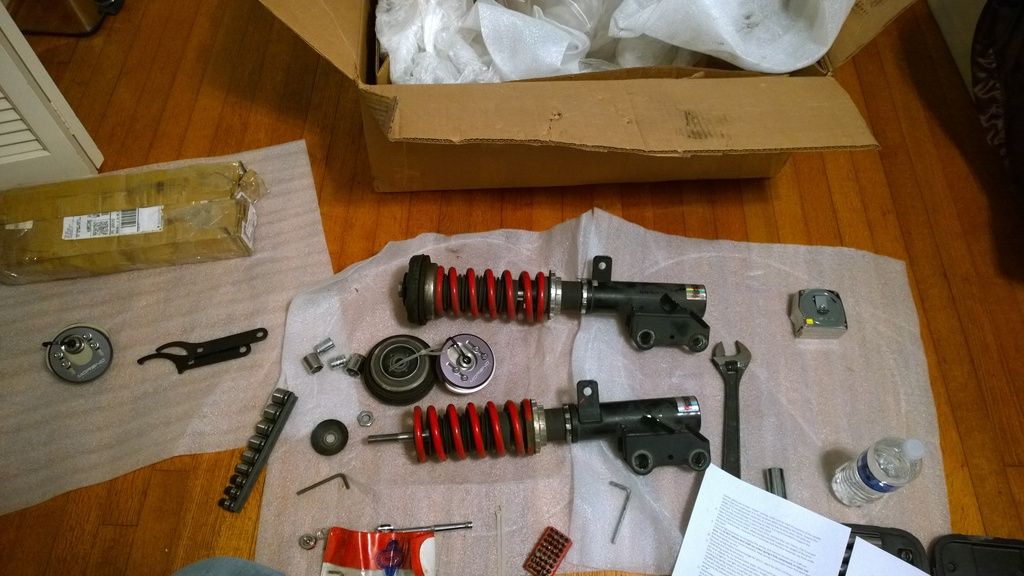 Comparing the spring perches on the Moreno camber plates to the original Pedders top mount, the Moreno mount lets the spring ride higher. Unfortunately, the bottom spring perch on the strut body can't be adjusted up high enough to compensate without partially raising it above the threads on the shock body. When the bottom mount is threaded as high as is can go while still being completely threaded onto the shock, the spring is about 10.6 mm too short, plus the 5mm of preload that needs to be added in addition to that. The springs free length (when totally uncompressed) right at 6 and 7/8", so I need a minimum of a 7.49" long spring to make the mounts work. Pedders specs an 8 kg/mm spring with the coilovers, which works out to 448 lbs/in, so I've got a set of 8" 450 lbs/in Hyperco springs on the way now. These particular coilovers are used, so your spring length may vary a little bit, but long story short, if you're planning on running Moreno Motorsports camber/caster plates with Pedders XA coilovers, you'll probably need longer springs. That's not really that big of a hassle, the springs are $60 eash on Amazon with free shipping, and in my case, the front springs are showing some wear, the powdercoat is coming off in a couple places, and there's surface rust where it's come off. I'm going to go ahead and install the coilovers with the original mounts, my 28 mm 1LE rear bar and toe links, and wheels/tires tonight, and then pull the front coilovers back off and install the new springs and camber plates later. Even without them, the autocross will be a blast this Sunday.
__________________
2012 Camaro SS - Sold
Selling off my remaining wheels, tires, 27mm front sway bar, and MGW shift knob. Get them out of my house before my wife puts me out! Last edited by Burt; 03-13-2015 at 09:00 AM. |
|
|

|
|
|
#10 |
|
Cone Killer
Drives: 2012 SS Join Date: Dec 2013
Location: St. Albans, West Virginia
Posts: 832
|
The last few days have been hectic, but totally worth it. I got the coilovers on the car, as well as the rear sway bar and toe links. I got the hyperco springs in the mail, and once I move into my new place at the beginning of the month, I'll install them as well as the Moreno camber/caster plates, and probably some camber bolts for the rear. I had the techs at the alignment shop time the bushings, but they either didn't time all of them, or time any of them at all, and the rear end feels hamstrung, so I'll do that when I have the car apart again. I ran into a few sticking points during the install, so when I have the opportunity to take some pictures I'll do a proper write-up on it.
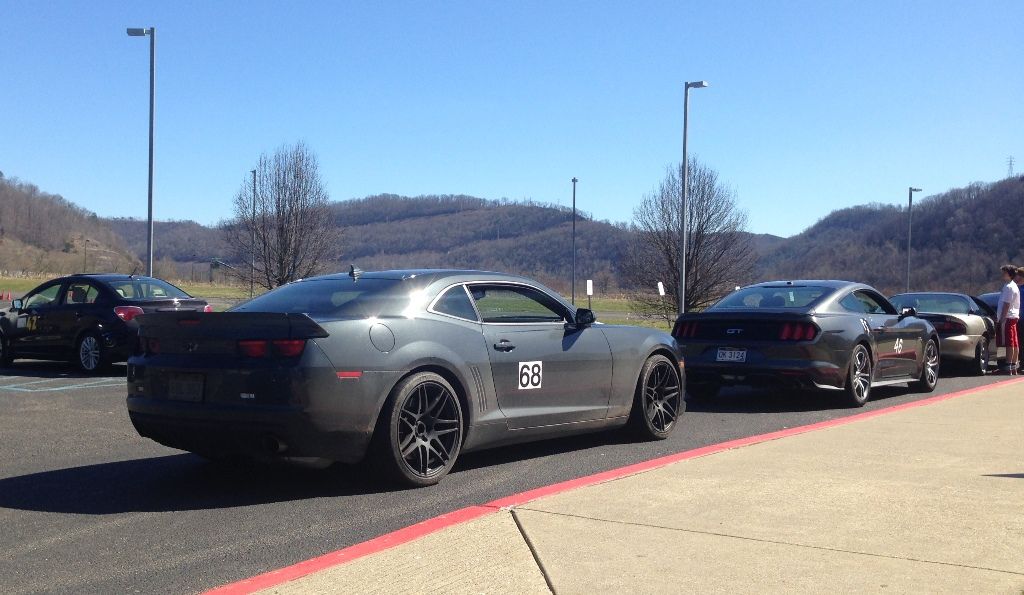 I took the car to the autocross on Sunday, and wow, it's a totally different animal. Body roll is minimal, front end grip is abundant, and the grip balance is much more neutral. It's going to take me a little while to actually figure out how to use all of the capability I have. For the first time since January, the car isn't filthy. I think it cleans up pretty well myself...
__________________
2012 Camaro SS - Sold
Selling off my remaining wheels, tires, 27mm front sway bar, and MGW shift knob. Get them out of my house before my wife puts me out! |
|
|

|
|
|
#11 |
 Drives: camaro Join Date: Mar 2015
Location: FL
Posts: 2
|
Legoman so much joy, and a comparison to the new MGW knob, to show the size difference.
|
|
|

|
|
|
#12 |
|
Cone Killer
Drives: 2012 SS Join Date: Dec 2013
Location: St. Albans, West Virginia
Posts: 832
|
I finally got my camber/caster plates on over the weekend. When I get the chance, I'll do a little how-to on installing the coilovers for somebody in their home garage like me, but for now, here's how I made the coilovers and camber caster plates play nice:
Moreno Motorsports camber/caster plates and Pedders XA coilovers are great products individually, but they need a little help to play nicely together. When the camber plate is mounted on the coilover, it lets the spring ride higher than original Pedders top spring perch, and the bottom perch has to be raised to compensate. However, there aren’t enough threads on the shock body to fully compensate for the increase, meaning that the spring cannot be preloaded. My solution to this was to switch to a longer spring. The springs on my particular coilovers measured around 6-3/4” uncompressed (I think it was around there, and with any used spring, yours may differ) and measuring from the attached, torque down top perch to the bottom perch, which I had threaded as high as possible while still being fully-threaded, measured somewhere in the neighborhood of 7.1-7.2,” however keep in mind that you still need to add 3-5mm for pre-loading the spring. Since that is the absolute minimum height needed, I rounded up to 8,” a commonly available spring length. Pedders specifies an 8 kg/mm front spring, which works out to: 8kg/mm * 2.21 lb/kg * 25.4 mm/in = 449 lb/in springs Hyperco sells a, eight-inch long (uncompressed) coil spring with a spring rate of 448 lb/in. I bought two on Amazon, for around $60 each, if I remember correctly, so this switch won’t break the bank. I should also point out that since these springs are the same rate as the original Pedders units, and ride height is set from the clevis instead of the spring perch, this swap won’t change how the coilover behaves or alter your ride height. The longer spring will limit how low you can drop the front of the car, but only by about ¾ of an inch, so you can still lower it at least two inches. The install is straight forward. Here’s a picture of mine showing most of what you’ll be working with: 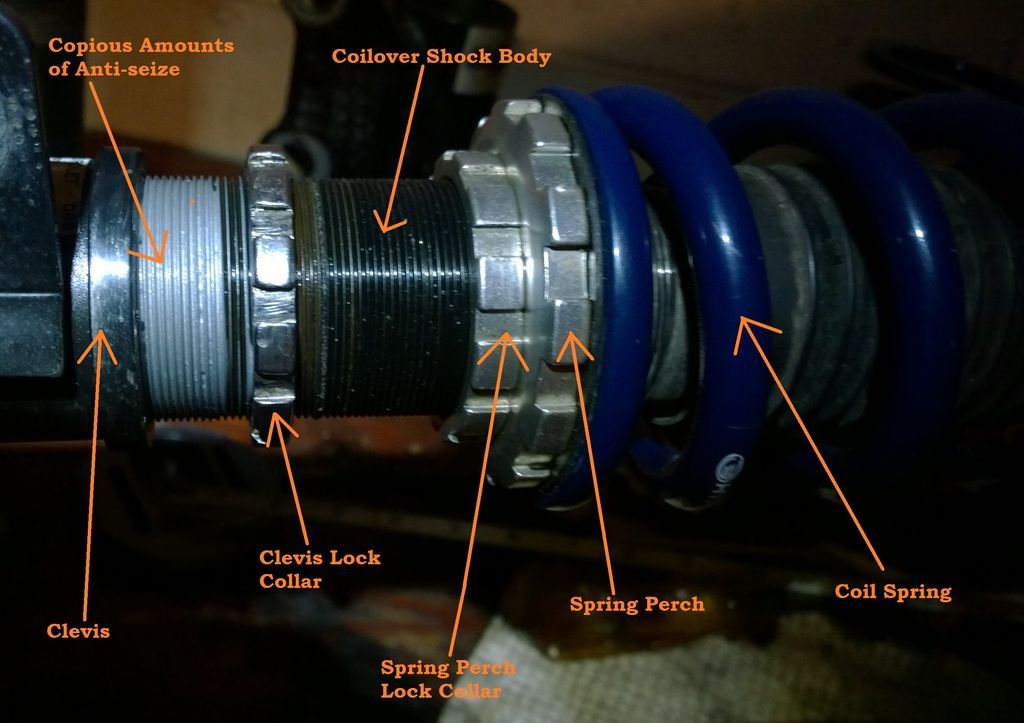 Loosen the lock collar for the bottom perch, and thread the lock collar and spring perch down the shock body until the spring is completely slack, and then an additional inch or so. Completely disassemble and remove the Pedders top mount, and remove the spring. Put the new spring on, and install the Moreno bottom plate (remember to take the rubber bushing off, or the spring won’t fit) mid-plate, spacer, and the original top nut. Make sure the bottom perch is low enough that there isn’t any tension in the spring, and torque the top nut to spec. (53 ft-lbs, I believe) Once the top nut is torqued down, raise the spring perch just enough to immobilize the spring, but not compress it. Now, add pre-load to the spring. You’ll do this by raising the spring perch an additional 3-5mm (for those of you who don’t have a metric ruler/caliper handy, like me, 3/16 on an inch is approximately 4.75mm, so use that. Measure the increase front the top edge of the spring mount to a fixed point on the coilover, like the leading edge of the clevis. Once you’ve got the pre-load dialed in, thread the lock collar up to meet the spring perch, and lock them together. Now, if you have your ride-height set and the clevis locked in place, you’re ready to re-install the coilover. Note: When you put anti-seize on the four bolts in the top of the camber/caster plate, put it in the holes for the bolts, not on the bolts themselves. If you put it on the bolts, it will get on the top plate, you, your tools, your car, your children, everything…so just put a little in each bolt hole, to be safe.
__________________
2012 Camaro SS - Sold
Selling off my remaining wheels, tires, 27mm front sway bar, and MGW shift knob. Get them out of my house before my wife puts me out! |
|
|

|
|
|
#13 |
|
SoCal HT5
|
Looking good my man! Can't wait to see more, and nice job with the detailed instructions on your mods

|
|
|

|
|
|
#14 |
|
Cone Killer
Drives: 2012 SS Join Date: Dec 2013
Location: St. Albans, West Virginia
Posts: 832
|
Thanks! Once I get the ride height dialed in and get it cleaned up, I'll take some decent pictures of it.
__________________
2012 Camaro SS - Sold
Selling off my remaining wheels, tires, 27mm front sway bar, and MGW shift knob. Get them out of my house before my wife puts me out! |
|
|

|
|
|
|
|
 |
| Tags |
| autocross, forgestar, mgw |
|
|