You are browsing camaro5 

|
 05-14-2013, 02:04 PM
|
#1 |
 
Drives: 2011 Chevy Camaro LS Join Date: Feb 2012
Location: United States
Posts: 368
|
VMAX BLACK ICE IS HERE, IS THIS RIGHT?
Just opened the package from RX and all i got was the black ice, is that all im suppose to get? I was expecting bolts as well as instructions to install? Im pretty disappointed, looking for help
__________________
2011 Camaro LS: [Rally Yellow] [22" Status Rims] [BBK Long Tube Headers w/ High Flow Cats] [Trifecta Tune] [K&N CAI] [Blacked out Bow Ties and Tail Lights] [15% Tint] [MAC Mufflers] [Rear Cat Delete] [Vmax Black Ice] |

|

|
|
05-14-2013, 02:05 PM
|
#2 |
            
Drives: 2011 CGM Camaro LS A6 Join Date: Jan 2011
Location: San Antonio, Texas
Posts: 10,305
|
Nope, I think that's all there is to it. If you buy directly from RX, you don't get extra bolts or anything. I know Ivan@Southwest Speed will throw in extra bolts. The extra bolts aren't needed but they are nice to have. And no, you don't get instructions either.
__________________
 Click Picture for Build Thread |
|
|
|
|
05-14-2013, 02:06 PM
|
#3 |
    
Drives: Really Slow Join Date: Apr 2010
Location: PA
Posts: 56,955
|
the stock bolts should fit back on with just the isolator. it is interesting that it didn't come with instructions.
__________________
 |
|
|
|
|
05-14-2013, 02:07 PM
|
#4 | |
|
Drives: Really Slow Join Date: Apr 2010
Location: PA
Posts: 56,955
|
Quote:

__________________
|
|
|
|
|
|
05-14-2013, 02:12 PM
|
#5 |
|
Drives: 2011 Chevy Camaro LS Join Date: Feb 2012
Location: United States
Posts: 368
|
Yeah, i mean im not an idiot, but im pretty sure instructions would help. Anyone know where i can get instructions? Hopefully the gains are noticable with this, cuz at the moment im not to happy with it. It took a month to arrive as well.
__________________
2011 Camaro LS: [Rally Yellow] [22" Status Rims] [BBK Long Tube Headers w/ High Flow Cats] [Trifecta Tune] [K&N CAI] [Blacked out Bow Ties and Tail Lights] [15% Tint] [MAC Mufflers] [Rear Cat Delete] [Vmax Black Ice] |
|
|
|
|
05-14-2013, 02:13 PM
|
#6 | ||
|
Drives: '15 Z06, '01 NBM SS, '97 SS Join Date: May 2009
Location: Rio Rancho, NM
Posts: 12,170
|
Quote:
Quote:
Shoot me a PM with your email...I'll email you the instructions.  Ivan @ Southwest Speed 
|
||
|
|
|
|
05-14-2013, 02:15 PM
|
#7 |
|
Drives: Really Slow Join Date: Apr 2010
Location: PA
Posts: 56,955
|
Here are step by step instructions with pics for both insulator and IM with port matching guide:
Step 1: Remove air coupler: 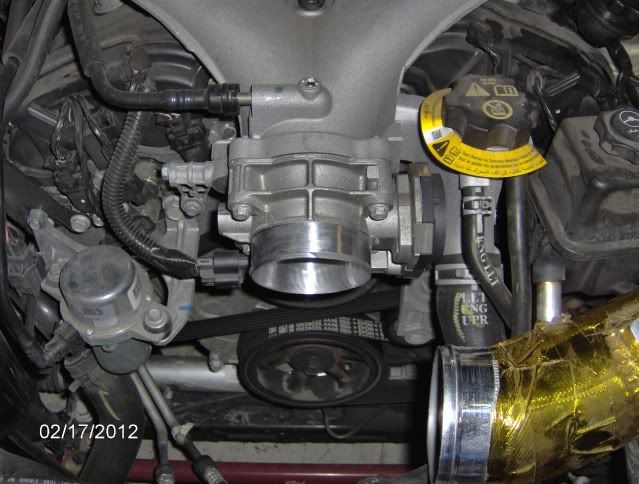 Unplug vac hoses:  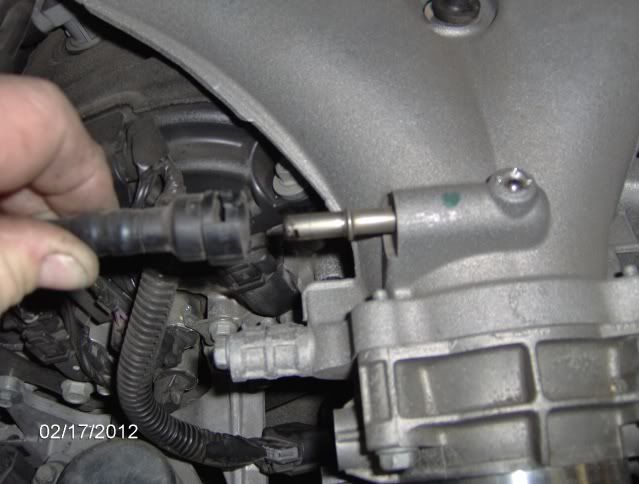 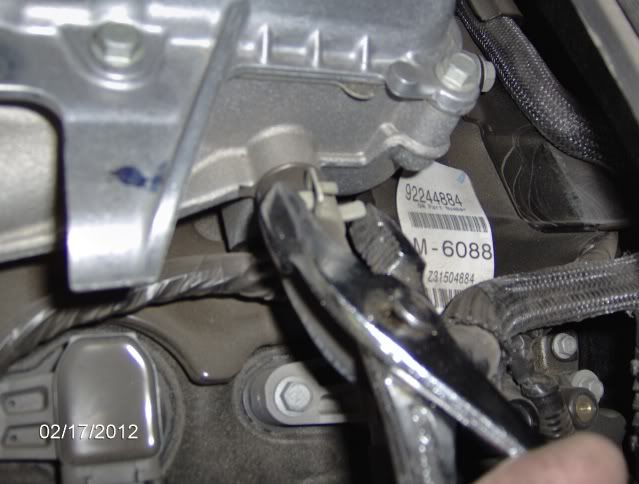 un plug TB harness: 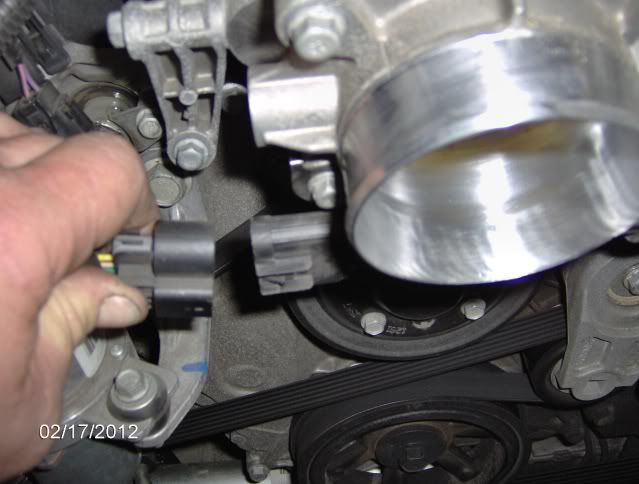 remove to 13mm bolts from rear of IM (these are not resused with the isolator) 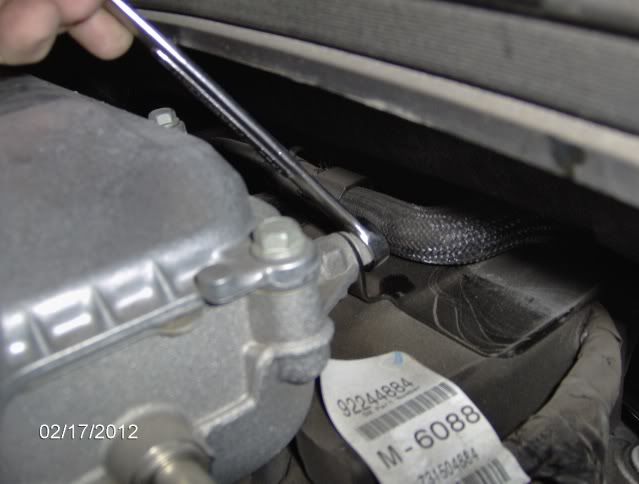 and the rest (make sure to get the rear IM bolt tha is somewhat hidden) 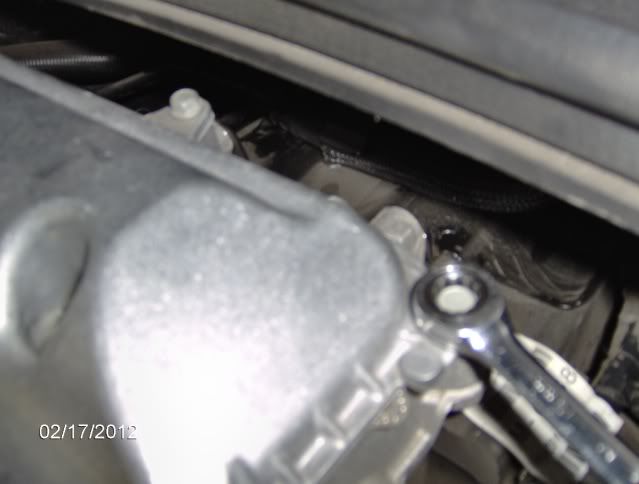 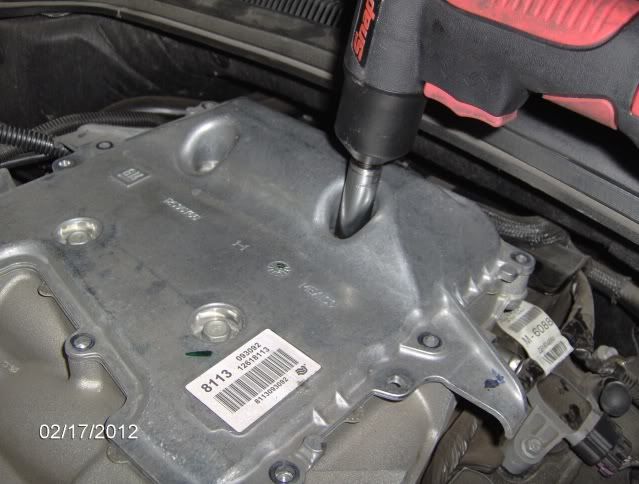 Lift plenum cover off and make note of this sealing spacer. It is reused: 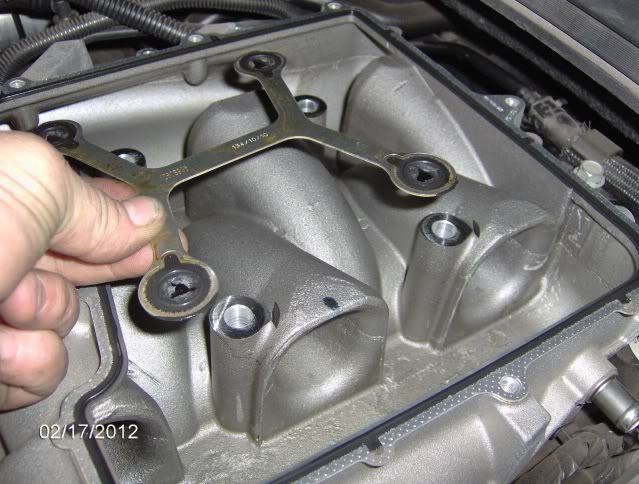 remove bolt from front brace (this is also not reused)  remove intake manifold making sure rear most bolt is held up to clear...when reinstalling bolt needs to be in IM before fitting back under cowl) 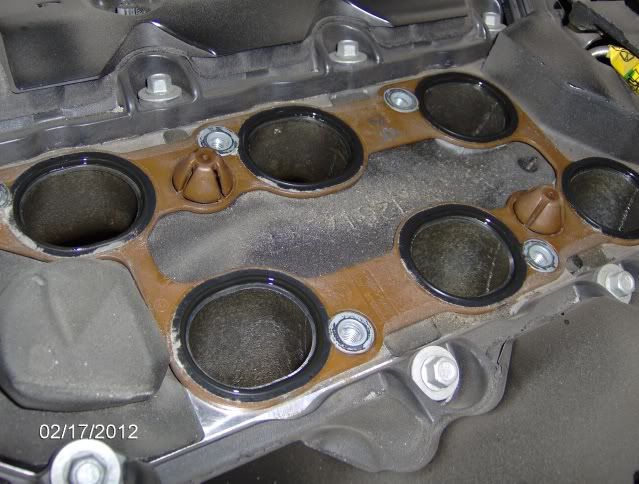 Reuse OEM gasket, but cut the tabs that hold these 2 nobs on and remove: 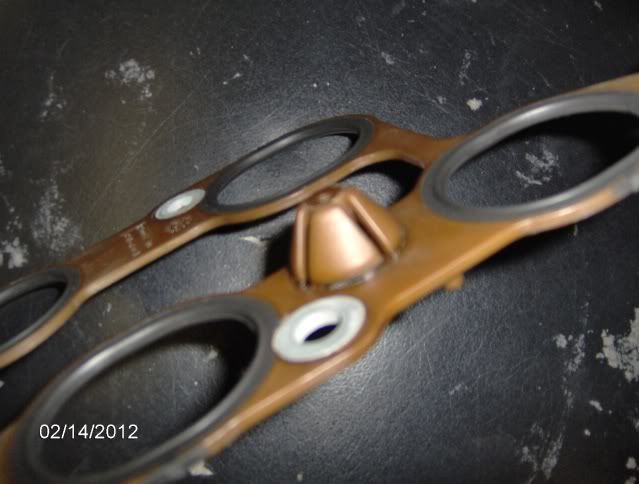 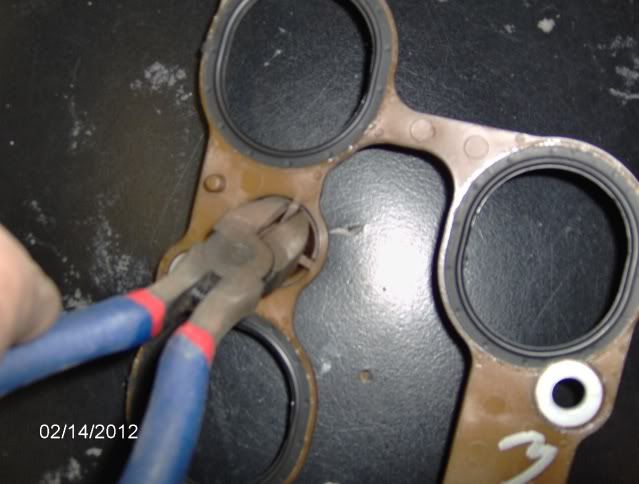 The next steps are optional port matching done with a round abrasive bit on a die grinder but can be done w/a dremel as well. The idea is NOT to go deep or alter the port shape any more than tapering and blending to match: 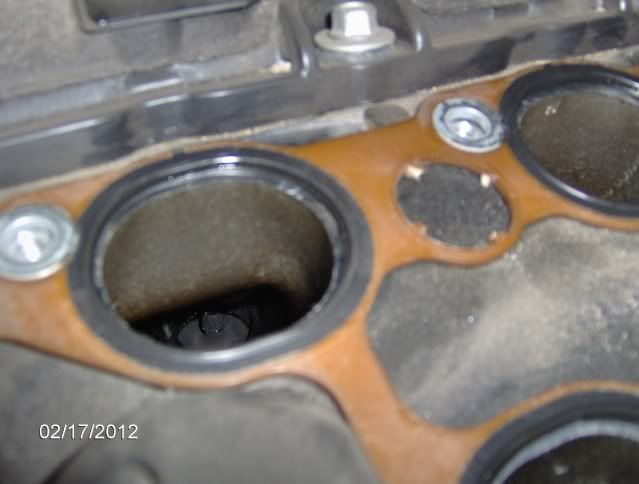 With gasket in place you can see the transition lip....trace OEM gasket openings with a sharpie marker: 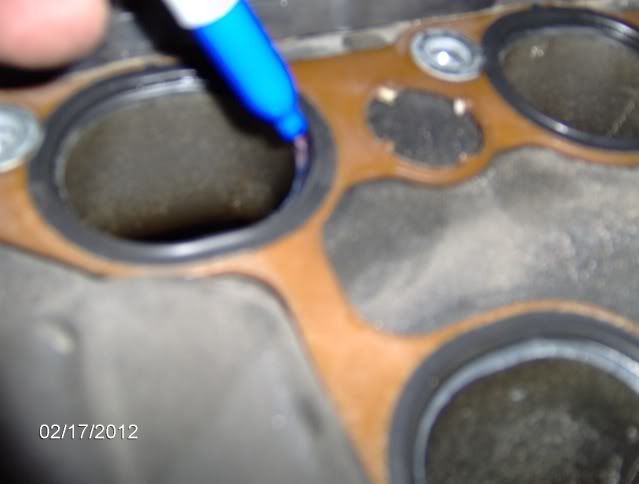 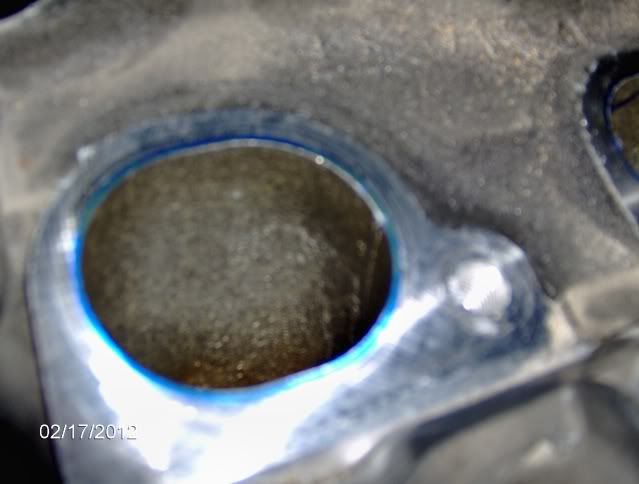 Remove gasket and tape over all ports except the one you are matchng. Stuff a paper towel wadded up into the port to keep debris out of the cylinder and use a shop vac to suck up flakes as you work: 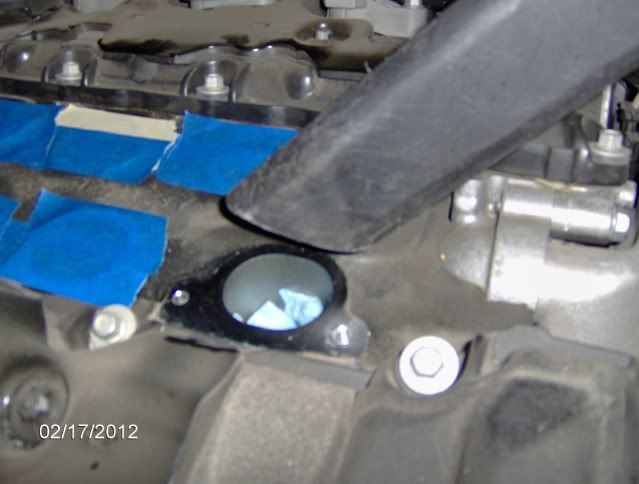 Again!! Only blend and open to the sharpie line. You want no flow disrupting transition, but do NOT want to go ery deep into the port: 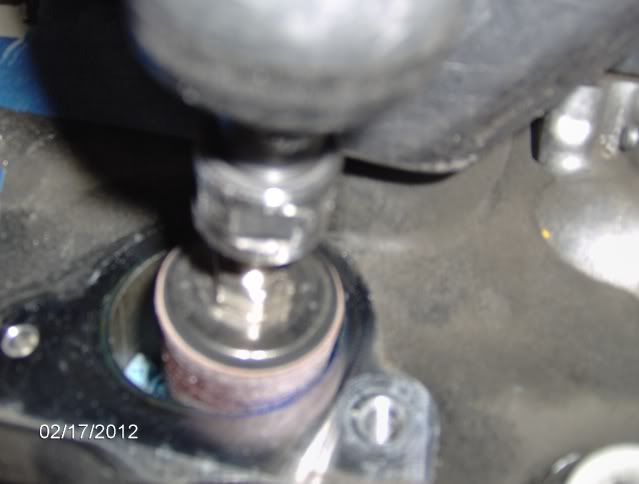 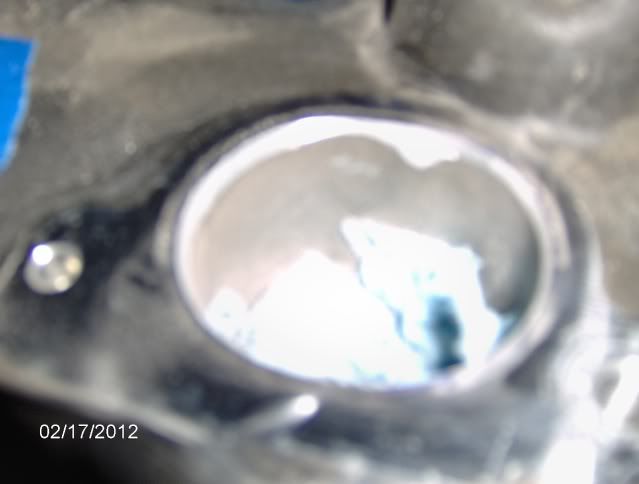 Should look like this when complete: 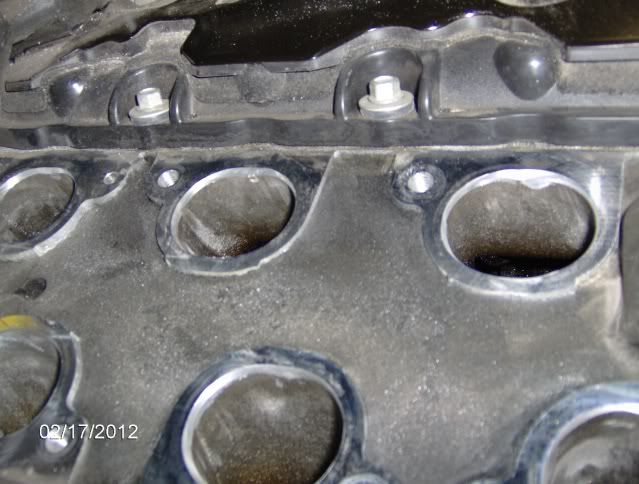 and with the gasket installed: 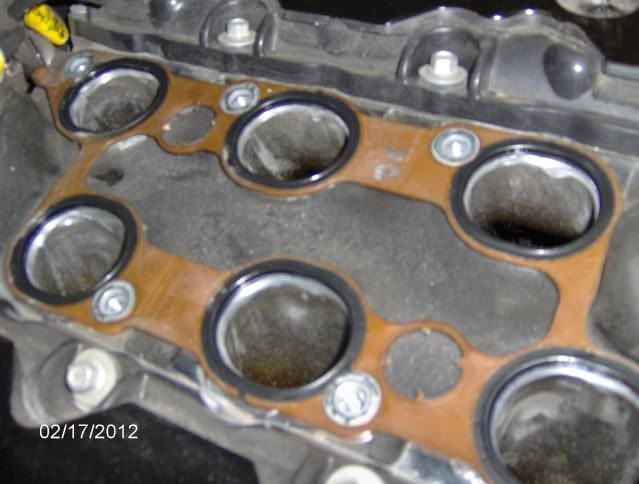 with Black Ice-olator installed....see the nice transition now? 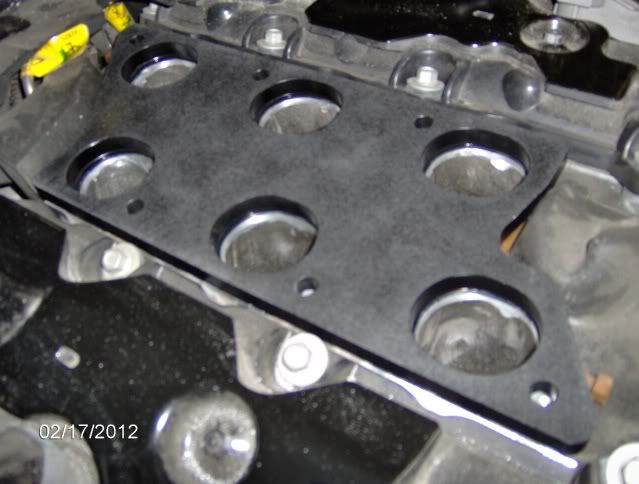 Spread a small bead of Permatex Right stuff (or RTV) around each port making sure to not over do it. You dont want it squeezing into the port and causing a flow disruption) 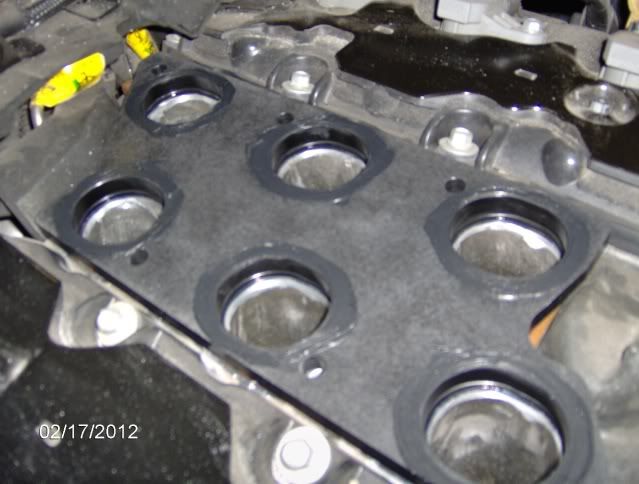 Reinstall all in reverse and make sure to tighten the rear most and front most bolts (they are slightly shorter than the main center ones) first tobegin comprssing the gasket. This will allow the center ones to start properly: 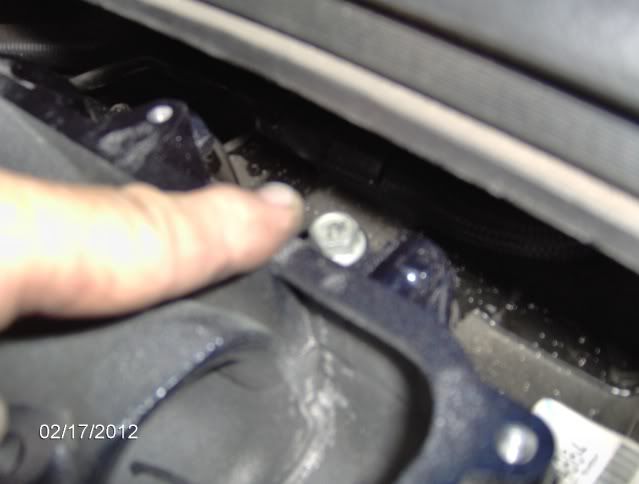 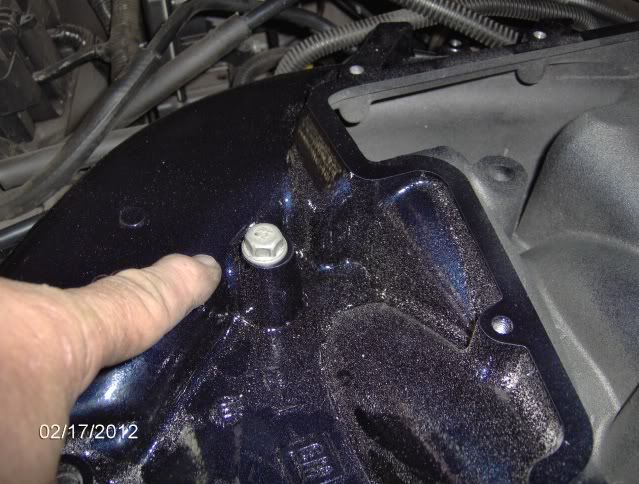 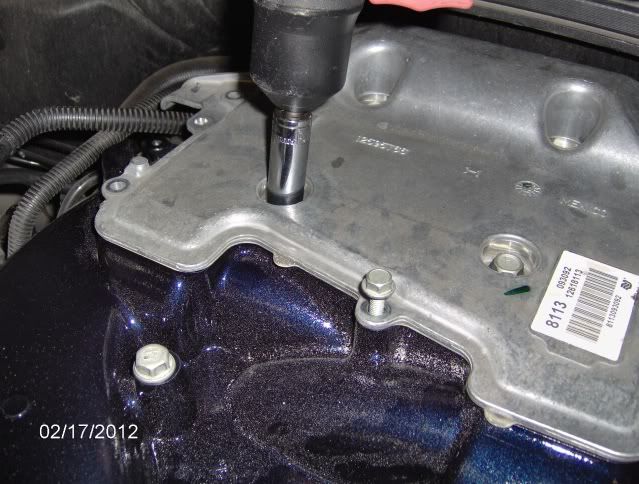
__________________
|
|
|
|
|
05-14-2013, 03:26 PM
|
#8 | |

Drives: 2000 Camaro SS Join Date: Feb 2010
Location: Louisville, Ky.
Posts: 25,179
|
Quote:
|
|
|
|
|
|
05-14-2013, 04:07 PM
|
#9 |
|
Drives: 2011 Chevy Camaro LS Join Date: Feb 2012
Location: United States
Posts: 368
|
Should i feel a relative difference with this installed?
__________________
2011 Camaro LS: [Rally Yellow] [22" Status Rims] [BBK Long Tube Headers w/ High Flow Cats] [Trifecta Tune] [K&N CAI] [Blacked out Bow Ties and Tail Lights] [15% Tint] [MAC Mufflers] [Rear Cat Delete] [Vmax Black Ice] |
|
|
|
|
05-14-2013, 04:08 PM
|
#10 | |
|
Drives: 2000 Camaro SS Join Date: Feb 2010
Location: Louisville, Ky.
Posts: 25,179
|
Quote:
|
|
|
|
|
|
05-14-2013, 08:13 PM
|
#11 |
|
Jan

Drives: 2010 Camaro 1LT Red Jewel tintcoat Join Date: May 2010
Location: Springfield, TN
Posts: 16,225
|
Oh Hell Yeah, you will notice!

__________________
 |
|
|
|
|
05-14-2013, 09:27 PM
|
#12 |

|
Thanks PoorMan, subscribing just for your post!
|
|
|
|
|
05-14-2013, 09:51 PM
|
#13 |
|
Question: With the ICEolator and Plenum Spacer does the engine cover fit back on?
|
|
|
|
|
05-14-2013, 10:03 PM
|
#14 | |
|
Got mine!

Drives: 2021 LT1 RS - Orange Crush Join Date: Mar 2011
Location: Fallbrook, CA
Posts: 1,295
|
Quote:
 !!! !!!
|
|
|
|
|
|
|
|
|
 |
| Thread Tools | |
|
|


