You are browsing camaro5 

|
 02-18-2012, 04:49 AM
|
#351 |
 
Drives: 2011 Camaro Convertible 2SS/RS Join Date: May 2009
Location: Port Charlotte,Florida
Posts: 263
|
Nathan, Thanks for the info on the fuel lines.Also,did TechAFX make you a custom line to go from AN at the intake to QD at the other end??
|

|

|
|
02-18-2012, 05:21 AM
|
#352 |
|
ACE5 (Atlanta Group)

Drives: "Black Ice" Join Date: Sep 2010
Location: Suwanee, GA
Posts: 1,702
|
Nathan,
I see you have supplies for your inner fender repair work. I have a white car and have used that dupli-color base along with their clear top coat for under-hood stuff. I also have a friend who has used the same. What we have found is that the dupli-color clear will yellow fairly quickly due to the heat. I have bought from autozone the clear engine paint. I painted a test piece with the dupli-color base, and then put the engine clear on top. It seems to be holding up fine. However, only time will tell if it will yellow too. Guys, keep up the excellent work! This thread is a wealth of information.
__________________
Custom Two-Tone Paint, Whipple, Pedders, NightOwl RGB Halos & Other Lighting
[COTW 5/2/11] 2011 Two-Tone White/Black SS/RS Convertible See our Atlanta Social Group or home page: ACE5.org |
|
|
|
|
02-18-2012, 09:55 AM
|
#353 | ||
|
Original Bumblebee Owner

Drives: 265hp ZX-14, 500hp Silverado, V-ROD Join Date: Apr 2009
Location: Arizona
Posts: 1,378
|
Subscribed!
 Read this thread. Went out to the garage, opened the hood and pondered... ...flipped my Evac line from over the throttle body to under it. Then got online and ordered the 2012 heater hoses and the short corvette fuel line too. Just a small start, but I've got the bug. Thanks guys! Great thread you've got going here. 
__________________
Quote:
|
||
|
|
|
|
02-18-2012, 10:01 AM
|
#354 | ||
|
Drives: G5.R Join Date: Sep 2010
Location: SoCal
Posts: 2,377
|
Quote:
Quote:
I'm only using the base coat for the inside panel to get a satin look. I'll let you know how that works out.
|
||
|
|
|
|
02-18-2012, 10:33 AM
|
#355 | |
|
Drives: G5.R Join Date: Sep 2010
Location: SoCal
Posts: 2,377
|
Quote:
14pilot that's cool. There's a lot of little stuff you can do that wont break the bank and make a big difference. Let me know if I can help in any way. Nathan |
|
|
|
|
|
02-18-2012, 07:01 PM
|
#356 |
|
Drives: G5.R Join Date: Sep 2010
Location: SoCal
Posts: 2,377
|
Got started on the fender this afternoon.
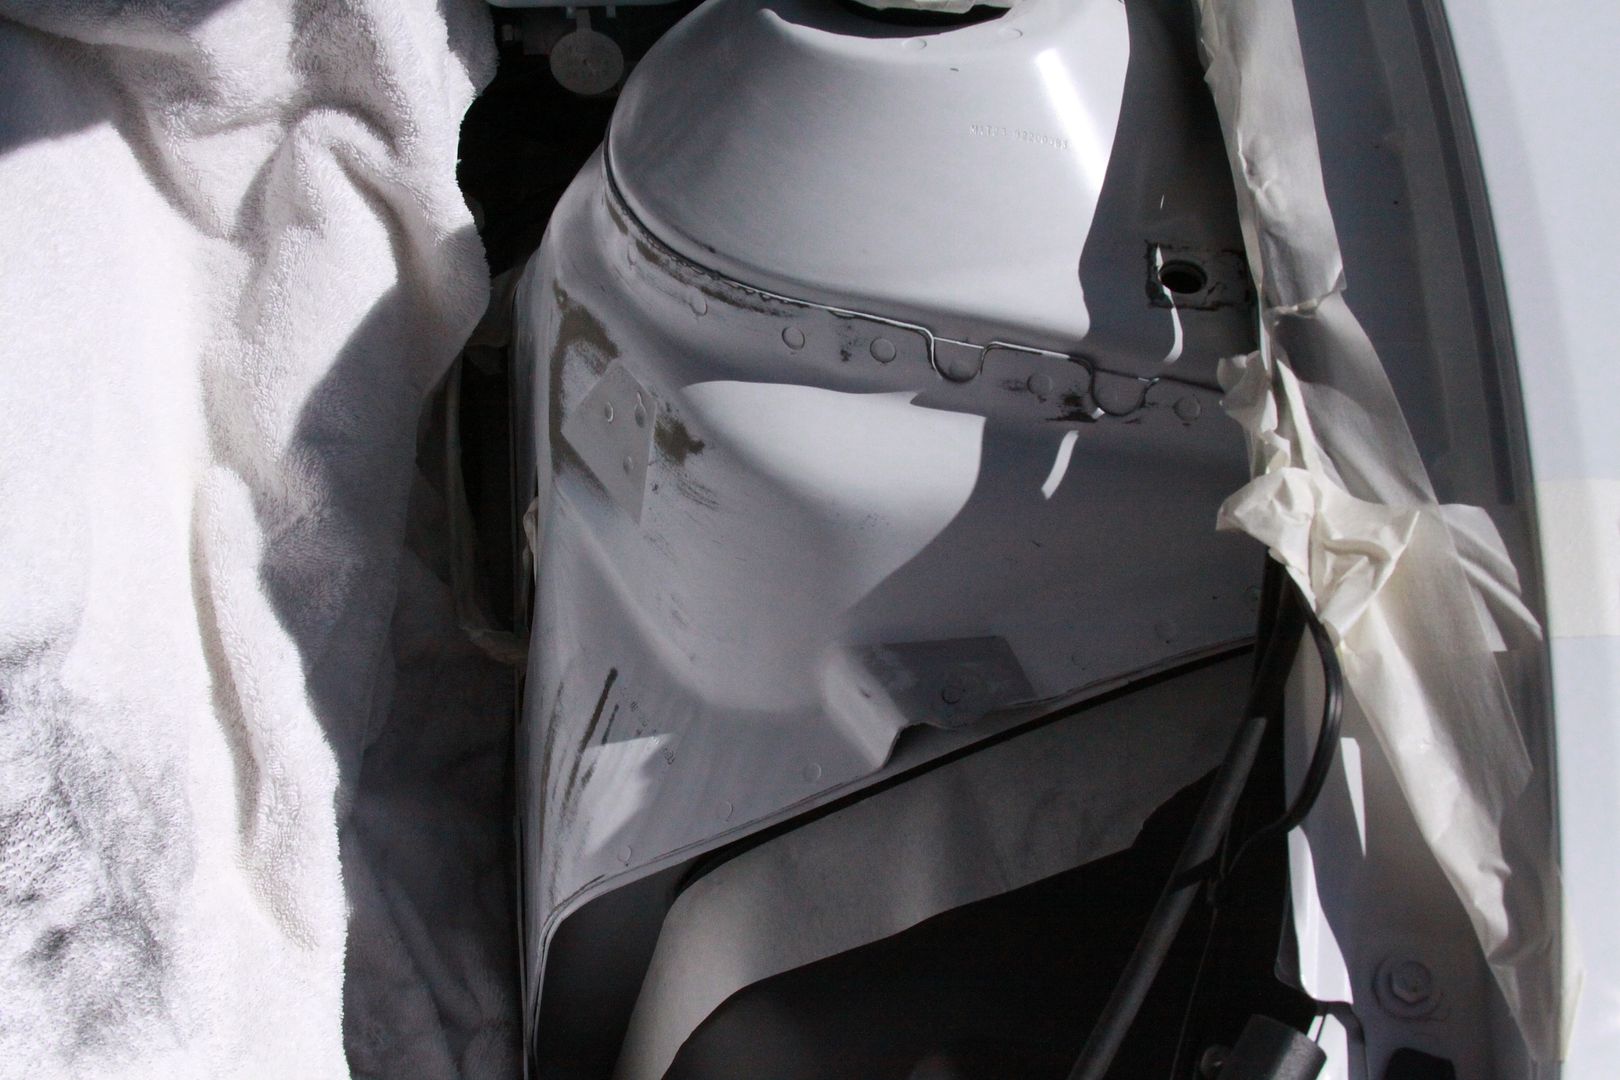 The goal is to smooth out all the imperfections. Notice it has the sets of numbers stamped on them. There's ripples from the stamping press. Looking to clean all that up. 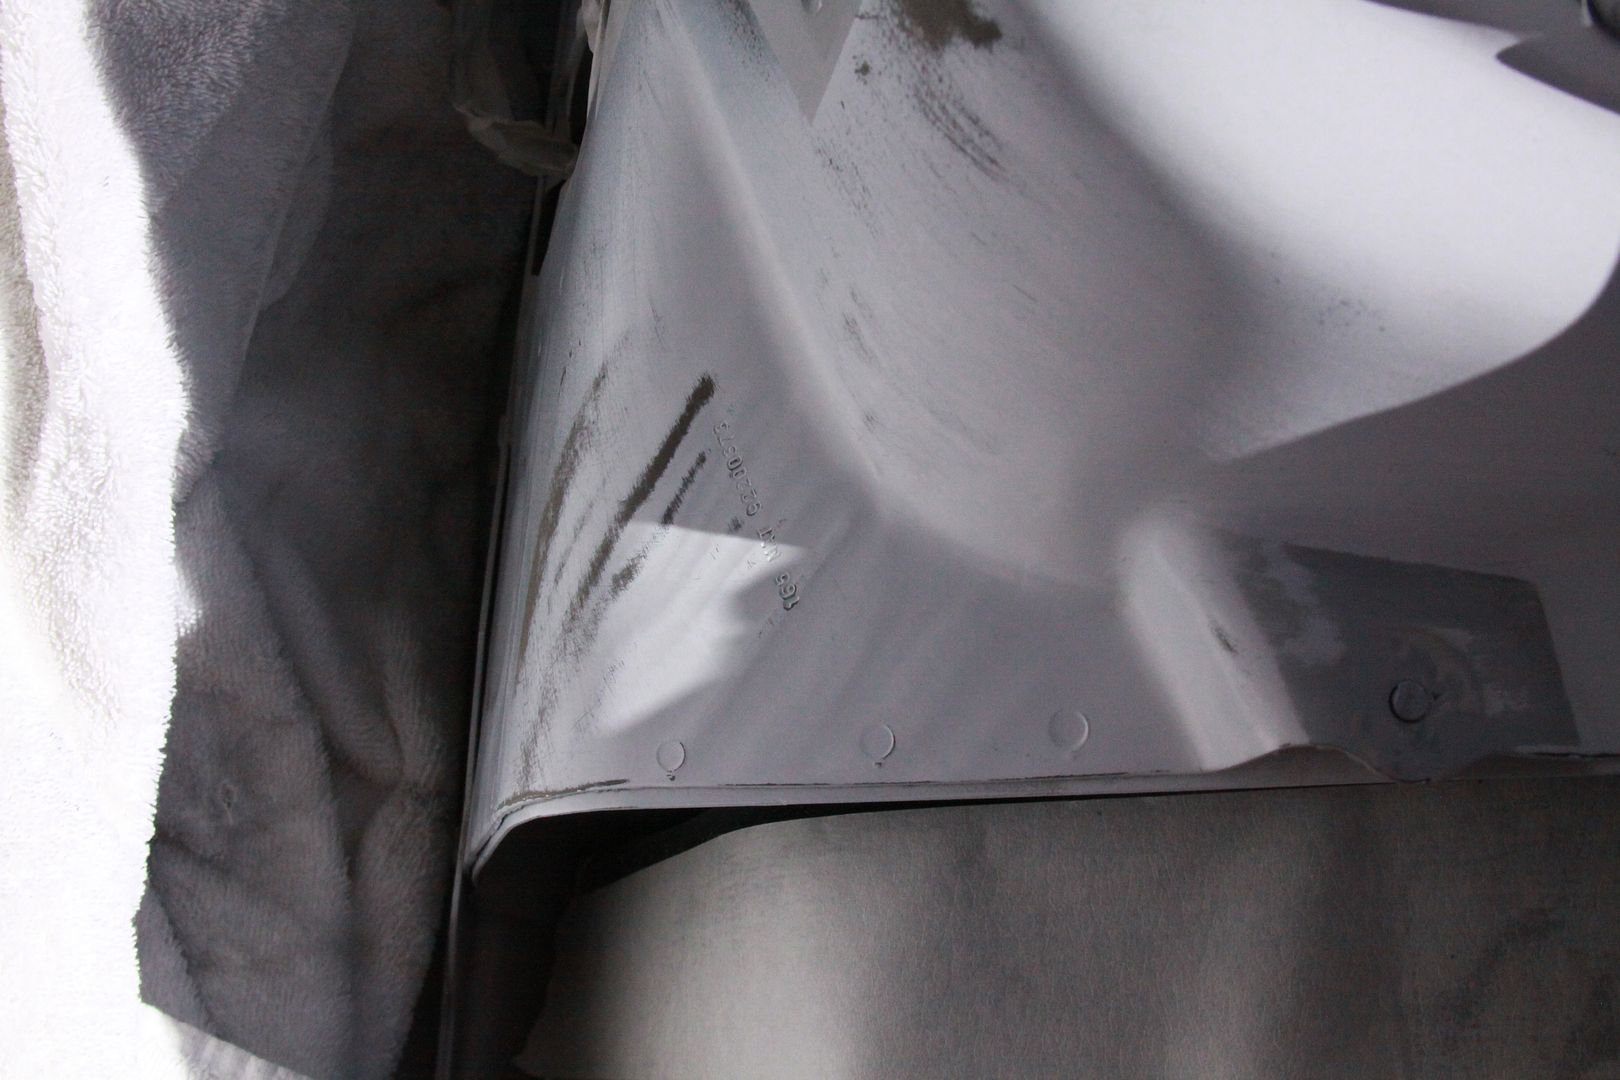 So I spent most of the time in this position. I hope my Aunt doesn't see this picture. Not sure she'd appreciate my use for the quilts she made us, LOL.  Progress shot. Looking pretty good considering I've never done this before. 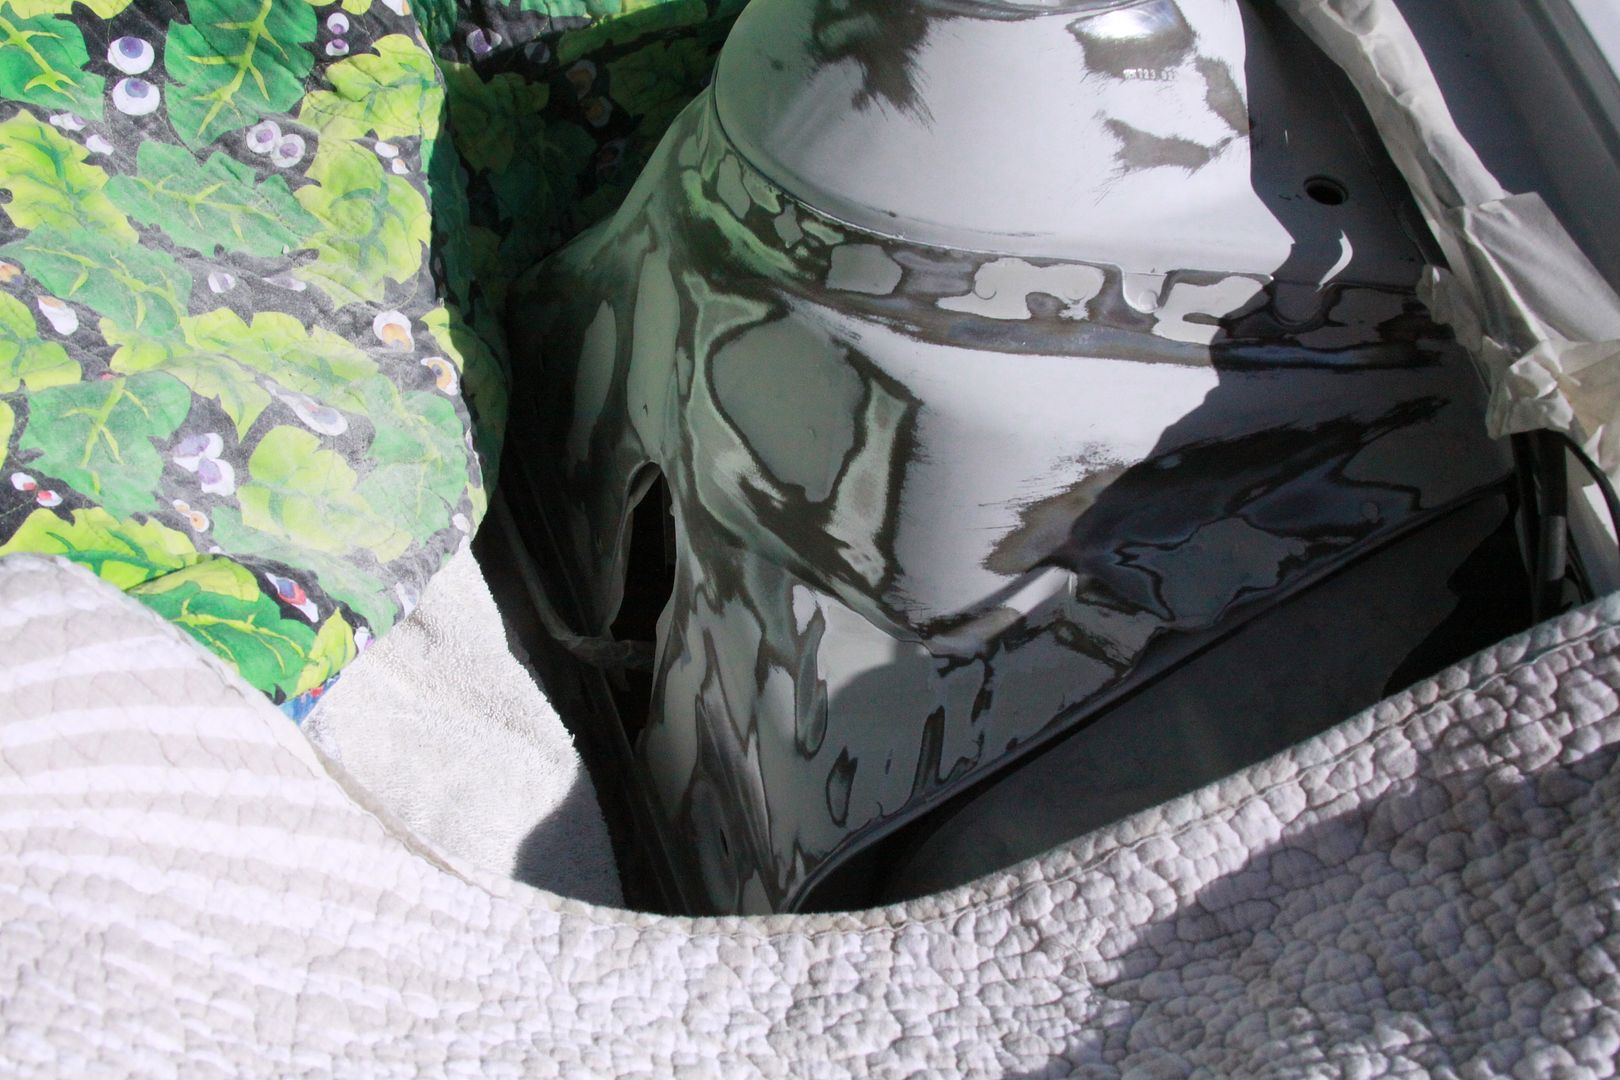 I gave it another coat but I ran out of time. 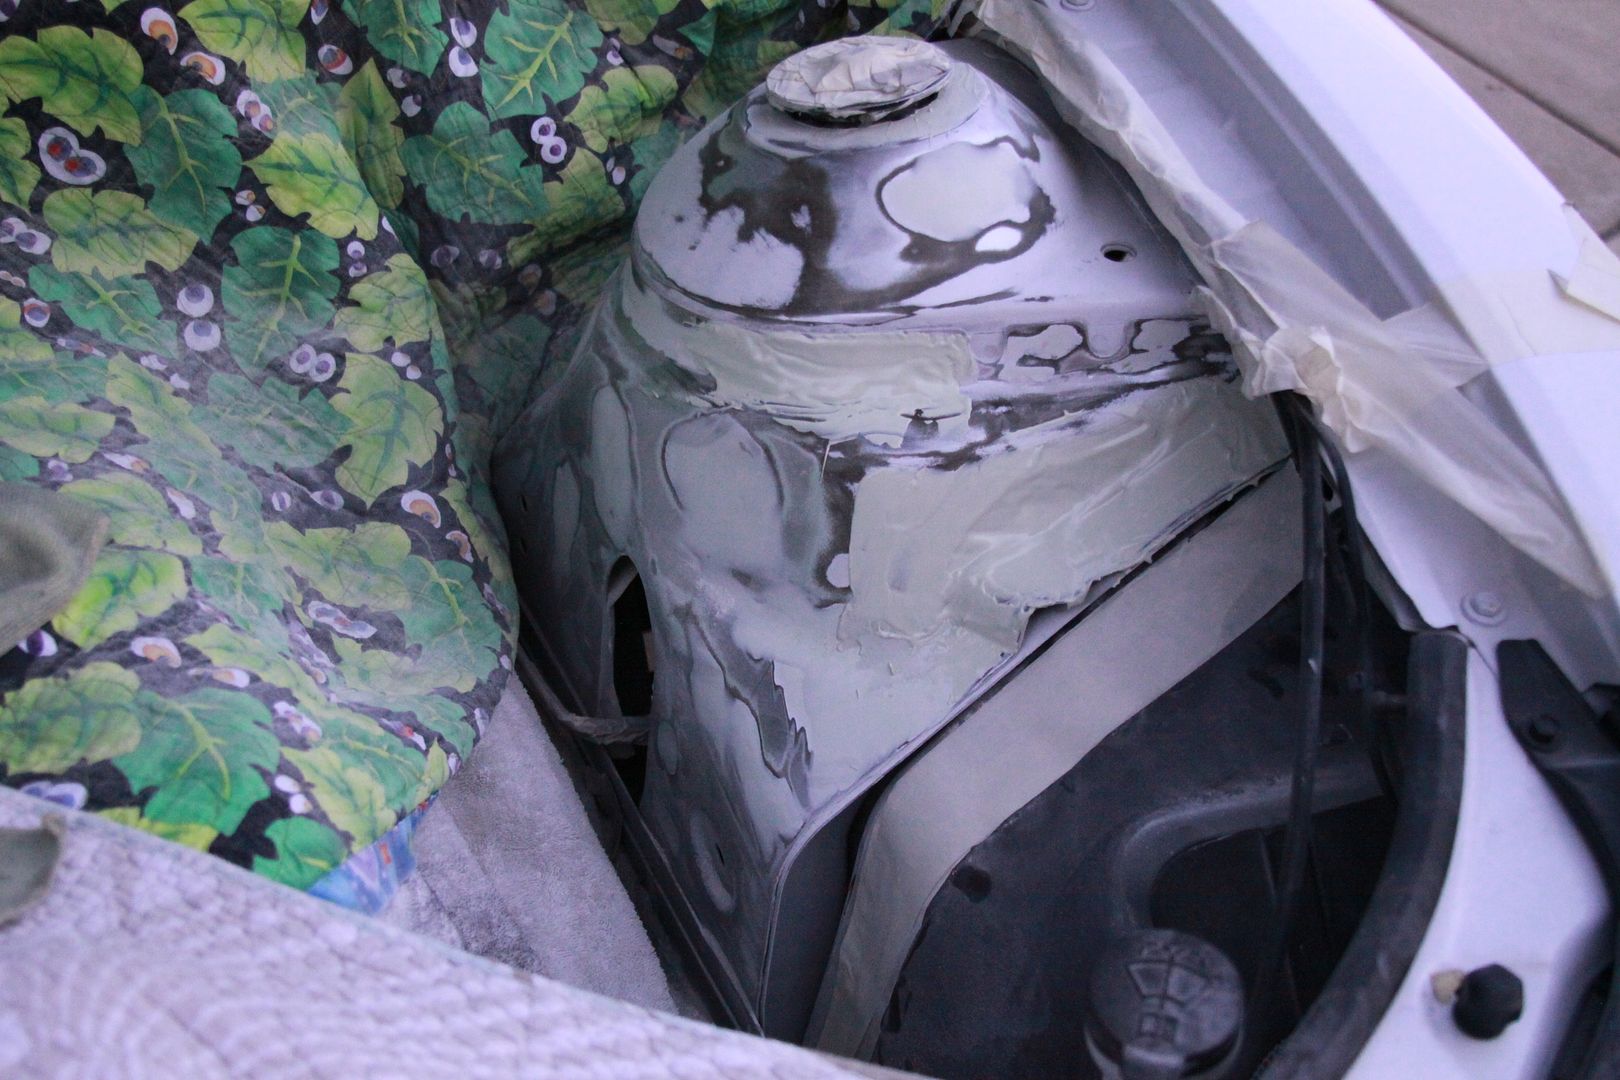 I'll finish up tomorrow. |
|
|
|
|
02-18-2012, 07:52 PM
|
#357 |
|
ACE5 (Atlanta Group)
Drives: "Black Ice" Join Date: Sep 2010
Location: Suwanee, GA
Posts: 1,702
|
Looking good Nathan. You can easily remove that top strut cover to get it out of the way. Just don't drive around with it off.
 Be sure to do the "toilet mod". Also, the LSR Performance billet cover looks/works very well with this toilet mod. I'll try to get a photo tomorrow. Be sure to do the "toilet mod". Also, the LSR Performance billet cover looks/works very well with this toilet mod. I'll try to get a photo tomorrow.Here is the toilet mod: http://www.camaro5.com/forums/showthread.php?t=148648
__________________
Custom Two-Tone Paint, Whipple, Pedders, NightOwl RGB Halos & Other Lighting
[COTW 5/2/11] 2011 Two-Tone White/Black SS/RS Convertible See our Atlanta Social Group or home page: ACE5.org |
|
|
|
|
02-18-2012, 08:13 PM
|
#358 |
|
ACE5 (Atlanta Group)
Drives: "Black Ice" Join Date: Sep 2010
Location: Suwanee, GA
Posts: 1,702
|
I pulled the water pump off today along with the power steering pump bracket, the alternator bracket, and the tensioner bracket. I'm going to take these to Mike to have them powder coated. Nathan, I love your new water pump, but I'm not ready to spend that much. Maybe later. For now, I'll see how the powder coating looks.
I spent quite awhile sanding down the throttle body and the whipple tensioner for powder coat. I had Mike powder coat the throttle body when he did my calipers a couple weeks back. The whipple tensioner bracket is sand-casted, and it is already powder coated. I wasn't planning on pulling the water pump, but I was somehow inspired.  I would love to take the time to sand this water pump down, but I don't have the equipment to do that large of piece, and I'm not real certain how well it will be visible being black powder coated anyway. I would love to take the time to sand this water pump down, but I don't have the equipment to do that large of piece, and I'm not real certain how well it will be visible being black powder coated anyway.I have finished filling/sanding/painting my coil packs. They will be mounted on the holley valve covers. I'll set them in place tomorrow, and snap a photo. I have also started on moving some of the wire harnesses. I'm going to see about moving the alternator cable to the bottom like you did Nathan. I have also stripped all of the corrugated tubing off of the wiring on the passenger fender. I would like to see if I could reroute this bundle around the strut tower instead of across the top. Man, the hardest part of this project is drawing a line on what to do / not to do. 
__________________
Custom Two-Tone Paint, Whipple, Pedders, NightOwl RGB Halos & Other Lighting
[COTW 5/2/11] 2011 Two-Tone White/Black SS/RS Convertible See our Atlanta Social Group or home page: ACE5.org |
|
|
|
|
02-18-2012, 08:37 PM
|
#359 |
          Drives: cars Join Date: May 2011
Location: Oversneeze
Posts: 4,544
|
If you're wanting it smoothed out and coated ask him to do a primer coat first. There's some that will fill the casting fairly well. It won't be perfect without some sanding but it'll be much smoother than purely top coat on a sand cast part.
|
|
|
|
|
02-18-2012, 09:15 PM
|
#360 | ||
|
Drives: G5.R Join Date: Sep 2010
Location: SoCal
Posts: 2,377
|
Quote:
 I can't wait to see the powder coating. We need picture pretty soon here! Quote:
Last edited by Moreno1; 02-18-2012 at 11:26 PM. |
||
|
|
|
|
02-18-2012, 09:23 PM
|
#361 |

Drives: 2011 Camaro SS Join Date: Nov 2010
Location: Greeley, CO
Posts: 769
|
I think the engine compartment will look great once you paint the inner fenders. Really considering painting mine also.
__________________
2011 Camaro SS Synergy Green
CAI Cold Air Induction, ADM Race Scoop, Apex Washer Bottle Kit, Vengeance Racing Kaotic Cam, DOD/VVT delete and LS3 conversion, American Racing LT Headers, American Racing Headers Off Road pipes, Borla S-Type Catback, FTI Billet Triple Disk 3600 rpm Torque Converter, DSS Aluminium Drive Shaft, AAC Plasma DRL's, Showstopper LED Sidemarkers,Carbon FIber Bow Ties, 35% Window Tint, Llyod's Floor Mats, JBL MS-8 Sound Processor, 2 Alpine PDX-1.600, Alpine PDX-4.100, JL Audio C5-650, JL Audio C5-650x, Alpine T10 Type R Shallow Mount, Stinger Dry Cell Battery |
|
|
|
|
02-19-2012, 06:15 AM
|
#362 | |
|
ACE5 (Atlanta Group)
Drives: "Black Ice" Join Date: Sep 2010
Location: Suwanee, GA
Posts: 1,702
|
Quote:
I wasn't aware of the water pump having issues with powder coating. I'll try to research it. Mike said that he has never done a water pump. Might just be the reason.  I guess I could just spray it with engine paint. Black isn't too difficult to match, and with the whipple tensioner bracket, you don't see too much of it anyway. I'm going to spray the aluminum part of the power steering pump too since I don't want to break open the lines. I guess I could just spray it with engine paint. Black isn't too difficult to match, and with the whipple tensioner bracket, you don't see too much of it anyway. I'm going to spray the aluminum part of the power steering pump too since I don't want to break open the lines.
__________________
Custom Two-Tone Paint, Whipple, Pedders, NightOwl RGB Halos & Other Lighting
[COTW 5/2/11] 2011 Two-Tone White/Black SS/RS Convertible See our Atlanta Social Group or home page: ACE5.org |
|
|
|
|
|
02-19-2012, 07:02 AM
|
#363 |
|
ACE5 (Atlanta Group)
Drives: "Black Ice" Join Date: Sep 2010
Location: Suwanee, GA
Posts: 1,702
|
After some research, I will NOT be powder coating the water pump. Seems like the pulley needs to be cut off to get to the bearings and seals, which need to be removed. I'll just go with some high temp paint.
__________________
Custom Two-Tone Paint, Whipple, Pedders, NightOwl RGB Halos & Other Lighting
[COTW 5/2/11] 2011 Two-Tone White/Black SS/RS Convertible See our Atlanta Social Group or home page: ACE5.org |
|
|
|
|
02-19-2012, 08:21 AM
|
#364 |
|
ACE5 (Atlanta Group)
Drives: "Black Ice" Join Date: Sep 2010
Location: Suwanee, GA
Posts: 1,702
|
Here are some pics:
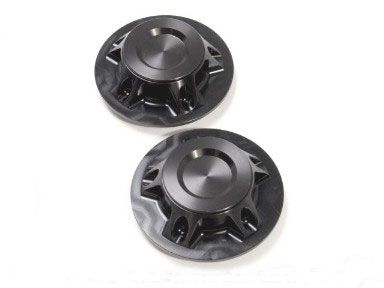
The LSR Performance billet strut covers. Also included is the toilet mod: Noise in the front, look here....might have something for you, +fill strutplate gap! The painted coil packs (with ARP bolts). I sanded down the raised part numbers, and filled in the dimple in the center with body filler. The coil packs on holley valve covers (new plug wires on back order). You can't really see the wire colors without the flash. I would wrap the wires first if I were to do it again.
__________________
Custom Two-Tone Paint, Whipple, Pedders, NightOwl RGB Halos & Other Lighting
[COTW 5/2/11] 2011 Two-Tone White/Black SS/RS Convertible See our Atlanta Social Group or home page: ACE5.org |
|
|
|
|
|
|
|
 |
|
|
 Similar Threads
|
||||
| Thread | Thread Starter | Forum | Replies | Last Post |
| Roto-Fab | Engine Covers - S/C | Fuse Relay Cover | Radiator Cover | Billet Oil Cap+ | AutoAgenda | Exterior Parts & Accessories | 14 | 02-06-2013 08:43 PM |
| New Texas Speed & Performance Engine Machining Center! | Trevor @ Texas Speed | Camaro V8 LS3 / L99 Engine, Exhaust, and Bolt-Ons | 18 | 01-16-2013 03:46 PM |
| Hawk Performance Brake Pads part HB247Z.575 $85.00 | Rogan | USA - Florida | 2 | 10-07-2011 12:10 PM |
| Acronyms? | KEEP RT | Camaro V8 LS3 / L99 Engine, Exhaust, and Bolt-Ons | 20 | 03-11-2011 08:57 PM |
| Great Read and Info on Oil Weight | Banshee | Mechanical Maintenance: Break-in / Oil & Fluids / Servicing | 1 | 11-23-2009 09:03 PM |


