You are browsing camaro5 

|
 02-11-2010, 08:51 AM
|
#15 | |
 Drives: Rally Yellow 2SS/RS Join Date: Nov 2009
Location: Charlotte, NC
Posts: 275
|
Quote:
That's the best look I've seen for the taillights. Was going to go black, but that looks so much cleaner.
__________________
|
|

|

|
|
02-11-2010, 09:32 AM
|
#16 |
|
2SS RJT OWNER/OPERATOR

Drives: 2010 2SS LS3 RJT Join Date: Jan 2010
Location: Currently on the 3rd Rock. Temporarily
Posts: 540
|
Yes, I can that do that. I prefer this look too. I will upload a pic of the Rubber gasket with the brand name too. I will post a brief explanation on how to do it later this evening, I'm at work now. If you already have the lights out of the bumper. Its very easy to install and just takes a few minutes. And It only cost me $7.99 + tax for the gasket. Also, You will need a little 100% silicon. If you wish to PM. w/ph#. I can call you later this evening and explain in detail.
__________________
Fly low and Avoid the radar!
|
|
|
|
|
02-11-2010, 09:55 AM
|
#17 |
  Drives: 2010 Camaro SS/RS Join Date: Oct 2009
Location: Fort Worth Texas
Posts: 926
|
There is a utube video out on this and didnt see the guy using silicone
|
|
|
|
|
02-11-2010, 10:04 AM
|
#18 | |
|
2SS RJT OWNER/OPERATOR
Drives: 2010 2SS LS3 RJT Join Date: Jan 2010
Location: Currently on the 3rd Rock. Temporarily
Posts: 540
|
Quote:
p.s. Do you have the link to the video? Might help others...
__________________
Fly low and Avoid the radar!
|
|
|
|
|
|
02-11-2010, 11:54 AM
|
#19 |
 |
Bone, Like the look. looking forward to the DIY
|
|
|
|
|
02-11-2010, 12:00 PM
|
#20 |
|
GM fix my PAINT U suck!

Drives: 2010 Black 1SS/RS 6Spd Join Date: Sep 2009
Location: Great Red North
Posts: 1,856
|
Looks amazing on black cars, mine were off the day I bought the car. theyll never go back on lol.
__________________
 |
|
|
|
|
02-11-2010, 12:37 PM
|
#21 |
 
|
I took a pic of my taillights with one bezel off and the other on, will try to put the pic up later. IMO it looks better with them than without them on SIM bc you can see the gap clearly.
__________________
|
|
|
|
|
02-11-2010, 12:52 PM
|
#22 | |
|
Drives: 2010 Camaro SS/RS Join Date: Oct 2009
Location: Fort Worth Texas
Posts: 926
|
Quote:
|
|
|
|
|
|
02-11-2010, 12:53 PM
|
#23 | ||
|
Drives: 2010 Camaro SS/RS Join Date: Oct 2009
Location: Fort Worth Texas
Posts: 926
|
Here ya go this is part two of video...show putting trim in
Oh and this is one guy put together about removing but I have heard you dont have to take apart the bumper |
||
|
|
|
|
02-11-2010, 01:02 PM
|
#24 | |||
|
|
Quote:
thanks for the video this will help alot 
__________________
|
|||
|
|
|
|
02-11-2010, 01:08 PM
|
#25 |
|
Drives: Rally Yellow 2SS/RS Join Date: Nov 2009
Location: Charlotte, NC
Posts: 275
|
That looks simple enough.
__________________
|
|
|
|
|
02-11-2010, 02:16 PM
|
#26 |
|
2SS RJT OWNER/OPERATOR
Drives: 2010 2SS LS3 RJT Join Date: Jan 2010
Location: Currently on the 3rd Rock. Temporarily
Posts: 540
|
That is not the way i did it. (see video) I actually removed the tail lights.And form fitted the rubber gasket around the lights. Read on.
When I first started investigating my options. I knew that I wanted to fill the gap w/ a black rubber gasket. But I didn't know what to use or where to purchase something like I wanted. I didn't know what I wanted. I just knew when I found it. I'd know... its what I wanted. I hope that kinda makes since. Anyway, looked around at a few auto stores. With no luck. As I was heading over to the marina shop. I stopped at Home Depot just to check there insulation dept. (never made it to the marina) As I was walking down the isle. there is was. Its a soft black rubber gasket. And It states right on the cover of the box. Made for marine and auto use. Fantastic.It comes in a 10foot roll. Its 19/32" wide and 5/16" thick. (The gap around the socket is about 1/4"+/-) Its also hollow. The top is rippled like the top of a lower case "m" (except it has about 6 ripples) the bottom is flat and it comes w/sticky tap. Installation: After fitting the rubber around the light. Useing the sticky tap to hold it to the light housing and cutting to proper length. I fasten it where the light sock and the lense comes together. I dry fitted it back into the bumper socket. To see how it looked. Once I was satisfied. Removed light socket and I put a few drops of silicon behind the rubber gasket to the light socket. After drying, I reinstall and I was done. I did not have to cut off the tab on the bottom of the light. Nor did I Black Marker anything... One last thing. You could put the seam (were the two pieces come together) on the top or the bottom of the light socket. I put it on the top. Because the seam is almost completely hidden under the black plastic cover. If you look hard you can see it. Also, when you take the bezel off of the outside lights. You can stick your finger in the gap that exists between the top of the light socket and the top of the bumper socket. Check it out for yourself...No problem because this gasket will fill that too. Can't remember what is called. I'll find out when I get home today and post product name. I will also take a couple or close up pic. To better illistrate. I wish I would have video'd it while I was installing. If someone from southeast michigan Wayne county is interested in this mod. I would gladly help you and video it too for archive purposes. This is a very easy mod. And its much better than stuffing the gap with vinyl. You may have also notices on the top of his tail lights. (video) The top of the light housing was still visable. Thats why he used the black marker. No you will not see the top of the sockets with my mod. Ok here are a coupe of pics. Sorry that the install is complete. Anyway the name of the rubber gasket is "MD" All Climate Marine/Automotive Black Rubber Weatherseal. Its in a purple package. It also comes in white. And it only cost $7.99 plus tax.  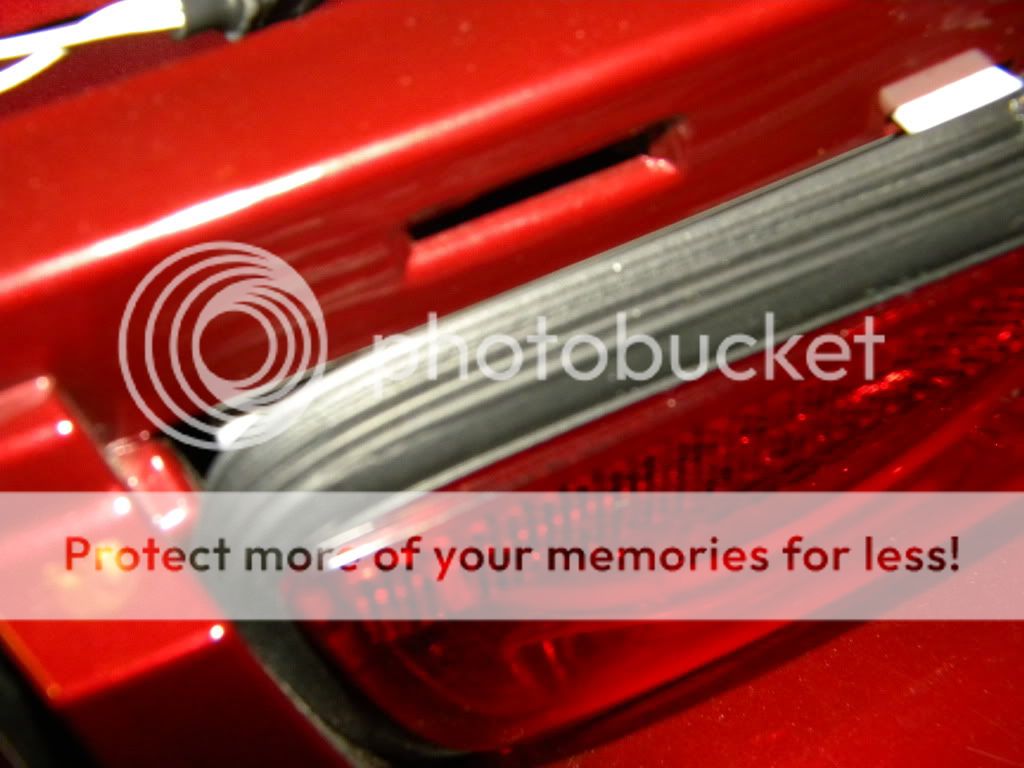 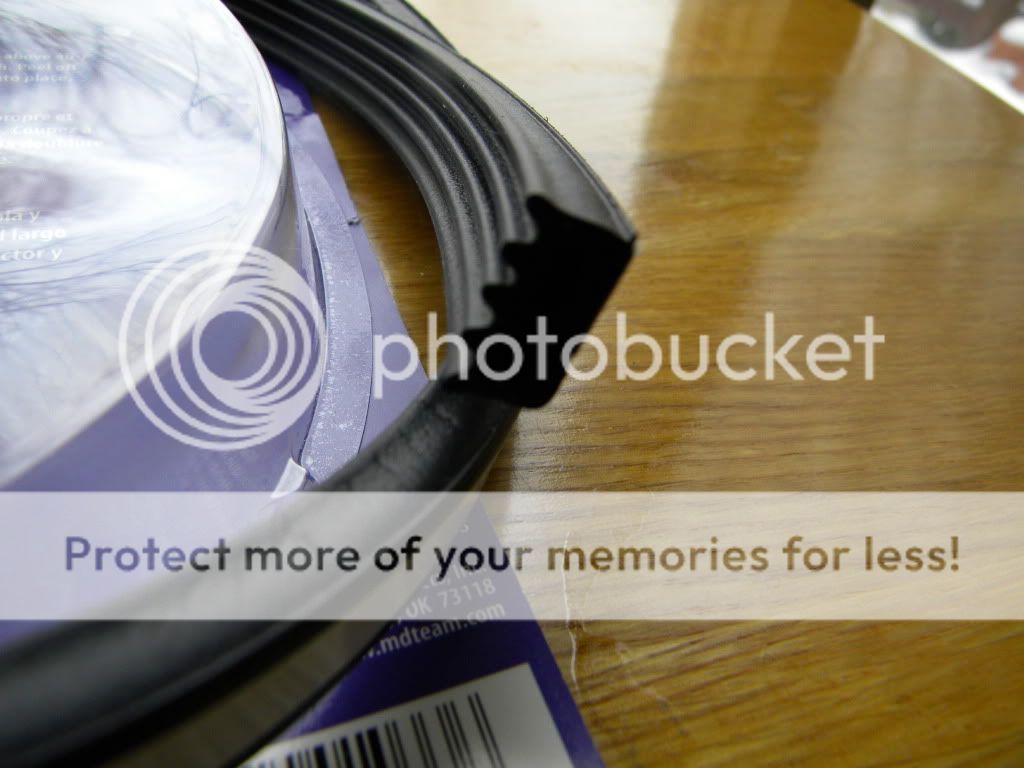 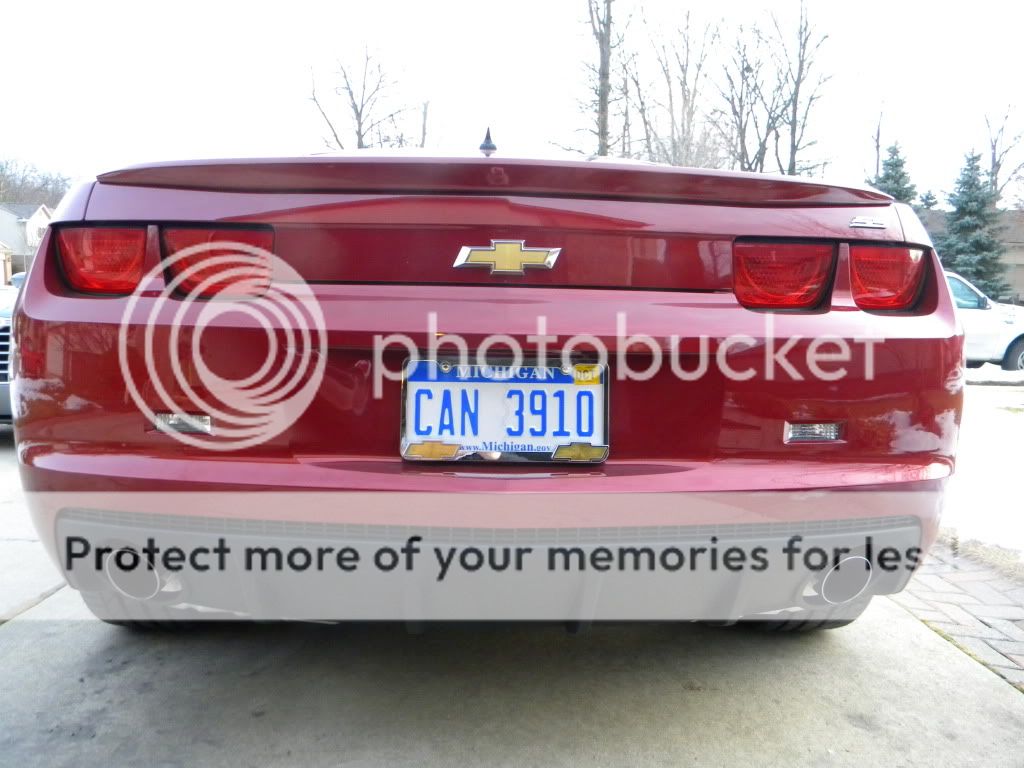 Bone...
__________________
Fly low and Avoid the radar!
Last edited by Bone; 02-13-2010 at 09:50 PM. Reason: Updated pics |
|
|
|
|
02-13-2010, 04:02 PM
|
#27 |
|
2SS RJT OWNER/OPERATOR
Drives: 2010 2SS LS3 RJT Join Date: Jan 2010
Location: Currently on the 3rd Rock. Temporarily
Posts: 540
|
Bump
__________________
Fly low and Avoid the radar!
|
|
|
|
|
02-13-2010, 08:28 PM
|
#28 |
 
Drives: 2010 MAROOOOOO Join Date: Jun 2009
Location: GLENDORA, CA
Posts: 350
|
cool cool. little further back pics for a finsih look to compare please! 8)
__________________
THIS CAR IS AMAZING!!!!!
|
|
|
|
|
|
|
|
 |
|
|
 Similar Threads
|
||||
| Thread | Thread Starter | Forum | Replies | Last Post |
| PAINTED and BLACK CHROME TAIL LIGHT BEZELS!!!!!!!!!!!! | orange10s.c. | Exterior Parts & Accessories | 422 | 09-01-2015 09:09 PM |
| Pic Request: Painted Taillight Bezels | SamSS | Camaro Photos | Spyshots | Video | Media Gallery | 7 | 04-02-2010 12:17 AM |
| Blacking out my tail lights bezels. | zsuns | Cosmetics and Lighting Modification Discussions | 13 | 02-02-2010 08:56 PM |
| removing gfx chrome bezels? | jeffny09 | Cosmetics and Lighting Modification Discussions | 20 | 11-30-2009 08:04 PM |
| Thought this was strange. . Chrome Taillight accents | franknbeans | 5th Gen Camaro SS LS LT General Discussions | 83 | 07-21-2009 08:16 AM |


