You are browsing camaro5 

|
 01-28-2012, 10:14 PM
|
#211 | |
|
Drives: G5.R Join Date: Sep 2010
Location: SoCal
Posts: 2,377
|
Quote:
I would also relocate the ABS if I was removing the engine. Can't do it with the engine still in. Keep us posted of how your projects is coming along. By the way, why are you pulling it out? |
|

|

|
|
01-29-2012, 11:02 AM
|
#212 |
|
knows 2 facts about ducks

Drives: ...and they're both wrong Join Date: Aug 2009
Location: The HMS Invincible
Posts: 25,072
|
Thanks for the tip, those look good.
__________________
 |
|
|
|
|
01-29-2012, 11:31 AM
|
#213 | |
 
Drives: cts-v Join Date: Dec 2011
Location: Mooresville, NC
Posts: 506
|
Quote:
yes! these are very handy and make it very easy to dress up your fuel and evap lines with some nice AN lines. Good suggestion Doc
__________________
|
|
|
|
|
|
01-29-2012, 07:15 PM
|
#214 | |
         
Drives: 2010 camaro Join Date: Aug 2009
Location: port st lucie ,florida
Posts: 4,273
|
Quote:
__________________
 |
|
|
|
|
|
01-29-2012, 08:03 PM
|
#215 | |
|
Drives: G5.R Join Date: Sep 2010
Location: SoCal
Posts: 2,377
|
Quote:
Mike! that's going to be sick. Thanks for sharing. Can't wait to see how it turns out. 
|
|
|
|
|
|
01-29-2012, 10:07 PM
|
#216 | |||
|
Drives: G5.R Join Date: Sep 2010
Location: SoCal
Posts: 2,377
|
Quote:
Quote:
Quote:
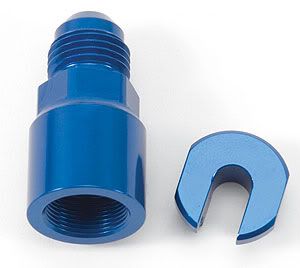
I could be mistaken but I don't think that fitting will connect to our hard line. There's a lot of manufacturers that make QD "quick disconnect" fitting for our cars. They look more like the one in the picture below made by Fragola.  I agree, they do look trick. I did four days of research just on fuel lines and fittings. I spoke with many techs at different companies. Here the reason I decided to go with TechAFX. 1. Even though those fitting look trick. The inside is plastic which could lead to problems. 2. TechAFX uses OEM style fittings for the QD which have no plastic. 3. I already have a bunch of AN fittings, so I thought that having OEM QD for the Fuel line and EVAC would keep it interesting. 4. More important then all of the above, with the other QD's, you have to use there traditional braided fuel line. These line, although they look cool, are known for emitting gas fumes in your garage in passenger compartment. Which isn't cool in a new car. Before I found TechAFX, one of the companies I spoke with was Fragola. They recommended I use Gates Nylon hoses which would avoid emitting fuel vapor. But they look like a regular rubber hose. I was thinking I'd cover them with braided nylon sleeves to male them look attractive. Than I stumbled onto TechAFX web site and they had the solution for me. Their fuel hoses are braided steel but they are cover with a nylon sleeve. Therefor, eliminating any possibility of emitting fuel vapor into the passenger compartment. And they were attractive to boot. So theres was no need to Foosesify them, LOL. Hope that helps 
|
|||
|
|
|
|
01-29-2012, 10:14 PM
|
#217 | |
|
Drives: '15 Z06, '01 NBM SS, '97 SS Join Date: May 2009
Location: Rio Rancho, NM
Posts: 12,170
|
Quote:
 Swell pic brotha! Ivan 
|
|
|
|
|
|
01-29-2012, 10:30 PM
|
#218 |
|
Drives: G5.R Join Date: Sep 2010
Location: SoCal
Posts: 2,377
|
Coming along.......
Here's some work I did on the factory harness to clean them up. Below are the step I did with all the factory harness: 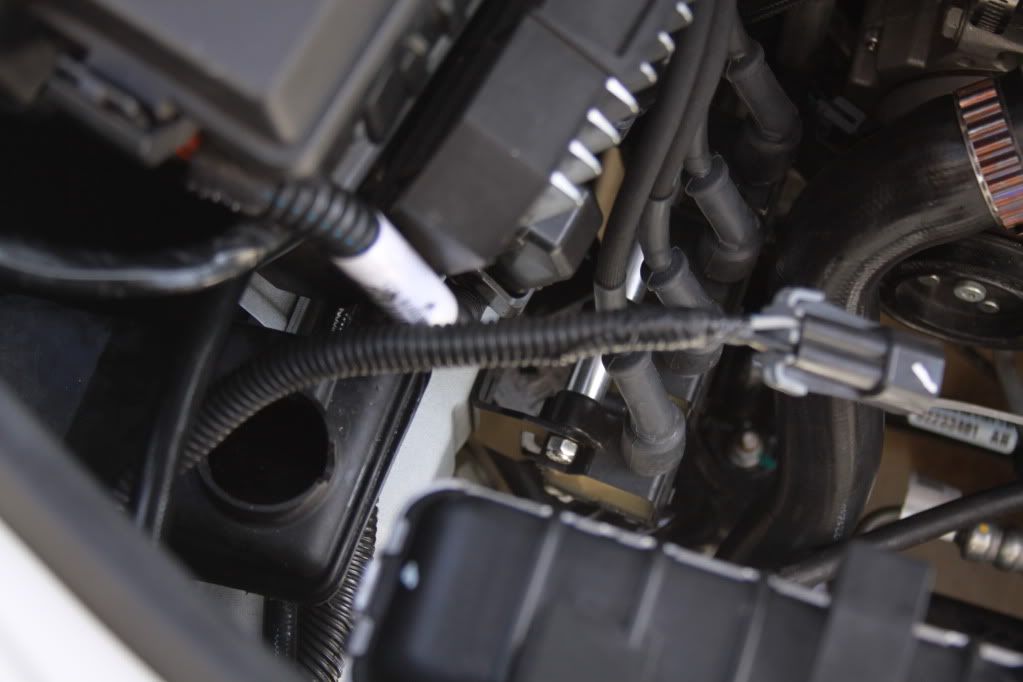 Next, I remove the factory plastic tubing: 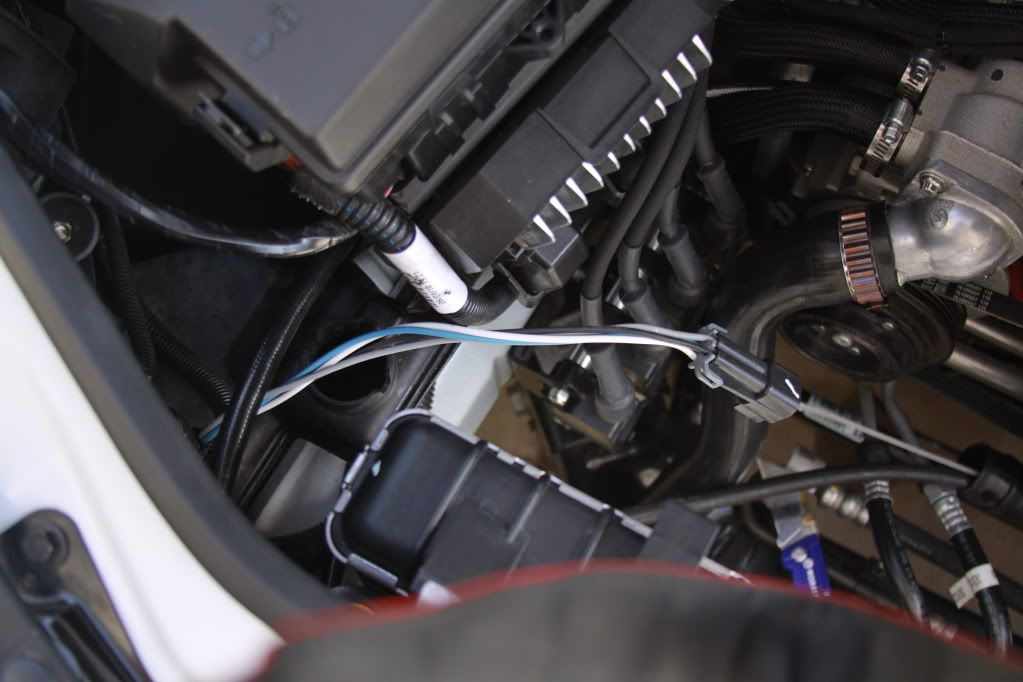 Next, I taped them completely with harness tape (different than electrical tape you get at HD) 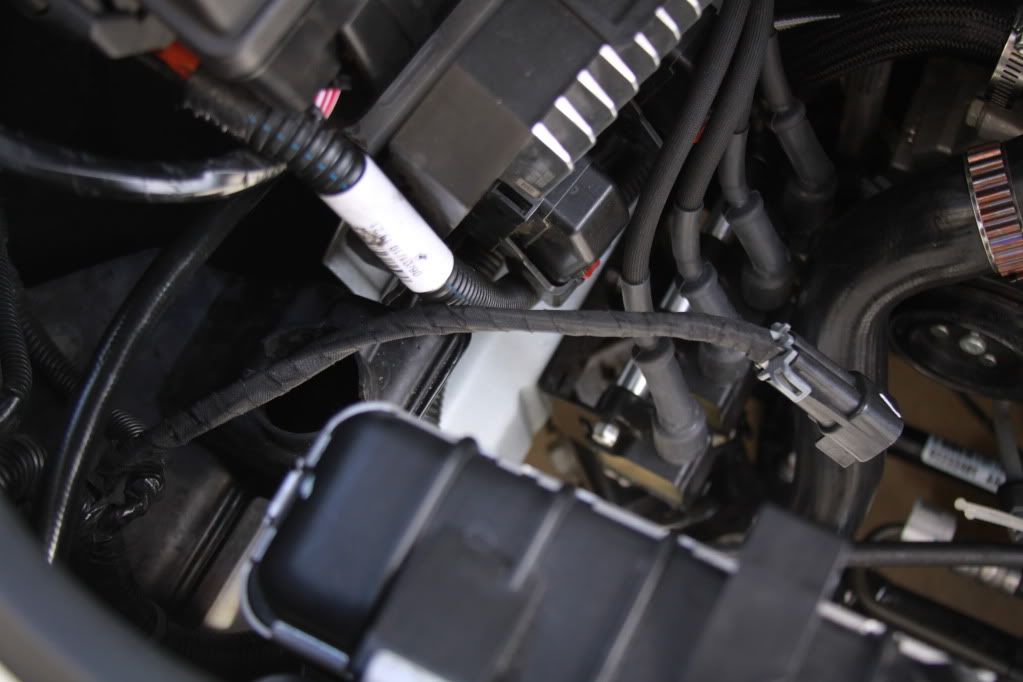 Lastly, I covered them with Russell's harness wrap.  Next came doing the harness that runs down the fender. 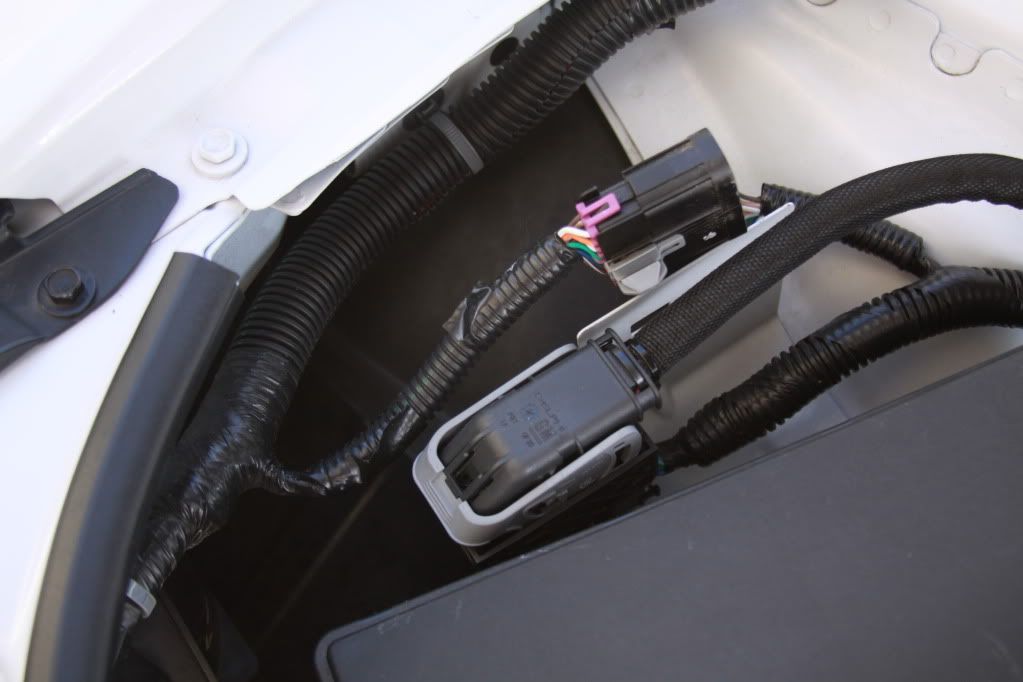 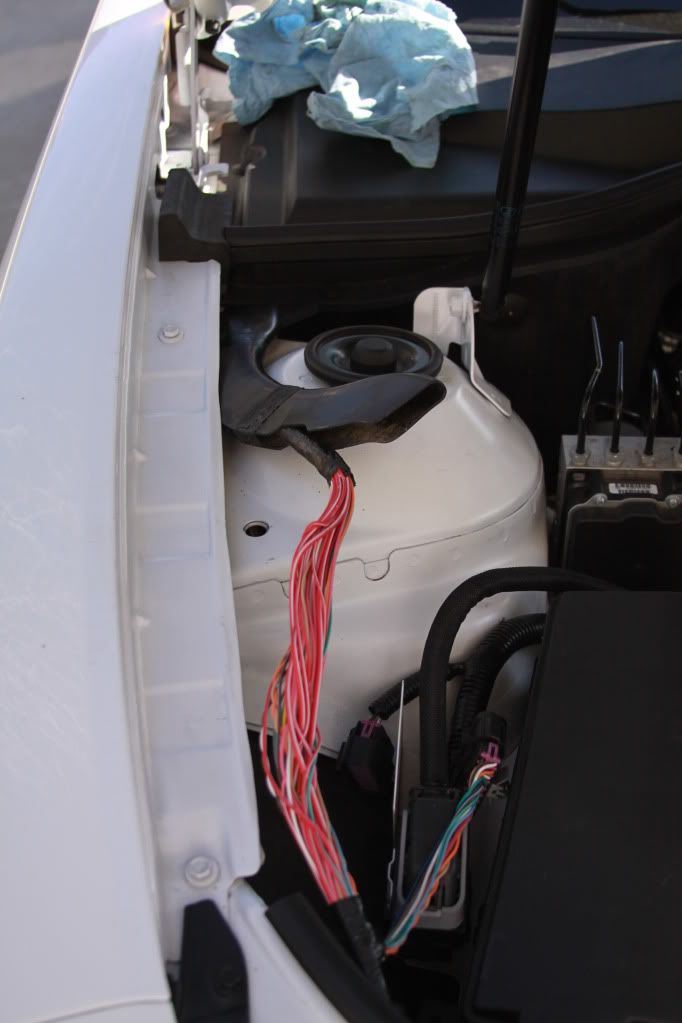 I felt no need to reinstall this plastic shield. 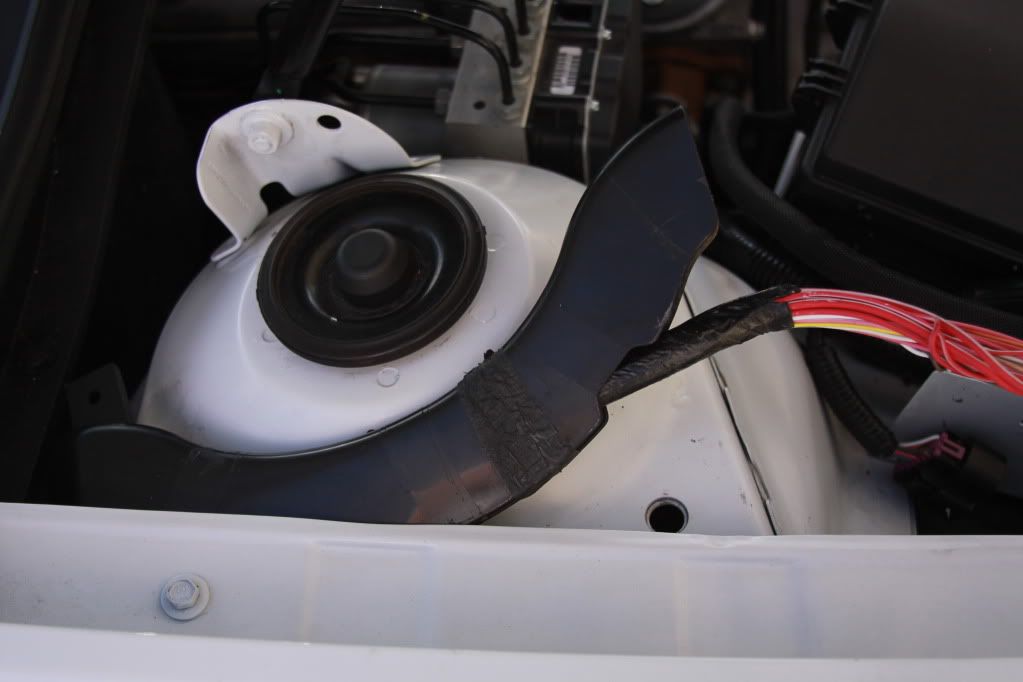 You can see all the crud that came out when I pulled the sheild. 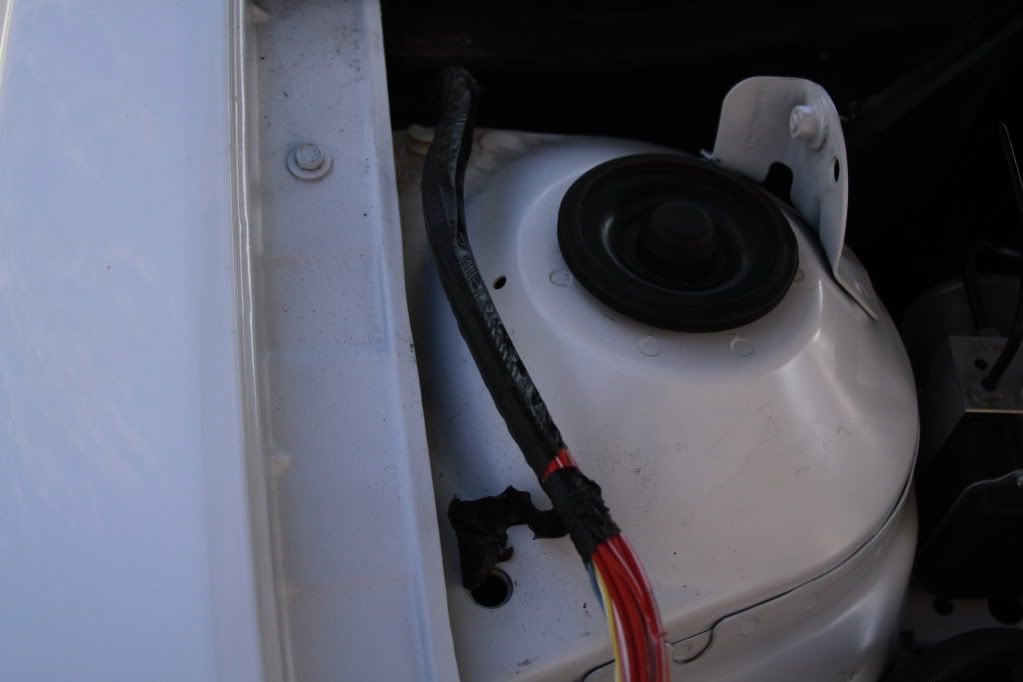 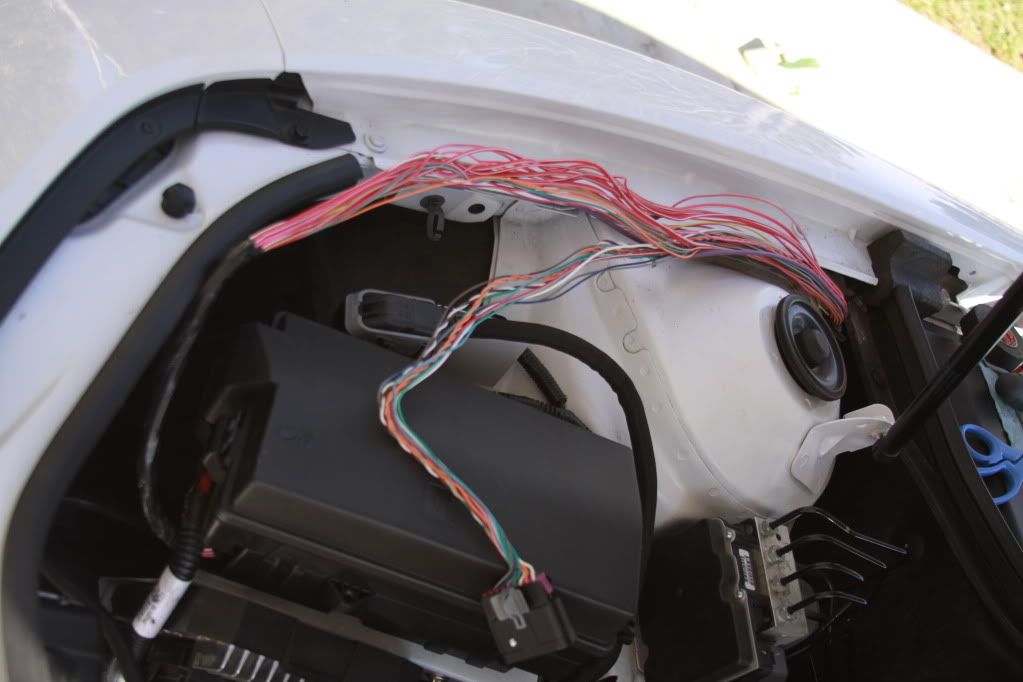 Here the harness completed. 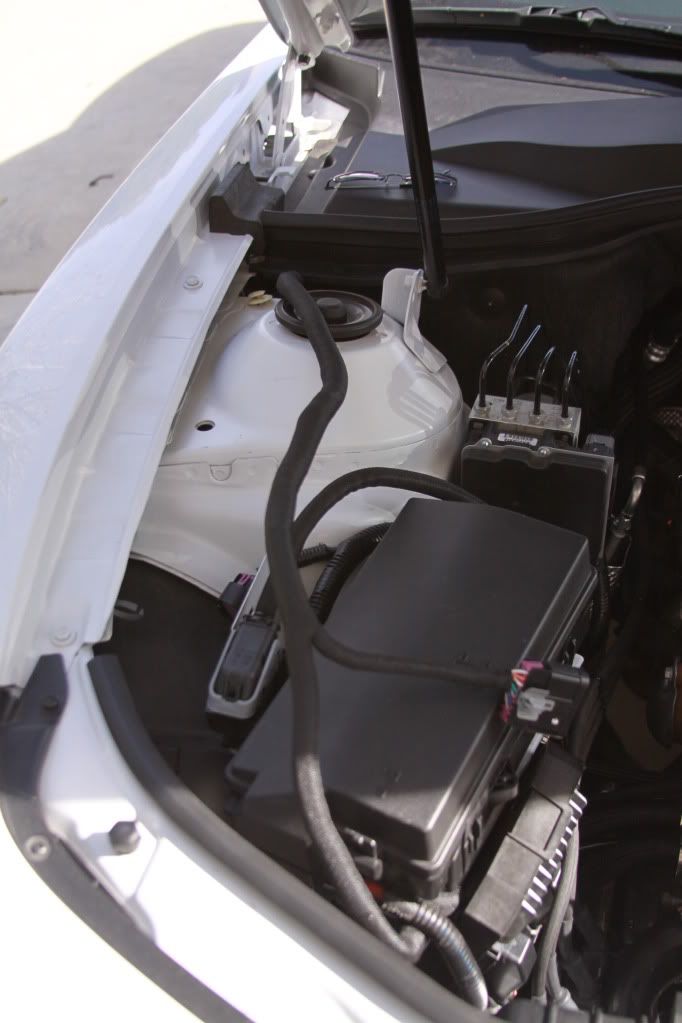 Well almost, I felt the connectors could use some help. Didn't much care for all the scratches on the fuse box lid either. 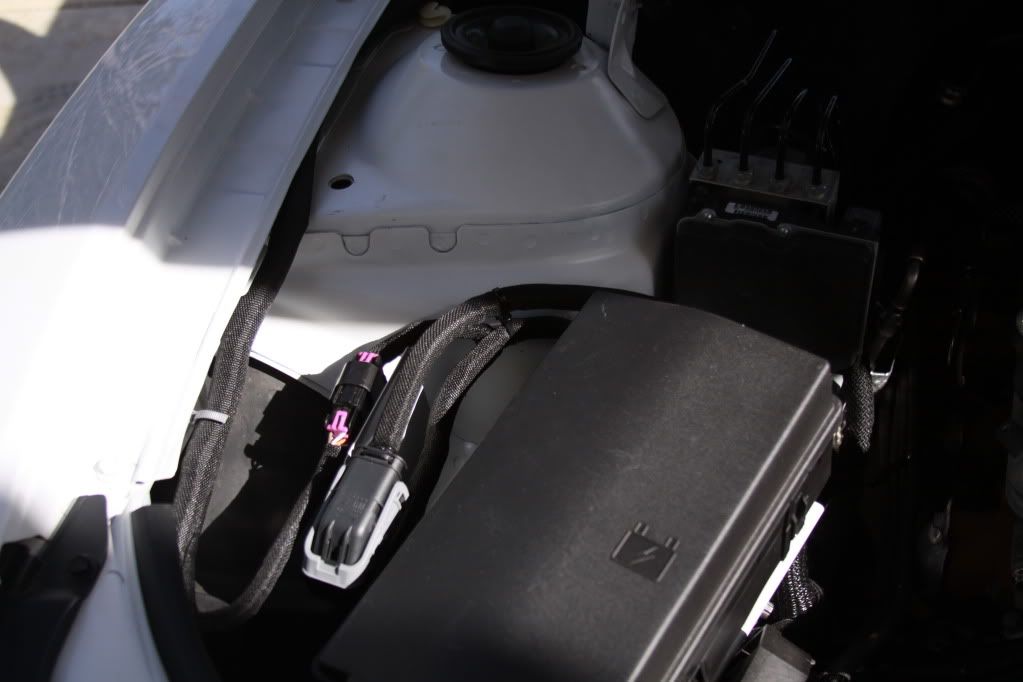 I used three different tones of black to keep it interesting.  repainted the lid, no more scratches and now the connectors......much better than purple, etc. 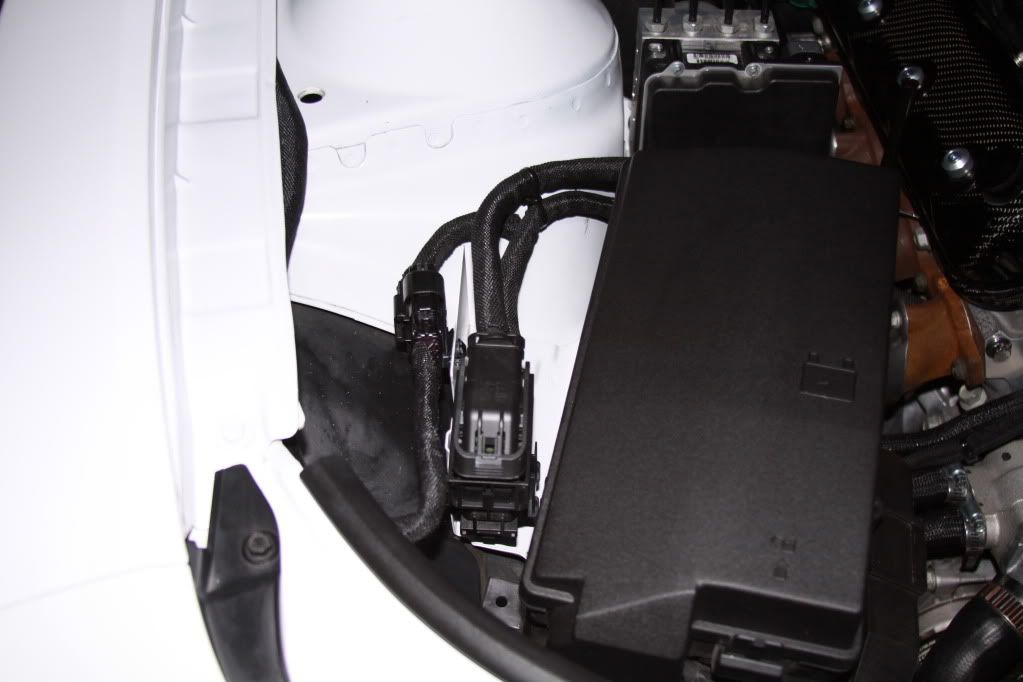 And after countless of hours of sanding, priming and painting. No more big Vararam Logo, no more cheap looking casting seem down the side and much nicer finish. Before: 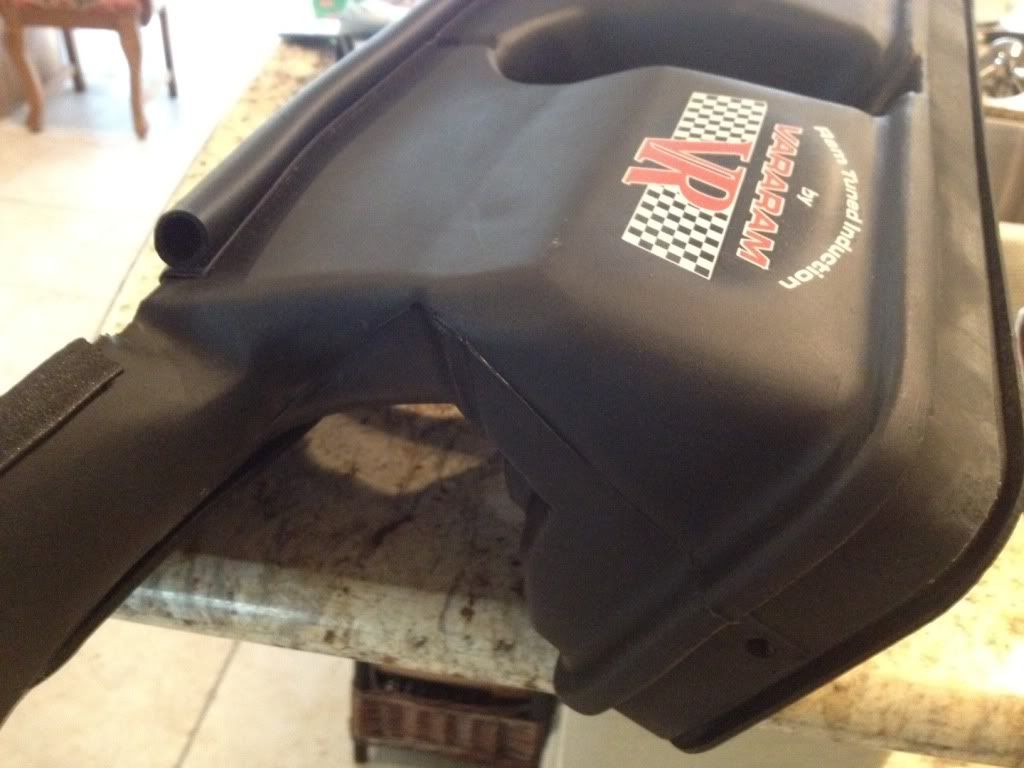 After:  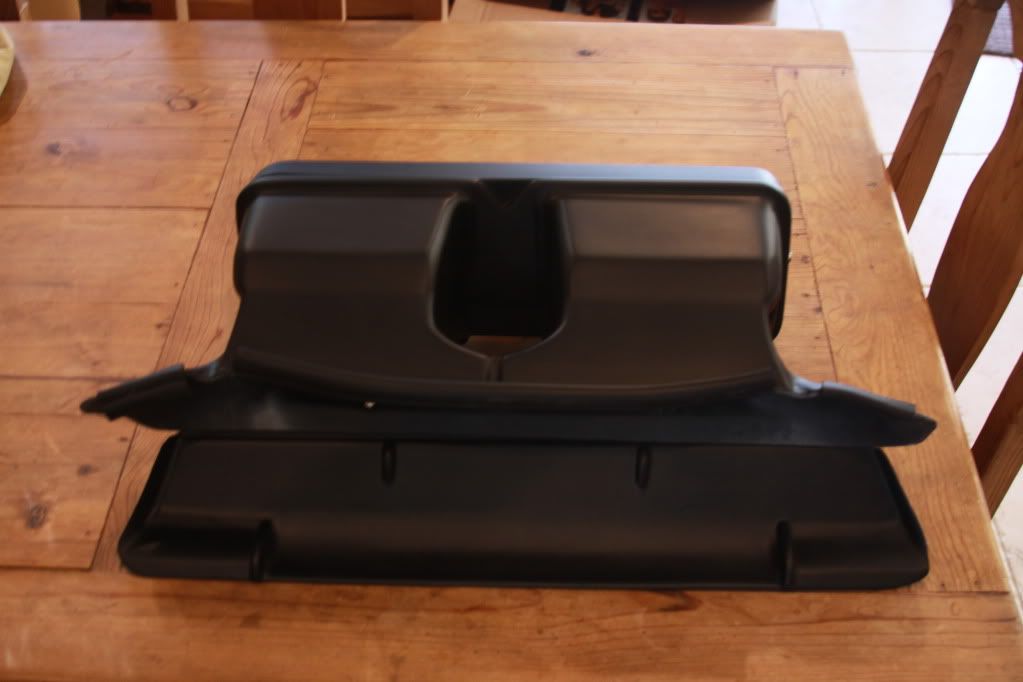 One last shot of a mock-up. You can see in this pic I painted the power steering cap. I also did the brake, radiator and water bottle caps. 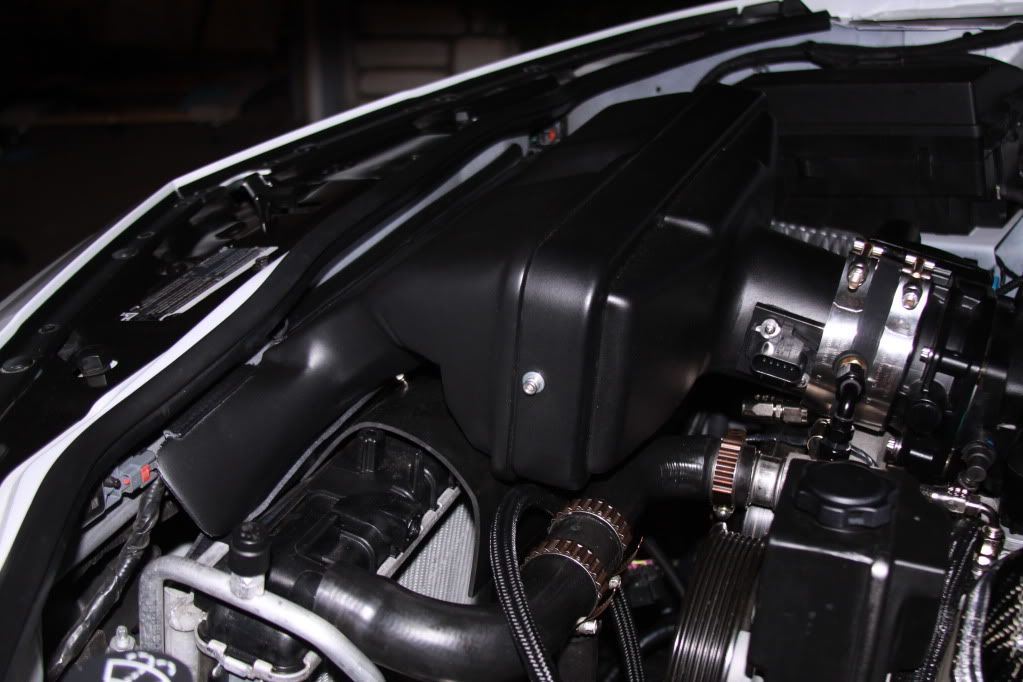 Got these in the mail. Will be using them to replace all the fender and radiator core support. They are made by the AWESOME Ring Brothers. 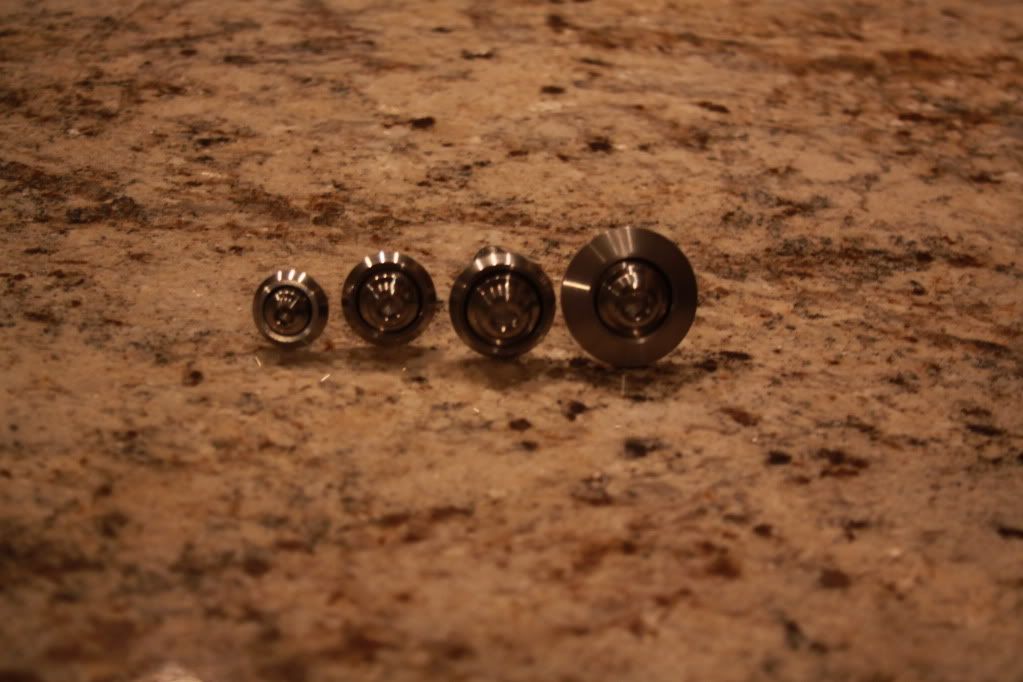 Hope it inspired to get out into your garage .
Last edited by Moreno1; 02-08-2012 at 01:04 AM. |
|
|
|
|
01-30-2012, 10:49 AM
|
#219 | |
|
Drives: G5.R Join Date: Sep 2010
Location: SoCal
Posts: 2,377
|
Quote:
 I first learned about braided lines emitting fumes from speaking with the tech guys at different fuel line companies. They did say it's kind of a hit and miss situation. You can have them for years and never have a problem. Or go 6 months without one and then start smelling the gas vapor fumes. Just didn't want to take the chance when there's solutions out there to address the potential problem.
|
|
|
|
|
|
01-30-2012, 07:44 PM
|
#220 | |
|
Drives: cts-v Join Date: Dec 2011
Location: Mooresville, NC
Posts: 506
|
Quote:
__________________
|
|
|
|
|
|
01-31-2012, 09:08 AM
|
#221 |
|
The Mark of Excellence

Drives: 2010 ABM 1SS RS LS3 Join Date: Jan 2009
Location: Smallest State in the Union
Posts: 8,690
|
Hi Nathan. A little help please. I am relocating my evap solenoid and have everything ready to go. How did you get yours under the fuse box and how is it oriented? I can hardly get my hand in there! I also notice where ypu bolted it there are more holes than in mine, I just have one small square hole. Thanks!
__________________
BMR, CAI, DynoMax, Elite Eng., Hurst, Jannetty, Clear Image Headers & Hi Flow cats, Jet Hot, LSR, TSW, VMax, Vredestein  |
|
|
|
|
01-31-2012, 10:21 AM
|
#222 | ||
|
Drives: G5.R Join Date: Sep 2010
Location: SoCal
Posts: 2,377
|
Quote:
Ahhh, got it....... thanks Quote:
First thing I did was to run the hose that attaches to the intake through the space between the water pump and block. It comes out the bottom by the heater hose. I than ran it up the front by the frame rail. Next, I attached the hose to the solenoid. This way I could use the hose to manipulate the solenoid through the the front opening off the fuse box bracket. Next, I aligned the solenoid where I could put the bolt through. Miss "Small Hands" stuck her hands through the back side of the fuse box and installed the nut. FYI, the nut fell of her hands several times, so it's a good idea to have one of those magnet to grad it each time fall. Hope that helps. Last edited by Moreno1; 01-31-2012 at 10:36 AM. |
||
|
|
|
|
01-31-2012, 10:49 AM
|
#223 |
|
The Mark of Excellence
Drives: 2010 ABM 1SS RS LS3 Join Date: Jan 2009
Location: Smallest State in the Union
Posts: 8,690
|
Thanks, that does help, I knew there had to be a trick to it.
__________________
BMR, CAI, DynoMax, Elite Eng., Hurst, Jannetty, Clear Image Headers & Hi Flow cats, Jet Hot, LSR, TSW, VMax, Vredestein |
|
|
|
|
01-31-2012, 02:48 PM
|
#224 | ||
 
Drives: Summit White 2011 2SS/RS Join Date: Feb 2011
Location: The Central valley California
Posts: 272
|
Quote:
Quote:
I had the Tech FX lines shortened that one up a lot and took the 90 off and used the straight one from the factory hard line its still accessible if you need to take it off. Under the fuse box on the mount you can drill a new hole to mount the bracket, or theres a hole there you can use but theres a long tap coming off of the bottom of the fuse box that goes through that hole to line up the box on the mount it can be cut off if you wish but I opted to just zip tie the e-vap bracket to the mount using that hole and keeping the alinement tab. I ran the manifold line along the coolant line under the CAI tube across the top of the raditor and under the cover out of sight then through the front part of the fuse box mount on that I did like Nathan did attaching it to the solenoid first and pushing it through and i used the stock 45 degree end on that side instead of the 90. So thats another option if you don't have an extra set of small hands to use. 
__________________
 |
||
|
|
|
|
|
|
|
 |
|
|
 Similar Threads
|
||||
| Thread | Thread Starter | Forum | Replies | Last Post |
| Roto-Fab | Engine Covers - S/C | Fuse Relay Cover | Radiator Cover | Billet Oil Cap+ | AutoAgenda | Exterior Parts & Accessories | 14 | 02-06-2013 08:43 PM |
| New Texas Speed & Performance Engine Machining Center! | Trevor @ Texas Speed | Camaro V8 LS3 / L99 Engine, Exhaust, and Bolt-Ons | 18 | 01-16-2013 03:46 PM |
| Hawk Performance Brake Pads part HB247Z.575 $85.00 | Rogan | USA - Florida | 2 | 10-07-2011 12:10 PM |
| Acronyms? | KEEP RT | Camaro V8 LS3 / L99 Engine, Exhaust, and Bolt-Ons | 20 | 03-11-2011 08:57 PM |
| Great Read and Info on Oil Weight | Banshee | Mechanical Maintenance: Break-in / Oil & Fluids / Servicing | 1 | 11-23-2009 09:03 PM |