You are browsing camaro5 

|
 10-26-2010, 06:57 AM
|
#1 |
 
Drives: 2010 Summit White Camaro 2SS RS Join Date: May 2009
Location: Columbia, SC
Posts: 196
|
DIY: Removing side markers Front and Rear
I know there have been several threads on this but I really couldn't find one that covered both sets the easiest way. Here is how I did it and was able to get all 4 out in less than 10 minutes
Fronts: Turn wheels either right or left and it will allow you to get to the 3 T25(I believe) Torx screws holding the inner fender in place in front of the tire. Pull that back and you will see a white tab inside of a black box holding the light in place. Grab a screwdriver, push the tab in and towards the outside of the car. That is the only tab holding the light in place. The front of the marker has a piece that slides into a slot. (Think of how the battery cover of a remote control works) Rears: Open the trunk and remove the 6 cargo net screw/hooks. Pull out the plastic piece they held in place. Pull the carpet down from the sides. There is one pushpin holding the carpet at the top. Once the carpet is pulled down, you will see a black rectangle that is probable 8 inches long and 4 inches tall that has flaps in it in front of where the side markers should be. If you look at the top of it you will see two extensions that click to hold that in place. push those down and carefully push and twist the black piece to negotiate it out. I say careful because I don't know if it can drop. Once that is out of the way you can reach through the hole and feel the rear markers. Theses are held in place the same way the fronts were(ie remote control battery cover) The tabs that you can push in are towards the front of the car. Sorry i don't have pictures but as I was looking at this, it was simple enough that pictures were not needed. I may go back this weekend and take pics just for the sake of having a clean looking DIY
__________________
2010 Summit White 2SS/RS.
Mods so far: BFXauto Black Replica wheels, Pfadt lowering springs, Black CAI Intake, VMAX CNC Spiral Ported TB, 20% tint, Painted Bowties and SS Badges, Blacked out sidemarkers, RPI Designs Tail Light Covers, Painted Tail Light Bezels, Pioneer touchscreen DVD, Fieldgoal wireless Harness, AAC Plasma LED DRL, AAC Hyper white dome, trunk and license plate LED's, Blue footwell lighting. |

|

|
|
10-26-2010, 09:24 AM
|
#2 |
      Drives: 2011 Camaro LS Join Date: Sep 2008
Location: NJ
Posts: 1,917
|
Did you tint yours? If so what did you use? VHT spray or actual tint?
|
|
|
|
|
10-26-2010, 10:52 AM
|
#3 |

Drives: 2011 ss camaro Join Date: Aug 2010
Location: spring hill, fl
Posts: 1,705
|
appreciate the info...thanks

__________________
10/28/2010 got it
|
|
|
|
|
10-26-2010, 11:04 AM
|
#4 |

|
sorry to butt in but for the rear simply lay on the ground under the car where the side marker is and reach up under the back side of the side marker and simply push clip to remove theres no need to remove anything but the side marker itself . once you push the clip the light comes out from the outside. and i will add that window tint is a great way to easily black them out.
__________________
2010 Hennessey HPE650 2SSRS Blk/Blk
 Magnuson TVS2300,ported heads,cam,Hotchkis suspension. Weld 17s, Mickey Thompsons. |
|
|
|
|
10-26-2010, 01:46 PM
|
#5 |
|
Drives: 2010 Summit White Camaro 2SS RS Join Date: May 2009
Location: Columbia, SC
Posts: 196
|
Thanks Klatterblast. I obviously didn't do it that way but atleast now hopefully when someone searches for it, all the info will be in one spot.
bigwayne --- I tinted mine with VHT. I am going to try and post pics of the new changes some time this week. I'm on call and haven't had much time to do so unfortunately.
__________________
2010 Summit White 2SS/RS.
Mods so far: BFXauto Black Replica wheels, Pfadt lowering springs, Black CAI Intake, VMAX CNC Spiral Ported TB, 20% tint, Painted Bowties and SS Badges, Blacked out sidemarkers, RPI Designs Tail Light Covers, Painted Tail Light Bezels, Pioneer touchscreen DVD, Fieldgoal wireless Harness, AAC Plasma LED DRL, AAC Hyper white dome, trunk and license plate LED's, Blue footwell lighting. |
|
|
|
|
10-26-2010, 08:26 PM
|
#6 |
|
Drives: 2011 Camaro LS Join Date: Sep 2008
Location: NJ
Posts: 1,917
|
Hows it look? Do they look like you just painted them or can you not even tell?
|
|
|
|
|
10-27-2010, 06:39 AM
|
#7 | |
|
Drives: 2010 Summit White Camaro 2SS RS Join Date: May 2009
Location: Columbia, SC
Posts: 196
|
Quote:
http://www.camaro5.com/forums/showth...07#post2486507 Any questions let me know there
__________________
2010 Summit White 2SS/RS.
Mods so far: BFXauto Black Replica wheels, Pfadt lowering springs, Black CAI Intake, VMAX CNC Spiral Ported TB, 20% tint, Painted Bowties and SS Badges, Blacked out sidemarkers, RPI Designs Tail Light Covers, Painted Tail Light Bezels, Pioneer touchscreen DVD, Fieldgoal wireless Harness, AAC Plasma LED DRL, AAC Hyper white dome, trunk and license plate LED's, Blue footwell lighting. |
|
|
|
|
|
10-28-2010, 06:39 PM
|
#8 |
  
Drives: 2010 Cyber Grey Camaro SS (LS3) Join Date: Mar 2010
Location: Clarksville TN
Posts: 2,275
|
I just installed my AAC SMD Sidemarkers today. Talk about one of the EASIEST and best looking mods you can do to your car! It literally only takes about 20 minutes from start to finish if that.
I will post a write up with a few pictures if anyone really needs it, but I doubt it.
__________________
GPI SS3 Cam / PRC 255 heads / Forged 376ci bottom / Fore level 2 fuel system / D1SC ProCharger on 12lbs / Alky control dual nozzle / 770 whp / 649 wtq tuned by Ryan Stevens at GPI
|
|
|
|
|
02-18-2011, 08:33 PM
|
#9 |

Drives: "Bmblbee" 2010 RY 2SS/RS. VIN 12043 Join Date: Oct 2008
Location: Waldorf, Maryland
Posts: 1,271
|
Got my AAC sidemarkers today and installed them in about an hour. Very easy to do. Here a some before pictures, installation pics, and after. Hope you all like.
I know you all know what stock side markers look like; this is just for comparison. First the front: 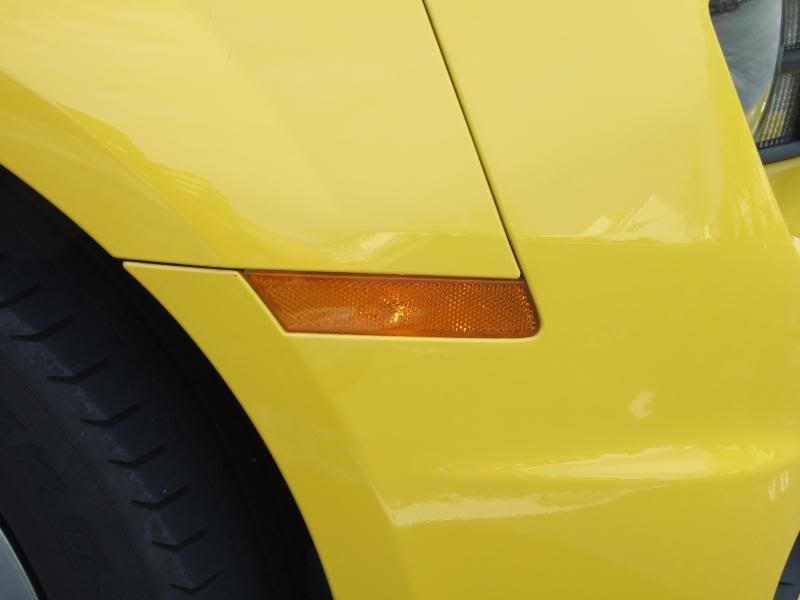 Now the rear: 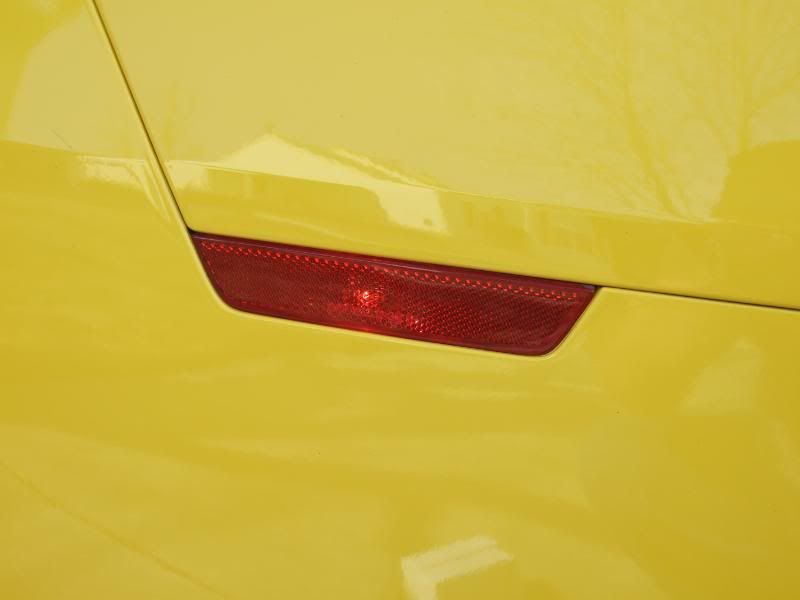 Now both:  Here's the installation of the front ones. You have to remove these three star screws: 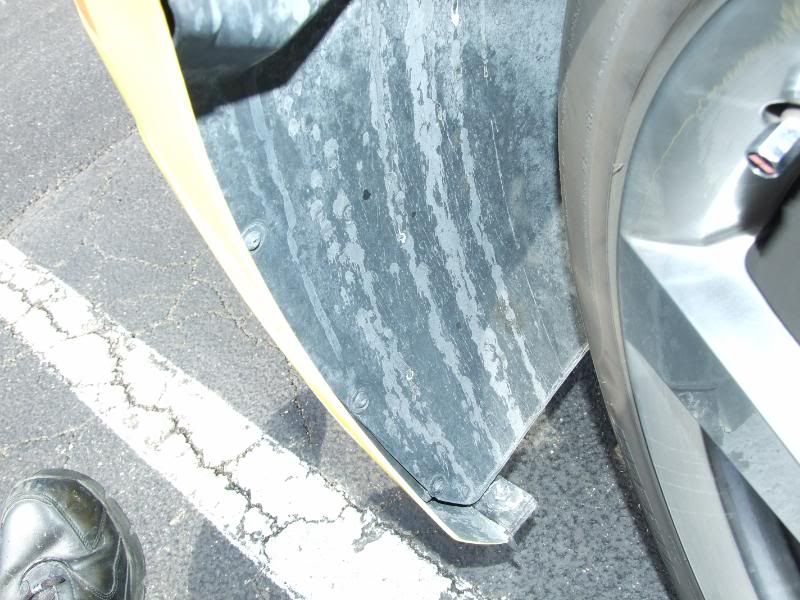 Once they're out you can peel back the well cover to gain access to the marker's retaining clip. See that gray tab back in there past the yellow bolt? That's the retaining clip. Use a small screw driver to gently push the clip forward and outwards. It won't take much pressure. 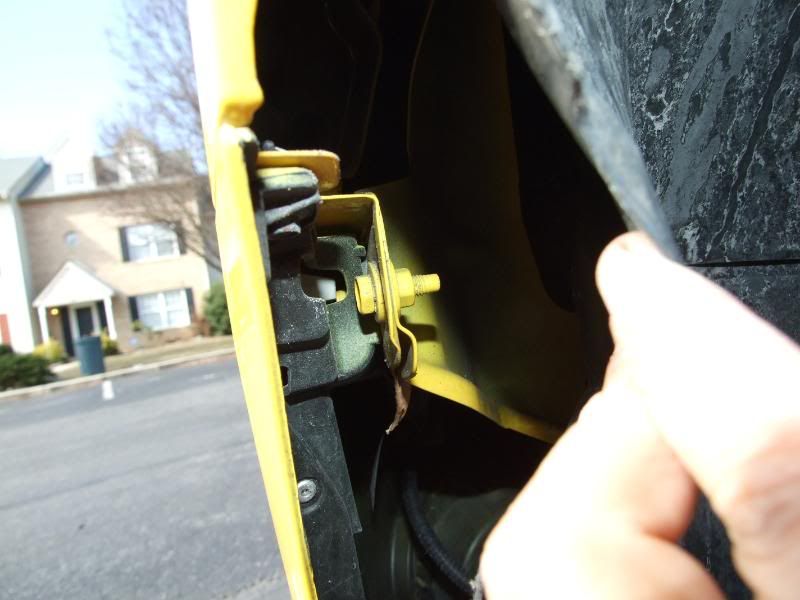 These next two shots make it clear how the clips work. 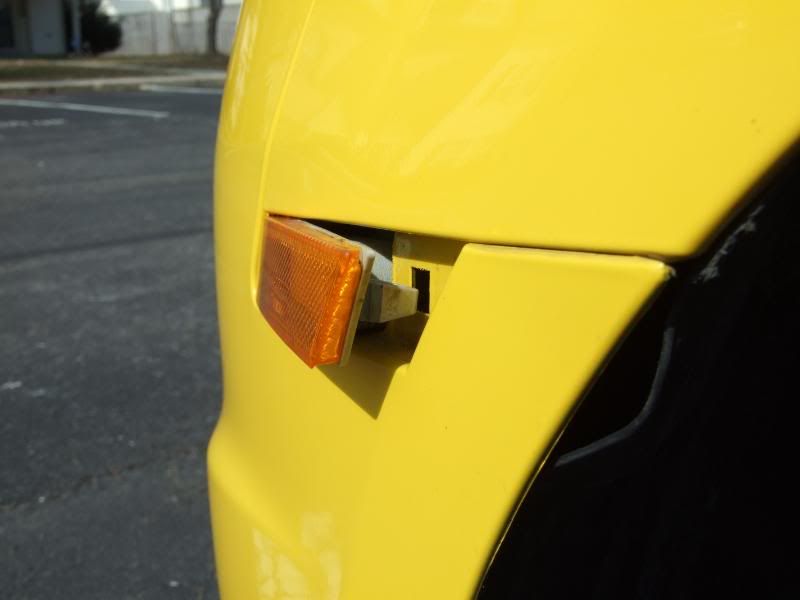 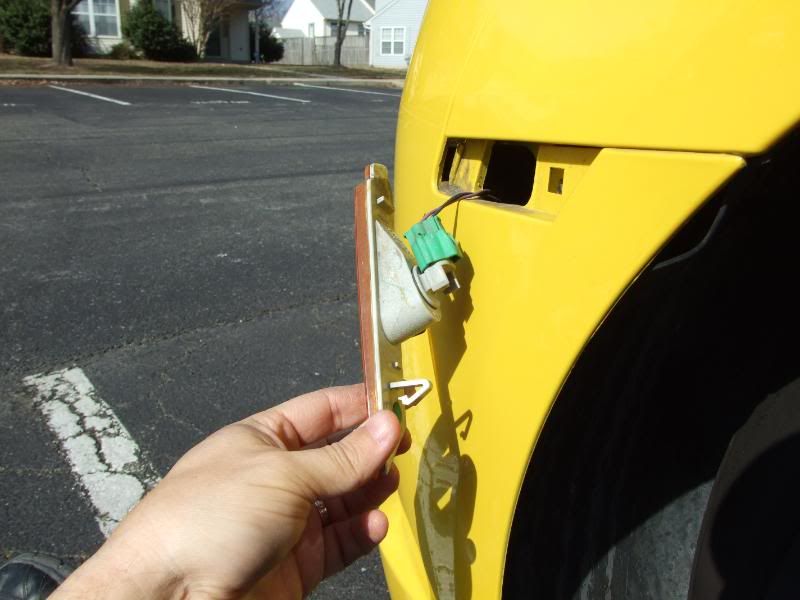 The rear ones are the same but a little trickier. You'll have to lay down behind the back wheels and reach up to the markers. You won't be able to see anything, but you can tell by touch where the clip is. One side I had to use needle nose pliers to squeeze the clip, the other I was able to do it by hand. Anyway, here's the finished work. 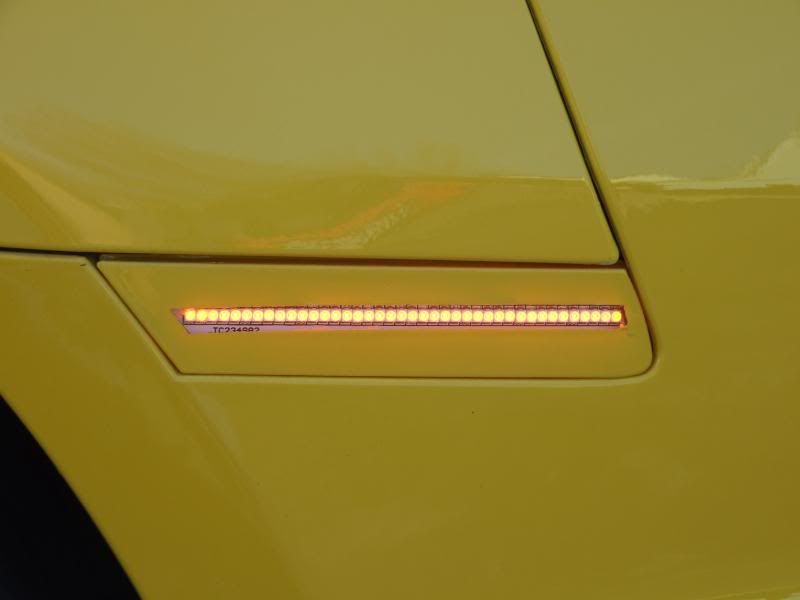 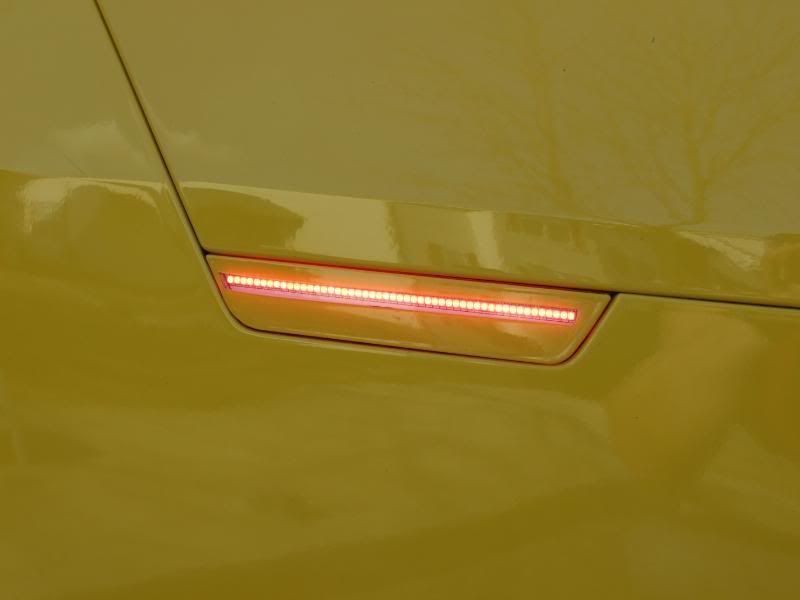 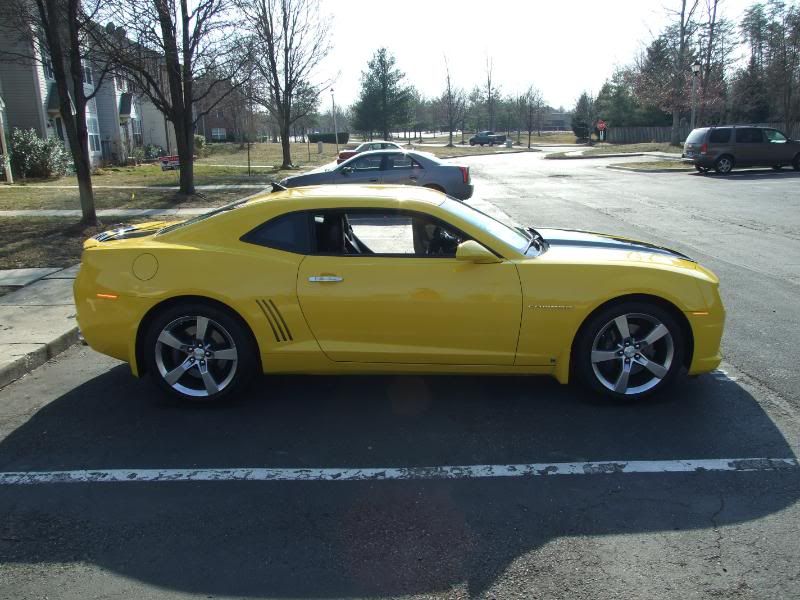 And here's night shots: 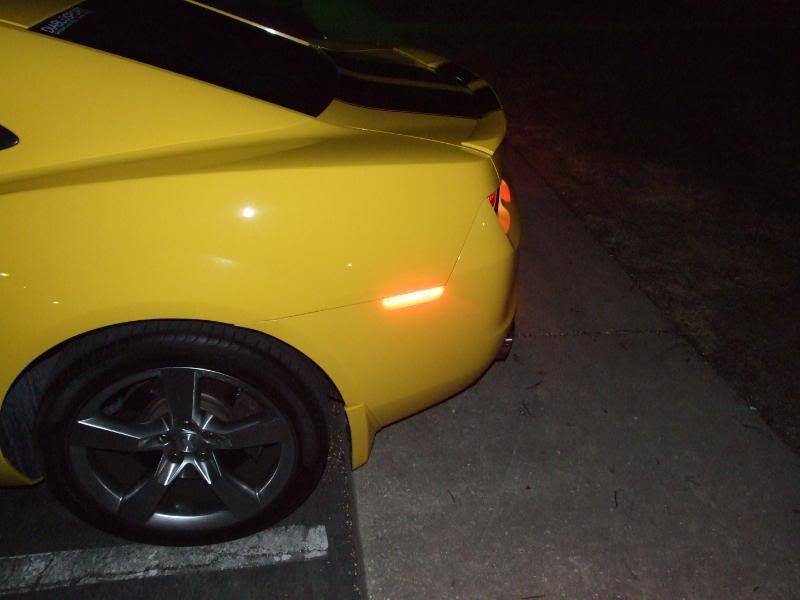 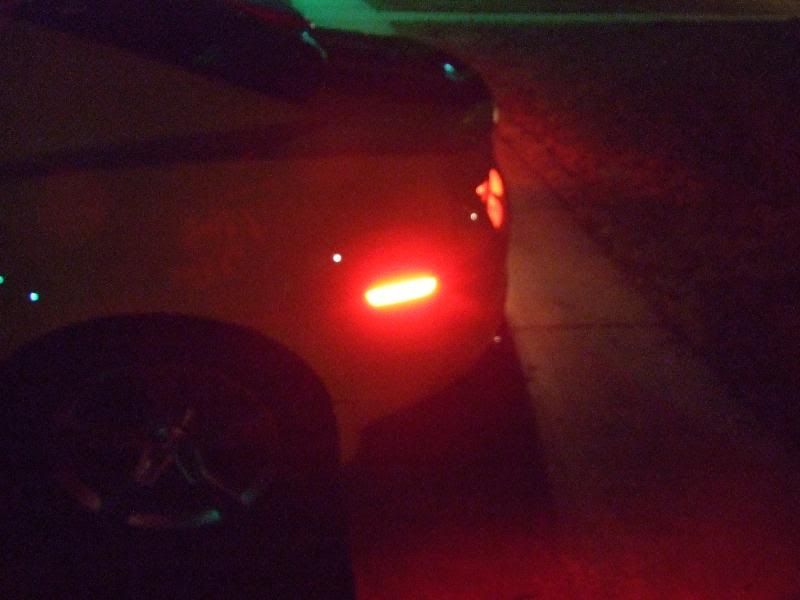 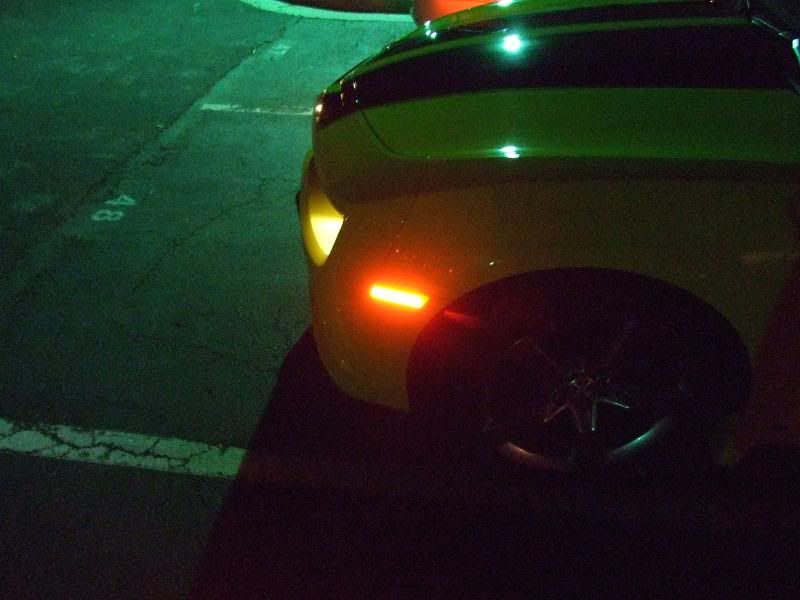
|
|
|
|
|
02-24-2011, 10:13 PM
|
#10 |
|
Steve from Canada.

Drives: 2010 SW SS/RS with Inferno package. Join Date: Mar 2009
Location: Niagara Ontario Canada
Posts: 1,969
|
Why can you see numbers in this shot?

__________________
 |
|
|
|
|
02-25-2011, 09:05 PM
|
#11 |
|
Drives: "Bmblbee" 2010 RY 2SS/RS. VIN 12043 Join Date: Oct 2008
Location: Waldorf, Maryland
Posts: 1,271
|
another person had the same thing. Don't know why there is gap betwix the LEDs and the outer frame; maybe heat? They do get warm.
|
|
|
|
|
|
|
|
 |
|
|
 Similar Threads
|
||||
| Thread | Thread Starter | Forum | Replies | Last Post |
| CAMARO WIKI | Tran | Wiki | 66 | 04-22-2024 11:41 AM |
| 5th Gen Suspension -- The Book | JusticePete | Suspension / Brakes / Chassis | 151 | 05-07-2015 05:52 PM |
| Setting up an IRS/Drivetrain for Drag Racing | Kyle2k | Suspension / Brakes / Chassis | 44 | 06-05-2010 09:17 PM |
| Im sure this has been asked before.. But forgive my innocence :) | gmag21 | Suspension / Brakes / Chassis | 23 | 02-21-2010 10:29 PM |
| Who makes painted or blacked out front and rear side markers?? | g-townmach | Cosmetics and Lighting Modification Discussions | 7 | 12-08-2009 06:03 PM |


