You are browsing camaro5 

|
 06-26-2011, 08:01 PM
|
#1 |
 
Drives: 2011 Camaro Join Date: Apr 2010
Location: NYC
Posts: 627
|
DIY How to Remove Door Trim and Replace Outside Mirror
I really hope no one will be needing a mirror replacement; but you may also benefit from this if you want to paint or change out your door panel
 This is my broken mirror. I'm happy this thing is made of flexible plastic, notice how the entire housing popped off without damage to the car. This is how GM justifies them being fixed in place. 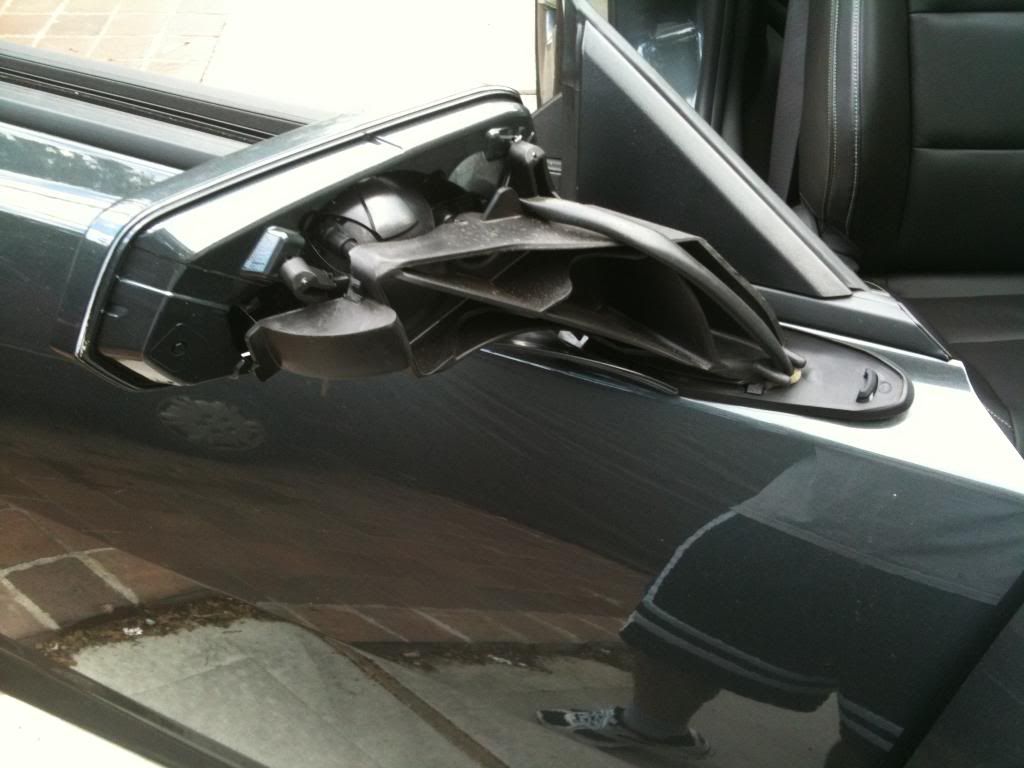 To remove the door trim, you will first need to remove the small speaker on the corner in red. Use some muscle to wiggle it out, then disconnect the wires. 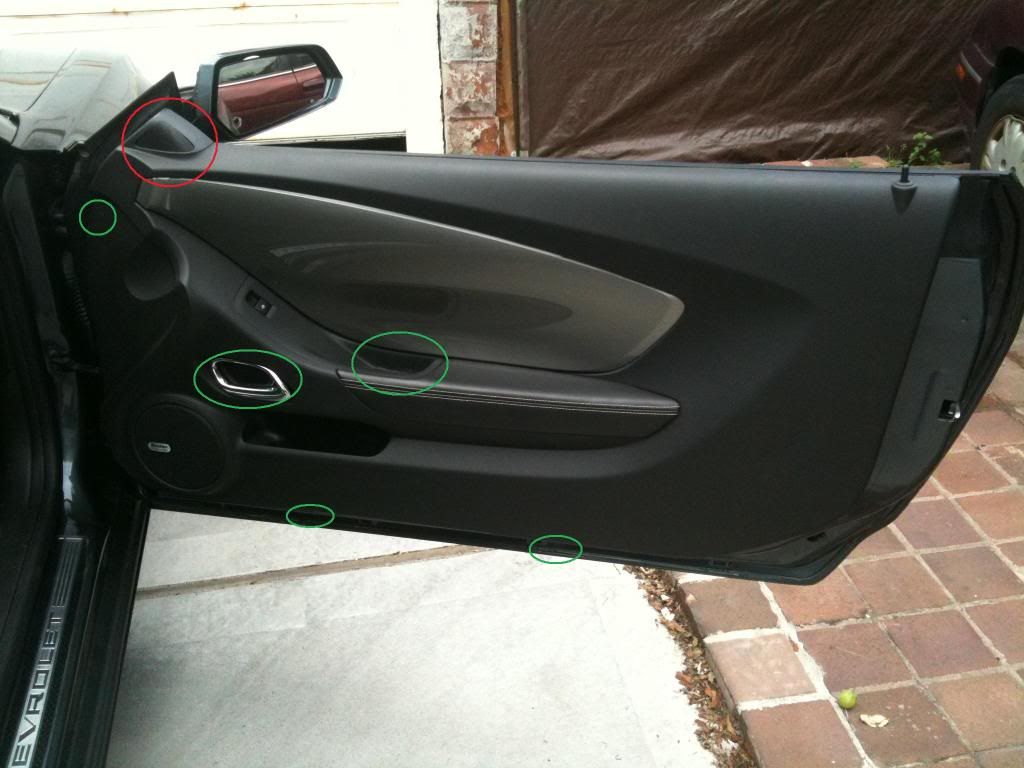 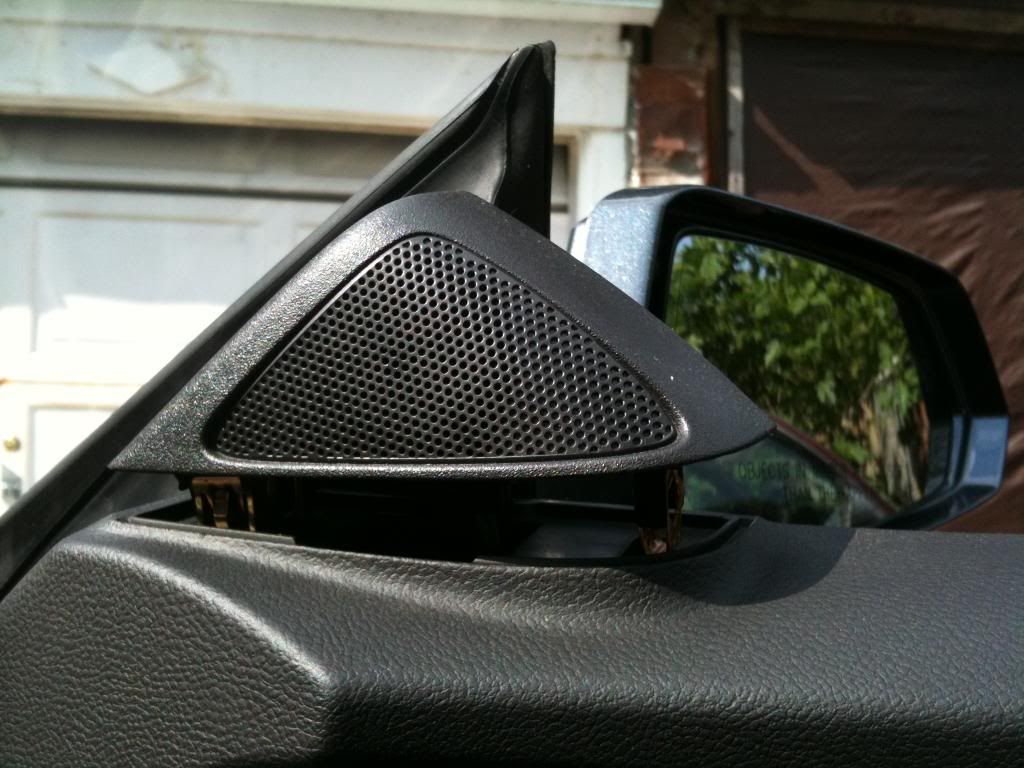 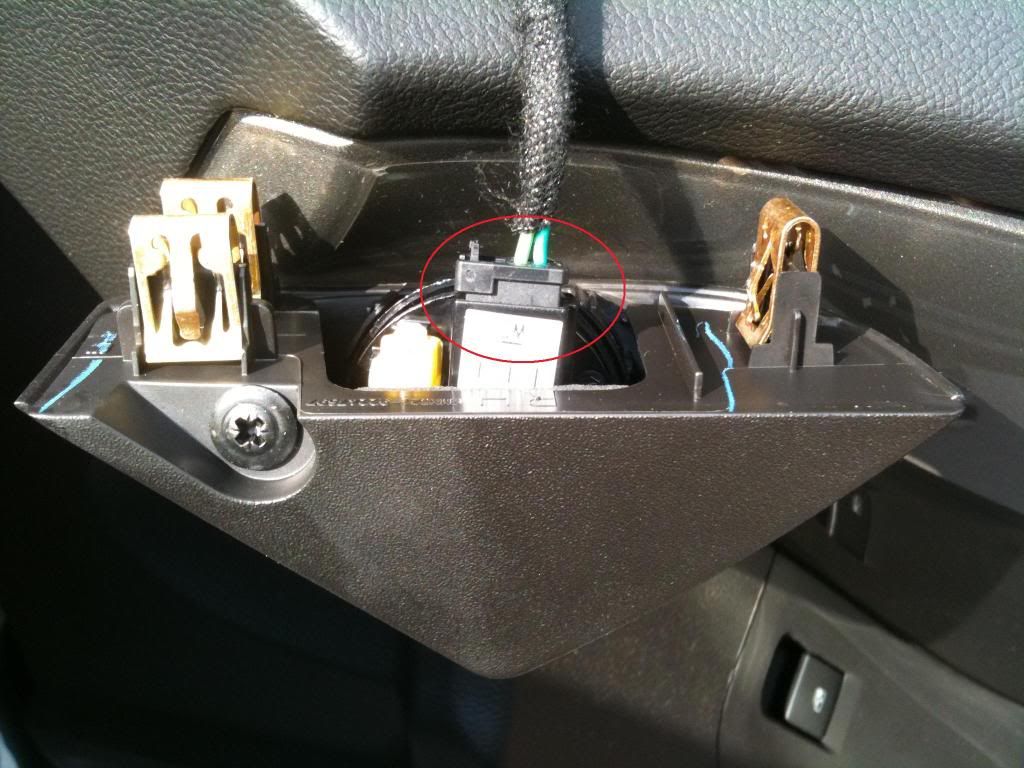 Once you have removed the speaker, you will need to take out 5 screws in total, in the green circles. The 3 around the periphery are easiest, they are nut-head style screws. The one in the armrest is under a rubber protector which you can just lift out. This one requires a special type of bit so make sure you have it before you start this. The screw in the door handle is a little tricky to get to; you will need to remove the plastic covering by getting behind it through the edges and pulling out. I used a thin s-hook for this. 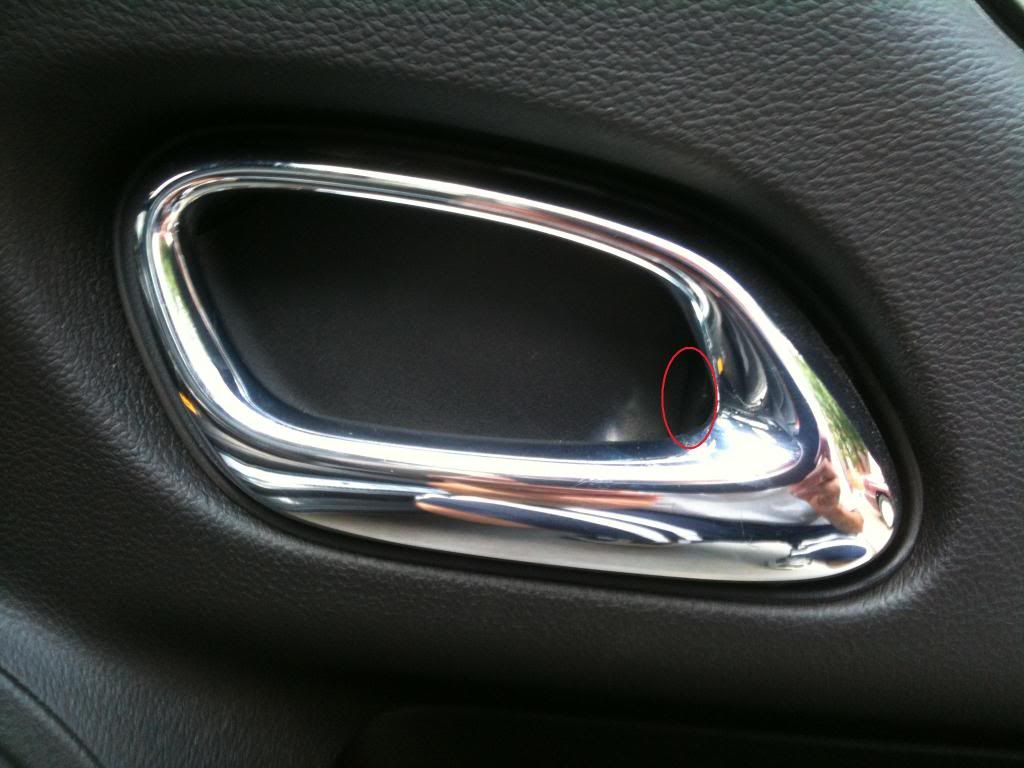 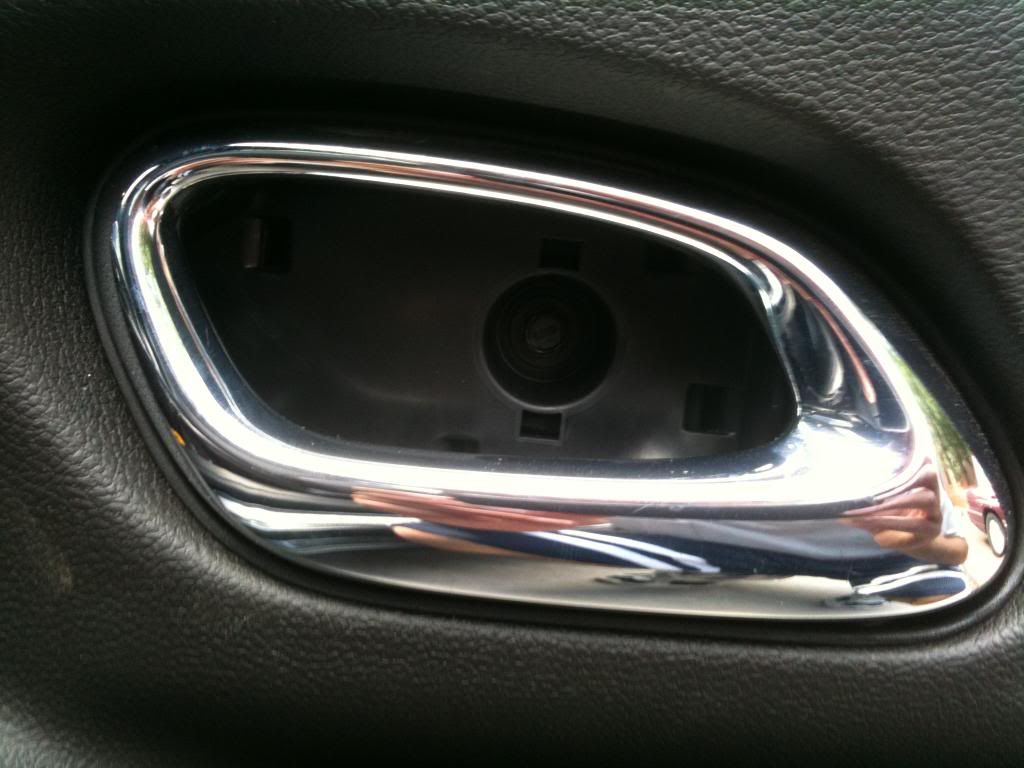 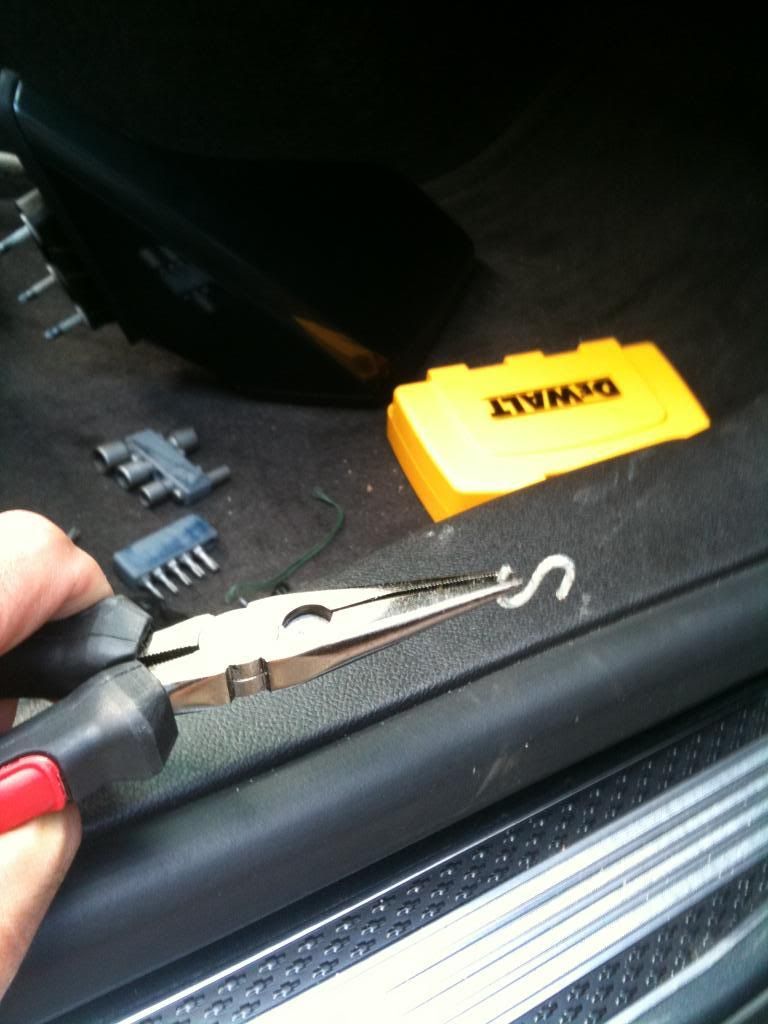 Now that you have removed the speaker and screws, you will again need to use some muscle to pull out the trim. I started from the corner near the lock, dug my fingers in, and worked my way around prying it off. It will sound like you broke something each time a clip comes out, this is normal. There are a number of retainers near the top as well. Just pull up and out  Now that the trim is out, you can rest it on something under the door, unless you want to disconnect all the wiring and door latch if you want to remove it altogether. To replace the mirror, you will need to pop out the rubber caps. They come right off, exposing the nuts inside. 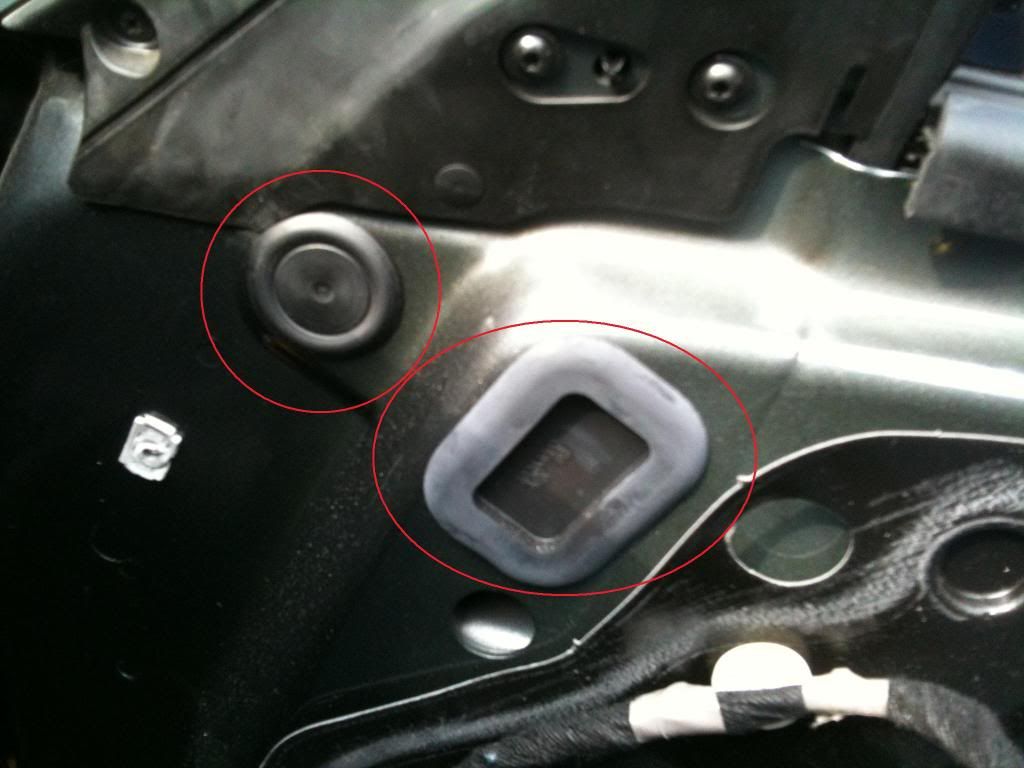  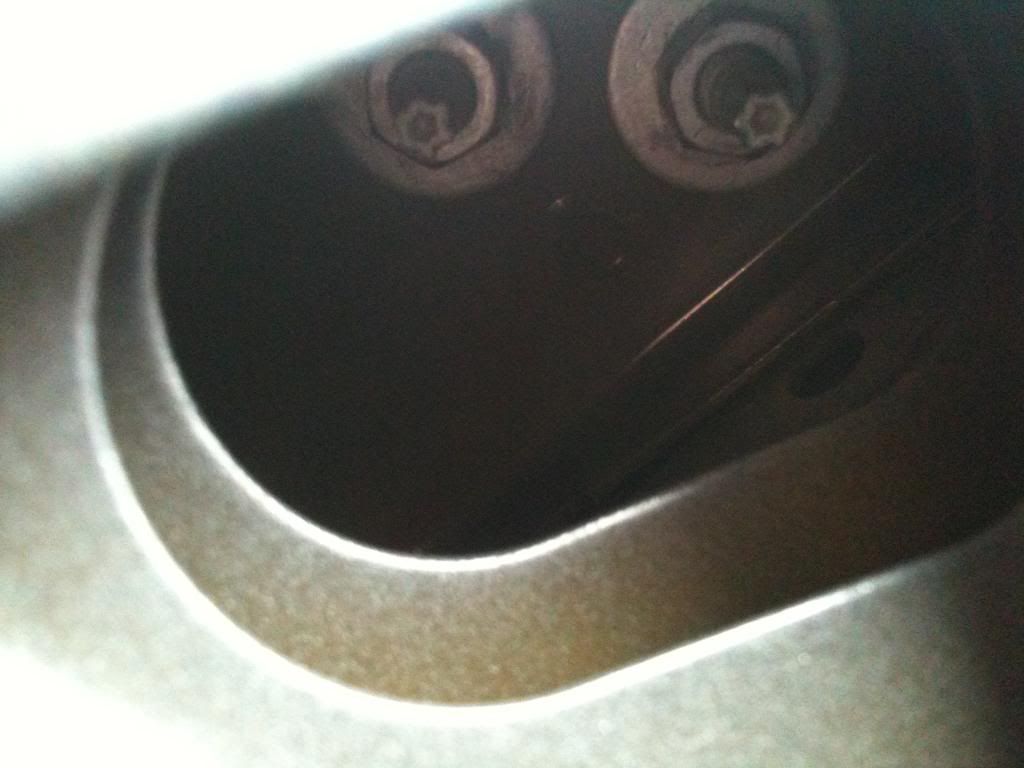 To remove the nuts, you will neet a ratchet, with an adaptor to reach the somewhat deep nuts, and a deep 10mm (thank you Kendell  ) socket since there is a good bit of thread running through them. They are 3 in total. ) socket since there is a good bit of thread running through them. They are 3 in total. 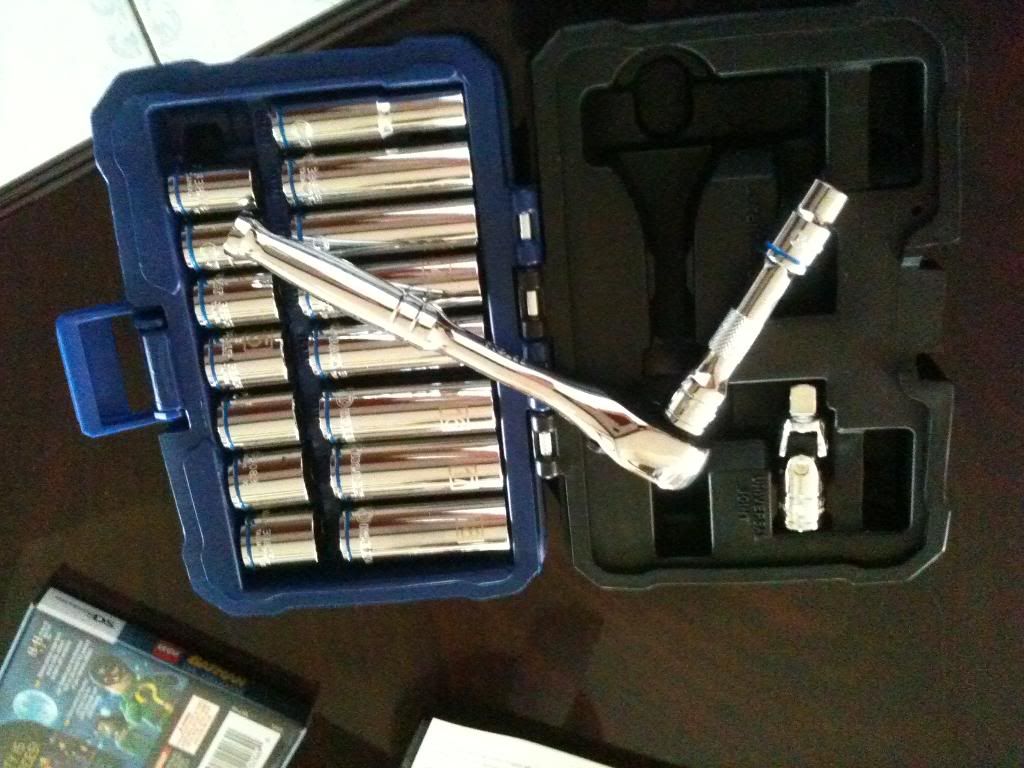 Here is the tricky part: Make sure you do not let the nuts fall into the door! For this, I used some thin cardboard to have them slide out as they came loose. Use your imagination. 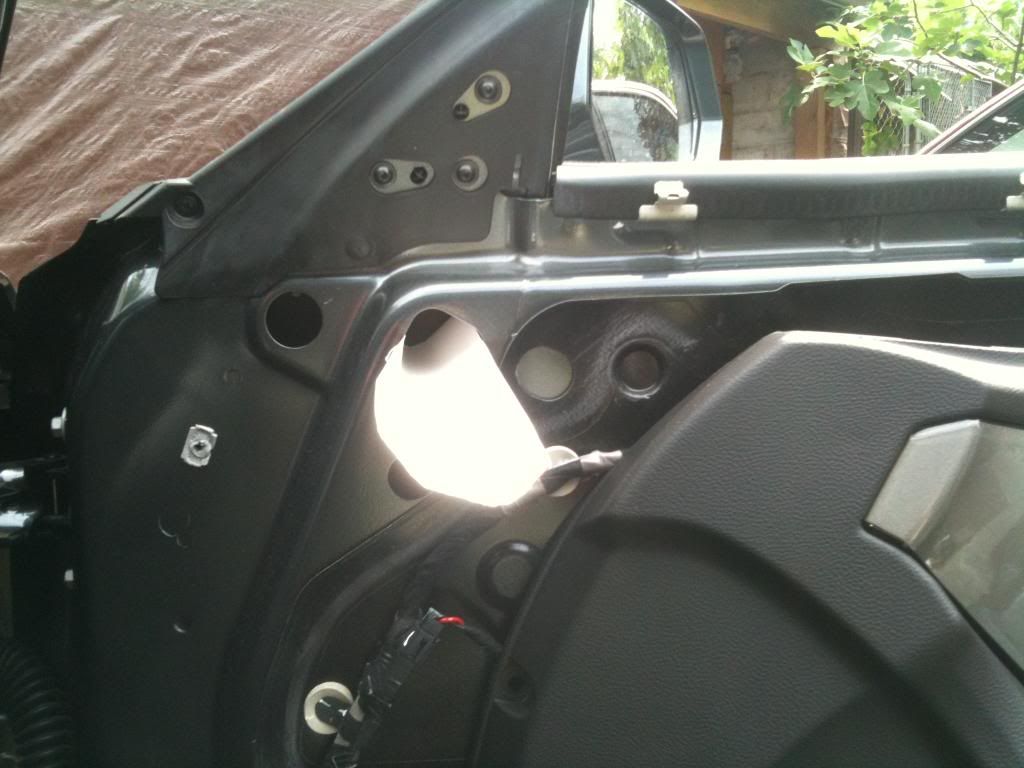 Now that the mirror is out, you have to disconnet the old and reconnect the new. The wires run into the door and at a glance it looked too involved. Being in a rush to get this done and head over to FBF I cut and spliced the wires. Match the colors, and test for function 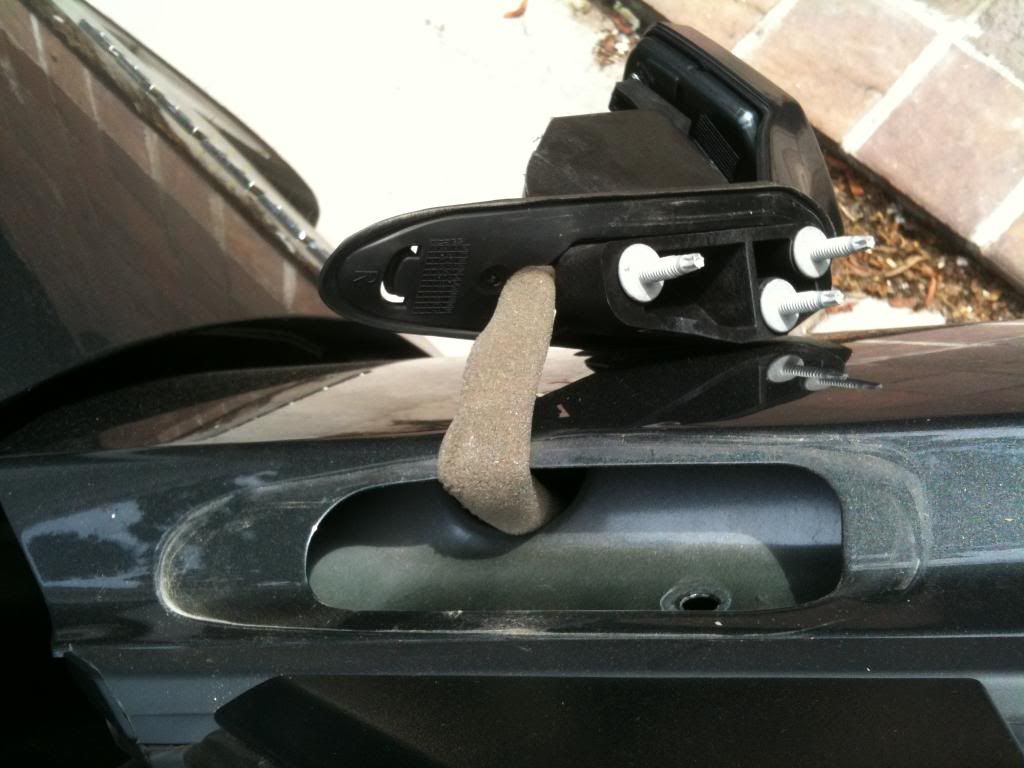 My dad held the new mirror in place while I tightened the nuts. Again be sure not to lose them into the door. Everything goes back on just the way it came off I bought my mirror from GM Parts House for less than $90 shipped. They have great customer service - ordered Monday morning and got it Wednesday. GM Parts Direct had it listed for less but after some research I decided not to buy from them. They have no phone number, the only way to get to them is via email. I'm still waiting on a reply since last Sunday. GM Parts House FTW The assembly comes primered black. Paint cost me $65. They had to paint it twice becuse the first time they didn't do the bezel and the color match was flawed. The second time they used the factory CGM paint. The guy told me he lost money on me. To be honest I'm still not satisfied with the job I might do it over myself even though you'd have to look real close to see the defects. If anyone spots something I missed or needs me to clarify just ask!
|

|

|
|
07-04-2011, 07:41 PM
|
#2 |
 
Drives: 2011 Camaro SS2RS M6 Join Date: Oct 2007
Location: New York
Posts: 54
|
Thanks for this. I used a T30 torx a 7MM nut driver and a 10MM deep socket for this repair. Just so you know the black rubber grommet above the speaker about just in line with the mirror needs to be pulled out and you can do the job without splicing.
|
|
|
|
|
07-05-2011, 10:34 AM
|
#3 |
|
Whipped

|
Very Cool.
__________________
|
|
|
|
|
04-20-2014, 07:27 PM
|
#4 |
 
Drives: 2013 Victory Red Camaro v6 1LS Join Date: Aug 2013
Location: Seattle, WA
Posts: 28
|
Will you be uploading instructions for the wiring?
It looks like the mirror wiring goes deep down into the door. How did you connect that? Is it difficult? etc Wait never...you cut and spliced them... |
|
|
|
|
04-21-2014, 12:05 AM
|
#5 |
|
I run 2 catch cans...

|
All your questions answered in my pdf instructions here: http://www.camaro5.com/forums/showth...95#post6577995
__________________
Overkill tuned Air Scoop CAI VMAX PTB JacFab Laminator FX + Extendolator SOLO Hi-Flo Cats + Cat-Back Exhaust
View my top 3 LFX performance mods and more: .  |
|
|
|
|
04-21-2014, 10:11 AM
|
#6 |
|
redleader
|
PDF link broken :-(
|
|
|
|
|
10-29-2014, 03:53 PM
|
#7 |
 Drives: 2010 Camaro LT base Join Date: Oct 2014
Location: Louisiana
Posts: 1
|
2010 camaro driver side mirror
trying to replace drivers side mirror on my sons 2010 Camaro. it does not have the heated feature. can anyone please tell me if a mirror from a model that does have the heated glass feature will hook up as I'm trying to find one in the cyber grey metallic so I don't have to get one painted! I'm concerned the plug may be different. there is one on ebay, but it is the heated version!
also, can you buy a replacement already painted or do they all come primed! |
|
|
|
|
11-07-2014, 09:38 PM
|
#8 |
|
Oldbie that nobody knows

|
Hate to necro this, but why in the first pic is the mirror still bolted on but missing the two panels that make its shape? Are those two pieces able to be removed without having to go through removing the door panel and everything or were they gone because the mirror got damaged? It would be nice to be able to remove those pieces alone, since I have a lot of wax buildup in the seam.
|
|
|
|
|
|
|
|
 |
|
|
 Similar Threads
|
||||
| Thread | Thread Starter | Forum | Replies | Last Post |
| DIY: LS3 Camshaft Install (a lot of pictures, may take a moment to load) | robertway | Camaro DIY & HOW-TO instructions & discussions | 313 | 12-16-2023 06:53 PM |
| retrofit success: GM mirror with backup camera LCD and Onstar | redZ28 | Audio, Video, Bluetooth, Navigation, Radar, Electronics Forum | 311 | 05-23-2017 02:09 PM |
| DIY : Install underdrive pulley on 2010 Camaro SS | Nine Ball | Camaro DIY & HOW-TO instructions & discussions | 34 | 09-30-2013 08:25 PM |
| Pfadt Race Engineering DIY Drop Spring installation procedure | PfadtRacing | Suspension / Chassis / Brakes | 20 | 09-23-2011 09:31 PM |
| how hard to remove and replace my rocker panels? | tmac1granger33 | 5th Gen Camaro SS LS LT General Discussions | 10 | 10-16-2010 10:18 PM |


