You are browsing camaro5 

|
 07-08-2010, 02:36 PM
|
#1 |
    
|
My ADM street intake review*long and informative* pictures to keep you entertained
I finally pulled the trigger and installed my ADM street air intake. I should have waited for a cooler time of day/year, but I only lost 5 pounds of body weight to sweat.
Construction: The system is VERY well built. This seems like it belongs on an aircraft rather than a car(I should know). The tolerances are tight(more on this later) and the materials used are about as good as you can ask for on an intake. It arrives at your doorstep with just about every piece wrapped for protection. There is also an individualized list of the packed items checked off personally to make sure accuracy is 100%  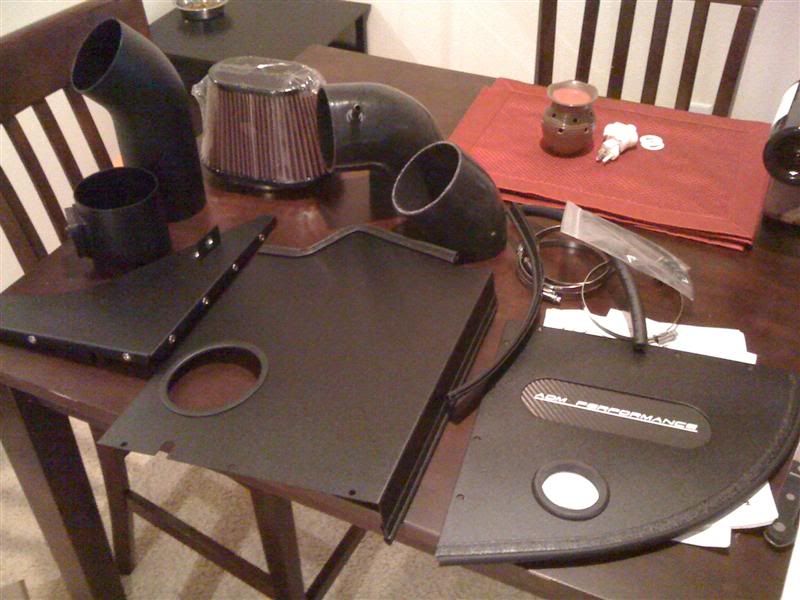 Installation: Installation took longer than I would have expected, but I can blame that on "admiring the engineering". It took 2 hours to install. Mostly because of the tight tolerances mainly in the airbox. Helpfull hint #1 If you didn't read ahead on the install instructions and you aren't putting your car on the lift make sure you turn your wheels so you have access to the driver side fender liner screws at the front. This will save you the time and headache of turning the wheel with no power steering or turning the engine on with no intake. You need to have access under there to loosen the wiper fluid reservior bolts. Deconstruction of the stock air intake system are straightforward and simple. Now on the to the fun part of putting your new intake in  ! Like I mentioned before the new airbox was my trickiest part of the install because of how the tolerances were in construction, but that is a good thing not bad. It took me quite a while to fenagle the rubber trim, rear and side airbox pieces into position. When you finally get them in their respective spots you can admire how well engineered this peice is. ! Like I mentioned before the new airbox was my trickiest part of the install because of how the tolerances were in construction, but that is a good thing not bad. It took me quite a while to fenagle the rubber trim, rear and side airbox pieces into position. When you finally get them in their respective spots you can admire how well engineered this peice is.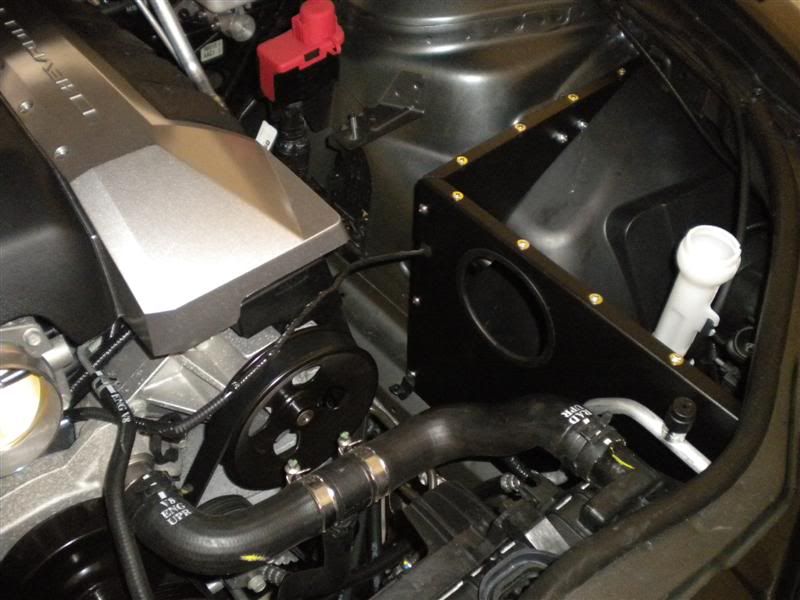 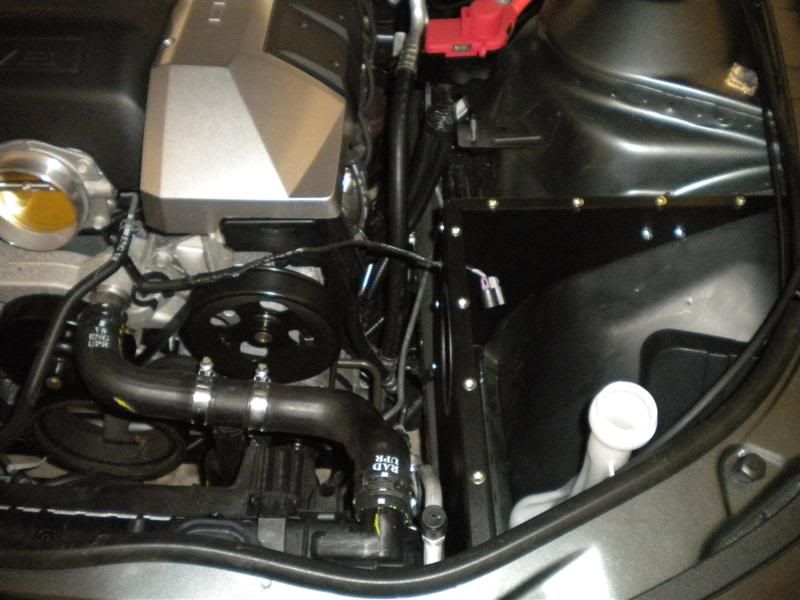 Helpful hint #2 As you notice in the 2 above pictures the MAF wiring goes right ontop of the power steering pully. If you leave it clipped on you will have no wiggle room to move it or zip tie it down anywhere. I don't know if I missed it in the instructions or what, but in the final installation process I took the clip off and zip tied it behind the power steering fluid reservoir(You will see this in later pictures). Installing the tubing wasn't all that difficult. The only hard parts were installing the MAF connector back to the sensor. It is VERY close to the back wall of the airbox so there is no way to install it with the MAF sensor already at it's final angle. You had to face it up and slowly turn it down while simultaniously putting the clip it. Again due to the tight tolerances of the system. Also, making sure the tubing doesn't get close to the power steering pully, while also getting a good seal between all the tubes takes a little bit of finess. Here is a Question for everyone who has the ADM intake. It says the jumper cable stud will be reinstalled at a different place, but it never says where in the instructions. Where does it go????? Helpful hint #3 I'm not sure if I couldn't find this in the instructions, but it doesn't tell you how to install the new PCV tubing to replace the plastic one. The tubing goes quite a ways back conveniently right underneith a wiring bundle. I don't have any pictures to help you out because it was so cluttered you wouldn't know what is what, so I'll try to verbalize what the cluster looks like and how to remove the PCV tube. Peronally I unclipped a sensor of some sort that was purple right next to the conection of the PCV tube so I could gain better access to unclipping it. While holding a flashlight in my mouth twist the tube around untill you can see a small clip that you need to push sidways to release the tube and pull it out. I then routed the new PCV tubing underneath most everything so It would be out the way and go under the throttle body as specified in the instructions. Be sure to clip the Misc. sensor back in. 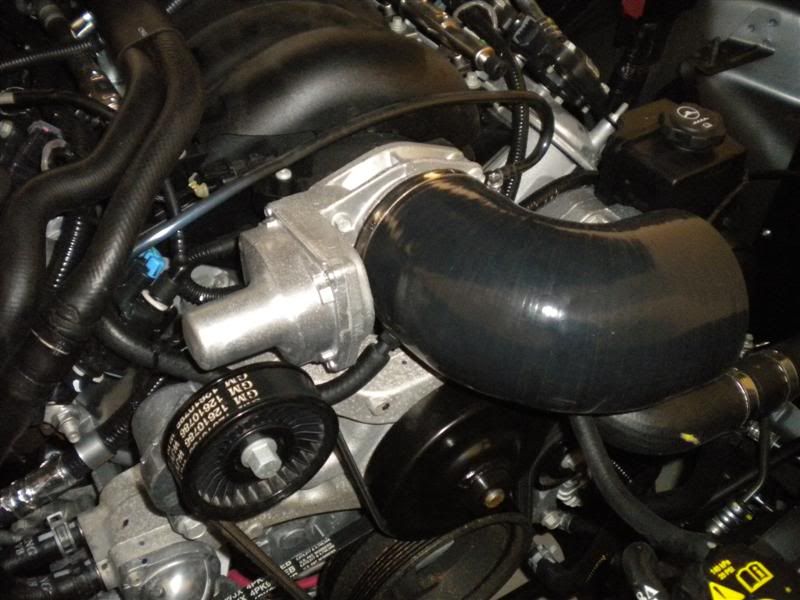 The final fun part of install was getting the washer bottle to fit through the hole(That's what she said). It was difficult because the top wants to keep unclick because it's so close to the grommet. It takes some effort, but I pushed down on the top of the airbox and finally got it in a postion to where it would stay. Now tighten everything up and enjoy! 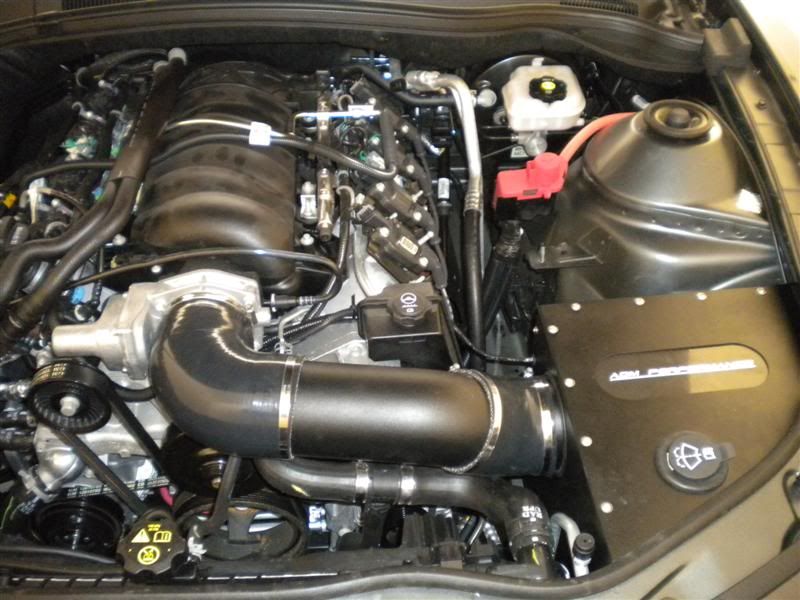 It's hard to see, but the MAF wiring is now behind the power steering fluid reservoir 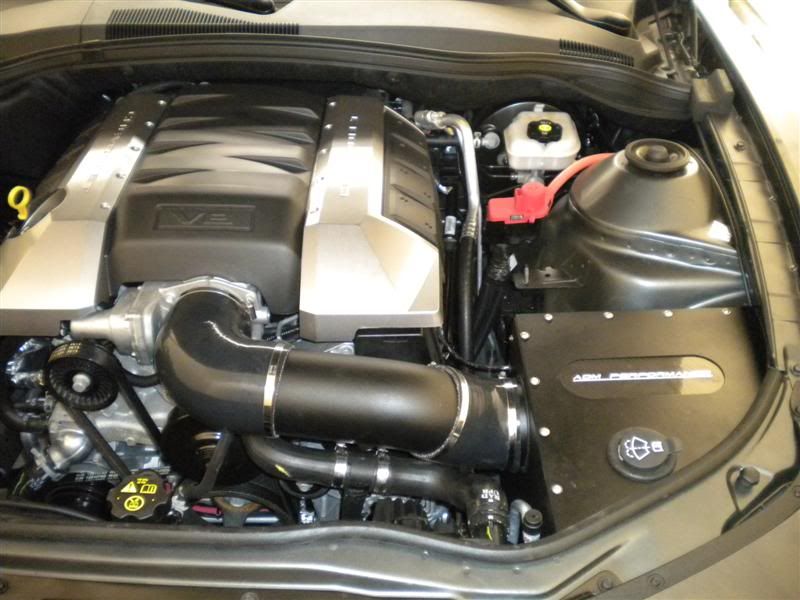 Test Drive: I'll keep this short because it's subjective. After letting the car idle for awhile to readjust to the intake I took it out for a spin. You can definatly tell the difference in DB's coming from the front end. There is for sure a lot more airflow and you can tell via olfactory. As far as the butt dyno goes I can tell there is a little more pull above 3K to redline. I would be willing to guess between 8-10hp over stock. I do not have a stock dyno nor will I have a dyno for awhile, so the rear end one will have to do. If you are still awake thanks for reading. 
Last edited by ackeight; 07-08-2010 at 05:24 PM. |

|

|
|
07-08-2010, 02:42 PM
|
#2 |
 Drives: 2006 Dodge Charger / 2SS IOM Join Date: Dec 2008
Location: United Kingdom
Posts: 1,640
|
i see u dont have to move the stock window washer bottle anymore. that is something new to me
|
|
|
|
|
07-08-2010, 02:44 PM
|
#3 | |

|
Quote:

__________________
|
|
|
|
|
|
07-08-2010, 02:45 PM
|
#4 |
|
The Mark of Excellence

Drives: 2010 ABM 1SS RS LS3 Join Date: Jan 2009
Location: Smallest State in the Union
Posts: 8,690
|
Nice write up and photo's!
__________________
BMR, CAI, DynoMax, Elite Eng., Hurst, Jannetty, Clear Image Headers & Hi Flow cats, Jet Hot, LSR, TSW, VMax, Vredestein  |
|
|
|
|
07-08-2010, 02:47 PM
|
#5 | |
|
|
Quote:
Last edited by ackeight; 07-08-2010 at 03:02 PM. |
|
|
|
|
|
07-08-2010, 02:59 PM
|
#6 |
|
Drives: 2006 Dodge Charger / 2SS IOM Join Date: Dec 2008
Location: United Kingdom
Posts: 1,640
|
in the first design u had to remove it didnt u
|
|
|
|
|
07-08-2010, 03:03 PM
|
#7 |
 |
"Here is a Question for everyone who has the ADM intake. It says the jumper cable stud will be reinstalled at a different place, but it never says where in the instructions. Where does it go?????"
Same question for me. Very easy install but I never did see where to re-install the jumper cable stud to. |
|
|
|
|
07-08-2010, 03:03 PM
|
#8 | |
|
|
Quote:
|
|
|
|
|
|
07-08-2010, 03:29 PM
|
#9 | |
|
CamaroFans.com

|
Quote:
The nice thing is most of these parts are interchangeable so if you wanted to switch to race later on you wouldn't have to buy a complete new CAI.
__________________
 |
|
|
|
|
|
07-08-2010, 03:29 PM
|
#10 |
|
Pat @ ADM PERFORMANCE

Drives: CGM SS/RS M6 Join Date: Aug 2009
Location: Prosper, TX
Posts: 506
|
KICKASS WRITE UP!
The jumper stud is installed in the available hole right next to the positive battery cable bracket on the inner fender, just behind the airbox. It utilizes the Stud that you removed and one of the original 10mm nuts removed while removing the factory air box. There are indeed 2 versions of our intake system. The Street version is for most customers. The Race version is for the true enthusiast that is not driving in inclement weather and plans to RACE their car. It deletes the factory washer bottle and installs an air scoop to vent air into our airbox. Again FANTASTIC WRITE UP. Andy devoted alot of time and thought into developing this system. He was building on his 1st shop car when tuning was not even available. He was not satisfied with the available intake products then in production and thus was born the ADM Air Box. We really appreciate your input and most of all your very informative post and feedback to EVERYONES benefit.
__________________
"old age and treachery will always overcome youth and ambition" author unknown "There are two types of racers: cheaters...and losers." Smokey Yunick  |
|
|
|
|
07-08-2010, 03:36 PM
|
#11 |
|
Okie doke

|
Nice writeup and pics
 Crowley
__________________
 |
|
|
|
|
07-08-2010, 05:20 PM
|
#12 |
 
Drives: Wild Cherry Join Date: Nov 2008
Location: Keller, Texas
Posts: 430
|
Very Nice write-up....and as Pat said Kick-ass!
__________________
2010 RJT 2SS/RS L99 CAMARO ARH 1 7/8" LT HEADERS W/ HF CATS MAGNAFLOW 3" COMP EXHAUST ADM PERFORMANCE CAI ADM PERFORMANCE CUSTOM TUNE ADM PERFORMANCE PORTED THROTTLE BODY ADM PERFORMANCE TRANS COOLER 3.45 GEARS BMR TRAILING ARMS |
|
|
|
|
07-08-2010, 05:26 PM
|
#13 |
|
|
Thanks guys. I still have my Elite Engineering catch can to write up. Then comes the Borla exhaust. Just trying to help out some C5 owners who are on the edge about a certain product/install process.
|
|
|
|
|
07-08-2010, 08:56 PM
|
#14 |
|
SOON.........

Drives: 2010 ABM SS/RS Z-281LE Join Date: Jan 2008
Location: Wolcottville, Indiana
Posts: 946
|
VERY NICE write up! If I end up getting this intake, it will be a big help.
__________________
 No, it's not a real Z/28..... No, it's not a real Z/28..... |
|
|
|
|
|
|
|
 |
|
|
 Similar Threads
|
||||
| Thread | Thread Starter | Forum | Replies | Last Post |
| Front Horn Mounts for Vararam intake | Jayhawk500 | Camaro V8 LS3 / L99 Engine, Exhaust, and Bolt-Ons | 11 | 11-09-2016 08:57 PM |
| K&N Engineering Aircharger Black Cold Air Intake | +18.62whp/18.95wtq | FREE S&H | AJ@ECSMotorsports | V8 Bolt-Ons & Tunes | 103 | 11-13-2010 03:49 PM |
| A few random shop and project pictures from TORQ | Erik@Torq | Camaro Photos | Spyshots | Video | Media Gallery | 0 | 06-24-2010 08:05 AM |
| looking for any pictures of a AIR INTAKE installed in a aqua blue camaro | camarossrs2150 | Camaro V8 LS3 / L99 Engine, Exhaust, and Bolt-Ons | 0 | 05-11-2010 03:23 PM |


