You are browsing camaro5 
|
|
 06-29-2015, 02:17 PM
|
#1 |
|
Retro Camaro Emblem - Install
Ok Guys / Gals FWIW I am not the first to do this but thought I would write up what I did.
Replace the side Camaro emblems with 1968 reproduction script emblems Part #3916660. 3M 03609 Molding tape. 5ft was plenty with about half left over
          
__________________
2014 L99 2SS. 595HP/571ft-lbs
Mods: LSA Conversion 2.5" Upper Pulley, 65# injectors, GPI SS1 Cam, SP Long Tubes, ADM Race Scoop & CAI, NPP exhaust (DIY control), BMR 1" lowering springs, ZL1 Rear Differential / Axles, CF Side Strip / Hood Spear, Tint - Windows / Tails / Sidemarkers, Splash Guards, ADM Boost Gauge, ABL Dashkit, '68 Script Badges, ACS T4 Splitter, ZL1 Rockers from Gary's, Z28 Spoiler, Carbon Fiber Hood Vent, Summer - MRR FS01 Satin Black (10" Front 11" Rear) Winter, pictured-Drag DR 64's Satin Black (9" Front-10" Rear.)  |

|

|
|
06-29-2015, 02:45 PM
|
#2 |
 Drives: Summit White 2012 1LT/RS Join Date: Dec 2010
Location: California
Posts: 191
|
looks awesome. good job man
__________________
2012 Summit White 1LT/RS
Cold Air Inductions CAI, VMaxx ported throttle body, RX catch can, Led Interior Lights, Led License plate lights, Hood Spears, Blacked Out Rear Trunk panel, Gills, Blacked Out Front Fascia, and Bow tie |
|
|
|
|
06-29-2015, 03:09 PM
|
#3 |
Drives: 1LT 2011 Camaro M6 Join Date: Sep 2013
Location: Union City, MI
Posts: 140
|
Looks great, big improvement over the block letters. I've had a pair of those for almost a year now, I was hesitating because of that hollow back, I'm going to get it done now with that JB Weld stuff, great tip!
|
|
|
|
|
06-29-2015, 06:37 PM
|
#4 |
|
|
The JB weld is messy... I would suggest only trying to fill half of each emblem at a time. Gives you something to hold onto while you are working and cleaning.
I also considered using a thinner epoxy and a syringe to inject it into the void. In the end the JB weld works and cleans very easy with water as it sets up. I found installing the double sided tape at angle's almost equal to the slant of the script made for a good base that I used a razor blade to cut off. I bet I used a half dozen. clean and share was important as you are trimming. I would also suggest trimming at an angle that will keep the tape from bubbling out when you press it on.
__________________
2014 L99 2SS. 595HP/571ft-lbs
Mods: LSA Conversion 2.5" Upper Pulley, 65# injectors, GPI SS1 Cam, SP Long Tubes, ADM Race Scoop & CAI, NPP exhaust (DIY control), BMR 1" lowering springs, ZL1 Rear Differential / Axles, CF Side Strip / Hood Spear, Tint - Windows / Tails / Sidemarkers, Splash Guards, ADM Boost Gauge, ABL Dashkit, '68 Script Badges, ACS T4 Splitter, ZL1 Rockers from Gary's, Z28 Spoiler, Carbon Fiber Hood Vent, Summer - MRR FS01 Satin Black (10" Front 11" Rear) Winter, pictured-Drag DR 64's Satin Black (9" Front-10" Rear.) |
|
|
|
|
06-29-2015, 06:37 PM
|
#5 |
|
War Horse Pilot

|
Nice install!
__________________
COTW 09/07/2015 - 2014 AGM 2SS/RS - RIP 6/01/17
2017 Nightfall Gray Metallic 1SS 1LE Born 5/17/17 - Click Sig Pic below for for Demon War Horse 02 Build Thread  SigPic by Hazman |
|
|
|
|
07-02-2015, 10:40 AM
|
#6 |
|
Drives: 2011 2ss/rs Join Date: Dec 2014
Location: hershey
Posts: 162
|
Sweet!!!
|
|
|
|
|
07-02-2015, 12:16 PM
|
#7 |
|
looks awesome!
__________________
 |
|
|
|
|
07-02-2015, 01:06 PM
|
#8 |

|
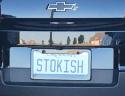
I definitely like it. Here is mine.
__________________
 |
|
|
|
|
07-02-2015, 02:32 PM
|
#9 |
|
Drives: 1LT 2011 Camaro M6 Join Date: Sep 2013
Location: Union City, MI
Posts: 140
|
Looks cool with the crossed flags, Bfastnotlast!Thanks for the tips, Dentsnhell, I'm going to do it during this 3 day weekend!
|
|
|
|
|
07-03-2015, 06:32 AM
|
#10 |
 Drives: 2011 1SS Red jewel tint Join Date: Jun 2015
Location: Agawam MA
Posts: 32
|
That's a nice classy upgrade with a nice attention to detail. Really clean install.
'Moe |
|
|
|
|
|
|
|
 |
|
|


