You are browsing camaro5 

|
 04-11-2011, 09:01 PM
|
#1 |
|
Whipped

|
Well, I have the PDF form and such, but I'm still a little lost on how to remove some things and in what order to do it.
Right now I have the center console out. The silver plastic strip across the dash, and the end dash panels. Next? Steering wheel? Radio? I've tried to use a screw driver and push in the holes by the steering wheel to pop off the air bag and I can't seem to do this correctly. Am I to do one side at a time or both? Not sure if I am even pushing the right thing in to pop it off.
__________________
|

|

|
|
04-11-2011, 09:07 PM
|
#2 |
   
Drives: aqua 2ss l99 Join Date: Jun 2009
Location: Edmonton
Posts: 1,215
|
one side at a time works.
heres a pic i placed things pretty much as i took them off one at a time, from left to right. this is a 4x8' sheet its all on. 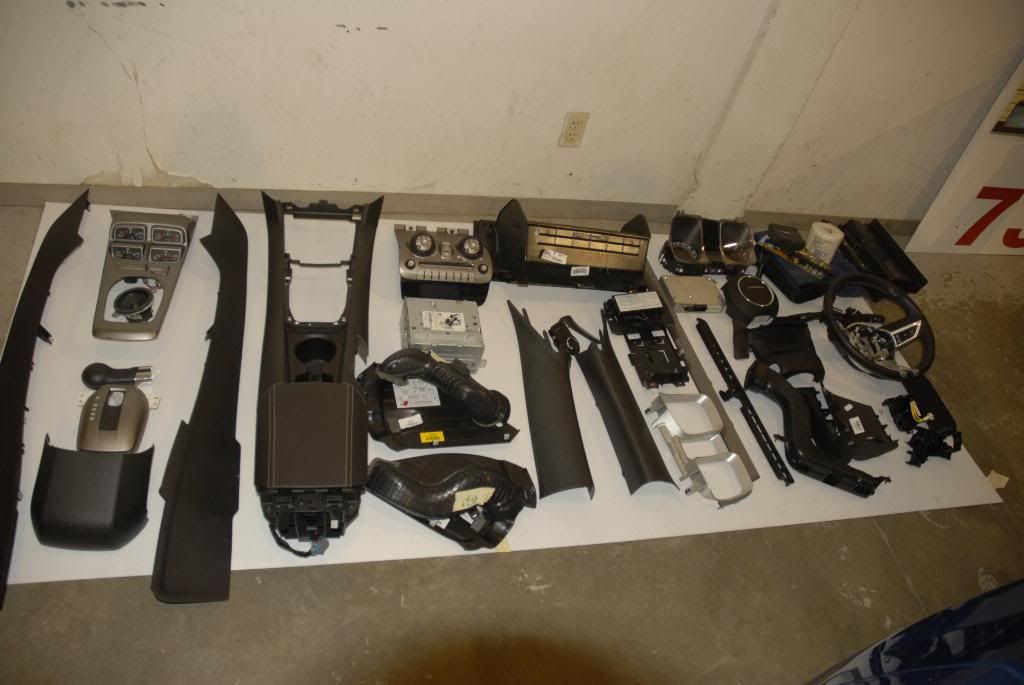 when it was install time, i started from the right. and soon it will look like this. 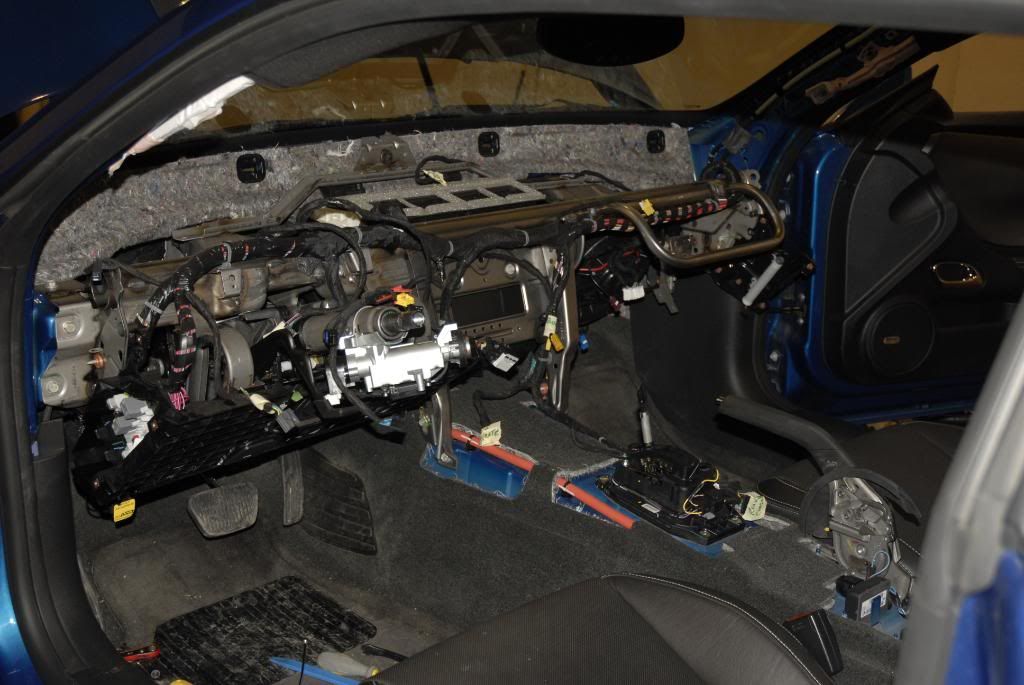
__________________
May your exhaust note, sing in harmony with your blower.
|
|
|
|
|
04-11-2011, 09:15 PM
|
#3 |
|
Drives: aqua 2ss l99 Join Date: Jun 2009
Location: Edmonton
Posts: 1,215
|
also, before the aribags are touched, remove airbag fuses, or disconnect negative from battery. also, wait 15 mins before unhooking them.
and when you thing you have the entire dash unbolted, and it wont come... theres a hidden screw 3 inches behind the hole you cut for hud switch.
__________________
May your exhaust note, sing in harmony with your blower.
|
|
|
|
|
04-12-2011, 12:55 PM
|
#4 |
|
Whipped
|
I thought I seen a picture of the airbag off of the steering wheel. . . Showed where and what to push in to get it out...
I can't seem to find this now... anyone know where it is?
__________________
|
|
|
|
|
04-13-2011, 07:20 PM
|
#5 |
 
Drives: 2017 Raptor, 2017 SS Join Date: Feb 2010
Location: Charleston, SC
Posts: 277
|
http://www.camaro5.com/forums/showth...radio+controls in this thread a few post down (#7/#8)
|
|
|
|
|
04-13-2011, 07:23 PM
|
#6 |
|
Whipped
|
dude, thanks so much. . that's what I'm looking for.
__________________
|
|
|
|
|
04-14-2011, 08:53 AM
|
#7 |
|
Whipped
|
Question... Do you have to mark the steering wheel to make sure it goes back on the correct way?
__________________
|
|
|
|
|
04-14-2011, 11:46 AM
|
#8 | |
|
xbox: this is tedious

|
I'd have to imagine it would only go on one way. Could be wrong though
 Has anyone done this with a 2011 1SS? I'm considering trying this but looks a bit over my head
__________________
Big Carrot's Changes - It's a work in progress   Quote:
|
|
|
|
|
|
04-14-2011, 12:02 PM
|
#9 |
|
Whipped
|
guess my "fear" is not lining the teeth on the steering wheel and post in the car the same as it came out... 4-5 teeth off, now the steering wheel isn't centered with the wheels.
__________________
|
|
|
|
|
04-14-2011, 12:43 PM
|
#10 | ||
|
xbox: this is tedious
|
Quote:
__________________
Big Carrot's Changes - It's a work in progress Quote:
|
||
|
|
|
|
04-14-2011, 02:14 PM
|
#11 | |||
|
Drives: 2017 Raptor, 2017 SS Join Date: Feb 2010
Location: Charleston, SC
Posts: 277
|
Quote:
Quote:
I am going to put a few more miles on my vert (it has 148 as of this morning) before I pull the dash apart. I read that our cars may be prewired for this, but I will still have to disassemble the instrument bezel to check. I still need to find out exactly what I am looking for though. Quote:
|
|||
|
|
|
|
04-14-2011, 02:26 PM
|
#12 |
|
Drives: aqua 2ss l99 Join Date: Jun 2009
Location: Edmonton
Posts: 1,215
|
when the airbag is off. the steering wheel spline has a center mark.
i used a punch and marked the wheel adjacent to the factory mark,. and you cant screw that up...... id be carefull to clock the wheel position censor correctly upon reinstall.
__________________
May your exhaust note, sing in harmony with your blower.
|
|
|
|
|
04-14-2011, 03:17 PM
|
#13 | ||
|
xbox: this is tedious
|
Quote:
__________________
Big Carrot's Changes - It's a work in progress Quote:
|
||
|
|
|
|
04-14-2011, 03:29 PM
|
#14 | |
|
Live for On Ramps!

Drives: 2010 Camaro/2LT/RS/T.F./6M "naomi" Join Date: Feb 2010
Location: Phoenix
Posts: 185
|
Quote:
You might want to check out post #1135 of the following thread. And you do have to push the latch almost 3/8 of an inch, to get it to move the 1/8 inch where it is hooking on to the Air Bag. http://www.camaro5.com/forums/showth...=93729&page=10 Joe Starting with post #1265 has a combination of all the photos and some splaining also! (Same Thread as above.) Last edited by STINGS; 04-14-2011 at 03:42 PM. |
|
|
|
|
|
|
|
|
 |
| Thread Tools | |
|
|
 Similar Threads
|
||||
| Thread | Thread Starter | Forum | Replies | Last Post |
| Add HUD to your 2010 | 2SSRS@Gen5diy | Camaro DIY & HOW-TO instructions & discussions | 1993 | 03-30-2019 08:02 AM |
| HUD>>>First 2010 HUD install in the country completed, 2010 Camaro, Steve Doten; | SteveDoten | Camaro DIY & HOW-TO instructions & discussions | 16 | 05-10-2011 09:19 PM |
| Install pics or step by step. DIY on T3 ports? | ROBBDOGG1986 | Camaro DIY & HOW-TO instructions & discussions | 11 | 09-21-2010 10:43 PM |
| Who wants the HUD system available ASAP? | linkwpc | Audio, Video, Bluetooth, Navigation, Radar, Electronics Forum | 72 | 04-27-2010 12:14 AM |
| M45 Blinder X-treme laser jammer install | klove | Camaro DIY & HOW-TO instructions & discussions | 7 | 12-10-2009 03:39 PM |


