You are browsing camaro5 

 |
|
|
#71 |
          Drives: 2010 camaro Join Date: Aug 2009
Location: port st lucie ,florida
Posts: 4,273
|
murphy,s law, this ain,t overhaulin..lol
__________________
 |
|
|

|
|
|
#72 |
 Drives: 2013 2SS 1LE Join Date: Mar 2013
Location: United States
Posts: 134
|
so, yesterday i'm complaining about how long this is taking me...
today i decided to do something about it. i work quite a bit, and normally feel too tired to bust out some more work when getting home. tonight i got home at 6, and while not much can be done in 1 hour, it's one less thing that i need to do later  i masked up a few areas that i was going to be glassing and didn't want to get messy, and took to it ... i laid down 1-2 layers of chop on the top and around the back side of the top of the enclosure... the parts that's harder to get inside the enclosure, and then laid up about 2-3 layers of woven mat on top of the chop to finish it out. the rest of the enclosure can be strengthened from the inside, so that's what i will do next. left and right sides .... so purrty...  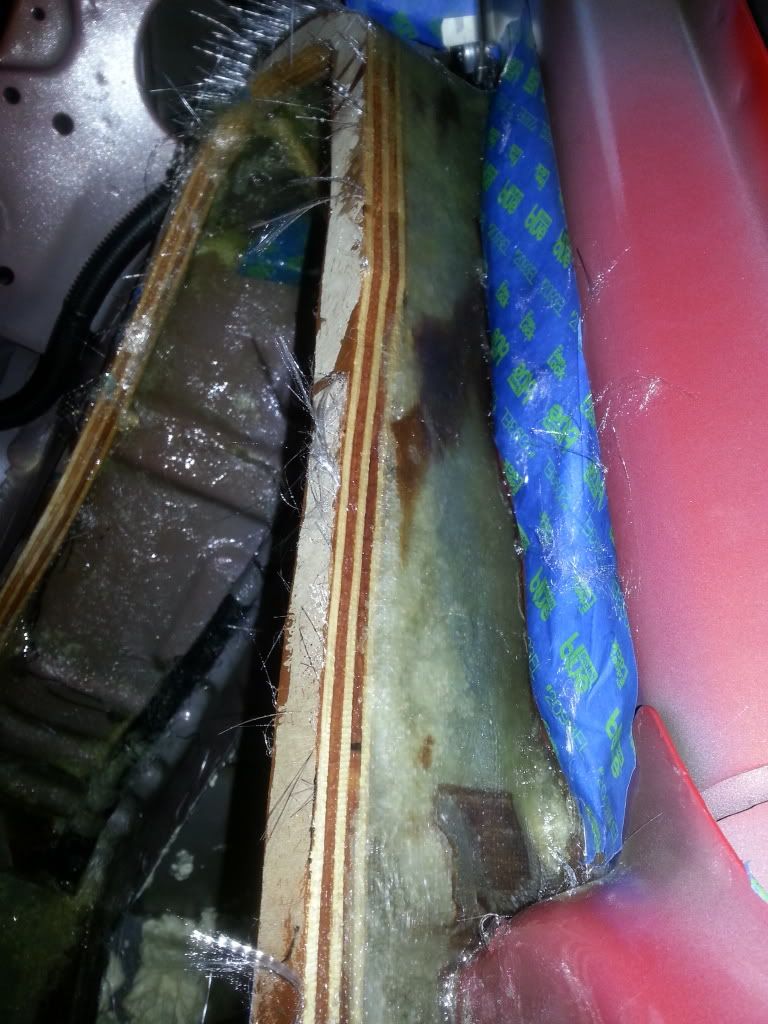 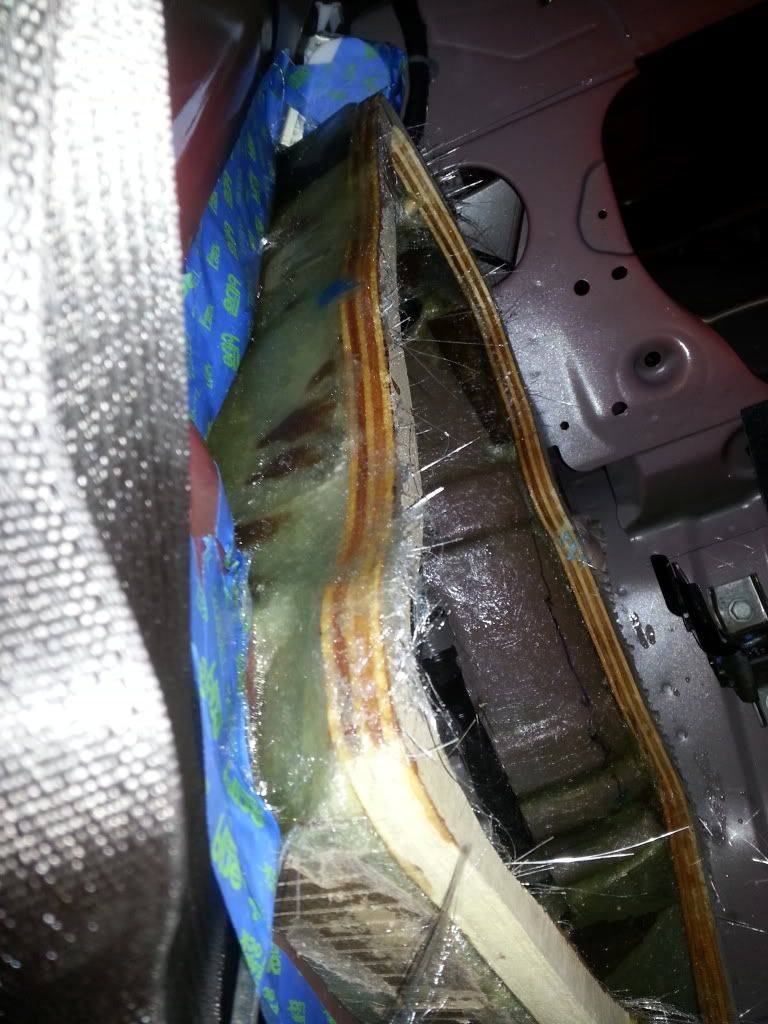 no holes, no gaps, and i'll make a sludge mix when all is done and slather the inside for final strength. last night i also finished wrapping the 2nd AS 200.4, and need to order some more carbon wrap for the A Class and the remaining pieces of the install that I'll be trimming out. |
|
|

|
|
|
#73 |
|
Tampa Bay Camaros
Drives: 2016 Camaro 2SS, Hyper Blue Join Date: Jan 2013
Location: New Port Richey, Florida
Posts: 253
|
Wow that is a lot of serious work! It's coming along really well, but man I'd be pretty nervous about glassing right over those wire harnesses. Needless to say if there is ever a wiring issue it would be near impossible to get to without tearing out the fiberglass.

|
|
|

|
|
|
#74 |
 Drives: 2013 2SS 1LE Join Date: Mar 2013
Location: United States
Posts: 134
|
^ yes true... but how often do you have a "wire" issue where you need to replace wires that are in a bundle? its normally not a wirin bundle that goes bad... at least that was my thoughts.
|
|
|

|
|
|
#75 |
 Drives: 2013 1LS, 2013 Ram 1500 Join Date: Mar 2013
Location: Minneapolis, mn
Posts: 645
|
I was thinking the same thing about wiring. If it was me i would have protected it with tape or a foil something so you can still get the contour tightly, but are still able to get it out. even if you mix your resin too hot it can melt your wires.
|
|
|

|
|
|
#76 |
 Drives: 2013 2SS 1LE Join Date: Mar 2013
Location: United States
Posts: 134
|
^ no matter what, the wiring bundle is not going to be accessible, as the enclosure is fiberglassed directly to the car, so none of this was a concern. in addition, the wiring bundle is loose and is not glassed, with the exception with the entrance and exit from the enclosure.
everything is working fine, so i know the wires didn't melt. i admit, it's not very "repair" friendly, but nor is any part of this enclosure. if i had to do it again i would have protected it "just in case", but again... i didn't see it, nor has it become, a big issue. Last edited by mattyjman; 04-25-2013 at 09:28 PM. |
|
|

|
|
|
#77 |
 Drives: 2013 2SS 1LE Join Date: Mar 2013
Location: United States
Posts: 134
|
ok, still not much to do as i make meager progress with the midbass pods.
i layed down a healthy amount of layers of kyntex to the inside portion of the enclosure... this is a much thicker mat and allows a quick, strong build up, but it suffers in formability. lucky for me, formability isn't much of an issue since the panels are flat for the most part. on the passenger side, i did the back wall first, and then the sides to the left and right of it. i repeated the same on the drivers side but was only able to get the back wall done before it got dark. i think i may have about 4 oz of resin left, enough to do the side walls tomorrow. 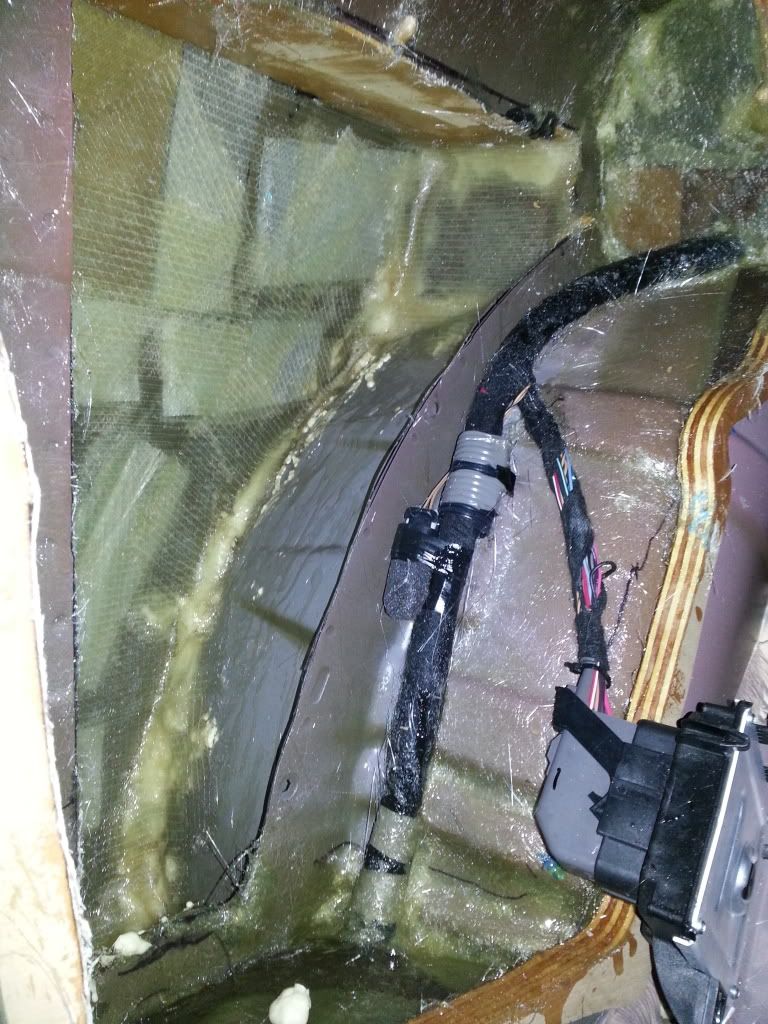 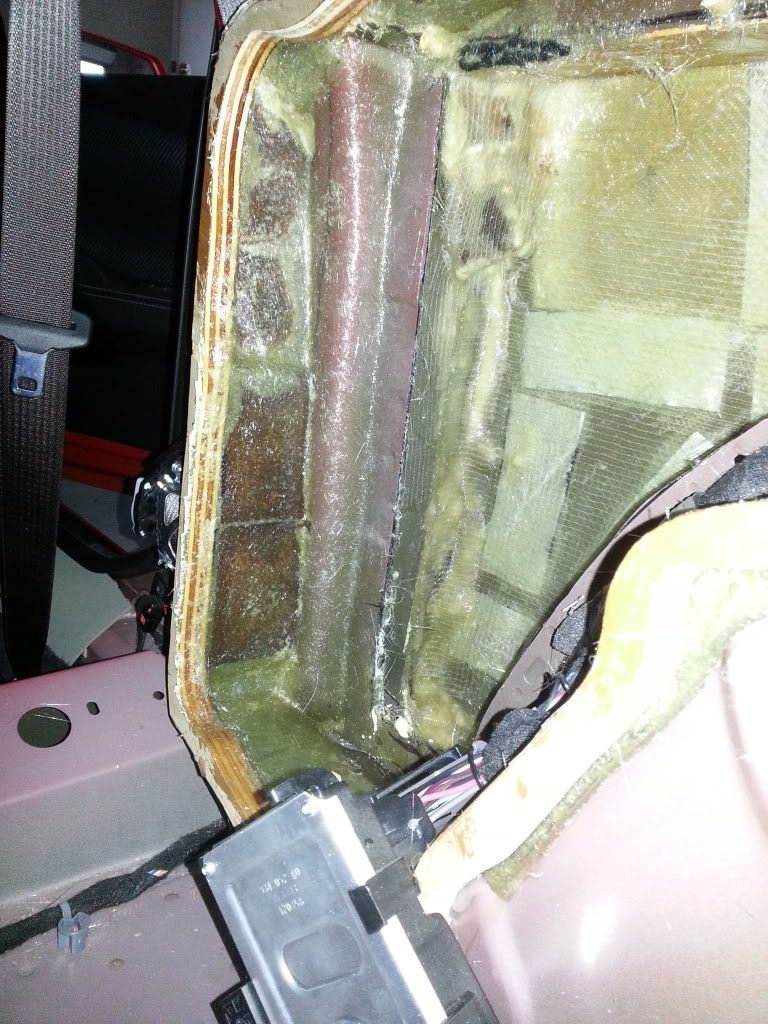 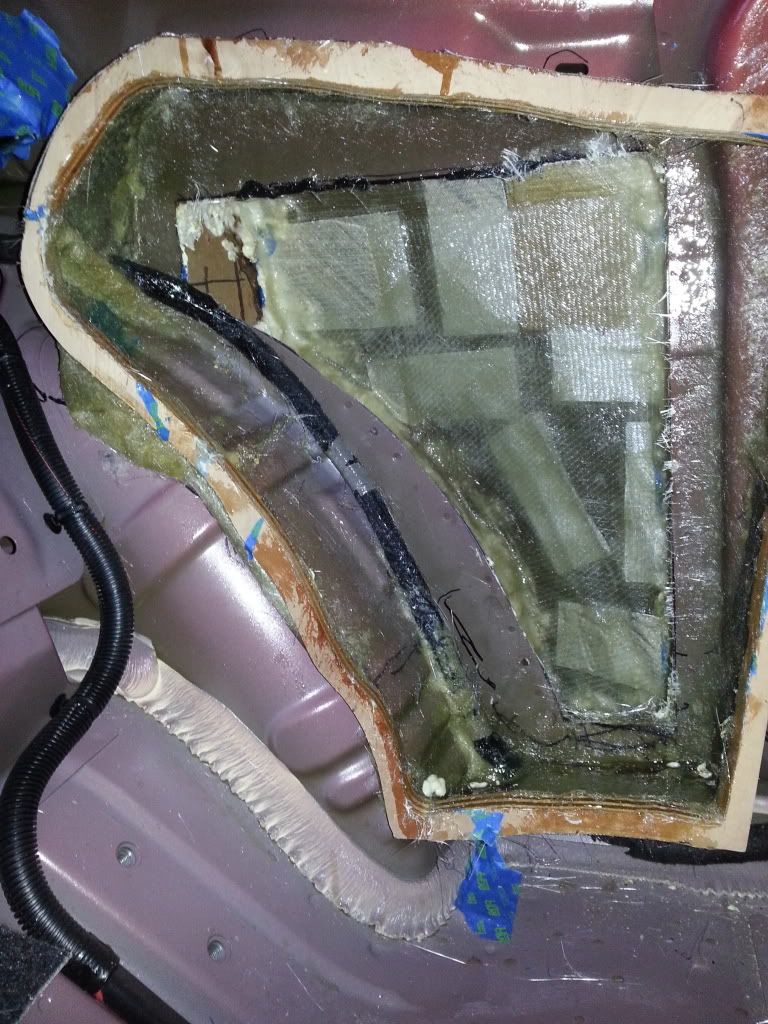 (looking at this made me laugh... made me remember just how far I've come in my install ability. the g35 was my first real build, but i knew nothing then ...  http://www.diymobileaudio.com/forum/904799-post109.html ) http://www.diymobileaudio.com/forum/904799-post109.html )so, with there only being a bit of resin left before I'm completely dry, I placed an order last night for some goodies... looks like i'll need to take a departure from the pods and focus on some other areas.... this weekend, I hope to be able to start addressing some of the trunk pieces... amp rack, IB wall, bitone mount, and battery relocation... and of course, i still need to do mlv and stuffs back there. making progress. slow and steady wins the race. |
|
|

|
|
|
#78 |
        Drives: 2ss/rs vr 6m Join Date: Mar 2009
Location: New Port Richey,fl
Posts: 2,831
|
Looks good man, Rome wasn't built in a day...
|
|
|

|
|
|
#79 |
 Drives: 2013 2SS 1LE Join Date: Mar 2013
Location: United States
Posts: 134
|
minor update, since today is friday... just got the drivers side walls done. 3 layers of kyntex each...
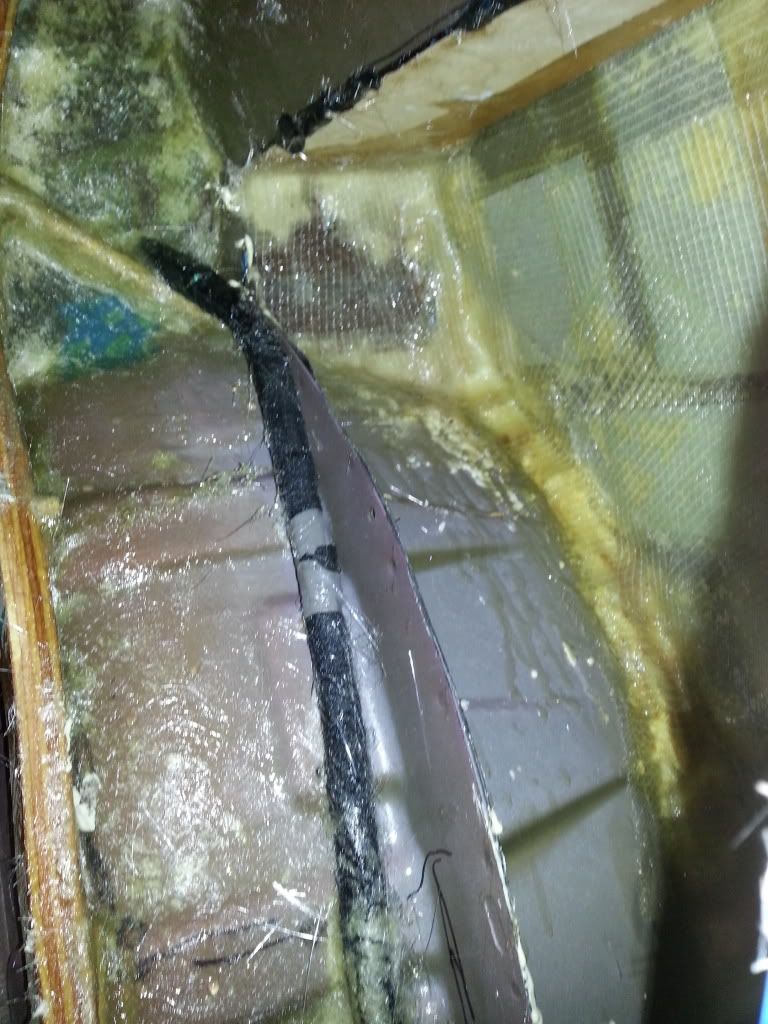 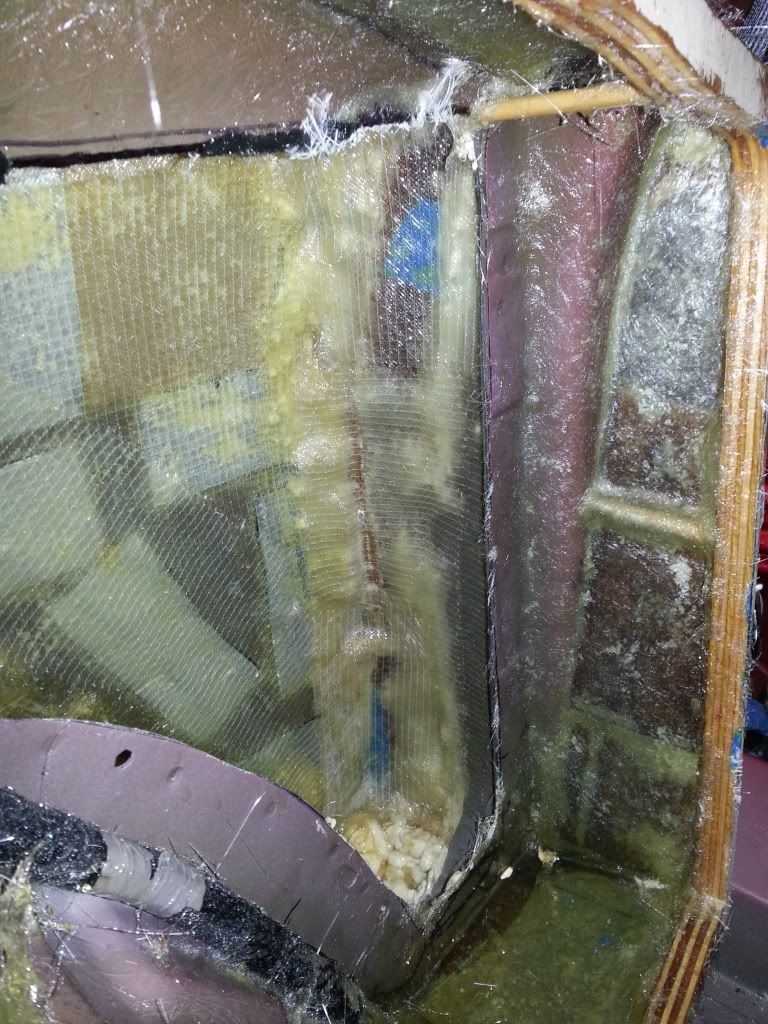 quick note about expanding foam - it dissolves slowly with resin... luckily not fast enough to be a worry in this case, but i thought it was interesting to note. so, tapping around on the exterior panel was fun... all around it sounds like it should, flimsy sheet metal with nothing around it... then you get to the enclosure, and you get a satisfying thud. with the exception of the mud paste i'll be applying, this marks the end of the fiberglassing of the inner midbass tubs    NOW I can say I'm making progress... 
|
|
|

|
|
|
#80 |
|
Its so hard
Drives: 2010 SS, 2009 Yamaha Warrior Join Date: May 2012
Location: San Antonio
Posts: 295
|
Update?
|
|
|

|
|
|
#81 |
 Drives: 2013 2SS 1LE Join Date: Mar 2013
Location: United States
Posts: 134
|
sure, i got the other amp wrapped
 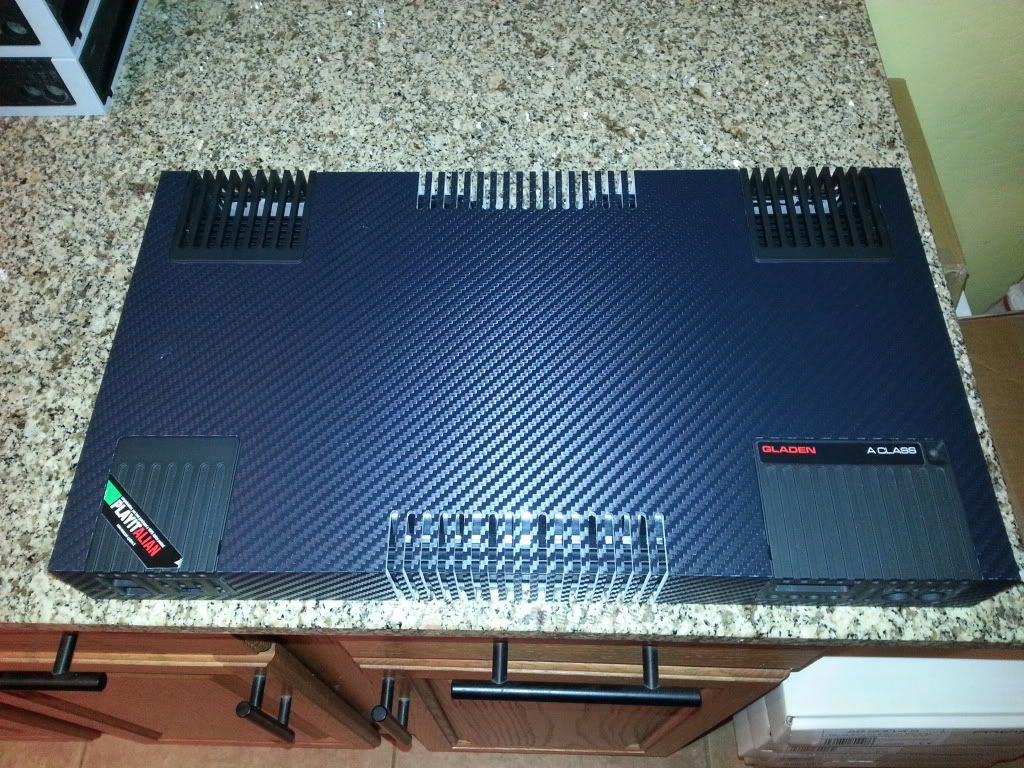 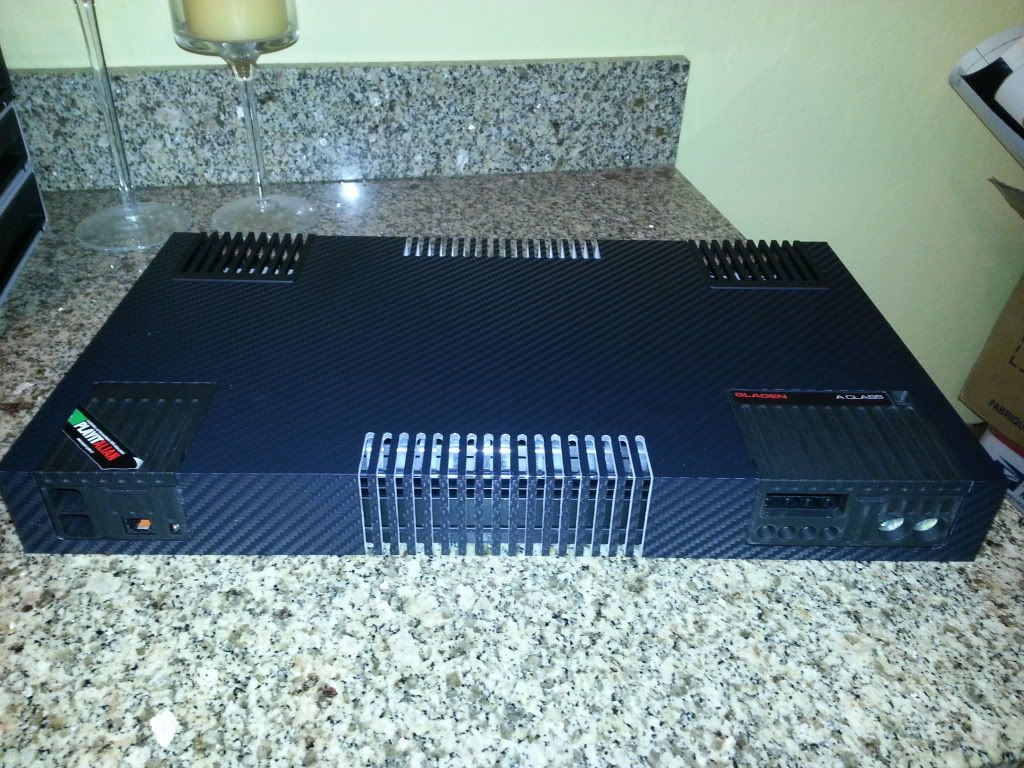 and a "guts" shot for any electronics geeks  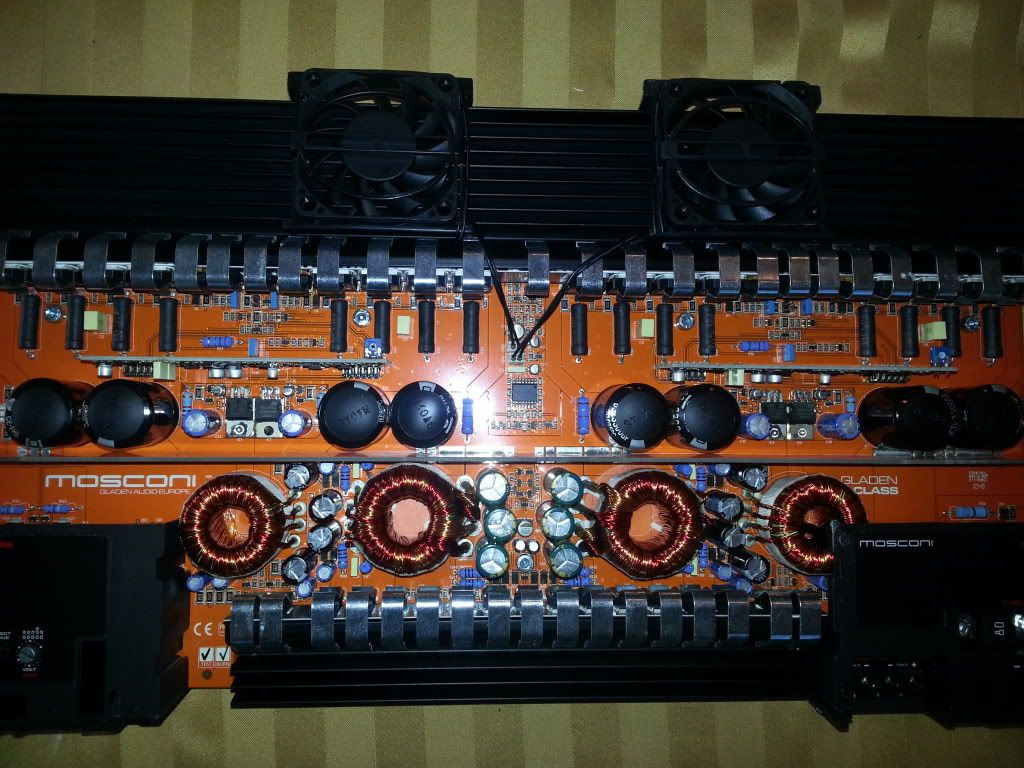 other news, I'm waiting on my order of replacement resin to finish up the midbass pods. and I'm outsourcing some metal fab work for the trunk. tomorrow I drop the car off at a buddies shop, and he'll be doing the fabrication for the amp rack, bitone rack, and battery replacement rack... while he has it, he'll be cutting the kicks, and i'll be moving my midrange speakers to the kick area (i'd do it myslef, but i figured if he's got it, why not  ) ... this should improve depth and decrease path length differences so I don't have to use as much eq and time alignment to get good staging for both passengers. width will be increased as well, since i'll be recessing them "in" to the kick panel area about 1/4" ... this will be outside of the boundaries of the a-pillars... so if the staging is done right, i should get a stage wider than the physical boundaries of the car ) ... this should improve depth and decrease path length differences so I don't have to use as much eq and time alignment to get good staging for both passengers. width will be increased as well, since i'll be recessing them "in" to the kick panel area about 1/4" ... this will be outside of the boundaries of the a-pillars... so if the staging is done right, i should get a stage wider than the physical boundaries of the car  i'm also getting tint done at the same time, and upgrading the battery to a Stinger battery... once that is returned to me, I'll resume work and hopefully within another week or so, have everything wired up at least. finishing work on panels, amp rack, kick panel areas will take a while, but I'll at least have a functional stereo while i'm doing that. |
|
|

|
|
|
#82 |
|
Its so hard
Drives: 2010 SS, 2009 Yamaha Warrior Join Date: May 2012
Location: San Antonio
Posts: 295
|
I'm assuming you have some quality recording stuff as well. If you do could you record the sound when your finished with your install?
|
|
|

|
|
|
#83 |
 Drives: 2013 2SS 1LE Join Date: Mar 2013
Location: United States
Posts: 134
|
i don't actually... never really thought you could capture the same experience over video so i've never tried. i'll definitely post up my listening impressions though
|
|
|

|
|
|
#84 |
 Drives: 2013 2SS 1LE Join Date: Mar 2013
Location: United States
Posts: 134
|
so, minor update but i'm so stoked that i can't wait for more pictures. my buddy Jon, from Handcrafted Car Audio in Mesa, is working on the metal fab portions I mentioned earlier.
Looking at the (almost) final for the amp rack I realize now just how challenging I made it, and he came through like a champ  There is NO way I could have taken what I wanted to do, and done it with my woodworking skills... metal fab was the only way to go. There is NO way I could have taken what I wanted to do, and done it with my woodworking skills... metal fab was the only way to go. more to come and more pieces to display, but here's a teaser until I get it all back. 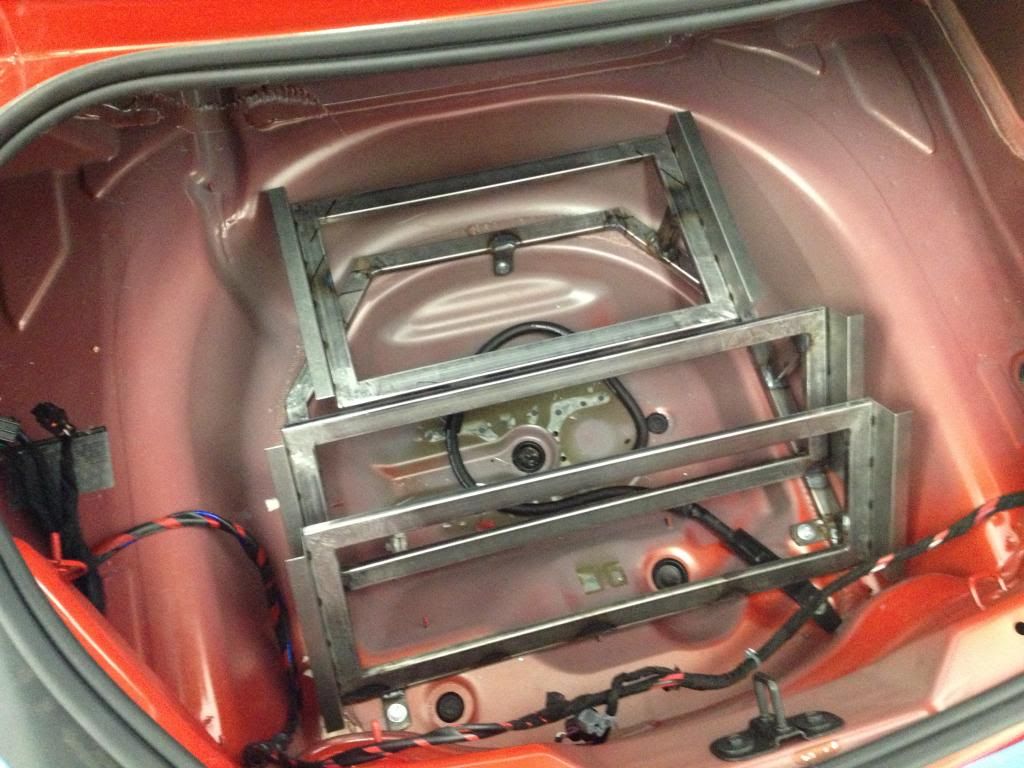
|
|
|

|
|
|
|
|
 |
|
|