You are browsing camaro5 

|
 06-16-2012, 06:50 PM
|
#85 |
|
M6 9 second club

Drives: A 4000 Lb BeaSSt Join Date: Jul 2009
Location: Crackin Azz on a hi-way near you
Posts: 1,033
|
Bushings are in! Shifter is tighter than mosquito pu$$y! Install is a little involved and I did take some pics of how I did it. I will try and post them up today when I get home or tomorrow
 Thanks again NH-SS for making these bushings for us 
__________________
 TEAM LS3 Best pass: 9.61 @ 146 with M6 TEAM LS3 Best pass: 9.61 @ 146 with M6TBDRWHP TBDRWTQ ECS S/C 408, YSi, m6, Mantic Triple, ZL1 diff #BuiltByJRod.... J-Rod's Speed Shop.... Tuned by: Matt Sorian @ MS Tuning Check out my youtube channel: http://www.youtube.com/user/6410Jrod Follow me on Instagram: @J_Rod6410 |

|

|
|
06-16-2012, 08:30 PM
|
#86 |
 Drives: 2010 SS2,6M Join Date: May 2012
Location: NH
Posts: 80
|
Nice !!
|
|
|
|
|
06-17-2012, 01:17 AM
|
#87 |
          
Drives: 2021 1LE Join Date: Jul 2011
Location: N'Awlinz
Posts: 6,315
|
installing in the morning... cant wait.. been having trouble hitting first sometimes, yep first... hope taking the slop out helps....
Thanks for the fast ship... very well packaged... obviously you are compulsive about details... PERFECT. |
|
|
|
|
06-17-2012, 04:54 AM
|
#88 |
|
ʇuɐıʌǝp lɐıɔos
Drives: 2011 2SS/RS LS3/M6 Join Date: Feb 2011
Location: Pennsylvania
Posts: 231
|
Bushing received. Nice work.
|
|
|
|
|
06-17-2012, 10:34 AM
|
#89 |
 
Drives: 2011 Camaro 2SS/RS Join Date: Mar 2012
Location: SoCal
Posts: 29
|
pm sent
__________________
2011 2SS/RS SIM w/ Chrome Stock Wheels and AirLift Suspension
 |
|
|
|
|
06-17-2012, 11:36 PM
|
#90 |
|
Jersey Jeff

Drives: 1969 Camaro L89/T400 ~ 2015 ZL1 Join Date: May 2011
Location: Jersey
Posts: 548
|
PM sent.
__________________
 JerseyJeff |
|
|
|
|
06-18-2012, 02:34 AM
|
#91 |
|
M6 9 second club
Drives: A 4000 Lb BeaSSt Join Date: Jul 2009
Location: Crackin Azz on a hi-way near you
Posts: 1,033
|
Again I can def say these bushings are simply amazing!! My car feels totally different. The last time I went to the track a month ago I was about to run a personal best time.....................but I missed 4th gear due to the slop
 Well that shouldnt be a problem any more First off these things look like jewelry..............beautiful and very precisely made. Eeven the packaging they came in and the instruction sheet is very professional and impressive New bushings 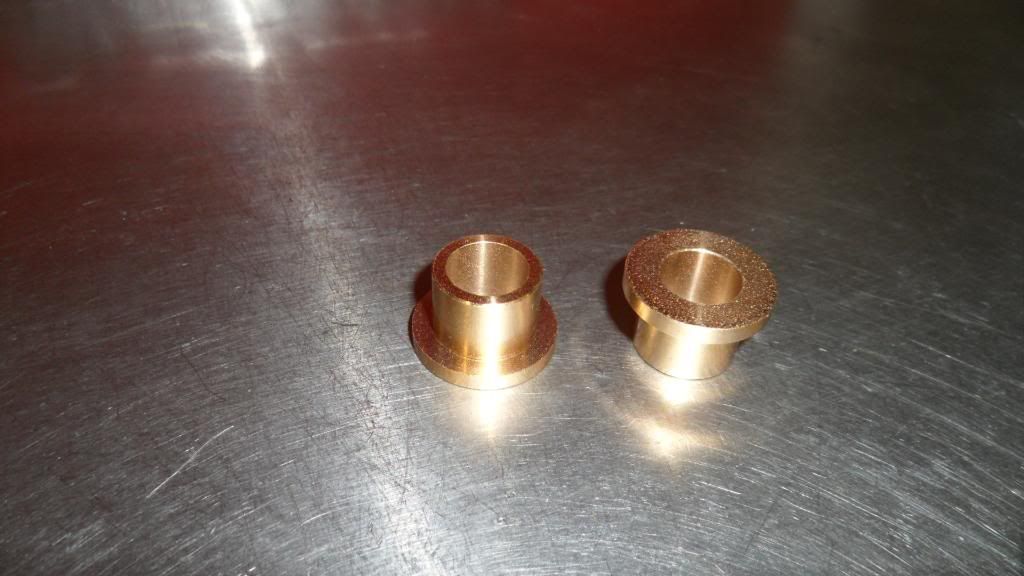 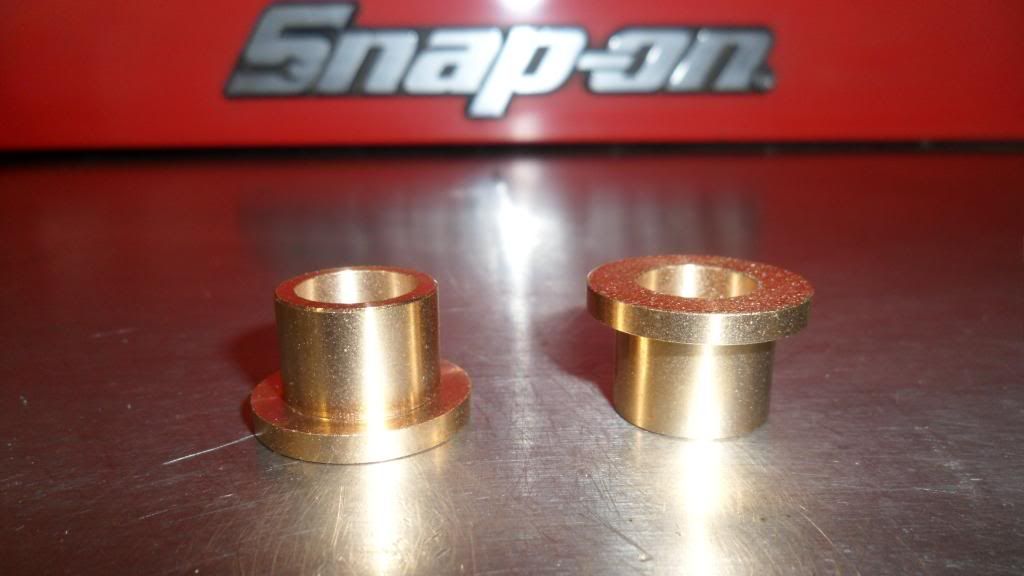 First off I disconnected the linkage and removed the worn out cheap hurst bushings. Note that these are only a few months old  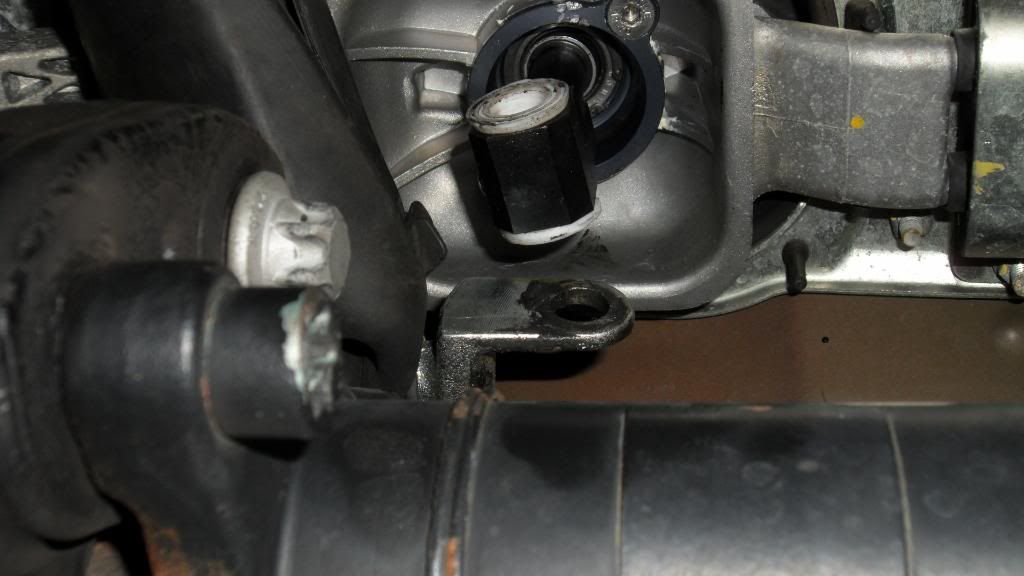 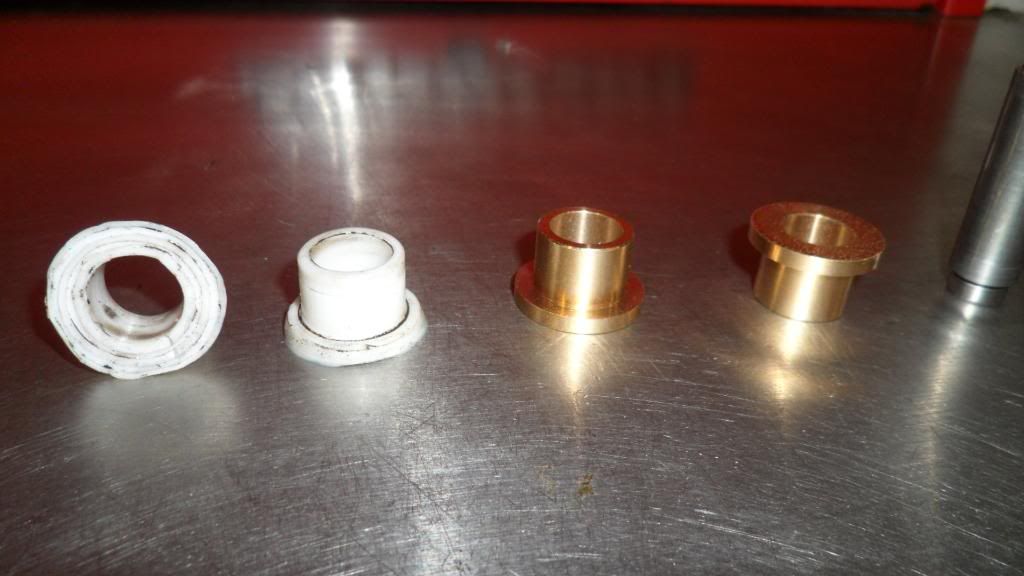 Notice the gap between the shifter pin and hurst bushing     PLEASE NOTE: I have been a professional auto repair tech for over 20 years. With that being said when you guys do this please follow the directions to the T. My shifter could not be removed from the vehicle since one of the small allen screws that hold it in is completely stripped. This is due to me having to re-install my stock shifter back in several times dealing with the bad bushings and trying to find someone to make some better bushings. I was unsuccessfull. Therefore, I did not have a replacement allen screw and being that this is what I do for a living I had to improvise on some of the instructions but I strongly advise against it since you can easily damage the new bushings by not following the provided instructions. next step, installing the new bushings into the shifter after cleaning out the shifter bushing housing. I was able to put them in by hand almost all the way in but you have to be extra careful to put them in perfectly straight. The tolerance is simply perfect  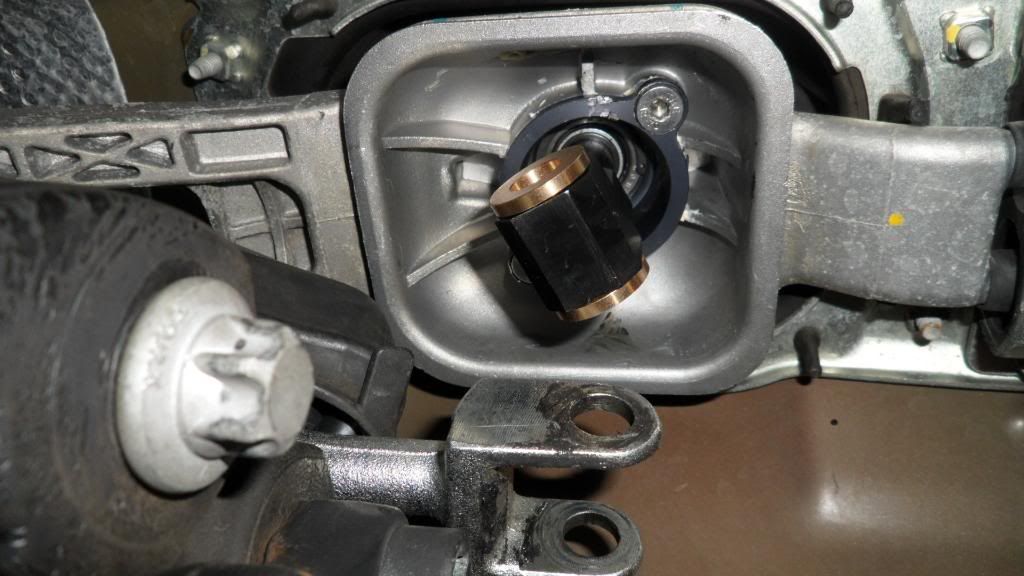 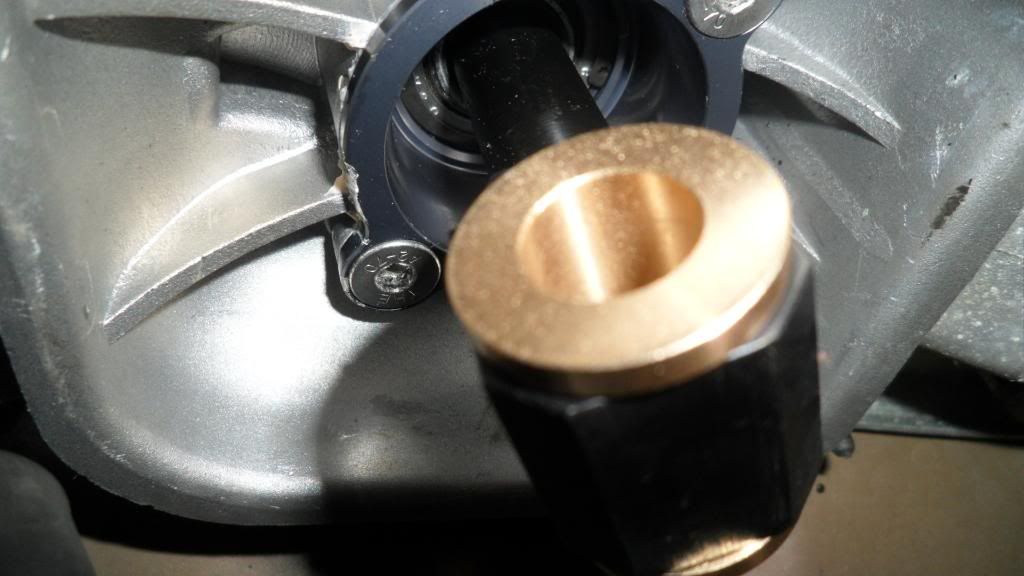 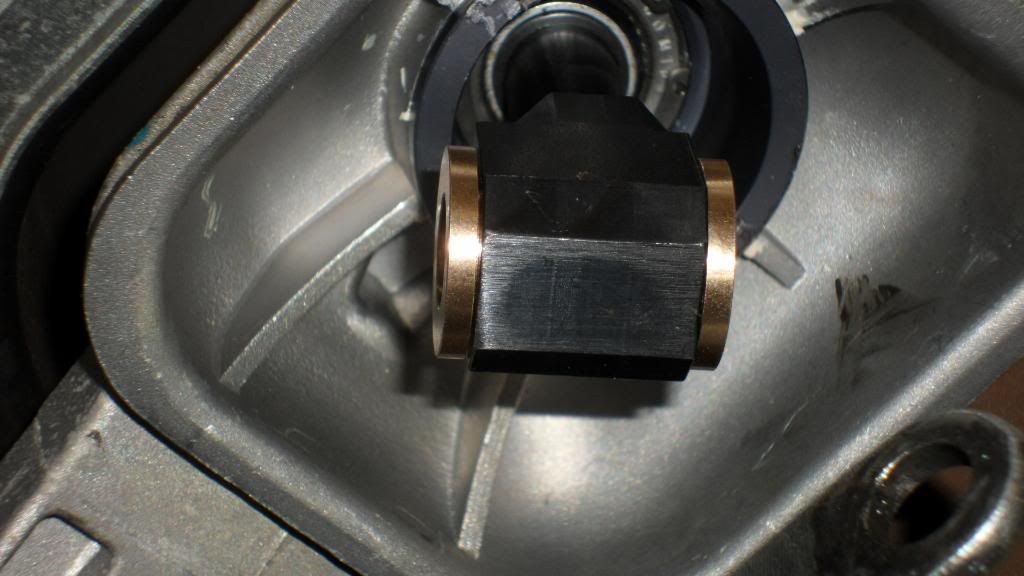 For the final pressing in my tool of choice was a c-clamp vise grip with flat ends and started putting clamping force on them slowly and evenly till they seated completely. Again, a PERFECT FIT! 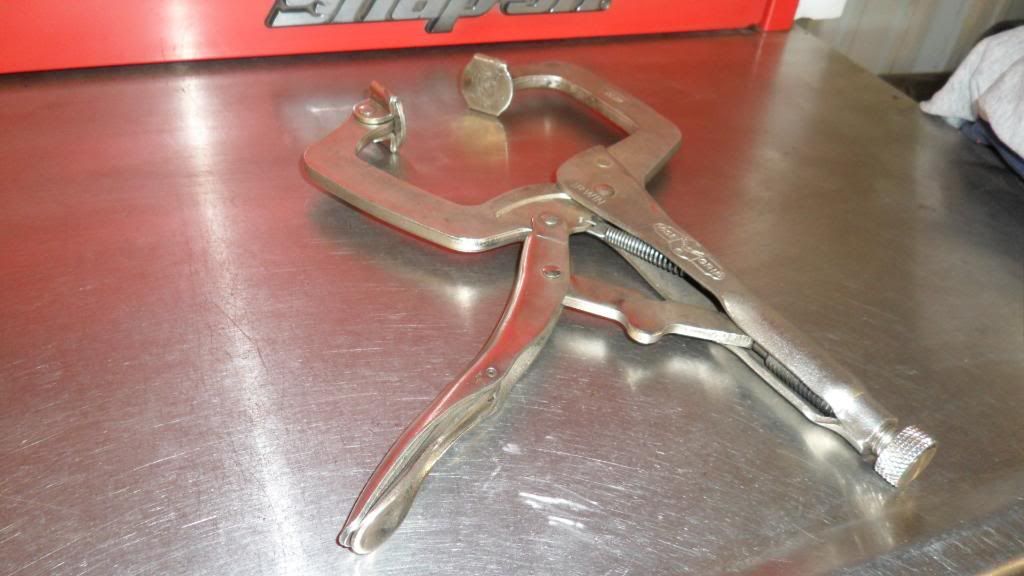 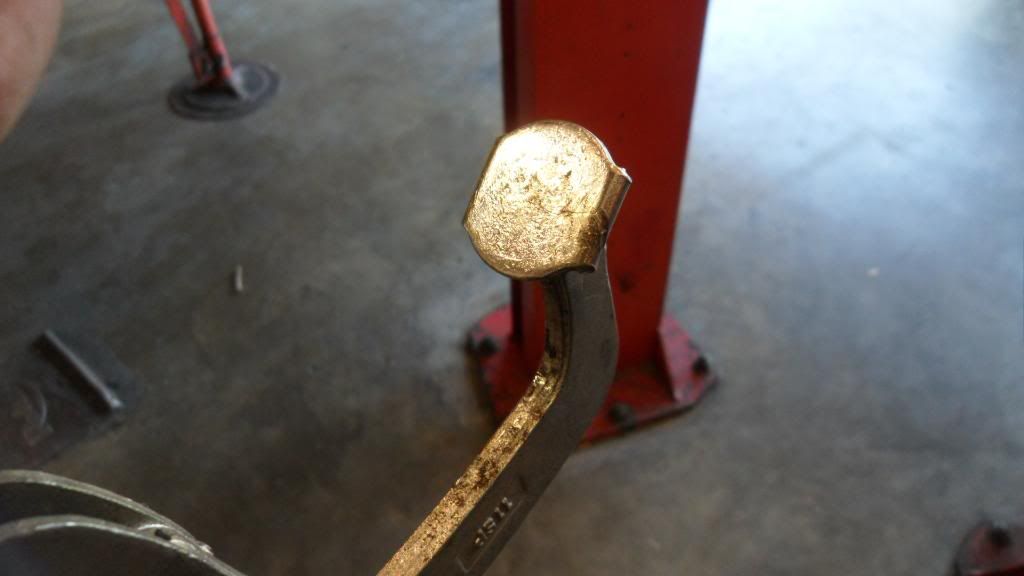 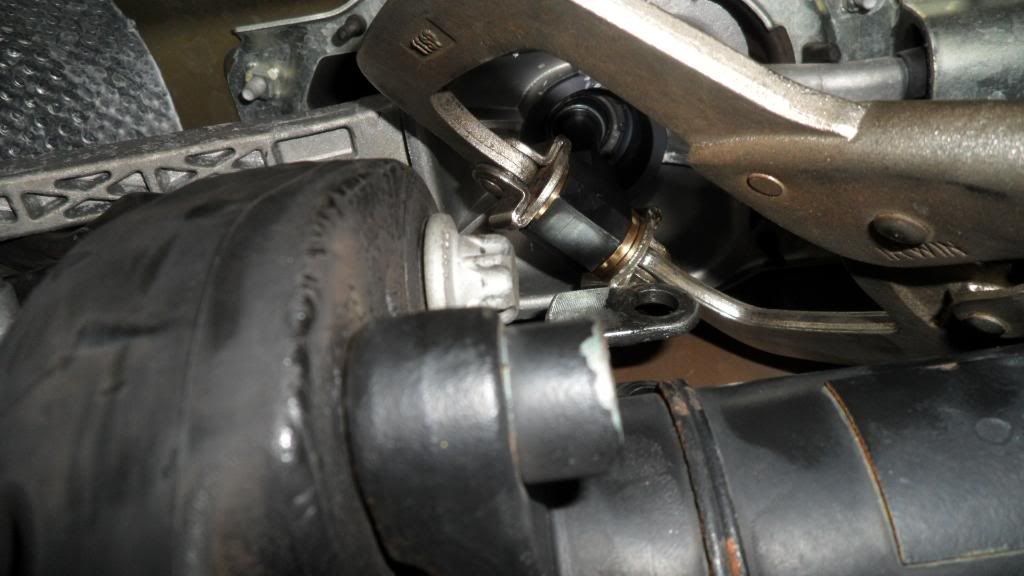  Next, burnishing in the bushings with the shifter pin. Note the instructions say to use a drill. You must use a 1/2 inch drill because the pin is too big for a 3/8" drill. Again I improvised since I didnt have a 1/2" drill at the shop(Sorry NH-SS)but my car was torn apart so I couldnt go get the 1/2" drill from home. The only tool I had that would hold the pin was a stud extractor so I put that on my air ratchet and used that. The air ratchet turns at about 200 rpm so the speed was good. Put a little grease on the pin and started going at it. You must be vey careful to make sure the pin is perfectly straight with the bushing. 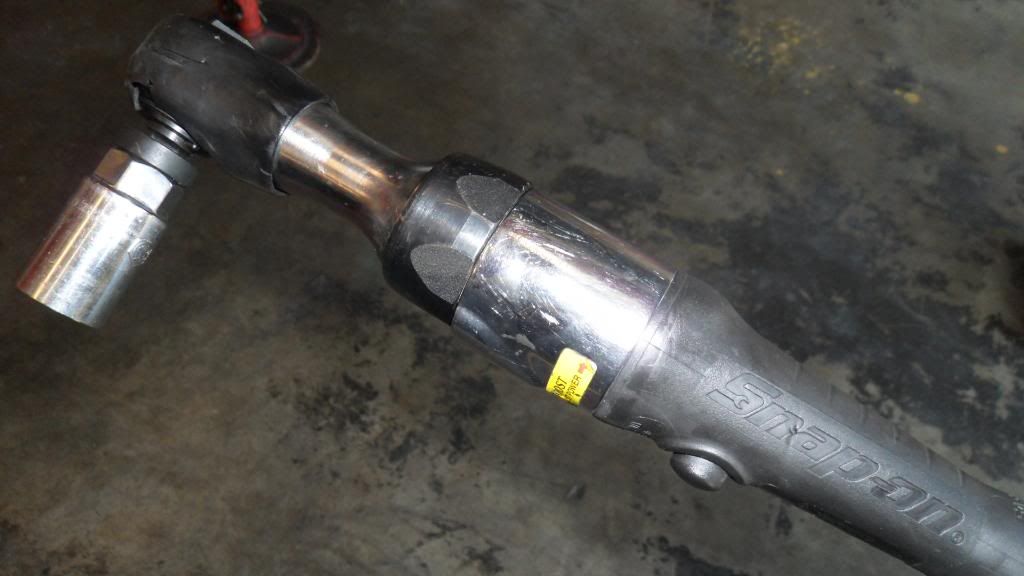 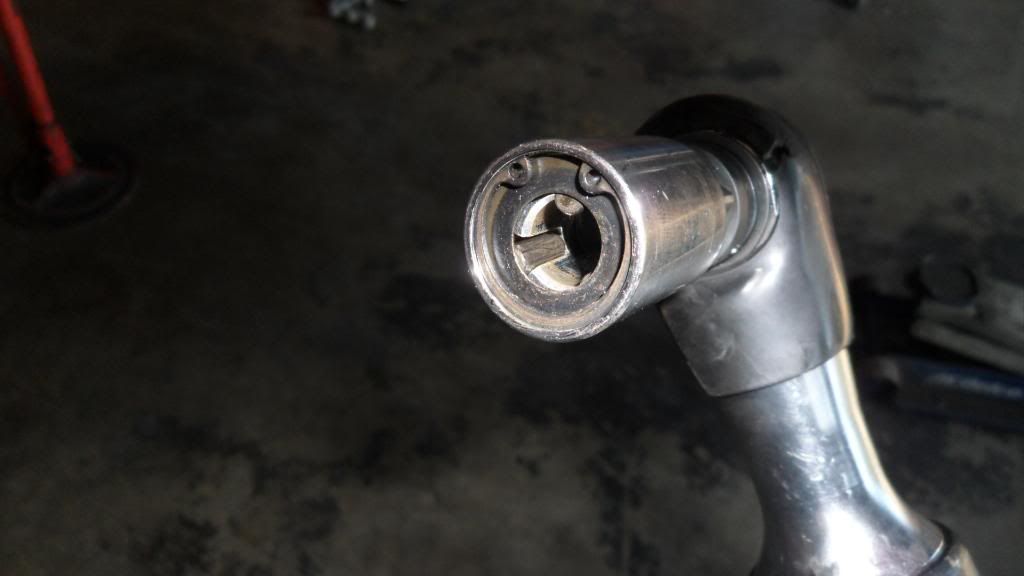   Then a clean rag and a little carb ceaner to remove all the grease residue 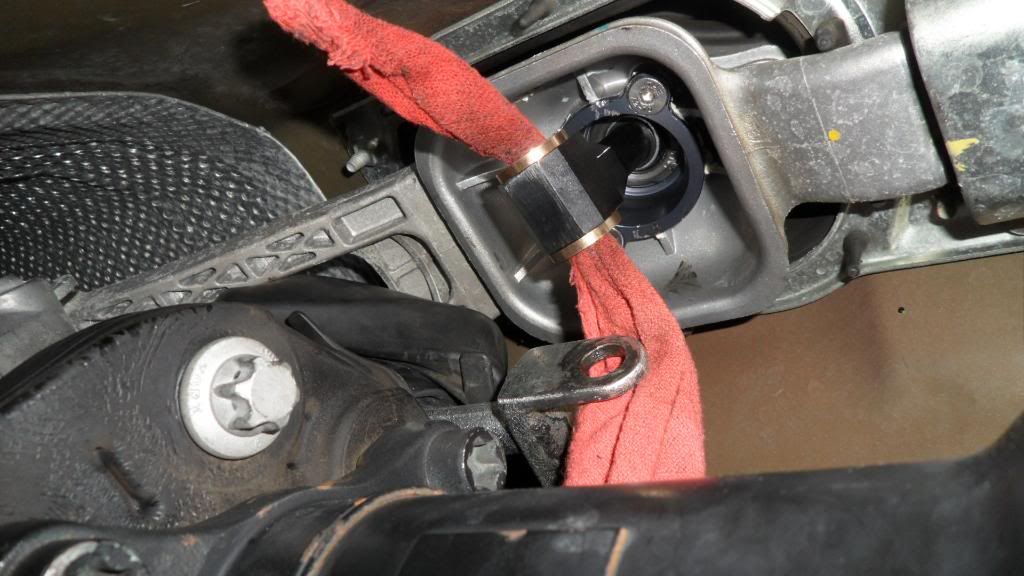 Reinstalled the pin and clips and a perfect fit  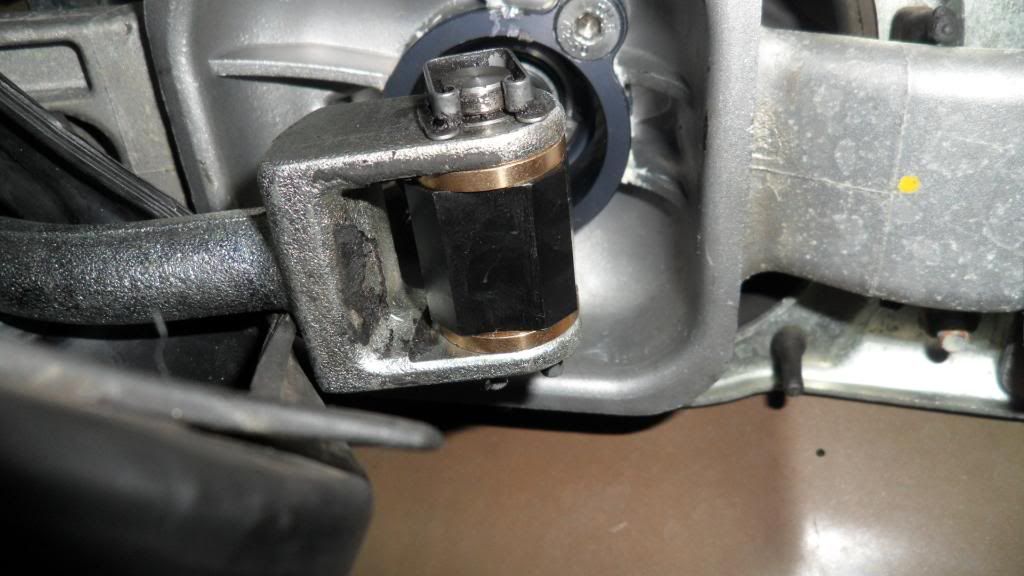 After driving the car some all I can say is "WOW" I love it!! My shifter went from having a 1 1/2" inches of slop when in gear to have about 1/16" of movement  Simply amazing Thanks again NH-SS for your awesome creation Again please note these pics are to help you guys understand what needs to be done. But please follow the provided instructions for successful results 
__________________
TEAM LS3 Best pass: 9.61 @ 146 with M6TBDRWHP TBDRWTQ ECS S/C 408, YSi, m6, Mantic Triple, ZL1 diff #BuiltByJRod.... J-Rod's Speed Shop.... Tuned by: Matt Sorian @ MS Tuning Check out my youtube channel: http://www.youtube.com/user/6410Jrod Follow me on Instagram: @J_Rod6410 |
|
|
|
|
06-18-2012, 04:56 AM
|
#92 |
|
Drives: 2010 SS2,6M Join Date: May 2012
Location: NH
Posts: 80
|
Thank you for the great pictures you have added !! With this visual aid it should be easier to understand how it all works.
|
|
|
|
|
06-18-2012, 05:25 AM
|
#93 |
 
Drives: 11 IBM n White 2SS/RS M6 Join Date: May 2011
Location: Tewksbury Ma
Posts: 358
|
My shifter s/b delivered today, looking forward to getting it installed with the new bushing right off the get go..
So if I read the picture details right to deburr / burmish the new bushing once pressed in the oem pin is used with some grease to size the fit of the pin? |
|
|
|
|
06-18-2012, 11:58 AM
|
#94 | |
|
M6 9 second club
Drives: A 4000 Lb BeaSSt Join Date: Jul 2009
Location: Crackin Azz on a hi-way near you
Posts: 1,033
|
Quote:
__________________
TEAM LS3 Best pass: 9.61 @ 146 with M6TBDRWHP TBDRWTQ ECS S/C 408, YSi, m6, Mantic Triple, ZL1 diff #BuiltByJRod.... J-Rod's Speed Shop.... Tuned by: Matt Sorian @ MS Tuning Check out my youtube channel: http://www.youtube.com/user/6410Jrod Follow me on Instagram: @J_Rod6410 |
|
|
|
|
|
06-18-2012, 11:59 AM
|
#95 | |
|
M6 9 second club
Drives: A 4000 Lb BeaSSt Join Date: Jul 2009
Location: Crackin Azz on a hi-way near you
Posts: 1,033
|
Quote:
I-trader positive review coming your way! Hope you do the same also
__________________
TEAM LS3 Best pass: 9.61 @ 146 with M6TBDRWHP TBDRWTQ ECS S/C 408, YSi, m6, Mantic Triple, ZL1 diff #BuiltByJRod.... J-Rod's Speed Shop.... Tuned by: Matt Sorian @ MS Tuning Check out my youtube channel: http://www.youtube.com/user/6410Jrod Follow me on Instagram: @J_Rod6410 |
|
|
|
|
|
06-18-2012, 09:17 PM
|
#96 | |
|
Drives: 11 IBM n White 2SS/RS M6 Join Date: May 2011
Location: Tewksbury Ma
Posts: 358
|
Quote:
I am hopin to get it installed new bushings and all before I drop the car off with JRE next Monday for the week! NH-SS talk with you in the morning
|
|
|
|
|
|
06-19-2012, 03:01 PM
|
#97 |
|
Account Suspended
Drives: 2010 tbd Join Date: Mar 2009
Location: california
Posts: 647
|
so.. you're going to make brass style bushings?. well I'm definately no engineer but common sense tells me that if the tolerances are correct you will fix any side to side play that may be there, but with that type of metal to metal it will rattle horribly!.
|
|
|
|
|
06-19-2012, 03:43 PM
|
#98 |
|
Drives: 2010 SS2,6M Join Date: May 2012
Location: NH
Posts: 80
|
Well,.. I'am an engineer,.. for over 30 years. The material is not brass. It is extreme grade bearing material.
|
|
|
|
|
|
|
|
 |
|
|


