You are browsing camaro5 

|
 06-16-2011, 04:21 PM
|
#1 |
    |
DIY : Rear Diffuser Removal
Here is a clear illustration of how to remove the rear diffuser from the Camaro bumper. The whole bumper itself does not have to be removed in order to do this.
I have taken my diffuser off several times. It's great for painting your stock exhaust cans black, or if your installing a new exhaust, I took my diffuser off to put on my new axle-back exhaust. It gives you a lot more room to work with. Some people have even painted their diffusers. Tools: 7mm socket Large flat head, or tire changing tool Patience! Lets get started... 1. On each side of the diffuse is 2, 7mm bolts holding it to the bumper. Looking underneath each side you will see this bolt. Remove the bolt, and then pull the diffuser and pop out the first tab. 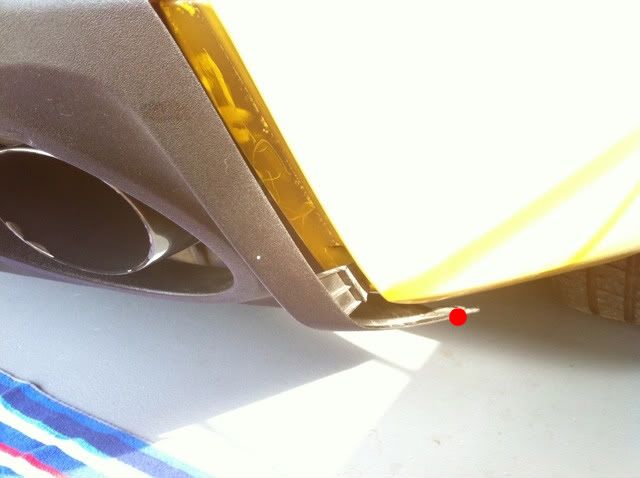 2. Laying on your back, and crawling underneath the car, you will find 4 more 7mm bolts holding the diffuse onto the plastic bracket that is show in the picture. The 4 red dots represent the locations. Remove these bolts. 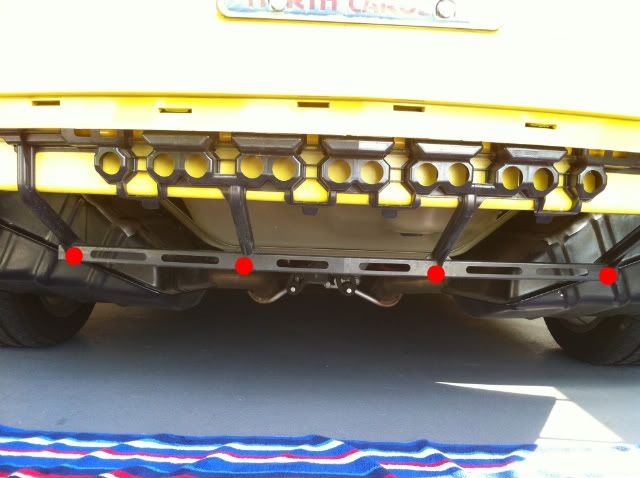 3. Now that all the bolts are removed, its time to start pulling off the diffuser. In this picture take a look at the dots. This is where all the tabs are. Starting at each side work your way towards the middle. The red dots are the easiest to pull out, and the blue dots get a little harder. 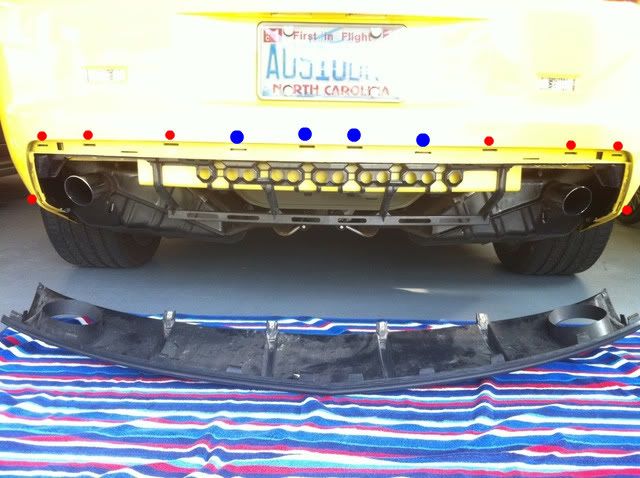 4. After having the first tab removed on each side, grab the diffuser and slowly start popping the tabs out. The first few are pretty easy, but may require a bit of tugging. Just be careful and take your time.  5. As your start working your way to the middle, start working your fingers behind the diffuser and popping out more tabs. This is where it starts to get a little harder. 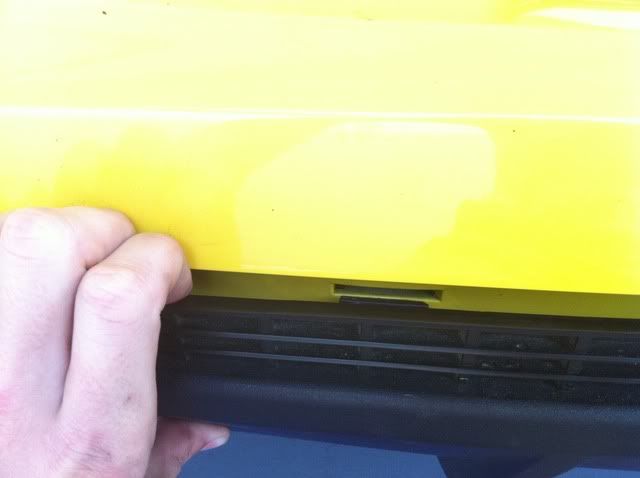 6. Here comes the tough part. Since you do not want to break the tabs in the middle by just pulling as hard as you can, use the diagram above to get an idea of where the tabs are. Using a large flathead, or in my case a large bicycle tire changing tool, you can slip behind the diffuser and push down on the tabs to release them, and then pull out. Also use a shammy or towel behind the tool so you do not damage the bumper. 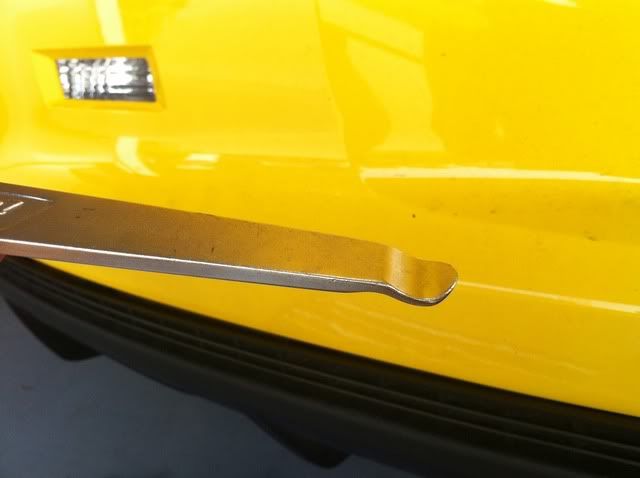 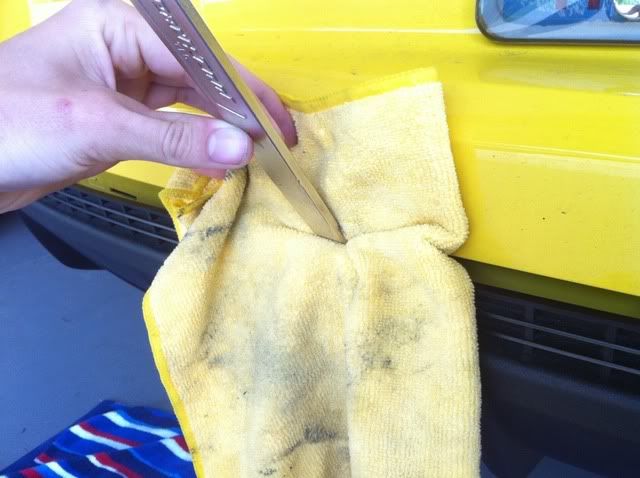 7. Now that all the tabs have been pulled out, your diffuser will come right off. As stated, just be patient with the tabs, you do not want to bend or snap them. To put the diffuser back on, just snap it back in, and screw back in the 6, 7mm bolts. Here is a close up look at the tabs, and the screws. 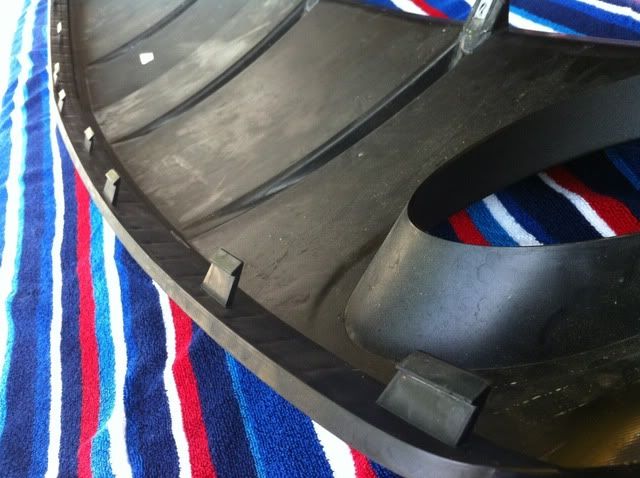 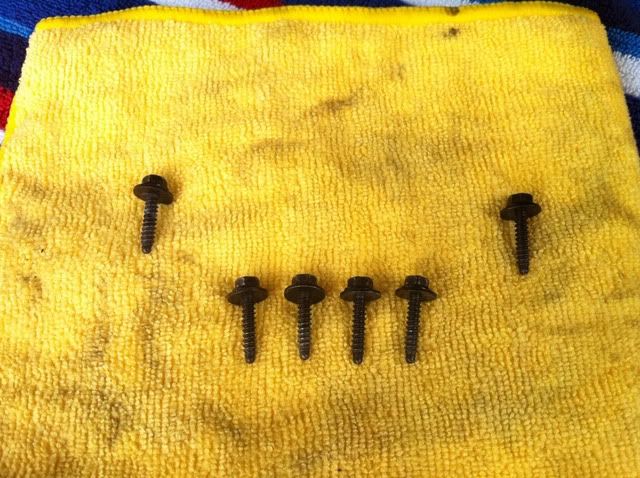 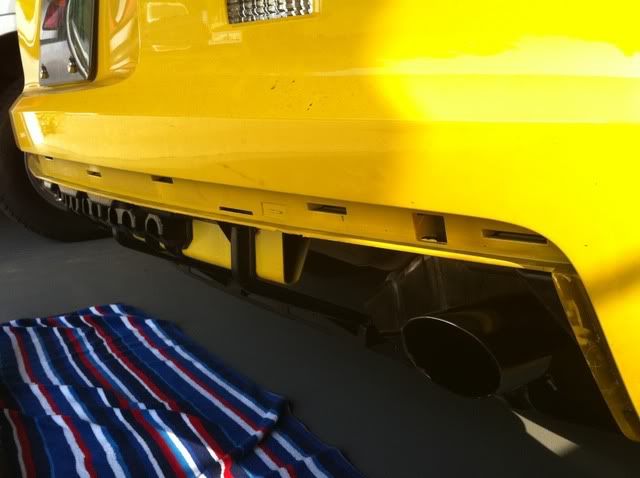 Also a quick tip for removing the exhaust hangers... Using a spray bottle, mix Dawn, or any kind of dish detergent with degreaser, and water, spray on the hangers, and they will easily slide off with your hand. 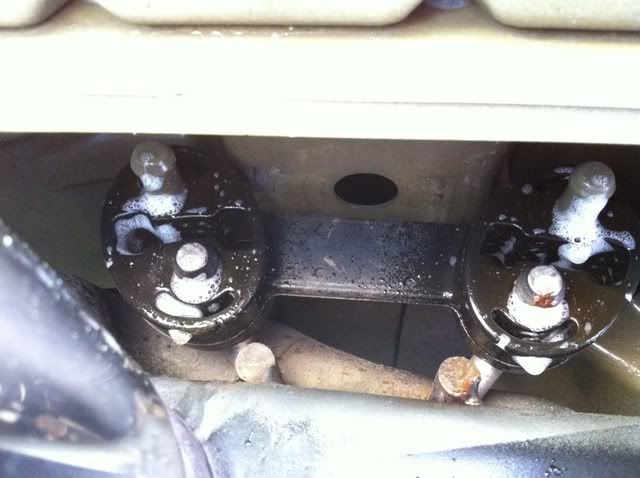 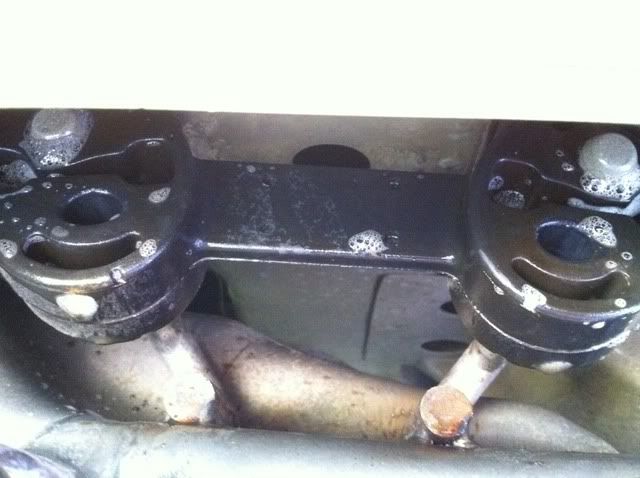
|

|

|
|
06-16-2011, 04:44 PM
|
#2 |
|
Drives: 2010 IBM Camaro SS Join Date: Jun 2007
Location: DFW, Tx
Posts: 1,157
|
Thanks for the write up. I need to take my diffuser off to locate a squeak going on back there and I do not want do have to deal with a dealership.
__________________
2010 Camaro SS Imperial Blue | CAI Inc, CAI | Solo Hi Flow Cats | X-Pipe | Backup Camera | PDIM
|
|
|
|
|
06-16-2011, 06:19 PM
|
#3 |
|
SoCal Mayhem

Drives: 2010 Camaro 1SS/RS Join Date: Aug 2008
Location: Foothill Ranch, CA
Posts: 5,488
|

__________________
 |
|
|
|
|
06-17-2011, 09:26 PM
|
#4 |
|
Rumbly Bumble Bee

Drives: 2010 2SS Camaro Join Date: Aug 2009
Location: DFW
Posts: 1,469
|
Excellent write up!
__________________
2010 RALLY YELLOW 2SS 6M
-OBX Longtubes FTW! |
|
|
|
|
06-21-2011, 04:38 PM
|
#5 |

Drives: 2010 2SS Join Date: Apr 2010
Location: Washington
Posts: 677
|
Great info! This will be handy in the near future.
|
|
|
|
|
07-06-2011, 10:00 AM
|
#6 | |||
|
|
Quote:
Quote:
Quote:

|
|||
|
|
|
|
07-09-2011, 05:43 PM
|
#7 |
|
SoCal HT5 *COTW 8/26/13*

|
saved . . .
__________________
 |
|
|
|
|
07-24-2011, 05:56 PM
|
#8 |

Drives: Cyber Grey 2LT RS Coupe Join Date: Feb 2011
Location: NY
Posts: 757
|
Any idea how tp get those black pastic thongs off?
|
|
|
|
|
07-24-2011, 06:38 PM
|
#9 | |

Drives: 2014 Z/28 #82+#192, 18ZLE 66Nova Join Date: Oct 2008
Location: By the lake in AZ
Posts: 15,719
|
Quote:
|
|
|
|
|
|
07-24-2011, 09:09 PM
|
#10 |
|
(ʘ‿ʘ)

Drives: The one with a roof rack Join Date: Dec 2009
Location: Northern Virginia
Posts: 1,221
|
thank you! planning to get an aftermarket diffuser for a new exhaust set up i have. youre the man.
__________________
 |
|
|
|
|
07-24-2011, 10:52 PM
|
#11 |
|
Texas Camaros

Drives: 2011 Synergy Green 2SS/RS Join Date: Oct 2010
Location: Venus, Tx
Posts: 1,681
|
Thanks, Mine will be off soon to get painted. Nice write up.
__________________
 |
|
|
|
|
08-15-2011, 09:29 AM
|
#12 |
|
having FUN now 13.66@101

|
FANTASTIC write-up...........THANK-YOU.
__________________
|
|
|
|
|
09-29-2011, 10:29 PM
|
#13 |
|
OKCamaros

Drives: 4 banger Diesel Join Date: Mar 2010
Location: Philippines
Posts: 4,572
|
|
|
|
|
|
09-30-2011, 07:45 AM
|
#14 |
   
|
So is it possible to paint this plastic diffuser same as body.. CGM in my case? thanks ryd.
|
|
|
|
|
|
|
|
 |
|
|
 Similar Threads
|
||||
| Thread | Thread Starter | Forum | Replies | Last Post |
| rear bumper and diffuser removal(can some1 make this)? | 2010camarolt | Camaro DIY & HOW-TO instructions & discussions | 0 | 06-11-2011 11:55 AM |
| Ground FX without Rear Diffuser | hvychvy970 | Cosmetics and Lighting Modification Discussions | 12 | 12-20-2010 02:06 PM |
| Rear Diffuser removal guide? | daphatgrant | Camaro DIY & HOW-TO instructions & discussions | 21 | 10-20-2010 10:46 AM |
| F/S: INFERNO ORANGE METALLIC Factory GM side skirts and rear diffuser | FINALLYSATISFIED | Exterior Parts & Accessories | 10 | 10-17-2010 02:19 AM |
| Removal of rear diffuser on v6 | kellyjrt | Cosmetics and Lighting Modification Discussions | 3 | 02-03-2010 12:10 PM |


