You are browsing camaro5 

|
 01-19-2013, 03:36 PM
|
#1 |
        
Drives: 2SS/RS - Black - GFX Join Date: Nov 2008
Location: B'ham, Alabama
Posts: 2,458
|
DIY: Fix your broken seat warmer (pics)
If you are like me and many others that have had their drivers side seat warmer go out... I found the problem and fixed it.
Problem: Your drivers side seat warmer stops working. The lights on the button stay illuminated for ~1 minute, and the light goes off without the seats ever getting warm. Solution: If you are under warranty... you could take it to the dealer... that is, if you don't mind them ripping your seat to shreds replacing your elements...................... that you do not even need. If you want to fix it yourself, it is not that bad of a job. There is one little wire that has burnt out and had lost connection. It is not in the element.... .... YOU DO NOT NEED TO RIP YOUR LEATHER SEATS APART TO CHANGE THE ELEMENT!!! Step 1: Take your seat out of the car. This takes me less than 3 minutes. Seat removal DIY: http://www.camaro5.com/forums/showthread.php?t=100176 Step 2: From the bottom of the seat, locate the heater element leads that go to the seat back (not the bottom... that one is probably fine) There is ONE pink and ONE blue wire going into a grey connector. (the other connector with pink and blue and 2 more wires goes to the bottom element)  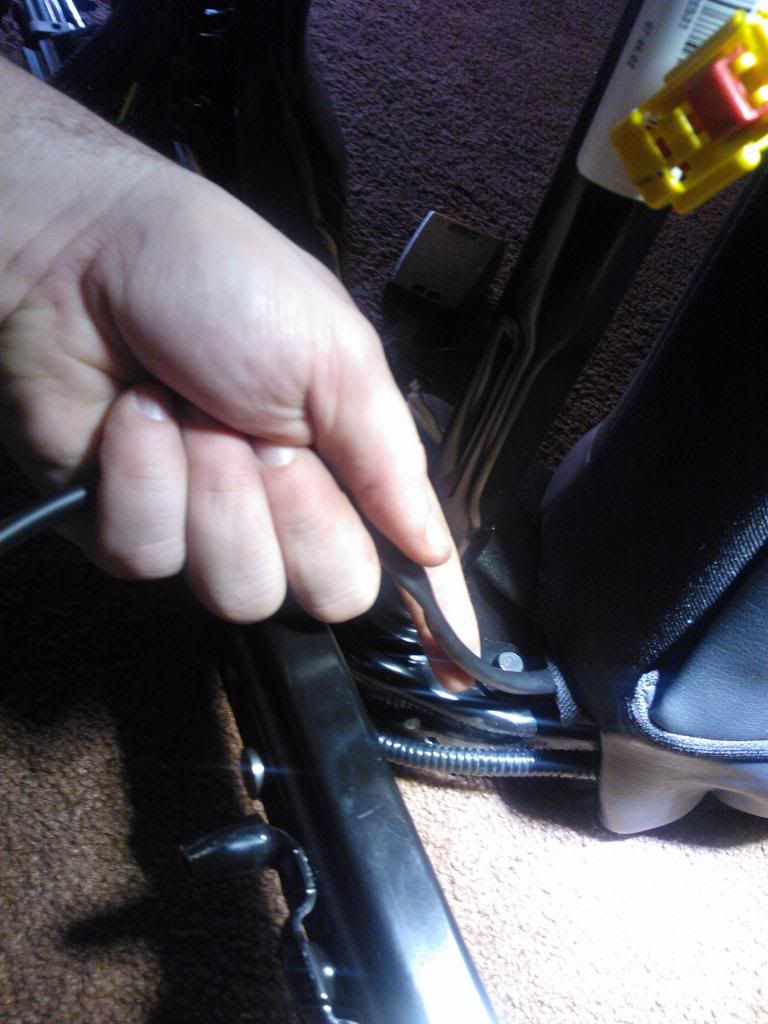 Check the two wires for resistance or continuity. It should be between 1 and 2 ohms or they should show continuity. Mine showed an open circuit. (above) If it is an open circuit, you will need to dig a little deeper to see the problem. The wire takes a 90 degree turn under the one-zie, and it gets burnt up there for some reason. .... I dug a little too deep because I didn't know what I was after. That is why my bottom cushion is missing Step 3: Unsnap bottom seat "one-zie" connector to release the leather. Then unzip 2 zippers on the back of the seat. Fold up the front leather to expose the lower section of the heater element. 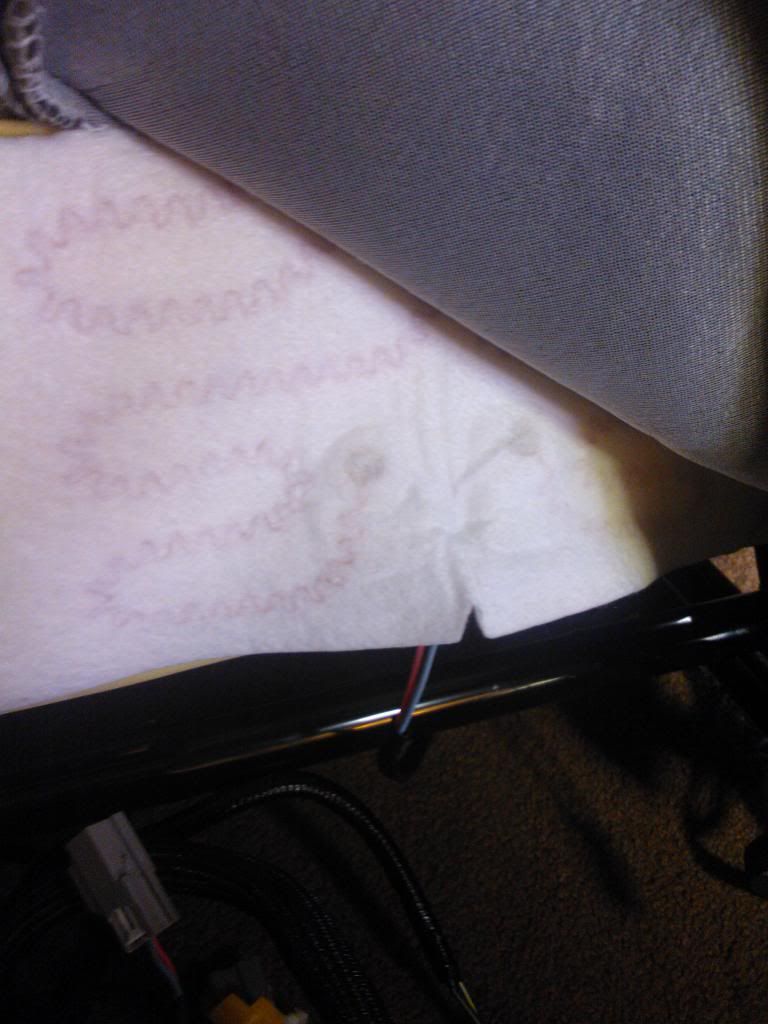 Step 4: check the resistance directly on the heater element. It should be 1 to 2 ohms. 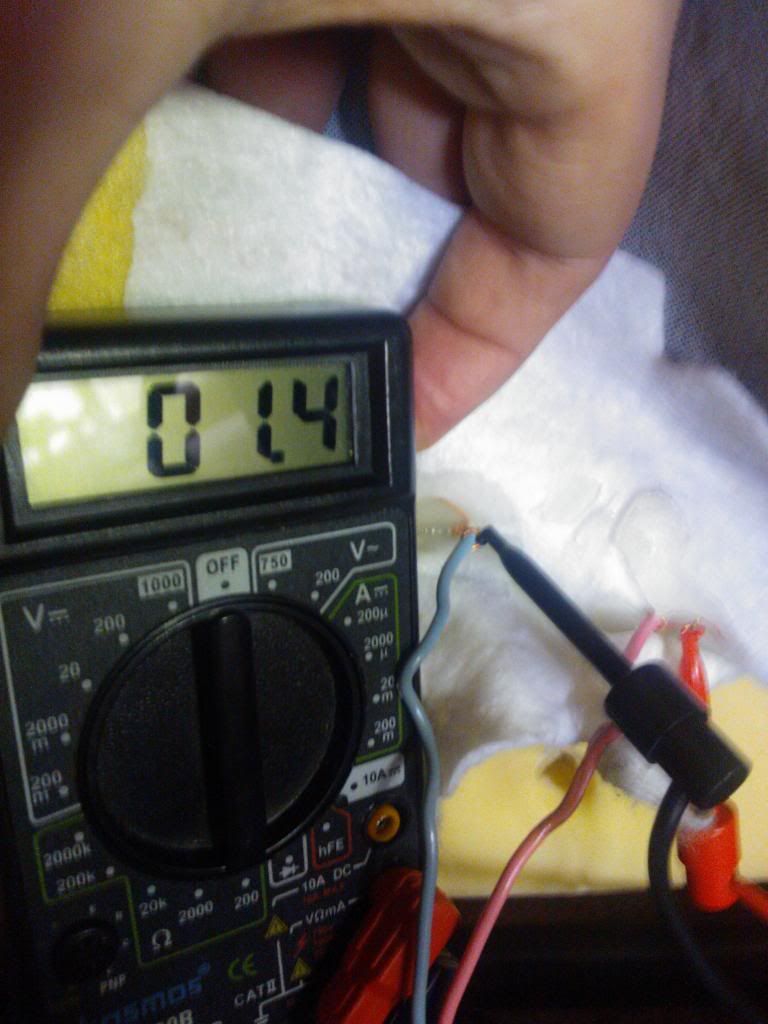 So......... you have an open circuit at the connector, but a good circuit at the element.... the wires in between must be bad. Indeed they are:  You can cut and redo the connection on that one, and you will be done. I added male and female spade terminal connectors so it will be easy if I ever need to go back in there. Enjoy your butt being warm again... 
__________________
Ordered: 10-13-08
Built: 3-30-09 (#1691) Recieved: 6-12-09 Blacked out, Cammed (Lunati Voodoo 233/245, .578/.598 @114°, +4°), ARH LTs, VR OTR CAI, Cutouts, and lots of other fun mods. Last edited by Bell040; 01-19-2013 at 04:03 PM. |

|

|
|
01-19-2013, 03:46 PM
|
#2 |

Drives: '18 Sierra Denali '05 GMC 2500HD Join Date: Jul 2011
Location: Upstate NY
Posts: 1,396
|
Very nice diagnostic work and write up, saved for future reference.
__________________
Had: 2010 SS/RS M6 Hurst STS, Noweeds |
|
|
|
|
01-19-2013, 03:49 PM
|
#3 |
|
2010 Camaro 2 SS/RS M6

Drives: 2010 Camaro SS/RS Join Date: May 2009
Location: Clayton Delaware
Posts: 1,218
 |
Awesome write up. I need to do this to mine!
__________________
Forged LS3, FED M311 heads, CAI Inc, ARH 1 7/8, Corsa Xtreme, Taylor Wires, MGW Shifter, Street slayer twin carbon clutch, Tick braided clutch line & speed bleeder, ZL1 Diff Swap, BMR Split drop, Sway Bars, Trailing Arms, Toe Rods, Pro bushing kit, Carslyle racing 15in conversion, Whipple, LPE dual fuel pumps, Rx catch can, Id1300x, Alky Control
|
|
|
|
|
01-20-2013, 07:17 AM
|
#4 |

|
Thanks for the write up need to look at this on mine also.

|
|
|
|
|
01-20-2013, 08:34 AM
|
#5 |
|
Helping Build America

Drives: 2010 2SS/RS,LS3 2013 Duramax 3500HD Join Date: Aug 2008
Location: Freeport LPG Export
Posts: 3,839
|
How does the harness come loose? I got the bolts out no problem, not like a lot of members have said. I just used a torx and a 8", 3/8" drive ratchet. I have a sprained shoulder and still did it without a lot of pain. A little hard to break loose but maybe 50 lbs force.
__________________
Life's journey is not to arrive at the grave safely in a well preserved body, but rather to skid in sideways, totally worn out, shouting "Holy shit, what a ride!"
|
|
|
|
|
01-20-2013, 11:36 AM
|
#6 |
|
Helping Build America
Drives: 2010 2SS/RS,LS3 2013 Duramax 3500HD Join Date: Aug 2008
Location: Freeport LPG Export
Posts: 3,839
|
I finally got it out. I have continuity to the bottom of the seat. Found the problem after I remove the entire bottom cushion. It's in the back cushion damn it. Live and learn. I've done more work on this car than I did on any in the 70's and that was a lot.
Anyway, the pink wire was broken a little more than an inch from the heat element. Hope I don't have to do this again. It's like the rear deck, a bitch the first time and easy after that. Should be good to go once make the splice and put it all back together. Your writeups definately helped, thanks.
__________________
Life's journey is not to arrive at the grave safely in a well preserved body, but rather to skid in sideways, totally worn out, shouting "Holy shit, what a ride!"
|
|
|
|
|
01-20-2013, 01:37 PM
|
#7 | |
|
Drives: 2SS/RS - Black - GFX Join Date: Nov 2008
Location: B'ham, Alabama
Posts: 2,458
|
Quote:
From reading everyone's problems with it, it's always the back cushion on the driver side...and it is always just an inch or 2 from the element.
__________________
Ordered: 10-13-08
Built: 3-30-09 (#1691) Recieved: 6-12-09 Blacked out, Cammed (Lunati Voodoo 233/245, .578/.598 @114°, +4°), ARH LTs, VR OTR CAI, Cutouts, and lots of other fun mods. |
|
|
|
|
|
01-20-2013, 02:12 PM
|
#8 | |

Drives: 2014 Z/28 #82+#192, 18ZLE 66Nova Join Date: Oct 2008
Location: By the lake in AZ
Posts: 15,719
|
Quote:
|
|
|
|
|
|
01-21-2013, 10:33 AM
|
#9 |

Drives: 2010 camaro ss Join Date: May 2009
Location: Tacoma WA
Posts: 779
|
been saying this for a long time,if the issue was a short gm would recall it but since the wire breaks no recall,also the side air bag harness in the same seat has a similar issue
|
|
|
|
|
01-23-2013, 02:20 AM
|
#10 | |
|
Helping Build America
Drives: 2010 2SS/RS,LS3 2013 Duramax 3500HD Join Date: Aug 2008
Location: Freeport LPG Export
Posts: 3,839
|
Quote:
I had continuity through the pad and fixed the wire. Stuffed everything back together and tested again before reinstalling the seat and shi*, no continuity. Guess now I need a new heat pad.:(
__________________
Life's journey is not to arrive at the grave safely in a well preserved body, but rather to skid in sideways, totally worn out, shouting "Holy shit, what a ride!"
|
|
|
|
|
|
03-22-2013, 12:27 PM
|
#11 |

Drives: 2010 Camaro SS Join Date: Oct 2010
Location: MI
Posts: 601
|
Can anybody tell me what gauge this pink wire is? It would be nice to have wire in hand before pulling the seat out. This happened to mine and I want to replace the section of wire.
Has anybody re-engineered anything in fixing this to prevent it from happening again (like adding some extra support around the wire)?
__________________
L99 - 440 RWHP
Livernois 2c Cam & VVT/DOD Delete Roto-Fab Intake Stainless Works 1 7/8" Long Tube Headers Corsa Exhaust |
|
|
|
|
03-22-2013, 03:24 PM
|
#12 |
|
Drives: 2SS/RS - Black - GFX Join Date: Nov 2008
Location: B'ham, Alabama
Posts: 2,458
|
You can see the wire by just looking under your seat and finding the plug (there is a black cover over the pink and blue wires)... without taking the seat out.
I just ran the wire out of the seat differently... so it should not fail there again.
__________________
Ordered: 10-13-08
Built: 3-30-09 (#1691) Recieved: 6-12-09 Blacked out, Cammed (Lunati Voodoo 233/245, .578/.598 @114°, +4°), ARH LTs, VR OTR CAI, Cutouts, and lots of other fun mods. |
|
|
|
|
03-24-2013, 02:08 PM
|
#13 | |
|
Drives: 2010 Camaro SS Join Date: Oct 2010
Location: MI
Posts: 601
|
Quote:
Where did you end up running the wire? I'm assuming not around the corner of the seat like the factory did. I've not taken the seat apart yet so perhaps it will be self evident when I do. Did you add any extra protection to the wire bundle (like split loom)?
__________________
L99 - 440 RWHP
Livernois 2c Cam & VVT/DOD Delete Roto-Fab Intake Stainless Works 1 7/8" Long Tube Headers Corsa Exhaust |
|
|
|
|
|
03-29-2013, 06:42 PM
|
#14 |
|
Prefer to be blown!
Drives: 2010 Silver/Black 2SS/RS Manual Join Date: Mar 2010
Location: Nor-Cal
Posts: 2,677
|
I have a question about removing the seat, I loosened the two screws and they are spinning freely, yet they will not come out. It seems like I may have broken off the welded nut that is probably underneath the rails. Anyone have any ideas?
__________________
 MagnaCharger TVS-2300 550rwhp 540 rwt and a radical suspension under the car. MagnaCharger TVS-2300 550rwhp 540 rwt and a radical suspension under the car. |
|
|
|
|
|
|
|
 |
|
|


