You are browsing camaro5 
|
|
 04-10-2011, 10:13 PM
|
#1 |
|
Nightmare

Drives: Your mom crazy in bed Join Date: Mar 2011
Location: Naptown
Posts: 2,438
|
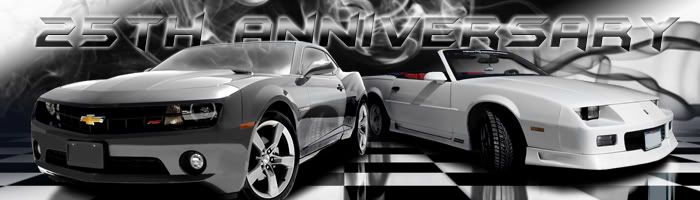
How to make your own signature banner
Okay so I've seen a few people ask about this, so I figured it might just be easier to do this instead. This post is about making your own signature banner for a forum. This will be a beginner level banner how-to.
If this works out well enough, I will be happy to create a more advanced version. The first thing you want to do is make sure you have a good picture editing program. Now, you can create a banner like this using Microsoft Paint, but it won't be nearly as nice. You will want to look at programs like Adobe Photoshop, Adobe Fireworks, GIMP, LView, or Paint Shop Pro. There is also a program called Paint.NET that works fantastically well and is free. It's a lot like Photoshop. http://www.getpaint.net/ I will be using Photoshop to do this tutorial, but most of the steps will be similar in most programs. Step 1: Get some good quality pictures of your car/truck. This is the most critical part of creating a signature banner. The better the quality, the easier it is to edit the picture for what you are doing. Don't use pictures with your vehicle in the grass or pictures that are blurry. It can be done, but it just makes the difficulty increase. Step 2: Once you have your pictures, open Photoshop and create a new document.  The forum size limit on your banner is 700x200. However, for this tutorial, create your banner at 1400x400. Why? Because we can re-size it when we are finished and it's much easier to see when it's larger. Step 3: Deciding on the picture you want to use for your image can be hard, especially with people who can't always get great pictures of their vehicle. Sometimes you have to use one that isn't perfect or the favorite of the group. Once you've decided on one, go ahead and open the picture in Photoshop. You do not have to close your original document from Step 2.  Step 4: You will then want to go into the bottom right hand corner and double click the little padlock next to the picture you have open.  It will open a window with some settings. Make sure yours match. Click OK when done.  And now the image should no longer have a padlock next to it.  Step 5: This will now let you edit your picture so it no longer has a background behind it. This is critical because if you did not remove the background, it would leave a white background behind the picture. The correct way will have what appears to be a checkerboard style background. Incorrect:  Correct:  In order to edit the picture, you can use a variety of methods, from beginner to advanced. I typically use the Polygonal Lasso Tool. Once you are done with the editing, save the picture as a .psd file. This is the standard Photoshop file type. ***TIPS*** Cropping out as much of the "excess" picture will make the editing faster, without needing to manually do it. CTRL and the -/+ keys allow you to zoom in/out while working on the image. Step 6: Okay, so now you have a new banner, and an edited picture of your car. It's time to create a nice background on that banner. Let's start by going to Filter > Render > Clouds Your background should now look like this  Now, you don't have to do this. You can use other images for your background, such as like this...  The reason I use the first option, is because I typically use brushes to create a custom background. This is a bit more advanced to do, but I will save that for another time. Step 7: Press Ctrl+U to enter the Hue/Saturation adjustment window. Make sure to click the colorize box in the window. This will let you change the color of the background to something other than black/grey and it will do it while you are looking at it.  Once you find a color you like, click OK. You should now have something like so:  Step 8: You've got a colored background, and you still have your picture of your car. However, the background is still pretty plain... so let's add a little something else. Create a new layer by going up to Layer > New > New Layer  Grab the Rectangle Marquee and create a box on the new layer in the banner. You can make this cover just a part, or all of the banner. You can use this to type your name in it, or to split the picture to add a box for a mods list....  Once you've created the box, you will have a dotted line that looks like it's flashing. This is the marquee. Grab your Paint Bucket tool (looks like a tipping over paint bucket) and fill the box you created with your choice of color. For this, I'm using white.  Step 9: Okay, so now we have a white box, but we want it to be a little see through too...(at least for this tutorial). You will want to change the Opacity box from 100% to whatever you feel is the best see through option. Mine was set to 48% for this...   Step 10: At this point, we want to add our picture (car/truck/image) into our banner. Now, understand that your original picture may be larger than the banner. We may need to resize the picture once we copy and paste it into our banner. So, drag your image to the banner by just using the mouse arrow and a left click.  As you can see, the image is too big for our banner, so we will need to resize.  Step 11: Resizing your picture is actually very easy at this point. Click on the image so that it's highlighted, and go up to Edit > Transform > Scale. When you do this, your image should now look like this:  Hold the shift key in, and grab one corner of the image. Using the left click, drag it down and the image will be resized to the size you choose. If you do not hold shift down, it will distort the image. Once you get it to the size you want, your image will look like this:  If you are using Photoshop, you will need to confirm the scale/resize and it will make the change permanent. Don't worry if you mess up, you can use the undo feature. Step 12: At this point, all that really remains is to start personalizing the banner. You will want to add your screen name and any other information you may decide important. You can do that by using the Text box. This is mostly identified by a T symbol in Photoshop, but it can be the letter A in other programs or simply say Text.  Once you are done adding text, you should have this...  At this point, you are pretty much done for the very basic signature banner. All that remains to do is resize it and get it uploaded to the forum. However, you can do a bit more tweaking if you like, such as adding shadows, border lines, and so forth to give the image a more personal look....  Last Step: At this point, save your file. You want to save it at this size and point as your final save because it's easier to adjust/alter a larger image than trying to fix a smaller one. All that remains is to resize the image to save a picture for the forum. Go to IMAGE > IMAGE SIZE and a box will appear  Change the 1400 to 700 and it will automatically adjust the other sizes. Clicking OK will resize the image for you. At this point, we just need to create a JPG of the file. The reason I use JPG's is because they are usually the smallest file size, and they are usually the most accepted form of file to use on forums. You can also use a PNG file if you so choose. Go to FILE > SAVE AS and a save box window will appear. Change the file format from Photoshop .PSD to JPEG/JPG. Choose a save location on your PC (I always recommend the desktop) and save. You will be promoted by a quality box to choose settings. I usually just leave it at 8 or 9, and click OK.  Here's your finished product..  DO NOT SAVE ANY CHANGES TO YOUR FILE AT THIS POINT. IT WILL SAVE EVERYTHING YOU JUST RESIZED. I hope this helps all of you out there interested in learning....
__________________
 Last edited by DevilsReject97; 12-20-2017 at 09:36 PM. |

|

|
|
04-11-2011, 11:14 AM
|
#2 |
|
Inland Empire Camaro Club

Drives: 2011 CGM Camaro LS Join Date: Aug 2010
Location: Ontario, California
Posts: 376
|
Great write up!!!
Now lets see how many new banners start popping up...LoL
__________________
ARK Performance Exhaust / 10000K HID / Tint: F=35% RQ=20% R=Ceramic Limo / Injen CAI (Polished)
 www.iecamaroclub.com www.iecamaroclub.com  |
|
|
|
|
04-11-2011, 11:48 AM
|
#3 |
      
Drives: 1997 30th Ann. Z28 & 2010 2LT RS Join Date: Jan 2010
Location: Suffolk Virginia
Posts: 1,933
|
Very nice write up ! I have CS3 and no clue how to use it yet. Need to take a class I guess.
__________________
 |
|
|
|
|
04-11-2011, 11:51 AM
|
#4 |
 
Drives: 92 Camaro Convt RS,2011 Camaro RS Join Date: Mar 2009
Location: Laredo,TX
Posts: 2,167
|
:w00t:
__________________
 TEAM LLT 1992 Camaro Rs Convertible  2011 Camaro 1lt Rs |
|
|
|
|
04-11-2011, 12:37 PM
|
#5 | |
|
Nightmare
Drives: Your mom crazy in bed Join Date: Mar 2011
Location: Naptown
Posts: 2,438
|
Quote:
Most of the stuff from CS4/5 will work in CS3....but this guy has a lot of great beginner to intermediate level tutorials. Also, I'd suggest starting with something simple like this, as the more you practice the better you will get...
__________________
|
|
|
|
|
|
04-11-2011, 12:50 PM
|
#6 | |
|
Nightmare
Drives: Your mom crazy in bed Join Date: Mar 2011
Location: Naptown
Posts: 2,438
|
Quote:
__________________
|
|
|
|
|
|
04-25-2011, 06:30 PM
|
#7 |
 
|
hey thanks a ton for this How To I have had Adobe Photshop Elements 7.0 for some time now and havent had the time to learn it. This helped me create the Signature you see below in under an hour! thanks!
__________________
 |
|
|
|
|
04-25-2011, 06:35 PM
|
#8 |
|
Go Blue!!!!!

Drives: 2012 Cruze LT Join Date: Mar 2009
Location: Indiana
Posts: 23,290
|
That's a very cool thing you did.

|
|
|
|
|
04-25-2011, 08:01 PM
|
#9 | |
|
Nightmare
Drives: Your mom crazy in bed Join Date: Mar 2011
Location: Naptown
Posts: 2,438
|
Quote:
Congrats, and I'm glad I could help...
__________________
|
|
|
|
|
|
04-25-2011, 11:20 PM
|
#10 |
|
Go Harder Than Baltimore!

Drives: 2010 CGM Join Date: Jun 2010
Location: Baltimore
Posts: 3,835
|
wow this is sweet... and that paint.net is safe to download and easy to use?
__________________
 |
|
|
|
|
04-26-2011, 09:04 AM
|
#11 | |
|
Nightmare
Drives: Your mom crazy in bed Join Date: Mar 2011
Location: Naptown
Posts: 2,438
|
Quote:
__________________
|
|
|
|
|
|
04-26-2011, 09:14 AM
|
#12 |
|
Building the Beast

|
nice write up, thanks!
__________________
 |
|
|
|
|
04-26-2011, 10:09 AM
|
#13 |

|
I agree - awesome write up . . . if you feel like doing the more advanced write-up, I'd love to see it. I'd also like to do a Chevy logo similar to yours if you wouldn't mind posting up the how-to for it. (I hope I'm not asking for too much - I too have Corel and PhotoShop and don't know what to do with either of them.) THANK YOU!
__________________
Karen  |
|
|
|
|
04-26-2011, 10:22 AM
|
#14 | |
|
Nightmare
Drives: Your mom crazy in bed Join Date: Mar 2011
Location: Naptown
Posts: 2,438
|
Quote:
__________________
|
|
|
|
|
|
|
|
|
 |
| Thread Tools | |
|
|
 Similar Threads
|
||||
| Thread | Thread Starter | Forum | Replies | Last Post |
| Guillermo ~ G ~ Godfather ~ Mr. A ~ is turning 30!!! | Hoddi | California Meets and Events | 113 | 02-06-2011 11:37 PM |
| Can we get enough people to make them make camaro SS? | GQ4Life | 5th Gen Camaro SS LS LT General Discussions | 14 | 12-23-2010 07:46 AM |


