You are browsing camaro5 

|
 07-25-2010, 12:16 AM
|
#1 |
|
AAC LED bowtie and LED interior lighting
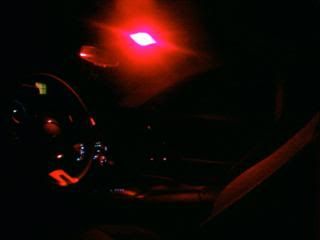
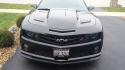
Just installed AAC's LED bowtie and LED interior conversion kit on my 1LT Camaro both in red. I highly recommend the LED conversion kit made a world of difference in the interior. I chose to go with red it looks great and goes with my black camaro. The installation was easy and completed in around 5-10 minutes.
Items need: -Flathead Screw driver -1 peice of paper towl (to wrap the end of the screw driver) -AAC LED conversion kit 1. I started on th drivers side around the edge of the plastic trim around the dome light. Be careful to not break the trim all that holds it in is a few clips. Be sure to turn the light off before you start it dos get very hot very quickly. Pull out the old light and place one of the new LED lights in. Put the cover over the ligh in first and make sure its snapped in and the put the trim back on. You can pull the switch out of the trim and check the light to make sure it works before you place all the trim back on. 2. The trunk light i thought was a little harder. I DID NOT REMOVE THE BATTERY CABLE. There was stll power going to the light. I took the screw driver and started on the driverside there a small spot inthe side of the light big enough to fit a flathed screw driver be careful and remover the light cover be quick to pull the light out or use thepaper towl to pt over your fingers and remove the light it gets very hot very fast. Insert the new LED and carefully put the light housing back into place being sure to not touch the metal pieces to the trunk. Once you get it back into place enjoy! The LED Bowtie. Items needed: -Goo-gone, wd-40 -squeegie -fishing line -maybe gloves (working the fishing line does hurt) -hair dryer -flathead screw driver, Claw hammer, or any tool to remove the revits on the trunk lid. I used a claw hammer and screw driver and it worked perfectly fine. -AAC LED bowtie and connectors 1. Heat the chevy emblem along the edges for 3-4 minutes. 2. Star at the tip of either end of the bowtie and start working the the fishing line along behind the emblem all the way around it. I used one end of the squeegie and pryed the emblem with it until i got it started the i held the emblem up with one hand and used the squeegie to pry the rest of it. 3. Use goo-gone or wd-40 (dont be shy with it) and begin removing the old glue frm the old bowtie. This was by far the longest part of the whole process. I used the squeegie to scrap some of the glue off you dnt have to if you dont want but it works well. 4. Once the old blue is removed feed the wiring for te new LED bowtie threw the passenger side whole then pull the cover off of the back of the new bowtie and stick it in place and use the center line of the car were it comes to a point as reference for the center of the bowtie and make sure its lever and center and then press ad apply pressure for around 15 seconds. 5. Pop the trunk and begin removing the revits along the edge of the trunk liner. There are 10 revits. 6. Once the revits are out you can remove the cover over the trunk latch vry easily it just pops off. take the liner completely off. 7. Begin feeding the wire through the trunk lid and pull it out of the bottom-right hole its big enough to stick your hand in and grab the wires. 8. Remove the passenger side cover over the lights. Theres 3 revits holding it in place. I got the LED bowtie that was just a runing light (NOT AS A BRAKE LIGHT) take your finger nail and squeeze just enoug to pull the two wires apart just enough to get a little slack probably 2-3 inches. Place the connectors over each of the wires. One on each use some black tape to wrap the wire so it wont come out of the connector. Place a tap on the brown and wite wire and on the black wire. One on each. Insert the connectrs into the taps. Black with black and red to brown and white. Place the excess wire into the light cavity. Place the cover back on and insert the revits. Put the trunk liner back on and insert the latch cover and then allthe revits. First make sure the light works. Your done Enjoy! |

|

|
|
07-25-2010, 02:16 AM
|
#2 |
|
Drives: '15 Z06, '01 NBM SS, '97 SS Join Date: May 2009
Location: Rio Rancho, NM
Posts: 12,170
|
Nice work!!!
Post pics...some of us (me) hate to read. LOL I've been eyeing some of AAC's stuff but man, you really have to have a plan or you'll end up buying ALL the stuff that they sell for these cars! Congrats and thanks for the instruction!  Ivan |
|
|
|
|
07-25-2010, 01:13 PM
|
#3 |
|
|
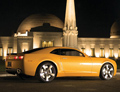
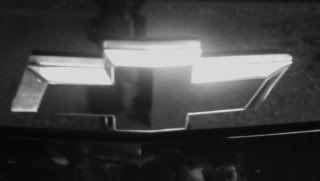
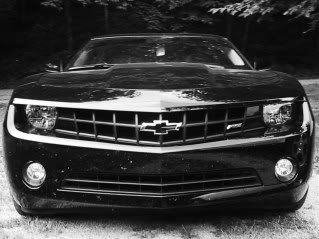
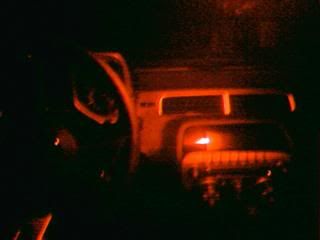
Heres a few pictures:
  There a little blurry i will post some pics of the interior later for you. |
|
|
|
|
07-25-2010, 11:38 PM
|
#4 |
|
|
|
|
|
|
|
11-29-2011, 11:52 AM
|
#5 |
 Drives: 2015 BMW M4 Join Date: Apr 2010
Location: Jacksonville, FL
Posts: 333
|
Looks good!
__________________
 |
|
|
|
|
06-17-2013, 11:52 PM
|
#6 |
 |
Where can you find these; I found one and there pretty pricey. Along with that it says the 2011 doesn't have the predrilled hole so i'd have to drill a hole somewhere on my car? Scary. any info you can give me would be extremely helpful!
|
|
|
|
|
06-18-2013, 10:31 AM
|
#7 |
Drives: 2013 Black Camaro 2SS/RS Convert. Join Date: Jun 2013
Location: Sauk Village, Illinois
Posts: 506
|
Sweet
__________________
 2013 Camaro 2SS/RS-Smoked tail lights and side markers, HID log lights, & LED lighting inside/outside the car, SJM LED Cupholder, SJM full dashboard ABL lighting, ZL1 Rockers, 1LE Splitter, Showstopper LED Mirrors, Showstopper LED Side Markers, & Showstopper Heat Extractor Hood, 20" Niche Concourse ZL1 Styled wheels 20X8.5 & 20X10 with 275/40/20 & 315/35/20 Nitto Invos, Black Gorilla Lug Nuts/Locks, Black Billet Elite Camaro License Plate Holder, and Hydro Dipped Speedo/Shifter/AC-Heat Bezels. 2013 Camaro 2SS/RS-Smoked tail lights and side markers, HID log lights, & LED lighting inside/outside the car, SJM LED Cupholder, SJM full dashboard ABL lighting, ZL1 Rockers, 1LE Splitter, Showstopper LED Mirrors, Showstopper LED Side Markers, & Showstopper Heat Extractor Hood, 20" Niche Concourse ZL1 Styled wheels 20X8.5 & 20X10 with 275/40/20 & 315/35/20 Nitto Invos, Black Gorilla Lug Nuts/Locks, Black Billet Elite Camaro License Plate Holder, and Hydro Dipped Speedo/Shifter/AC-Heat Bezels. |
|
|
|
|
|
|
|
 |
|
|
 Similar Threads
|
||||
| Thread | Thread Starter | Forum | Replies | Last Post |
| In Search of LED Rear Bowtie Install Step by Step Instructions | SynerJersey110 | Camaro DIY & HOW-TO instructions & discussions | 21 | 05-29-2014 10:44 AM |
| My IOM AAC Style full lighting system! | Dangeruss | Cosmetics and Lighting Modification Discussions | 93 | 12-30-2011 08:22 PM |
| AAC back Bowtie lighting, disappointed | SoTHavok | Cosmetics and Lighting Modification Discussions | 18 | 10-12-2010 10:02 AM |


