Camaro5 Chevy Camaro Forum / Camaro ZL1, SS and V6 Forums - Camaro5.com
 
Bigwormgraphix
Go Back   Camaro5 Chevy Camaro Forum / Camaro ZL1, SS and V6 Forums - Camaro5.com > Engine | Drivetrain | Powertrain Technical Discussions > Camaro V8 LS3 / L99 Engine, Exhaust, and Bolt-Ons


Reply
 
Thread Tools
Old 03-25-2012, 10:16 PM   #715
NC-V
 
NC-V's Avatar
 
Drives: cts-v
Join Date: Dec 2011
Location: Mooresville, NC
Posts: 506
Quote:
Originally Posted by 572HP View Post
Never heard of nutserts...learn something new every day!

Looking very good Nathan! Indy, your coils look awesome!

I'm going to order me one of the black anodized overflow tanks. NC-V, where did you mount this? Down low on the frame by the radiator outlet? This isn't too far down to be able to draw coolant back up? I've got to get rid of that overflow tank! I want to use the space to install me a small fuse/relay box for add-ons. I'm planning on putting the new fuse box down close to the frame where the overflow bottle was. I'll probably have to access it by removing the wheel and inner liner. I may create a shield so that you won't see the new box from the engine bay.

I have already cleaned up the back of the headlights and put on the braided sleeving for that wiring. I also installed the JDP RGB halo kit. I have torn apart their harness, and wiring it in a little better for my taste. Great kit by the way.

I didn't get a whole lot done with the car this weekend, but I think I have all of the parts now. I went over to Mike's today (thepowdercoater.com) (yeah...Nathan, you know him well). He powdered my tank and a few brackets. Awesome work, as usual. I think it looks just as good as having it anodized, and it was 1/7 the cost.

I spent a little time trying to get the AC belt back on. I don't have the special tool. Any tricks from anyone?
We don't have anything going in that location and I didn't have an issue with the location of the factory tank, we just wanted to get rid of the long necked ugly plastic tank. I mounted ours pretty much in the factory location, right on the upper pinch weld of the passenger frame rail. This way we didn't just have a big empty hole to the wheel well. It also helps hide the big orange hose for our brake cooling ducts. I'm not worried about suction problems, if you think about it the bottom of the factory tank and pick up is way lower than the frame rail.
-Kyle
NC-V is offline   Reply With Quote
Old 03-26-2012, 05:40 AM   #716
572HP
ACE5 (Atlanta Group)
 
572HP's Avatar
 
Drives: "Black Ice"
Join Date: Sep 2010
Location: Suwanee, GA
Posts: 1,702
Quote:
Originally Posted by 2010 Indy Pace View Post
After all, CAMAROFEST3 is coming to my hometown - I gotta be ready (maybe I will even meet some of you guys)!
I'm counting on that! I'm sure it will be difficult finding people though.
__________________
572HP is offline   Reply With Quote
Old 03-26-2012, 08:07 AM   #717
PAUL SS
The Mark of Excellence
 
PAUL SS's Avatar
 
Drives: 2010 ABM 1SS RS LS3
Join Date: Jan 2009
Location: Smallest State in the Union
Posts: 8,690
Paul PM me your address, mine is already polished. I'll just mail it to you.

Thanks, that's a great offer Nathan. But save it for someone who could use it more than me. I really appreciate the offer though.
__________________
BMR, CAI, DynoMax, Elite Eng., Hurst, Jannetty, Clear Image Headers & Hi Flow cats, Jet Hot, LSR, TSW, VMax, Vredestein
PAUL SS is offline   Reply With Quote
Old 03-26-2012, 09:38 AM   #718
Rockin the BlueSS
The New Guy
 
Rockin the BlueSS's Avatar
 
Drives: 2010 2SS/RS IBM M6
Join Date: Sep 2009
Location: Cali
Posts: 1,147
hey Nathan for those nut inserts check out http://www.mcmaster.com they are in cali and have EVERYTHING in stock. i use them on a regular basis here at work. They deliver to me on a daily basis so if you need some things i can order them here and then if your up by the 210 at any point we can meet up...

and just for reference they have 11 different types of threaded inserts
Rockin the BlueSS is offline   Reply With Quote
Old 03-26-2012, 03:31 PM   #719
Moreno1
 
Drives: G5.R
Join Date: Sep 2010
Location: SoCal
Posts: 2,377
Quote:
Originally Posted by Rockin the BlueSS View Post
hey Nathan for those nut inserts check out http://www.mcmaster.com they are in cali and have EVERYTHING in stock. i use them on a regular basis here at work. They deliver to me on a daily basis so if you need some things i can order them here and then if your up by the 210 at any point we can meet up...

and just for reference they have 11 different types of threaded inserts

Thanks Rockin, I appreciate the offer and tip for Mcmaster . I'm not going to be up by the 210 anytime soon. But we will definitely hook up in the future.


Quote:
Originally Posted by blazzin1 View Post
Well, I agree it may be a bit off-topic, but I'd like to hear more about this inside/outside coating discussion. It sure seems like coating the inside would make good sense, but I certainly don't want to give up any ponies because of it!!! Who has some undisputable proof?

Nathan, any word from Brandon at Casper Electronics about how to "de-pin" those wire harness connectors???
Blazzin, I just spoke with Brandon, he said there's three different toe of connectors. Some can be de-pinned. He would need to know which one you were thinking to let you know. He said to give him a call.

Edit: I was able to find the nutsert at http://www.fastenal.com They have local store everywhere. You can buy them individually for .43 cents ea.


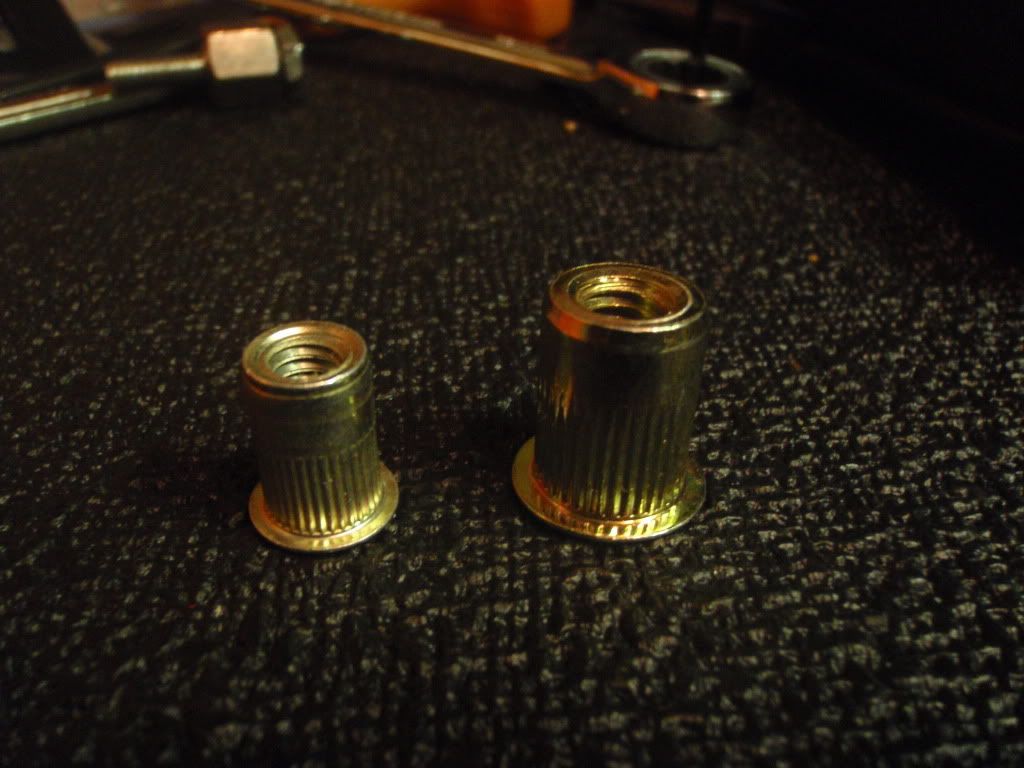
Last edited by Moreno1; 03-26-2012 at 07:22 PM.
Moreno1 is offline   Reply With Quote
Old 03-26-2012, 08:18 PM   #720
Cali_Camaro_SS

 
Cali_Camaro_SS's Avatar
 
Drives: 2010 Camaro 1SS (BLACK)
Join Date: Jan 2010
Location: Cali
Posts: 863
I honestly cant wait to see the end result! sure it will look amazing and clean

any idea on how long everything will be until you have most done for some pics? I know its learn on the way and always finding new things to do but just a rough estimate lol, if possible
__________________
_________________
1SS: Dnyatech LT Headers | Dynamaxx CatBack | Diablo Tune | Intake | Pfatds Springs | Heritage Grill | Blacked out Bezels | Black Chevy Sign | Blacked out Wheels | Tint | HIDs w/Error code Eliminator | Green Dome/Trunk Light |

Cali_Camaro_SS is offline   Reply With Quote
Old 03-27-2012, 09:16 AM   #721
572HP
ACE5 (Atlanta Group)
 
572HP's Avatar
 
Drives: "Black Ice"
Join Date: Sep 2010
Location: Suwanee, GA
Posts: 1,702
Quote:
Originally Posted by Nathan Moreno View Post
Also the harness for the head lights looks like crap. From the factory, the heads lights a marked with a several different color markers which also looks like crap. So I already know I will be removing them along with the front end and cleaning/ detailing that whole area. I know, I know
For the headlights, I removed all of the barcodes and such, removed all of the glue from the stickers, and removed all of the colored markings using lacquer thinner. I am wanting to fill in some of the voids on the top bracket that hangs the headlight. Those are visible when everything is installed, and it catches water from washing the car, and catches dirt which is very difficult to clean. What do you think I could fill that plastic in with? Fiberglass body filler, and a light coat of bondo? I think it would need to be too thick for just bondo, and I'd be worried that it would crack out of there.
__________________
572HP is offline   Reply With Quote
Old 03-27-2012, 12:08 PM   #722
bmbbl be

 
bmbbl be's Avatar
 
Drives: 2010 CAMARO SS
Join Date: Apr 2010
Location: ohio
Posts: 1,360
thought i would post what aluminum thats polished then clear anadized looks like,,,,these are my MTI manuel adjuster.....also received my coolant reservoir tank back from getting hydrocarbon on it...tank is roto-fab
Attached Images
  
bmbbl be is offline   Reply With Quote
Old 03-27-2012, 01:03 PM   #723
Synner


Drives: cars
Join Date: May 2011
Location: Oversneeze
Posts: 4,544
Quote:
Originally Posted by 572HP View Post
For the headlights, I removed all of the barcodes and such, removed all of the glue from the stickers, and removed all of the colored markings using lacquer thinner. I am wanting to fill in some of the voids on the top bracket that hangs the headlight. Those are visible when everything is installed, and it catches water from washing the car, and catches dirt which is very difficult to clean. What do you think I could fill that plastic in with? Fiberglass body filler, and a light coat of bondo? I think it would need to be too thick for just bondo, and I'd be worried that it would crack out of there.
From repairing motorcycle fairings you want to use a filler with the same hardness as the original material. This helps with smoothing and repair. FOr that reason I don't recommend epoxies since they dry so much harder than the surrounding material and then it sands unevenly and will look like crap since you can't feather/blend the edges easily.

Your best bet is a plastic filler and repair kit similar to this.
http://www.plastex.net/index.php?pr=Product_Info
Thats just a random company I found but if you google fairing repair kit or plastic repair you can find those. It uses a chemical to melt similar plastic material and then it bonds to the original surface. It comes in rods or pellets, for filling voids I'd use the pellet kits. Make sure you get the right kind of plastic as you can buy ABS, polyethylene, and maybe a couple others. It won't work at all and will jack up your headlight if you get the wrong one.
Synner is offline   Reply With Quote
Old 03-27-2012, 01:56 PM   #724
FurySS
Furious Shine
 
Drives: None
Join Date: Mar 2011
Location: Indiana
Posts: 669
Quote:
Originally Posted by 572HP View Post
For the headlights, I removed all of the barcodes and such, removed all of the glue from the stickers, and removed all of the colored markings using lacquer thinner. I am wanting to fill in some of the voids on the top bracket that hangs the headlight. Those are visible when everything is installed, and it catches water from washing the car, and catches dirt which is very difficult to clean. What do you think I could fill that plastic in with? Fiberglass body filler, and a light coat of bondo? I think it would need to be too thick for just bondo, and I'd be worried that it would crack out of there.
Sweet attention to detail!


Quote:
Originally Posted by bmbbl be View Post
thought i would post what aluminum thats polished then clear anadized looks like,,,,these are my MTI manuel adjuster.....also received my coolant reservoir tank back from getting hydrocarbon on it...tank is roto-fab


So almost 3 weeks ago when I was looking for coil brackets I sent Vengeance a pm because Nathan said they were working on them. I never got a response so I went forward with the eBay ones. Sunday I finally got a pm back from Vengeance saying they would be posting info about their brackets this week . Not sure why they could not have told me that a few weeks ago...
FurySS is offline   Reply With Quote
Old 03-27-2012, 06:40 PM   #725
lsuguy
 
lsuguy's Avatar
 
Drives: 2011 2SS/RS
Join Date: May 2011
Location: Baton Rouge, LA
Posts: 362
Thanks guys for the coil bolt size. One last question. What about the factory fuel rails? I know you have a size posted for the aftermarket rails you are running but not sure if they will work with the factory? Sorry if this has been posted already but I didn't see it if it was.

Thanks again!
lsuguy is offline   Reply With Quote
Old 03-27-2012, 07:15 PM   #726
572HP
ACE5 (Atlanta Group)
 
572HP's Avatar
 
Drives: "Black Ice"
Join Date: Sep 2010
Location: Suwanee, GA
Posts: 1,702
Quote:
Originally Posted by Synner View Post
From repairing motorcycle fairings you want to use a filler with the same hardness as the original material. This helps with smoothing and repair. FOr that reason I don't recommend epoxies since they dry so much harder than the surrounding material and then it sands unevenly and will look like crap since you can't feather/blend the edges easily.

Your best bet is a plastic filler and repair kit similar to this.
http://www.plastex.net/index.php?pr=Product_Info
Thats just a random company I found but if you google fairing repair kit or plastic repair you can find those. It uses a chemical to melt similar plastic material and then it bonds to the original surface. It comes in rods or pellets, for filling voids I'd use the pellet kits. Make sure you get the right kind of plastic as you can buy ABS, polyethylene, and maybe a couple others. It won't work at all and will jack up your headlight if you get the wrong one.
Thanks for this info. You sound like you have some definite experience on this. I guess I won't be doing it right now...but my latest moto is if I can easily do it later, then that is what I'll do.

I'm sure you know what my next question is...how can you tell what material it is? This is the black headlight bracket that you can see when you open the hood. It has a waffle pattern on top for strength, and has the word "TOP" on it. Is there some tests to tell what type of plastic? I would want to do this also with the stock radiator fan housing.
__________________
572HP is offline   Reply With Quote
Old 03-28-2012, 03:23 AM   #727
Moreno1
 
Drives: G5.R
Join Date: Sep 2010
Location: SoCal
Posts: 2,377
Quote:
Originally Posted by Cali_Camaro_SS View Post
I honestly cant wait to see the end result! sure it will look amazing and clean

any idea on how long everything will be until you have most done for some pics? I know its learn on the way and always finding new things to do but just a rough estimate lol, if possible
I hear ya, I want to see it done also. The challenge is predicting how ignorant I am, LOL. Base on what I'm planning if I were to guess about three months.

I spoke with Brandon from Casper electronic yesterday, he's going to be helping implement an idea that if I were to post, you guys think I'm crazy. Will definitly be a first. But it will be all documented here.

Quote:
Originally Posted by 572HP View Post
For the headlights, I removed all of the barcodes and such, removed all of the glue from the stickers, and removed all of the colored markings using lacquer thinner. I am wanting to fill in some of the voids on the top bracket that hangs the headlight. Those are visible when everything is installed, and it catches water from washing the car, and catches dirt which is very difficult to clean. What do you think I could fill that plastic in with? Fiberglass body filler, and a light coat of bondo? I think it would need to be too thick for just bondo, and I'd be worried that it would crack out of there.
Seriously, more ideas , I'm stilling thinking about what I going to do with the rad. Wait till you see it, it's going to be rad, no pun intended, LOL.

I got one for you, what about painting the wheel liner the same color as the shock towers? Making it blend in.

Quote:
Originally Posted by bmbbl be View Post
thought i would post what aluminum thats polished then clear anadized looks like,,,,these are my MTI manuel adjuster.....also received my coolant reservoir tank back from getting hydrocarbon on it...tank is roto-fab
I really like what your doing! Very nice, keep it up

Quote:
Originally Posted by lsuguy View Post
Thanks guys for the coil bolt size. One last question. What about the factory fuel rails? I know you have a size posted for the aftermarket rails you are running but not sure if they will work with the factory? Sorry if this has been posted already but I didn't see it if it was.

Thanks again!
6MM by 1 by 20MM

Quote:
Originally Posted by 572HP View Post
Thanks for this info. You sound like you have some definite experience on this. I guess I won't be doing it right now...but my latest moto is if I can easily do it later, then that is what I'll do.

I'm sure you know what my next question is...how can you tell what material it is? This is the black headlight bracket that you can see when you open the hood. It has a waffle pattern on top for strength, and has the word "TOP" on it. Is there some tests to tell what type of plastic? I would want to do this also with the stock radiator fan housing.

Last edited by Moreno1; 03-28-2012 at 10:36 AM.
Moreno1 is offline   Reply With Quote
Old 03-28-2012, 06:31 AM   #728
Synner


Drives: cars
Join Date: May 2011
Location: Oversneeze
Posts: 4,544
Honestly all I ever used was abs because that's what pretty much every fairing is made.of. I'm in the middle of moving this week and am doing all this from a smartphone. I don't have my bookmarks or anything to share. There's.a.glazing putty that also is best for plastics as it flexes and won't crack over time. It will give you a perfectly smooth finish. It may be a week until I can get the info but I will post it up when I can. The pellets can be bought in black or white to get the color close. The best place to get how to info is.searching for motorcycle fairing repair.
Synner is offline   Reply With Quote
 
Reply


Posting Rules
You may not post new threads
You may not post replies
You may not post attachments
You may not edit your posts

BB code is On
Smilies are On
[IMG] code is On
HTML code is Off

Forum Jump

Similar Threads
Thread Thread Starter Forum Replies Last Post
Roto-Fab | Engine Covers - S/C | Fuse Relay Cover | Radiator Cover | Billet Oil Cap+ AutoAgenda Exterior Parts & Accessories 14 02-06-2013 08:43 PM
New Texas Speed & Performance Engine Machining Center! Trevor @ Texas Speed Camaro V8 LS3 / L99 Engine, Exhaust, and Bolt-Ons 18 01-16-2013 03:46 PM
Hawk Performance Brake Pads part HB247Z.575 $85.00 Rogan USA - Florida 2 10-07-2011 12:10 PM
Acronyms? KEEP RT Camaro V8 LS3 / L99 Engine, Exhaust, and Bolt-Ons 20 03-11-2011 08:57 PM
Great Read and Info on Oil Weight Banshee Mechanical Maintenance: Break-in / Oil & Fluids / Servicing 1 11-23-2009 09:03 PM


All times are GMT -5. The time now is 02:34 AM.


Powered by vBulletin® Version 3.8.9 Beta 4
Copyright ©2000 - 2024, vBulletin Solutions, Inc.