You are browsing camaro5 

|
 03-17-2012, 07:15 PM
|
#43 |
 Drives: 2010 SS2 Camaro Join Date: Jun 2010
Location: SF Bay Area
Posts: 76
|
If you are going to paint it, then a wire brush or sanding disc will work very well
|

|

|
|
03-18-2012, 08:22 AM
|
#44 | |
  
|
Quote:
|
|
|
|
|
|
03-21-2012, 04:46 PM
|
#45 | |
 Drives: 2013 Camaro ZL1 VR/ECF/Sunroof-Trad Join Date: Apr 2011
Location: Rochester, NY
Posts: 134
|
Quote:
__________________
Traded:
2013 Camaro ZL1 Victory Red, Exposed Carbon Fiber, Sunroof Traded: 2011 Camaro 2SS IOM, RS, Polished Rims, Sunroof, Black Stripes, Hurst Shifter Mods: Borla ATAK Cat-Back, CAI Intake, Skip Shift Elim, Tint |
|
|
|
|
|
04-27-2012, 12:40 PM
|
#46 | |
 
Drives: 2011 Conv 2SS RS 6 Hurst SRX-4 Join Date: Apr 2012
Location: Vernon, BC
Posts: 15
|
Quote:
|
|
|
|
|
|
04-27-2012, 02:12 PM
|
#47 |
 Drives: 2011 Camaro 2SS Join Date: Oct 2011
Location: Bridgewater, NJ
Posts: 373
|
I had my wheels off to grease the calipers, had rusty hats & figured I'de hit them with some BBQ paint. About the brake pin rust, if your pins are covered in brake grease like they should be then it wouldnt be a problem
  
__________________
|
|
|
|
|
04-27-2012, 02:47 PM
|
#48 | |
       
Drives: 2018 Hot Red ZL1 Join Date: Nov 2010
Location: Los Angeles, CA
Posts: 3,599
|
Quote:
__________________
 |
|
|
|
|
|
04-27-2012, 02:56 PM
|
#49 | |

Drives: 2011 2SS/RS M6 VR Join Date: Aug 2011
Location: Chicagoland
Posts: 1,536
|
Quote:
I did my rears last Fall first because they just starting to rust around the hat. Painted them with silver caliper paint and it's held up for 3K miles and 2 HPDE events since.
__________________
 |
|
|
|
|
|
04-27-2012, 04:02 PM
|
#50 | |
|
J.T.

Drives: Camaro 2SS w/RS package, Imp. Blue Join Date: Jan 2012
Location: Sarasota, FL
Posts: 441
|
Quote:
This is driving me nuts. Thanks! Jason
__________________
2011 Camaro 2SS/RS L99
Mods done: 1LE replica wheels, black tail light bezels, LED driving lights (spliced to running lights), VMax CNC ported TB, No tune Vararam, and Rx catch can Mods planned: heritage grille, 1LE splitter, led signals, tune, and possibly LT Headers Love this car! |
|
|
|
|
|
04-27-2012, 10:08 PM
|
#51 | |
|
Drives: 2011 2SS/RS M6 VR Join Date: Aug 2011
Location: Chicagoland
Posts: 1,536
|
Quote:
Yes I jacked it up and removed one wheel at a time. You can do both if you want, probably from an efficiency standpoint makes more sense but I was just enjoying time with the car. Here's a quick rundown of what it takes. I used silver caliper spray paint I bought at Autozone. Nothing special, seems to have held up for 7 months on the rears. Summary: 1. Jack the car up. 2. Remove the wheel. 3. Remove the two caliper bolts (18mm) 4. Slide the caliper away from the rotor and secure it so it is not hanging on the brake line. (use a piece of wire or rope to tie it up to the strut) 5. Remove the torx screw on the face of the rotor hat (this holds the rotor to the wheel hub) 6. Slide the rotor out away from the wheel. 7. Using a small paint brush and liberally apply the Naval Jelly to the rusted areas. 8. Wait about 10 minutes then rinse thoroughly with a hose. 9. Dry the rotor off with a towel. 10. Using an air compressor blow out any water inside the veins (if you don’t have a compressor then just let it air dry.) 11. So the places you want to paint are the face of the hat and the valley, and the outside edges and inside the veins. 12. Begin by using masking tape and completely cover the sides of the rotor where the brake pads ride. It’s OK to tape past the outside and inner edge of the rotor’s face. You’ll notice that the outside edges of the rotors are beveled at a 45 degree angle. 13. Use a single edge razor blade and trim the tape running the blade against the beveled edge leaving the beveled edge exposed. Do this on both sides. 14. Then using the razor blade trim the tape from the valley side of the rotor face. For this, after I trimmed the major portion off I went back and trimmed back about 1/16” around the rotor face. You’ll see what I mean if you look at the rotor faces that the pads don’t contact the face about 1/16” on both edges. On my rotors this was dark colored and a few spots had surface rust. 15. Now go ahead and start painting. Make sure you keep shaking the paint can while using it. The silver tends to spray unevenly if you don’t. Several thin coats worked better than heavy coats. 16. Let the rotor dry for a few hours. 17. Pull off the masking tape and use brake cleaner sprayed onto a paper towel or clean shop rag and wipe any overspray or adhesive from the tape off the rotor faces. Try not to touch them after they are clean. (Don’t get brake cleaner on your new paint or you’ll likely remove the paint.) 18. Now reassemble. 19. Slide the rotor on the wheel hub. 20. Attach the torx screw. (not sure of the torque spec, but it’s not a lot.) 21. Slide the caliper back in place and start the two bolts back in. Since these are TTY you should use new bolts, but several people reuse the old ones and apply blue Locktite. Your choice. 22. Tighten the TTY bolts torque to 44 ft/lbs and 90 degrees more (fronts) and the rears to 30 lb/ft 90 degrees. 23. Put the wheel back and enjoy.
__________________
Last edited by bannonm; 04-28-2012 at 11:53 AM. |
|
|
|
|
|
05-22-2012, 09:17 AM
|
#52 |
|
Drives: Camaro 2010 Join Date: Mar 2010
Location: Germany
Posts: 54
|
Which brands, use these chemicals in their wheels cleaners that removes GM's coating? Up till now I have been able to clean my rims with dish soap and have no rusting issues. But I do have some stubborn spots that I am planning to hit with a wheel cleaner. Thanks.
|
|
|
|
|
05-23-2012, 12:29 PM
|
#53 | |
|
U235 is fun!

Drives: CGM 2SS/M6 Join Date: Apr 2009
Location: Florence, AL
Posts: 403
|
Quote:
 Wasting the dealer's time?? lmfao.. 
|
|
|
|
|
|
05-27-2012, 12:25 AM
|
#54 |
|
Anthony Cascio

Drives: White 2SS/RS, orange stripe & seats Join Date: Feb 2010
Location: Clifton, NJ, U.S.A.
Posts: 48
 |
I too objected to the rust on the center of the brake rotors so I decided to paint them.
It was best to remove the brake rotors & work on a table. Used 3 different size wire wheels on hand drills to clean off the rust & brake dust from the center of the rotors. In doing so I discovered that the rotors were not rusted. The rotors have a corrosion resistant coating on them from the factory. It appears that the bare steel wheel bearing hub that passes through the center of the rotor is the culprit. The hub rusts & the rust passes through gaps in the wheel & outward to the section of the rotor that is visible between the spokes of the wheel. In any case, after wire brushing & cleaning with brake cleaner & paper towels / clean rags, I used masking tape to cover the rotor face that the brake pads contact. You can actually make a circle using 1 wide masking tape by folding the tape back every ½ to ¾ to follow the curve of the circle. Used Dupli-Color Engine Enamel paints: DE 1612 gray engine primer, DE 1620 Chevrolet Orange & DE 1636 clear. I think the results speak for themselves. |
|
|
|
|
05-27-2012, 02:49 AM
|
#55 |
|
Anthony Cascio
Drives: White 2SS/RS, orange stripe & seats Join Date: Feb 2010
Location: Clifton, NJ, U.S.A.
Posts: 48
|
Pics of painted rotors
Painting front & rear brake rotors on my 2010 Camaro 2SS using Dupli-Color Engine Enamel Paint.

|
|
|
|
|
05-28-2012, 01:38 PM
|
#56 |
|
Account Suspended
|
I just finished up my brake upgrade last night. The rusty rotors were driving me nuts. I got a set of slotted and dimpled rotors from forum sponsor Brake Performance and some stainless lines from Granatelli. I had previously painted the calpiers red but decided to give them a fresh coat of ceramic caliper paint while I had them off. I also cleaned up the rust on the hubs and painted them black to prevent further rusting.
The new rotors are Zinc plated, not painted black. Here are a few before and after pictures. FRONT BEFORE: 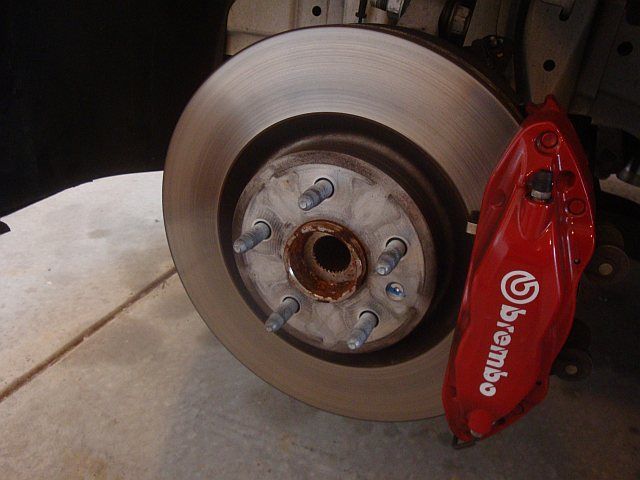 FRONT AFTER: 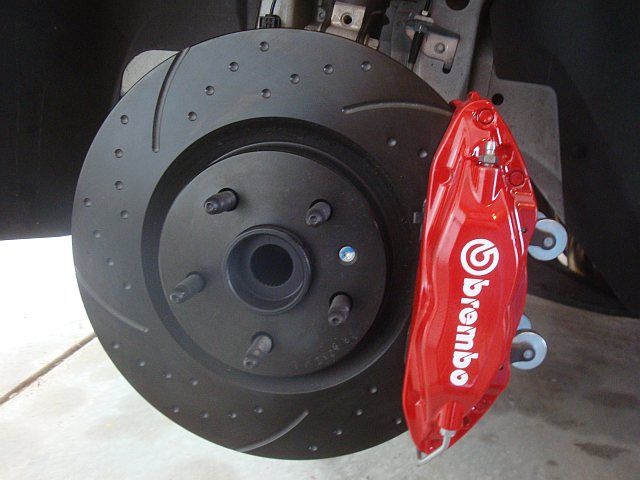 REAR BEFORE: 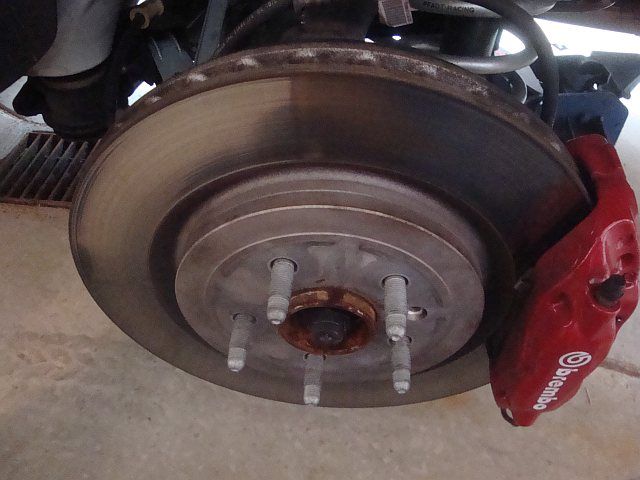 CALIPER AFTER PAINT AND NEW DECAL: 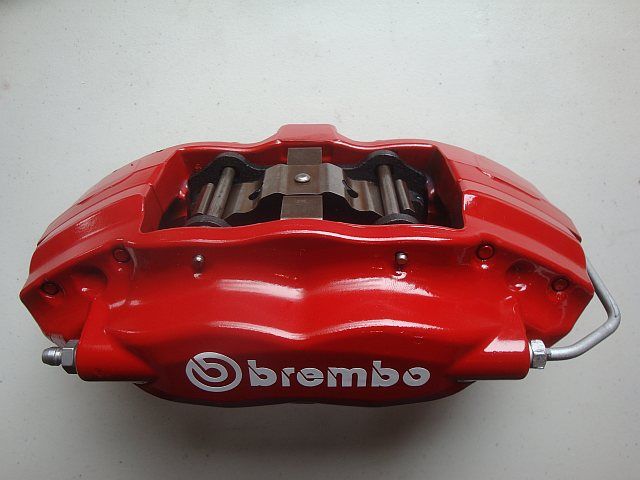 REAR AFTER: 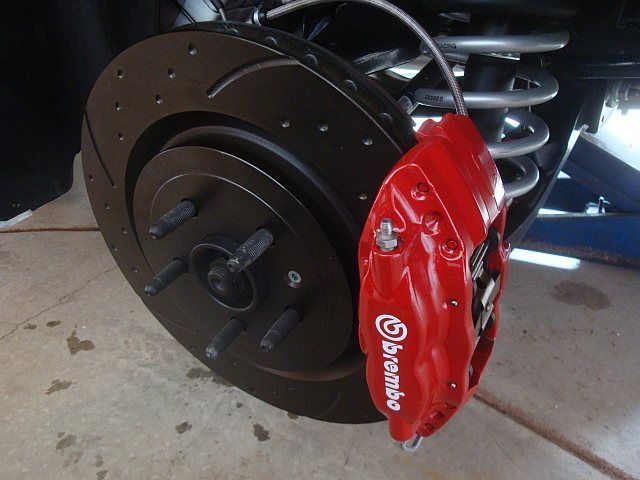
|
|
|
|
|
|
|
|
 |
|
|


 ? You could have hand painted the hats with small brush......3 or 4x with better results!
