You are browsing camaro5 

|
 12-05-2011, 07:27 PM
|
#1 |

Drives: 2010 CGM Camaro 2SS/RS 429 LSX/F1X Join Date: Aug 2011
Location: Sandy, UT
Posts: 429
|
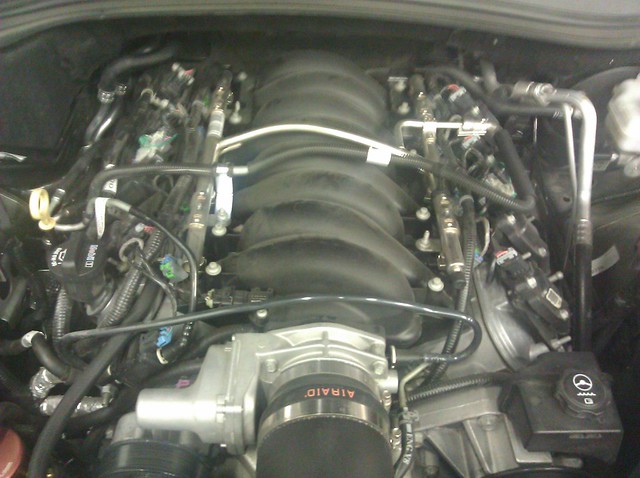
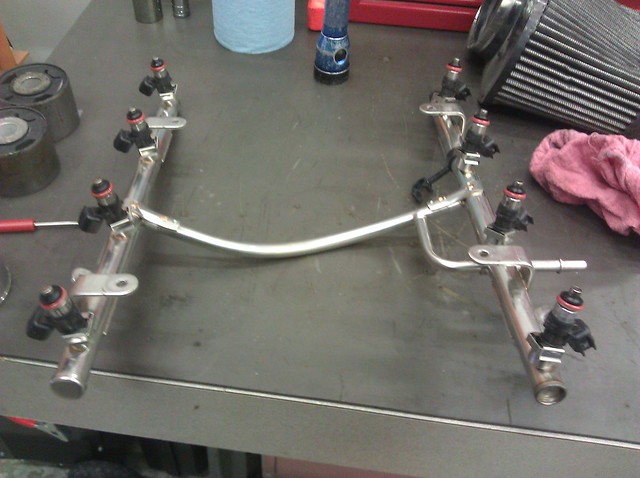
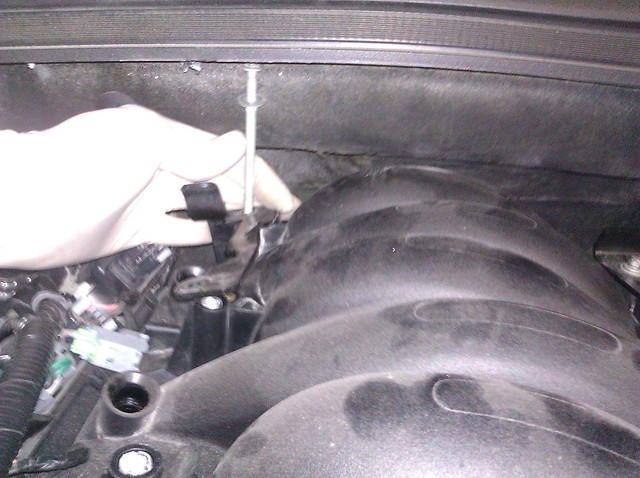
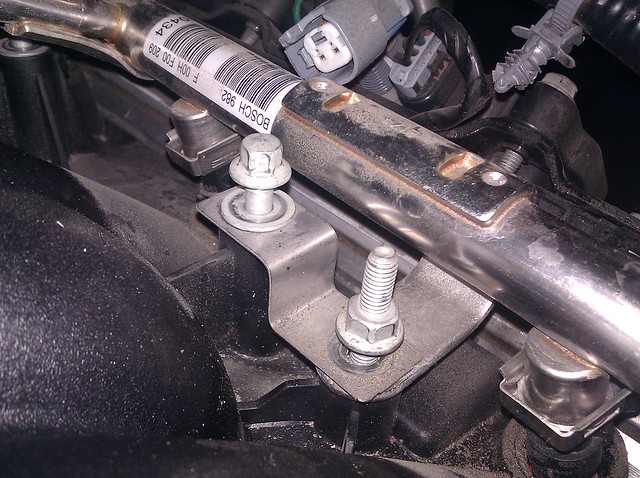
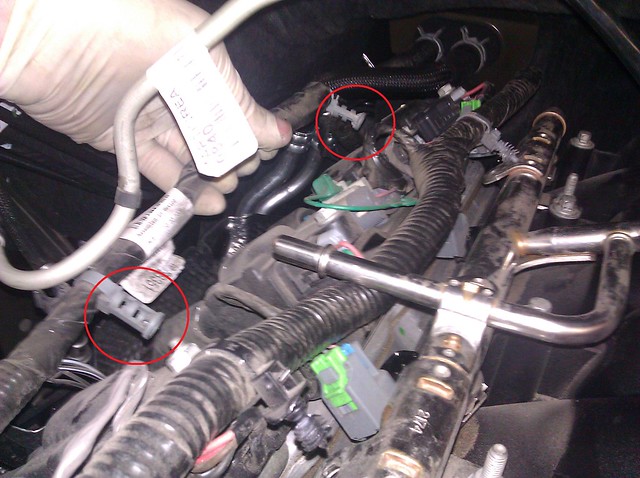
JDP Motorsports' 2010+ Camaro SS Fuel Line Retrofit DIY
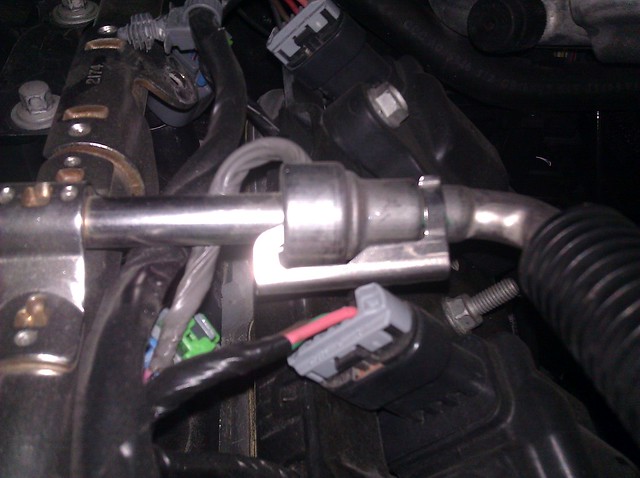
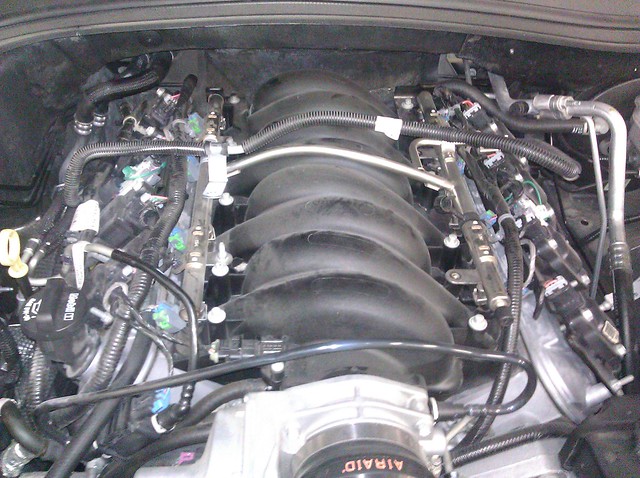
The JDP Motorsports 2010 and up Camaro SS Fuel Line Retrofit Kit is now available, and here is the do-it-yourself instructions for installation
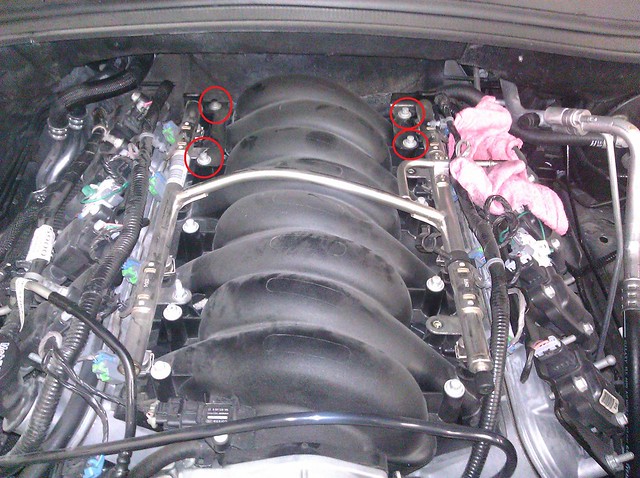
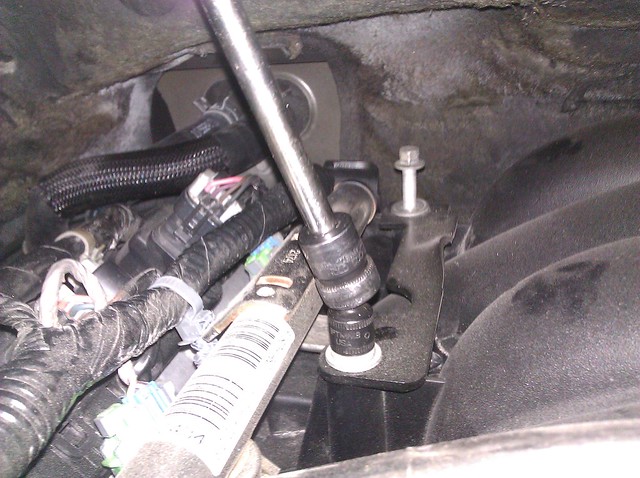
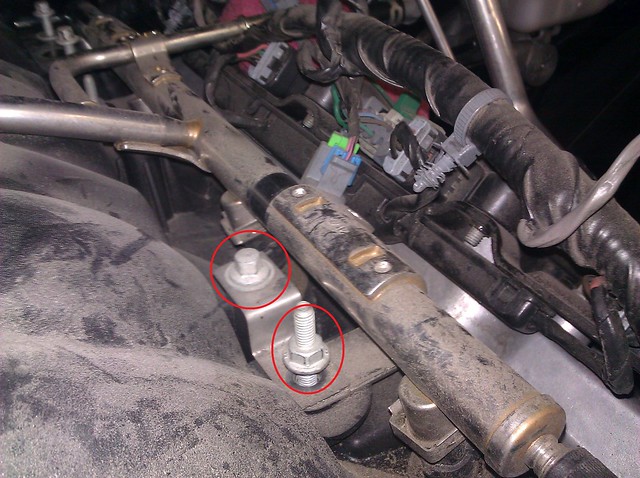
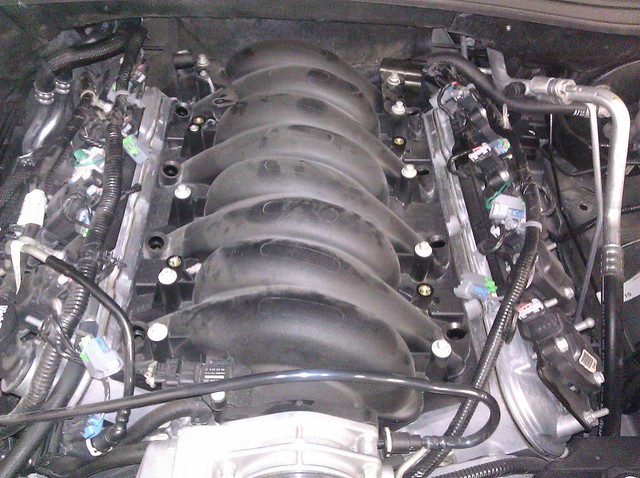
 This retrofit of a new fuel line is an excellent way of making your engine bay cleaner and look more like a muscle car engine bay! This, in addition to the JDP Motorsports' 2010-11 SS Heater Hose 2012 Update will make your Camaro SS's engine bay look the best on the block, with an actual good looking engine staring at you! Tools needed: 3/8" AC/Fuel Line Disconnect Tool (Optionally included with kit) 10mm 1/4" Deep Socket 8mm 1/4" Socket 1/4" Ratchet Torque wrench and socket is highly suggested
If you need any help, or have questions, feel free to call, PM, or email us anytime!  - Jeremy When performed correctly, and as shown, no problems should occur. However, JDP Motorsports is in no way responsible for any damage or injury received or produced by following these instructions. Last edited by JDP Tech; 02-25-2013 at 01:22 PM. |

|

|
|
12-20-2011, 10:41 AM
|
#2 |
|
Drives: 2010 CGM Camaro 2SS/RS 429 LSX/F1X Join Date: Aug 2011
Location: Sandy, UT
Posts: 429
|
Edited and added to, to accommodate different production differences.
- Jeremy
|
|
|
|
|
01-14-2012, 02:27 PM
|
#3 |
 
Drives: Camaro GT Join Date: Dec 2009
Location: Charlotte
Posts: 723
|
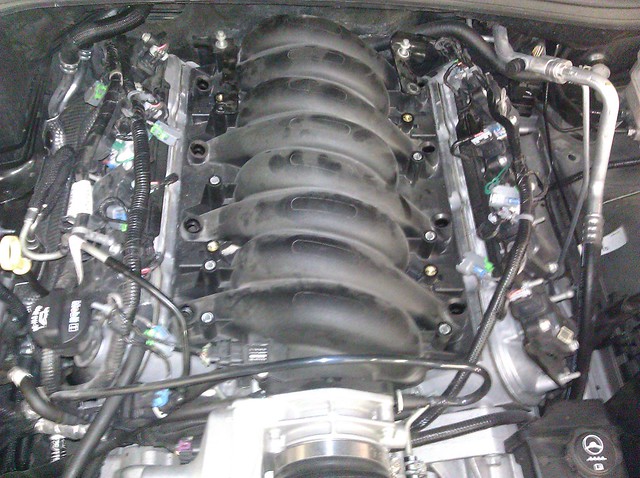
excellent. Is there any problem or performance loss running without the clamshell cover?
__________________
 Post Tenebras Lux  |
|
|
|
|
01-16-2012, 10:44 AM
|
#4 |
|
Drives: 2010 CGM Camaro 2SS/RS 429 LSX/F1X Join Date: Aug 2011
Location: Sandy, UT
Posts: 429
|
Not at all, in fact there is probably a very slight improvement in performance, without the cover the intake will stay cooler, which means cooler air, which means better performance.
With the cover it will keep the manifold warmer, which would help in getting to operating temperature slightly quicker in case you drive it in cold weather, but really you wouldn't notice anything different going either way. Feel free to call, email or PM anytime! - Jeremy
|
|
|
|
|
01-16-2012, 04:06 PM
|
#5 |
|
Burning up tires
Drives: 2023 ZL1 Vert Join Date: Jul 2010
Location: Macomb Twp, MI
Posts: 717
|
Very nice! This is on my to do list in the spring.
|
|
|
|
|
07-16-2012, 10:46 AM
|
#6 |
|
Drives: 2010 CGM Camaro 2SS/RS 429 LSX/F1X Join Date: Aug 2011
Location: Sandy, UT
Posts: 429
|
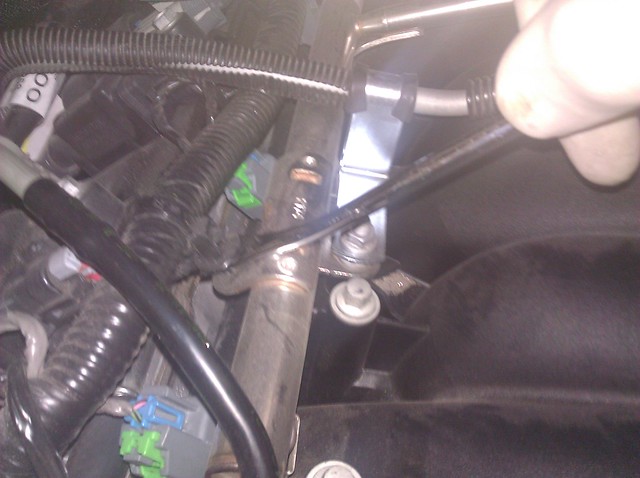
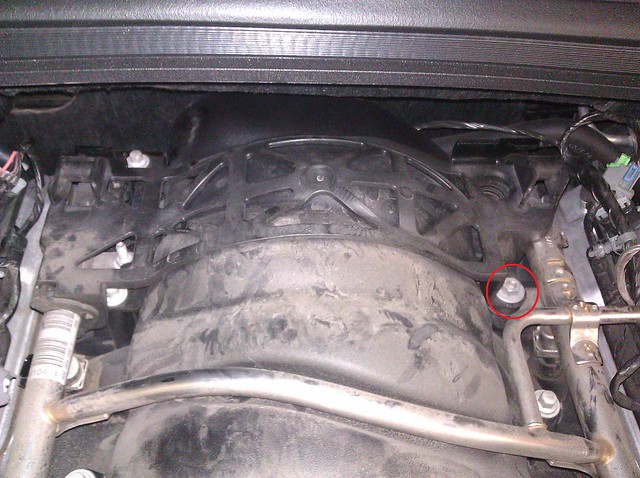
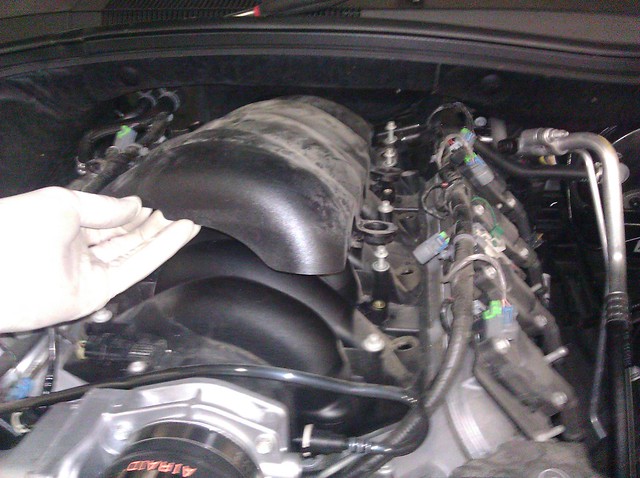
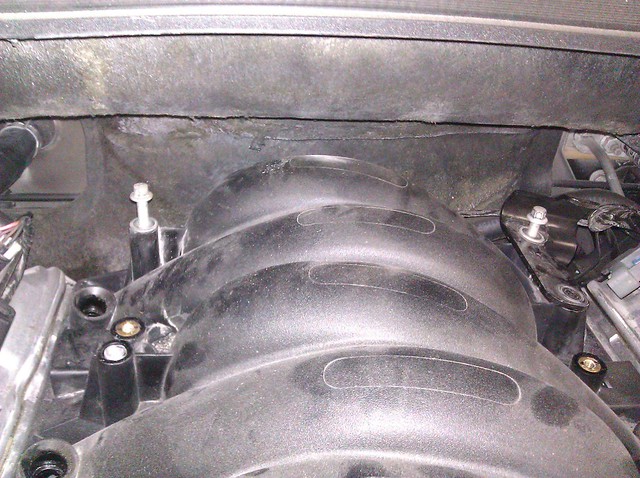
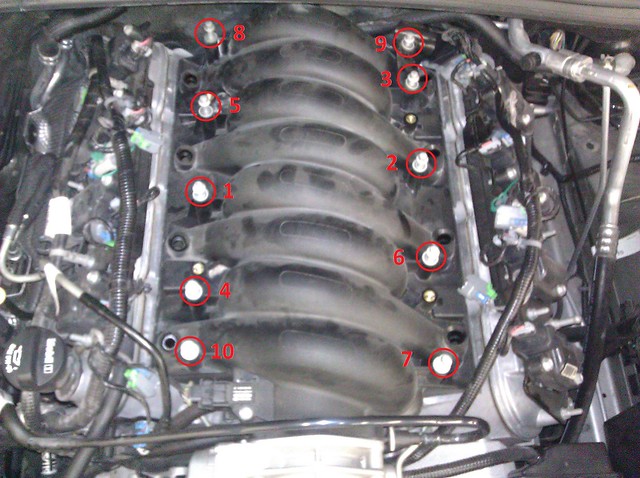
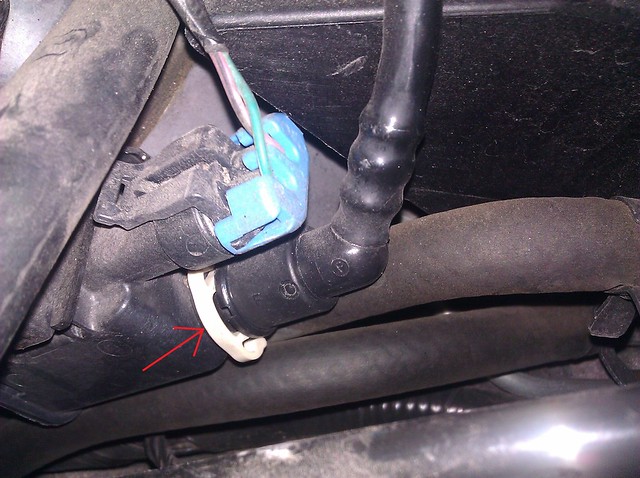
Just added a couple more things, particularly in step 17.
If you leave the clamshell on during intake manifold removal, the manifold cannot lift up enough to clear the oil pressure sending unit if plugged in, so you will have to disconnect the sensor to give you clearance. Feel free to call, email or PM anytime! - Jeremy
|
|
|
|
|
07-16-2012, 02:48 PM
|
#7 |
   
|
Just ordered a kit. Does it come with the fuel line tool or is it just "offered"? I didn't see it as an option to purchase. Thanks
__________________
ADM tuned 412HP/407RWTQ. Kooks 2" headers w/ cats, ADM race intake, Vmax TB, Pedders XA coilovers and ZL1 sways. 1le clone
 |
|
|
|
|
12-27-2012, 01:08 PM
|
#8 |

Drives: 2011 Camaro SS/ 2016 Camaro SS Join Date: Jun 2009
Location: Sandy, Utah
Posts: 3,256
|
Great info!
Kind regards, Jordan Priestley 888.308.6007 |
|
|
|
|
12-27-2012, 01:58 PM
|
#9 |
 
|
Added to the engine clean up list!!
__________________
 |
|
|
|
|
01-21-2013, 07:13 PM
|
#10 |

|
What is the price of the kit with the tool?
__________________
2011 1SS/RS LS3 - Stage II Ported Heads, Stage II Comp Cam, Ported T.B., Hurst Shifter - 0BX LT Headers - CAT delete, Pype Bomb Axle-Back Exhaust - Muffler delete - 4.5 Resonated tips, Spectre CAI, - 480 RWHP 442 TRQ. Dyno tuned by ARD.
 |
|
|
|
|
01-22-2013, 01:00 PM
|
#11 | |
|
Drives: 2011 Camaro SS/ 2016 Camaro SS Join Date: Jun 2009
Location: Sandy, Utah
Posts: 3,256
|
Quote:
Kind regards, Jordan Priestley 888.308.6007 |
|
|
|
|
|
05-06-2013, 02:26 PM
|
#12 |
|
HT5 COTW 1/21/13

Drives: 2010 Camaro Inferno 2SS RS 6M Join Date: Apr 2011
Location: Pleasant Hill, Or
Posts: 2,486
|
Very nice DIY thank you
__________________
 |
|
|
|
|
06-13-2013, 09:13 PM
|
#13 |
 
Drives: 2010 RJT 2SS M6 Camaro Join Date: Feb 2011
Location: Garrison,KY
Posts: 1,548
|
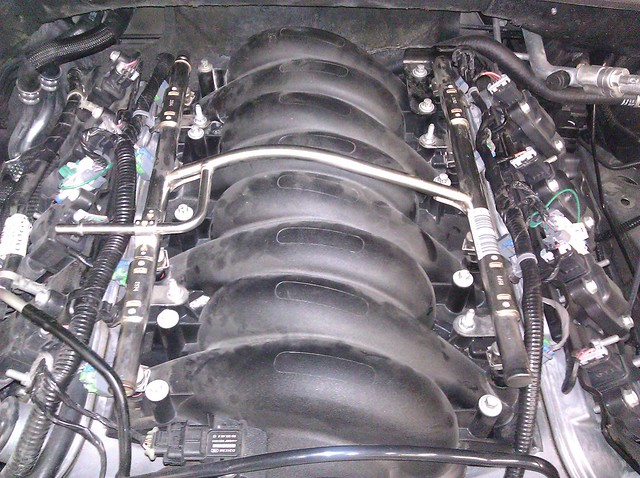
Looks much better, but doesn't rotating the fuel rails 180 degrees put the fuel pressure test port back against the firewall?
__________________
2010 RJT 2SS M6, Kooks Long Tubes, NPP Exhaust, CAI Cold Air w/Jannetty Scoop, RotoFab Washer Bottle, Elite Engineering Catch Can, MGW Shifter w/ZL1 Shaft and Knob, 2015 SS Sedan Steering Wheel and Air Bag, 2012 Heater Hose Conversion, 2012 Power Seat Conversion, RS Head Lights,Gen5DIY RS Conversion Harness, LED Fog Lamp Bulbs, Backup Camera Kit, NLP Spoiler, SLP Splitter, ZL1 Rockers and Diffuser, Color Matched Shark Fin, RS Roof Mouldings, Painted White Stripes, WCC LS3 Emblems, Heritage Grille and Blacked Out Tail Light Panel w/Retro SS Emblems, 416 RWHP, 411 RWT, Tuned by BlueCat.
|
|
|
|
|
06-14-2013, 07:18 AM
|
#14 | |
|
|
Quote:
__________________
ADM tuned 412HP/407RWTQ. Kooks 2" headers w/ cats, ADM race intake, Vmax TB, Pedders XA coilovers and ZL1 sways. 1le clone
|
|
|
|
|
|
|
|
|
 |
| Thread Tools | |
|
|
 Similar Threads
|
||||
| Thread | Thread Starter | Forum | Replies | Last Post |
| Transcript of Camaro ZL1 Q&A Webchat with Chevrolet | Tran | Camaro ZL1 Forum - ZL1 Specific Topics | 42 | 12-22-2017 04:42 AM |
| SEMA Show 2010 - New Camaro Products Showcase - pictures & descriptions! | Sean@Phastek | Camaro Photos | Spyshots | Video | Media Gallery | 59 | 06-23-2011 12:56 PM |
| Latest Camaro Products - March 2010 | Sean@Phastek | V8 Bolt-Ons & Tunes | 26 | 08-04-2010 04:42 PM |
| Stock Injectors vs Magnuson Kit Injectors | Mark-HD | Forced Induction - V8 | 24 | 01-27-2010 08:04 PM |