You are browsing camaro5 

|
 12-16-2017, 09:22 PM
|
#1737 |
   Drives: Z06 wannabe Join Date: Feb 2015
Location: Daytona Beach, FL
Posts: 1,200
|
Dude, so funny. I have the exact same issue....only smelled after 1/4 Mile runs.... no signs of a drop anywhere. Found it from under the car, had a small orangush stain on the top rear of the brand new head!! Made it easy to spot. I am also leaking at the T's
I'm thinking I will take my lid off and look around this winter while fixing this..... why not, am I right???? Need some peer pressure, thinking about a custom cam and going magnaflow full 3inch over diverters and stock cat back. Opinion?
__________________
Apex Focused
|

|

|
|
12-16-2017, 09:29 PM
|
#1738 |
|
'It's an experiment'

Drives: [COTW 2/09/15] '11 GPI LSA SC Z/LE Join Date: May 2014
Location: Dallas TX
Posts: 8,694
|
The stant pressure tester is awesome — I’ll get pics and part numbers — testing Cold is the way to go... you’ll find them...
I’d go with a custom pd cam based on your setup — GPI is my fav place to ask ;o) talk to Aaron or Ryan... Myself, if I really wanted to go all out, I’d do the 3" but, for cost and gain, I’d go with a custom cam first (which I did of course). 3" would be my very last change. Breathing is important, but having room for 3" (and clearing the cf drive shaft) would keep me from doing that... -Don
__________________
747 RWHP 794 RWTQ
"Horsepower sells cars, torque wins races." - Enzo Ferrari See My Build: http://www.camaro5.com/forums/showthread.php?t=385577 |
|
|
|
|
12-16-2017, 09:42 PM
|
#1739 |
|
'It's an experiment'
Drives: [COTW 2/09/15] '11 GPI LSA SC Z/LE Join Date: May 2014
Location: Dallas TX
Posts: 8,694
|
This is the Stant 30 PSI Pressure Tester:
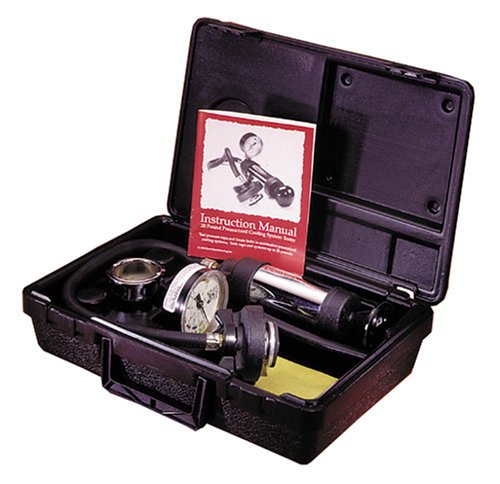 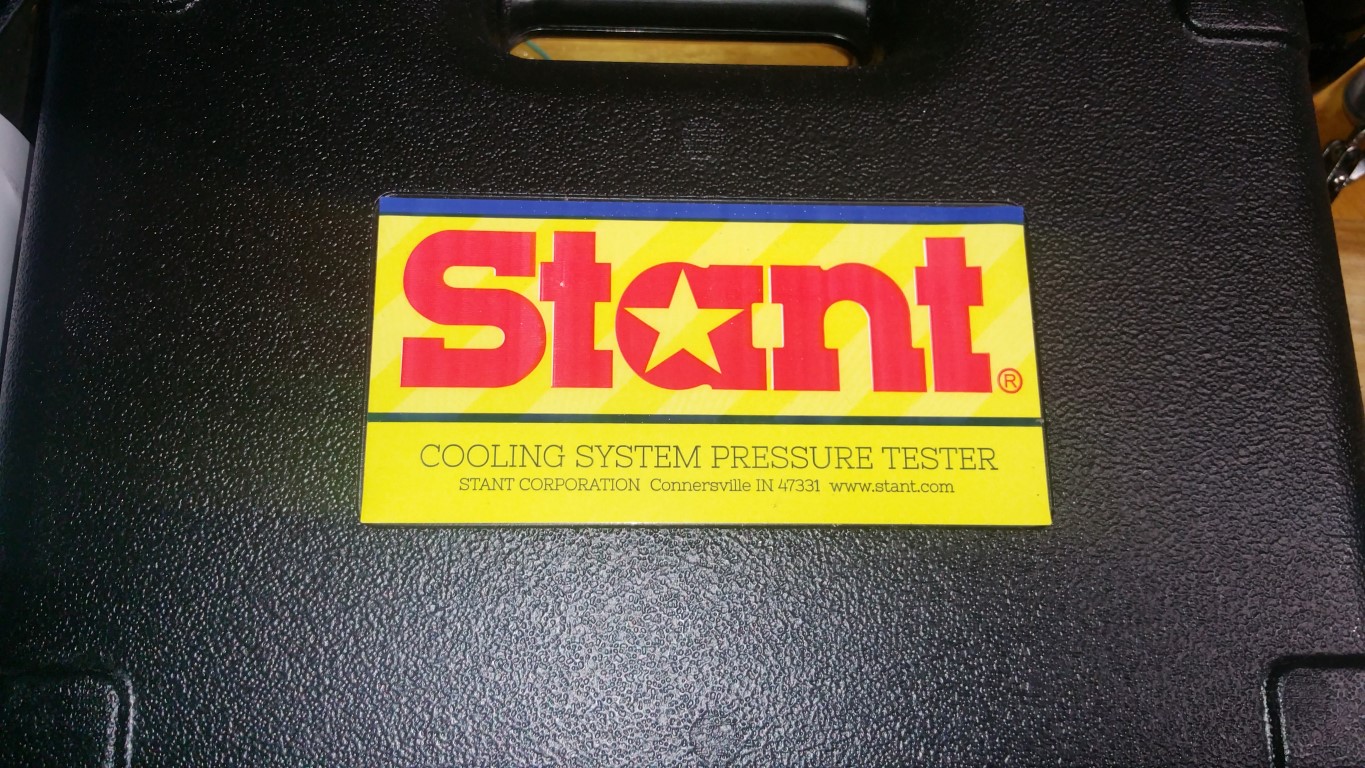 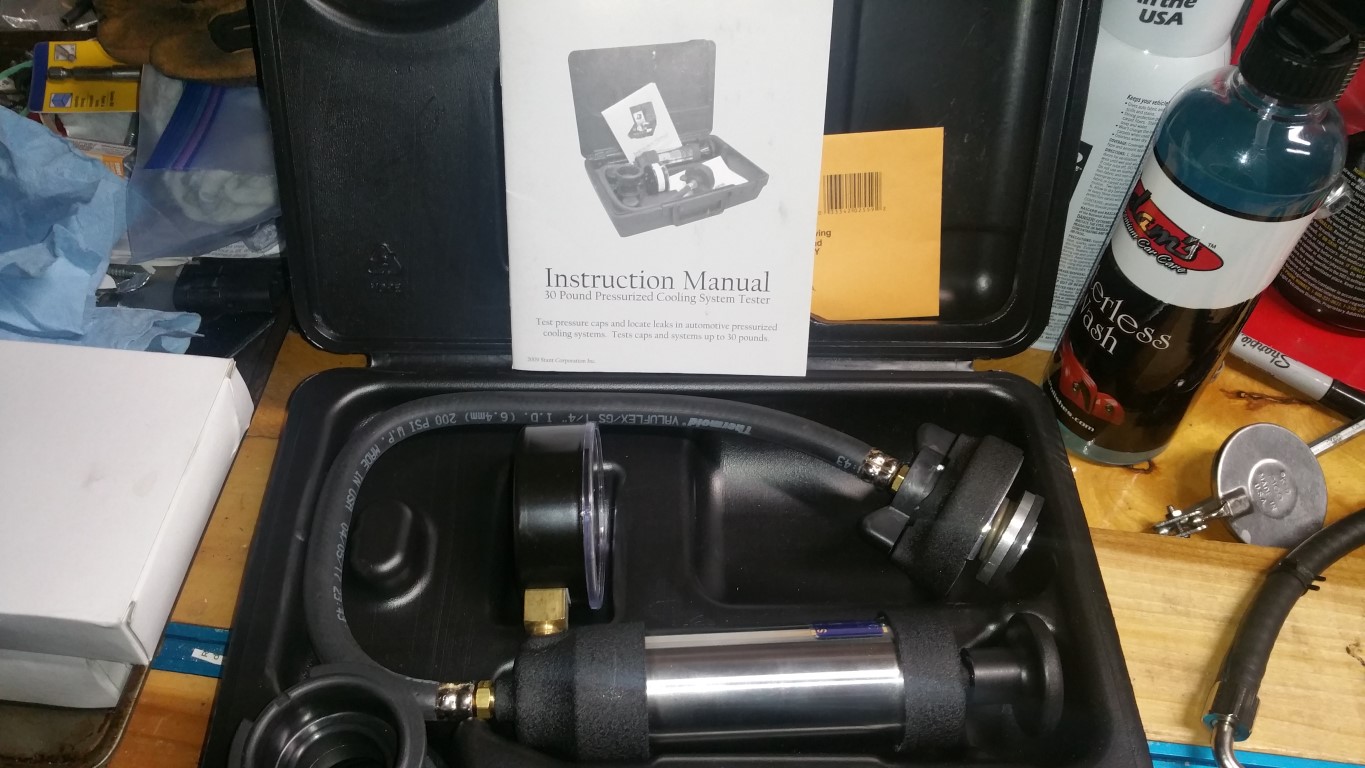 https://www.amazon.com/gp/product/B0...?ie=UTF8&psc=1 This is the adapter you need for our radiators: 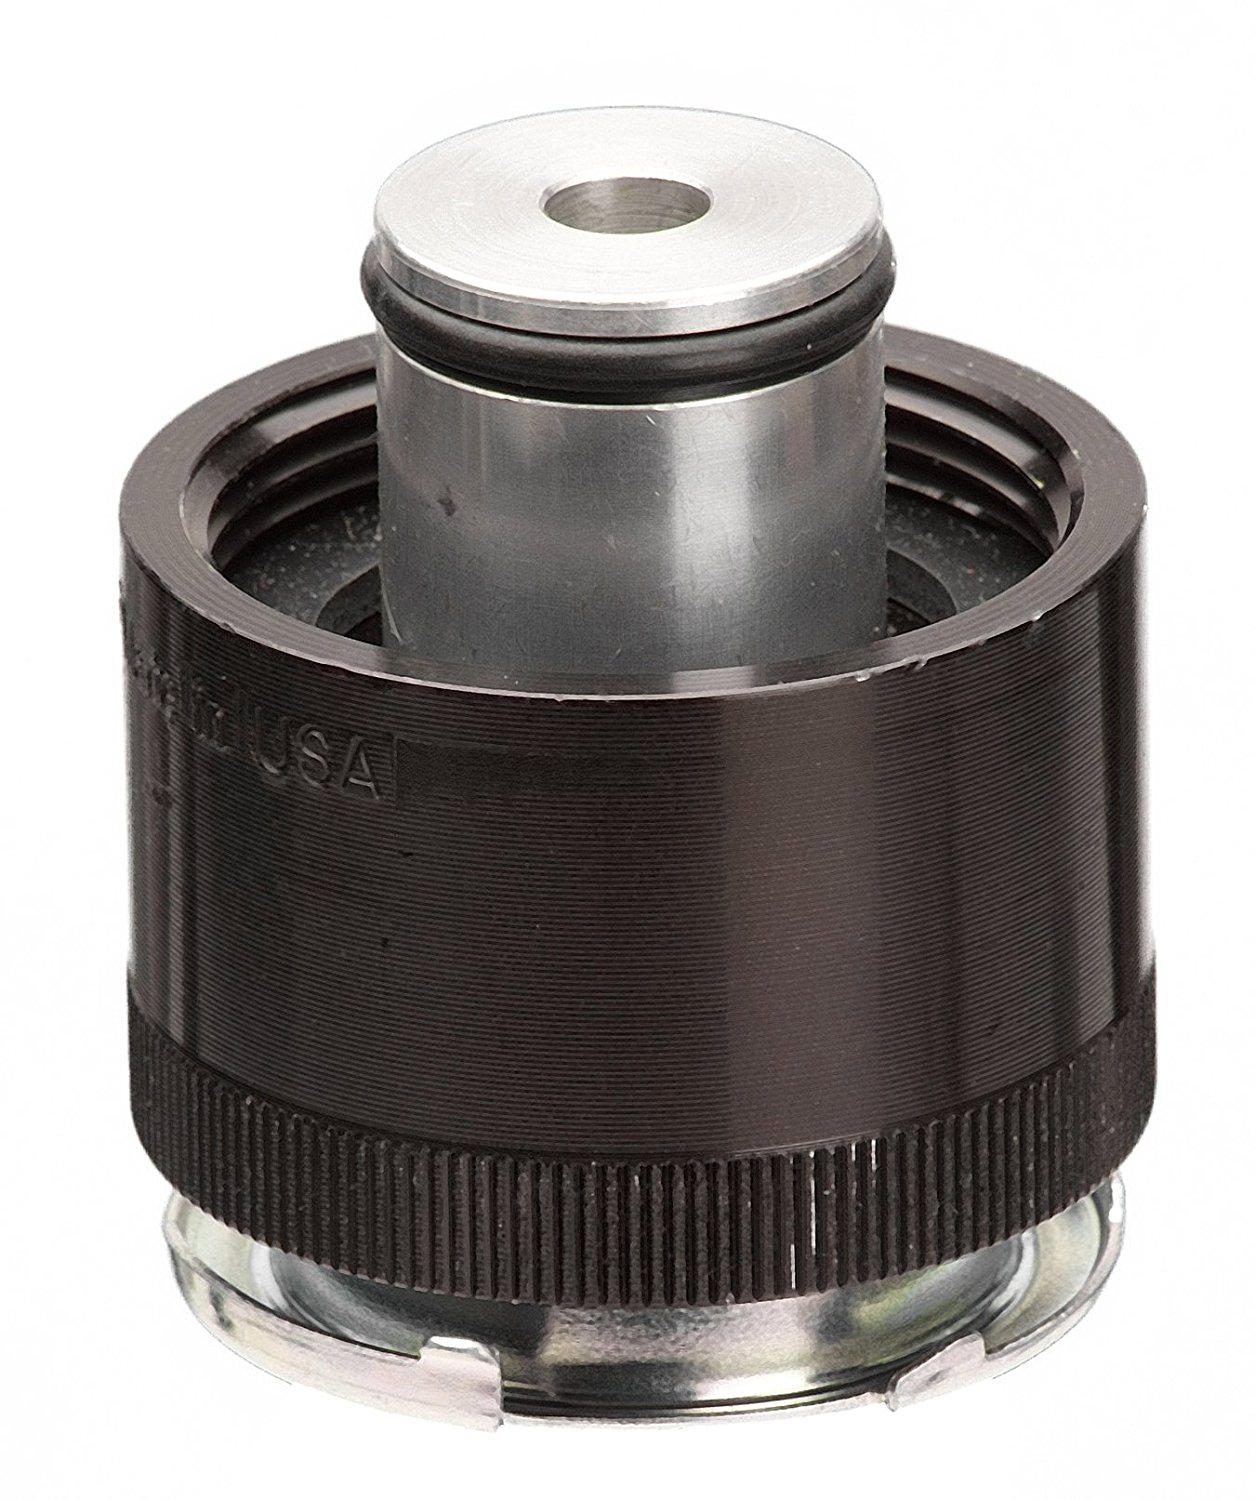 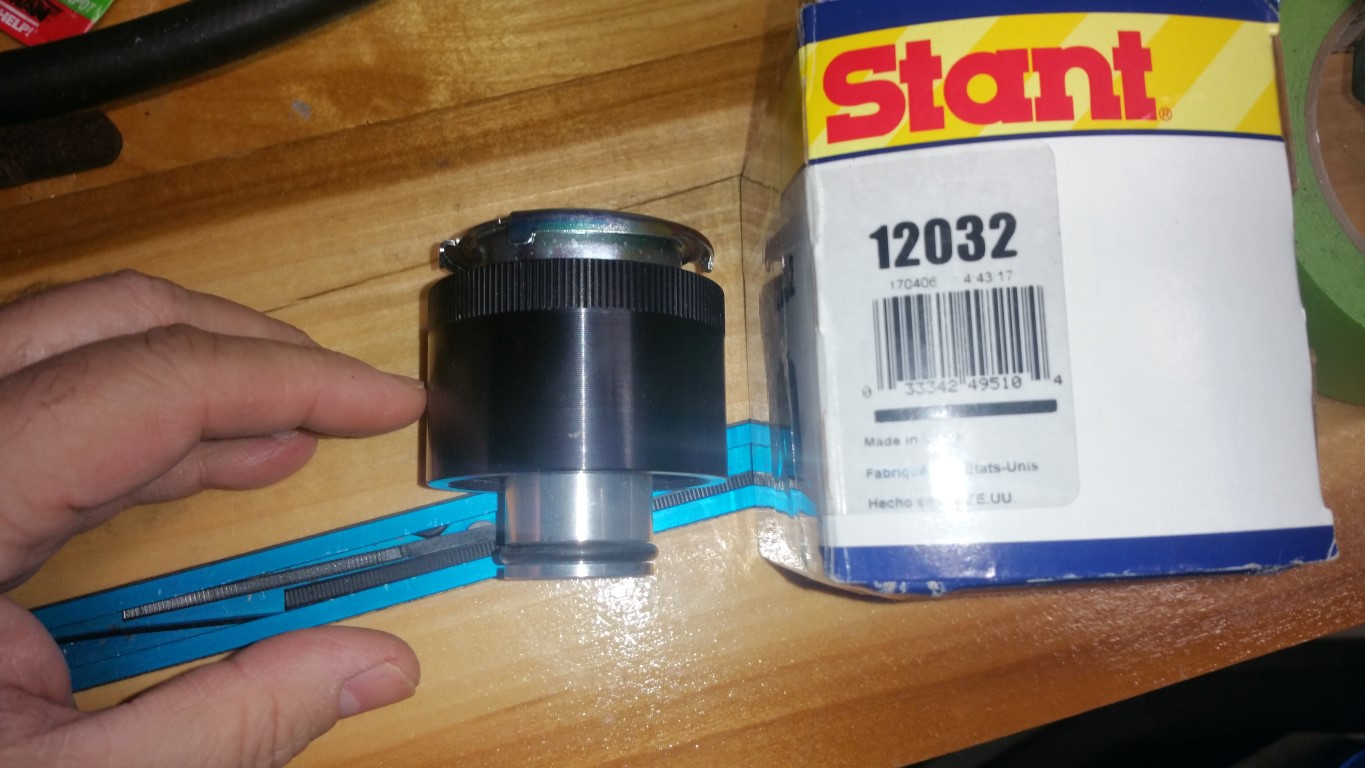 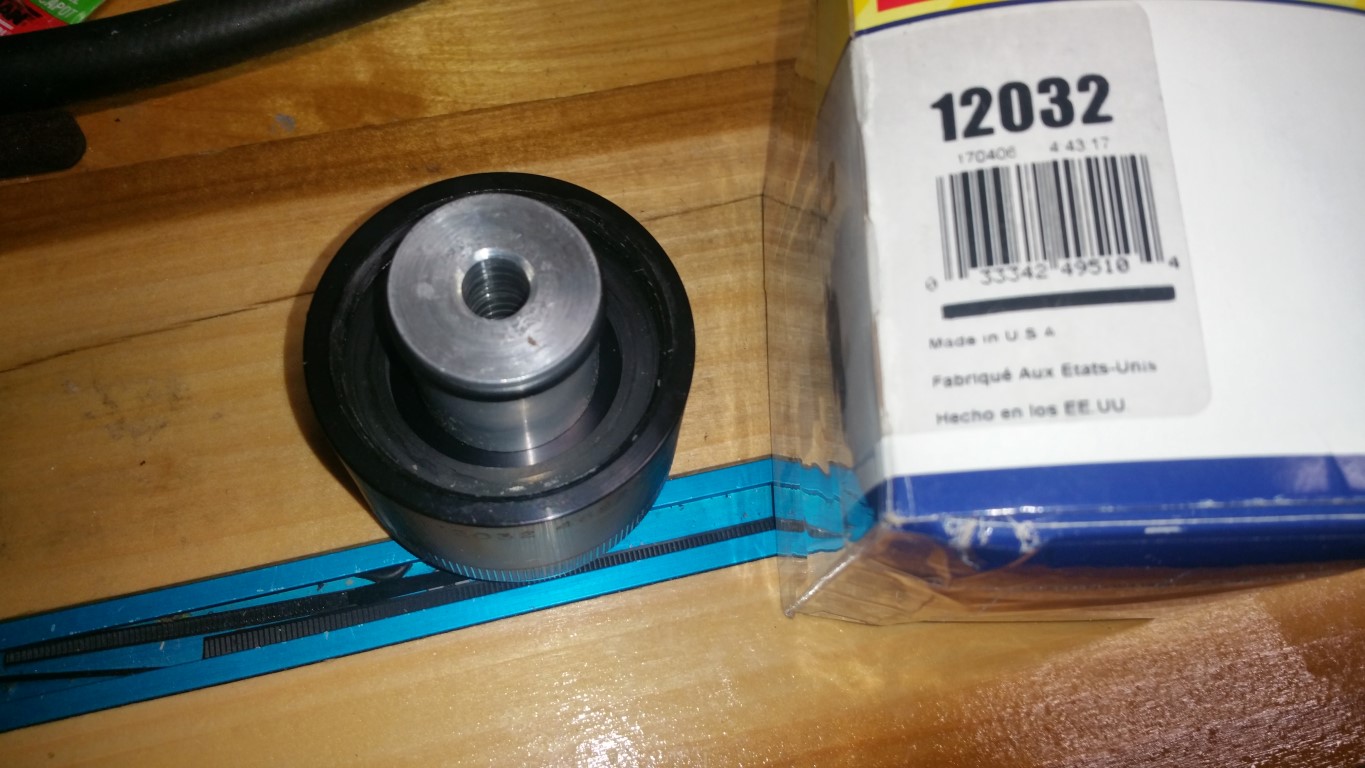 https://www.amazon.com/gp/product/B0...?ie=UTF8&psc=1 If you want to find a leak, this is the tool to use -- when things are cold and not 'expanded'... -Don
__________________
747 RWHP 794 RWTQ
"Horsepower sells cars, torque wins races." - Enzo Ferrari See My Build: http://www.camaro5.com/forums/showthread.php?t=385577 |
|
|
|
|
12-17-2017, 08:21 PM
|
#1740 | ||
|
'It's an experiment'
Drives: [COTW 2/09/15] '11 GPI LSA SC Z/LE Join Date: May 2014
Location: Dallas TX
Posts: 8,694
|
Looks like the combo of AN hose kit and the original steam hose fitting worked!
I can't get pics as everything is behind the supercharger, but, suffice it to say, the AN fitting kit: TFS-306SB601 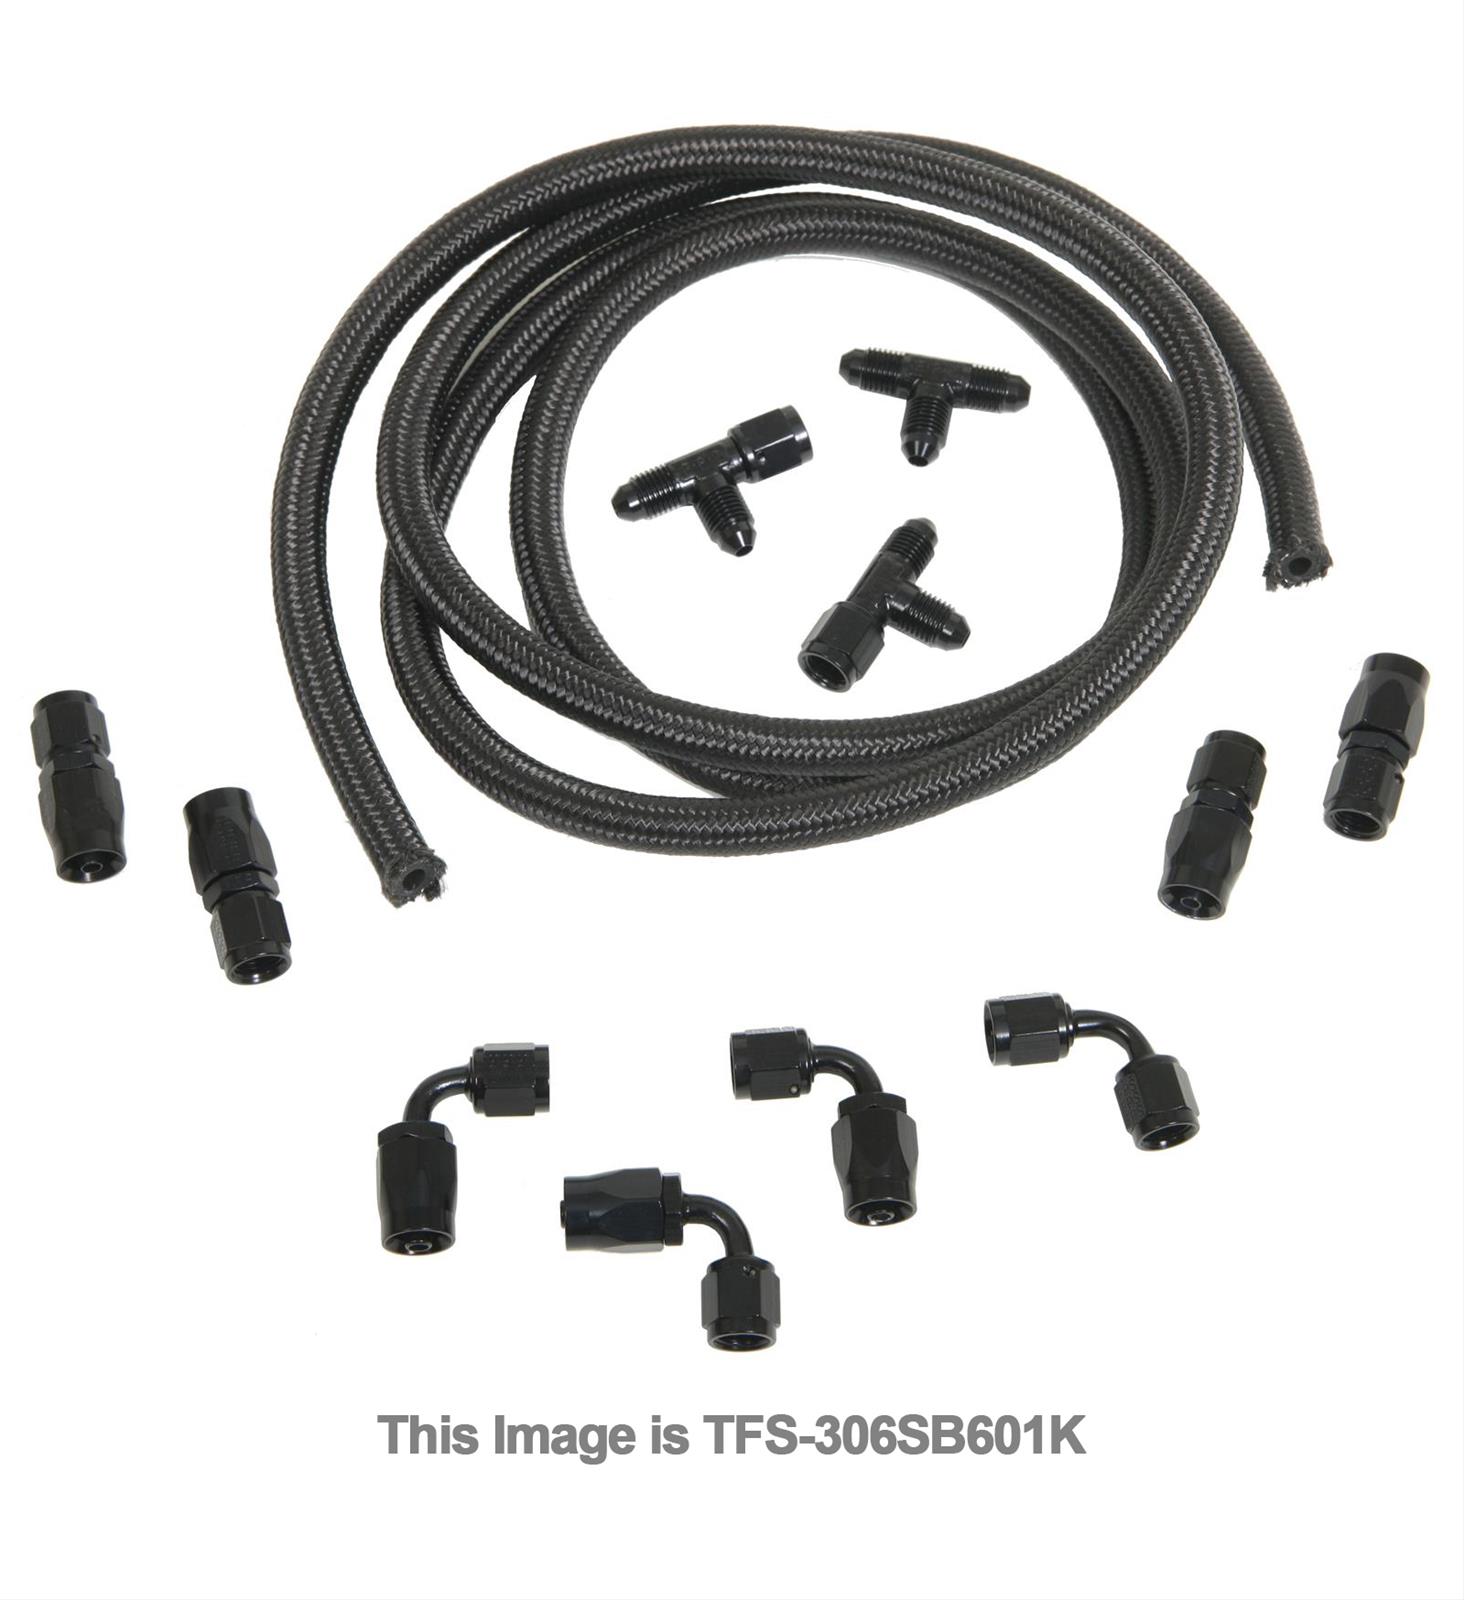 for the rear and just one fitting (barbed): 90 for the silicone 1/4 hose and I am back in business!  This combo worked perfectly -- no tee fitting in the middle with weak clamps. I would not use the barbed kit by itself unless I had better clamps and 1/4 silicone heater hose. Kept the car @ 20 PSI with the pressure tester and once I had everything tightened, found another leak by the water pump -- heater hose clamp was too close to the pump so I moved it closer to the opening -- that fixed it -- these spring clamps are sensitive to 'where' you put them -- I've found if I am using those, to keep the clamp closer to the fitting opening (mouth) so it has better clamping pressure and, does not give anything a path to leak from. Did idle and run the car in the garage (up to 2k rpm) to burp it and fill up the radiator with Water Wetter and Distilled. Will monitor over the next couple of days to see where we wind up... Glad Summit Racing is now in my back yard -- open 9-9 EVERY DAY -- really cool place and a 'dangerous' place for a guy who mods their car ;o) BTW here is a video on how to assemble AN Hoses (like I had in this steam line kit): Here is the other for PTFE type hoses: -Don
__________________
747 RWHP 794 RWTQ
"Horsepower sells cars, torque wins races." - Enzo Ferrari See My Build: http://www.camaro5.com/forums/showthread.php?t=385577 Last edited by hammdo; 12-18-2017 at 12:47 AM. |
||
|
|
|
|
12-17-2017, 09:48 PM
|
#1741 |
|
Drives: Z06 wannabe Join Date: Feb 2015
Location: Daytona Beach, FL
Posts: 1,200
|
Thanks.
Not sure what to do on exhaust....but plenty of time to think it over I guess.
__________________
Apex Focused
|
|
|
|
|
12-17-2017, 10:08 PM
|
#1742 |
|
'It's an experiment'
Drives: [COTW 2/09/15] '11 GPI LSA SC Z/LE Join Date: May 2014
Location: Dallas TX
Posts: 8,694
|
Yep! I bet a cam spected to your setup will make a big difference.
Exhaust is one of those things that as your Boost goes up, pressure relief/breathing can make a difference. Like I said, probably last thing I’d do after all other mods done... -Don
__________________
747 RWHP 794 RWTQ
"Horsepower sells cars, torque wins races." - Enzo Ferrari See My Build: http://www.camaro5.com/forums/showthread.php?t=385577 Last edited by hammdo; 12-19-2017 at 10:53 PM. |
|
|
|
|
12-21-2017, 11:06 PM
|
#1743 |
|
'It's an experiment'
Drives: [COTW 2/09/15] '11 GPI LSA SC Z/LE Join Date: May 2014
Location: Dallas TX
Posts: 8,694
|
Been running the car the last couple of days and no leaks. Tonight, I had time to actually 'drive' the car (76°!) and I can tell the 'maple syrup' smell is almost gone (coolant)!
Car is still running fantastic and as is typical with the weather here, New Years Eve-Eve and New Years Eve may have lows of 16° and 17° both days! (yep, can happen). Our High is expected to be right around 32°. Then 4 days later 62° (or so they say). Figured I'd get it out tonight and a few days next week while the weather is still decent (above 45°). Loving the new engine and performance! E85 ROCKS! -Don
__________________
747 RWHP 794 RWTQ
"Horsepower sells cars, torque wins races." - Enzo Ferrari See My Build: http://www.camaro5.com/forums/showthread.php?t=385577 Last edited by hammdo; 12-23-2017 at 08:31 PM. |
|
|
|
|
12-24-2017, 09:28 PM
|
#1744 |
 Drives: 2013 ZL1 Join Date: Dec 2017
Location: ohio
Posts: 82
|
hammdo I just read your complete build again. Thank you for all the time you took to document everything:-)
|
|
|
|
|
12-25-2017, 12:19 AM
|
#1745 |
|
'It's an experiment'
Drives: [COTW 2/09/15] '11 GPI LSA SC Z/LE Join Date: May 2014
Location: Dallas TX
Posts: 8,694
|
Thanks for reading! It’s a LOOOOOOOOOONG one ;o)
Merry Christmas! -Don
__________________
747 RWHP 794 RWTQ
"Horsepower sells cars, torque wins races." - Enzo Ferrari See My Build: http://www.camaro5.com/forums/showthread.php?t=385577 |
|
|
|
|
12-26-2017, 09:03 PM
|
#1746 |
|
Drives: 2013 ZL1 Join Date: Dec 2017
Location: ohio
Posts: 82
|
Question for hammdo.
From your build thread it looks like you have the cooling controlled on that monster forged engine.
How much do you think the Forced Inductions lid spacer helped with the cooling? Last edited by newz; 12-26-2017 at 09:16 PM. Reason: Correcting wording. |
|
|
|
|
12-26-2017, 11:23 PM
|
#1747 |
|
'It's an experiment'
Drives: [COTW 2/09/15] '11 GPI LSA SC Z/LE Join Date: May 2014
Location: Dallas TX
Posts: 8,694
|
Well. That is a good question. It actually helps with heat soak/recovery and improves the volume of air to the back cylinders (7 & 8). How much is hard to tell since I did a ton of changes at one time. So, the sc lid still gets hot when the car sits but, cools faster when the coolant and air moves over the the sc lid with the forced inductions lid spacer — and that is where the lid spacer comes into play — and makes a difference. Don’t forget, I also used the Mylar on the valley pan.
When I raced at Cresson MotorSport ranch, I had no issues at all with IAT2 temps so I’m guessing all the accumulated changes are doing their job... Thanks for asking... -Don
__________________
747 RWHP 794 RWTQ
"Horsepower sells cars, torque wins races." - Enzo Ferrari See My Build: http://www.camaro5.com/forums/showthread.php?t=385577 Last edited by hammdo; 12-30-2017 at 08:25 PM. |
|
|
|
|
12-27-2017, 02:29 PM
|
#1748 |
|
'It's an experiment'
Drives: [COTW 2/09/15] '11 GPI LSA SC Z/LE Join Date: May 2014
Location: Dallas TX
Posts: 8,694
|
Vanity Plates are in! I'll be picking those up tomorrow ;op
And another small project starts Friday -- hope to see if what I'm planning will work -- gotta wait until the part comes in... Hum... always looking ;o) -Don
__________________
747 RWHP 794 RWTQ
"Horsepower sells cars, torque wins races." - Enzo Ferrari See My Build: http://www.camaro5.com/forums/showthread.php?t=385577 |
|
|
|
|
12-30-2017, 07:53 PM
|
#1749 |
|
'It's an experiment'
Drives: [COTW 2/09/15] '11 GPI LSA SC Z/LE Join Date: May 2014
Location: Dallas TX
Posts: 8,694
|
Well, I started another 'test' project to see how this would work -- don't get mad, but, this is a Roush Intercooler Tank:
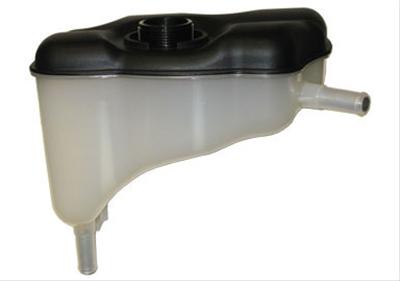 Its for the cough: mustang cough: but, it does 2 things I like:
So I purchased the tank and cap using a Black Friday deal (20%) from a Mustang site. Once it came in, I knew it is what I was looking for. Anyway, here is what it looks like on the car (I'll be building a permanent bracket later once I know this will do what I want). I only had to trim the locating tab (at the bottom) and apply heat shielding (just to be safe): 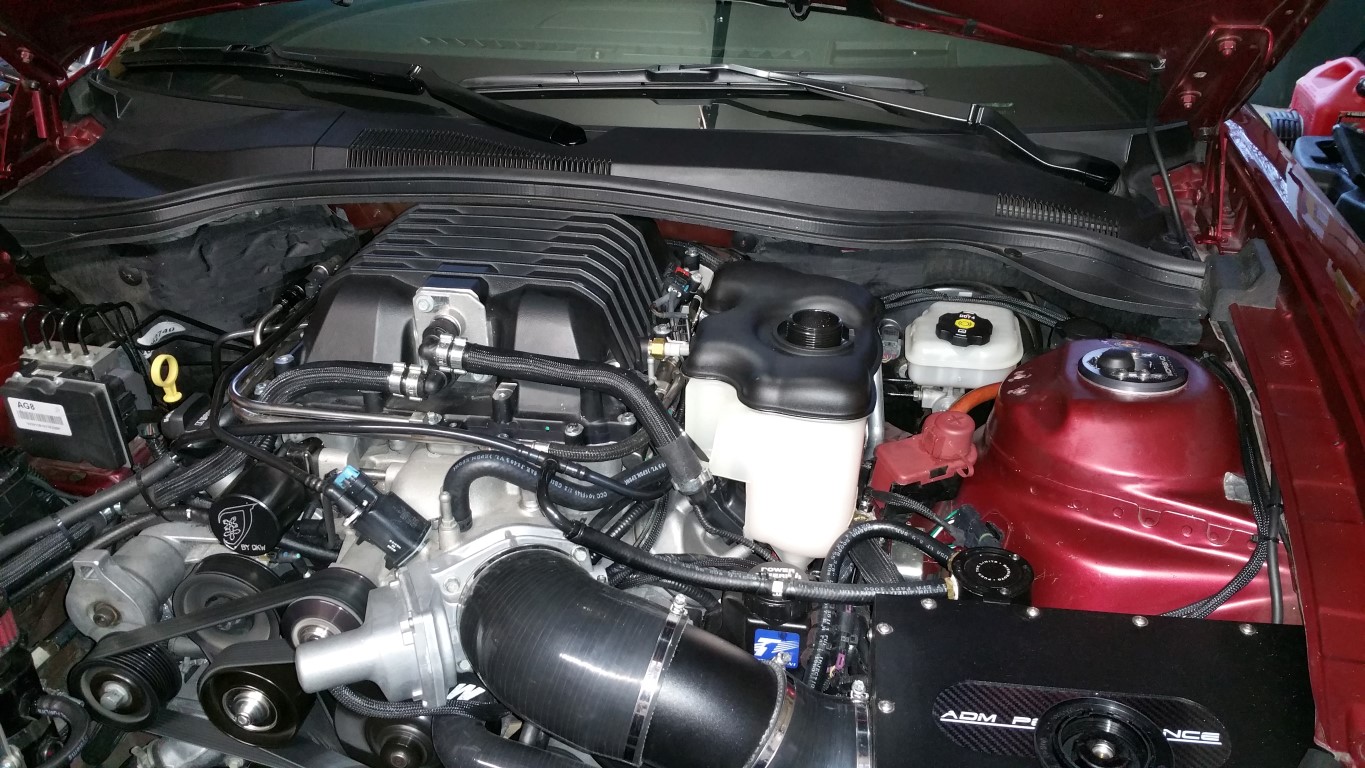 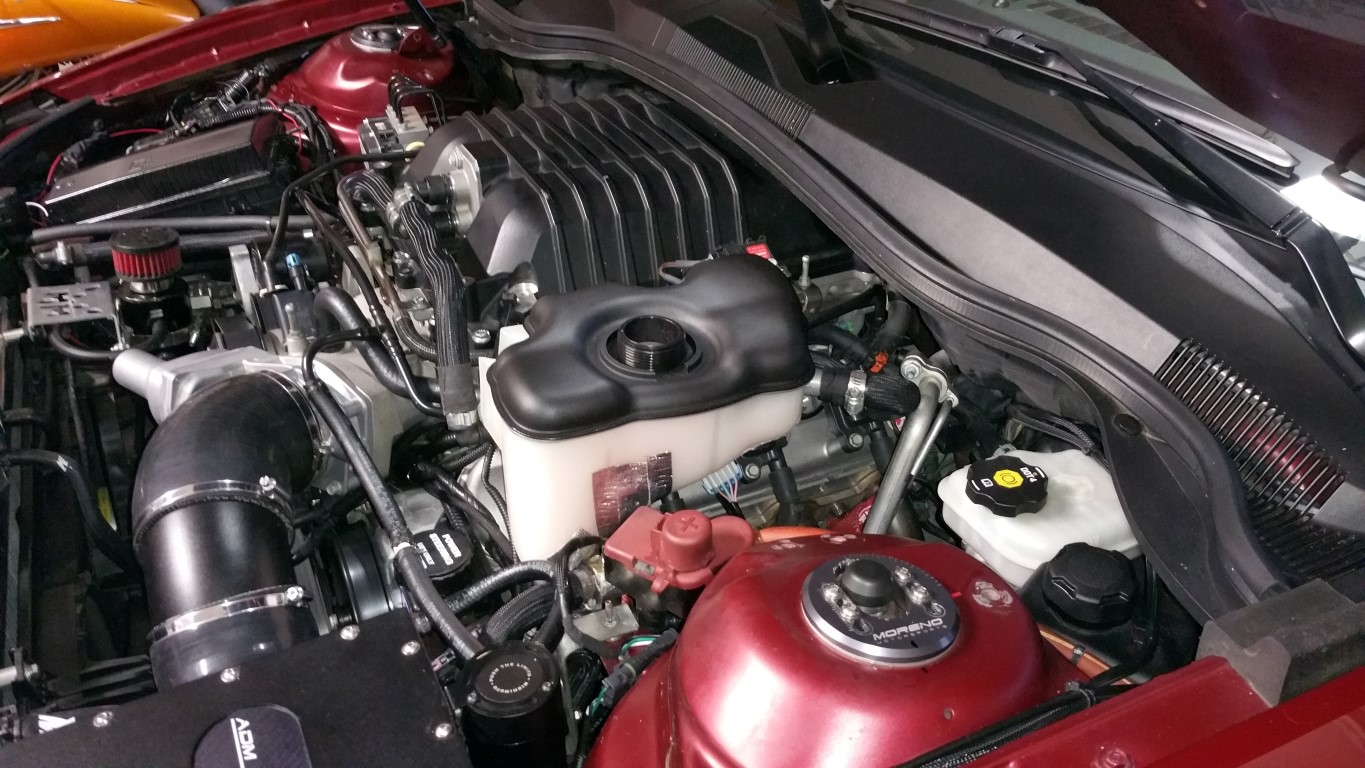 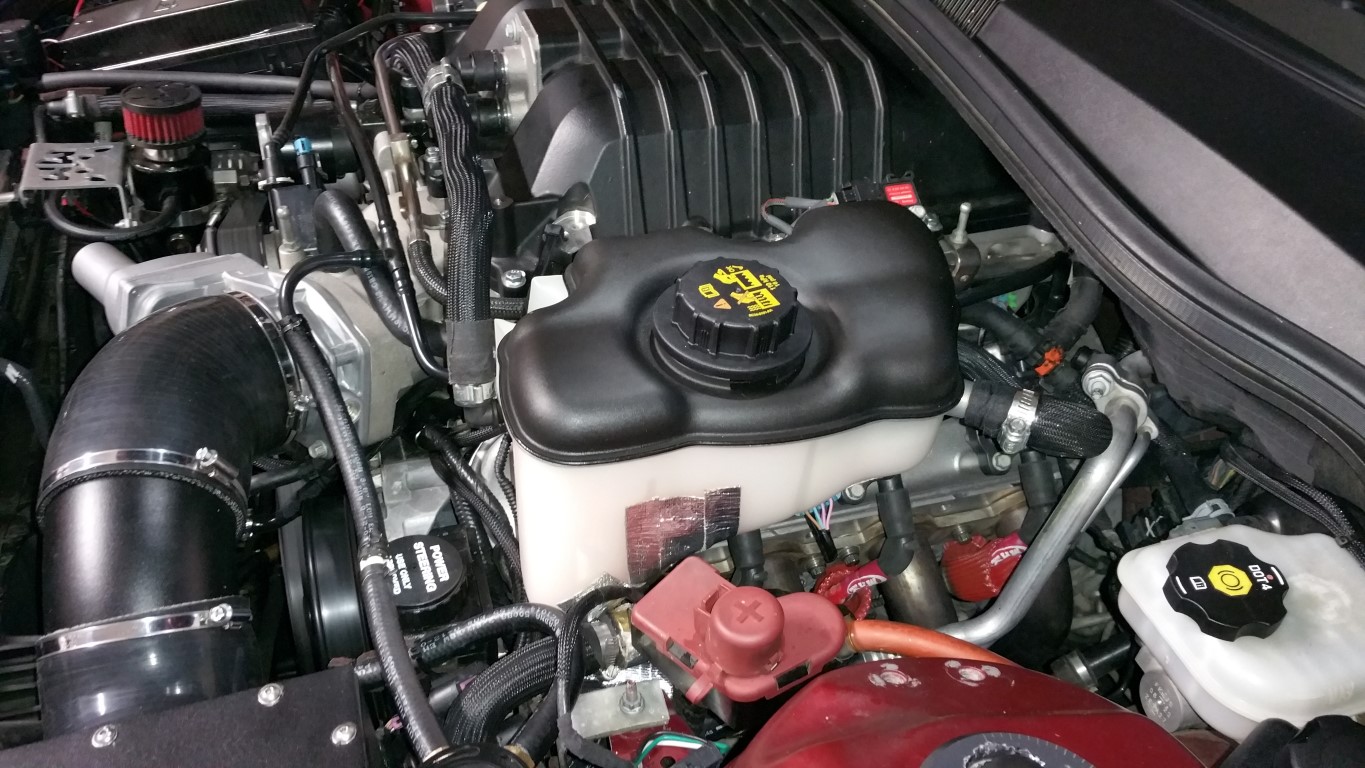 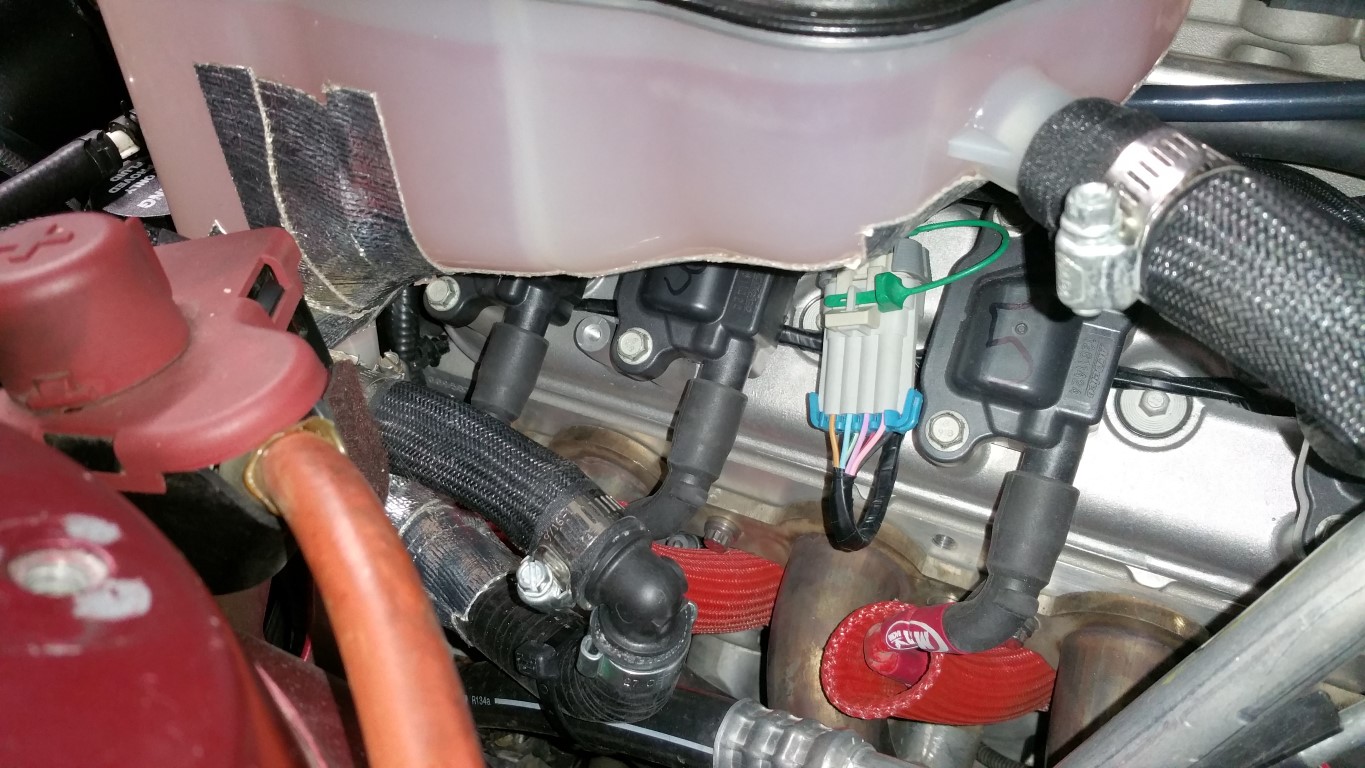 You can really tell the difference in size (the hose outlets were 3/4 and have a metal fitting inside each hose outlet to keep from crushing the inlet/outlet tubes): 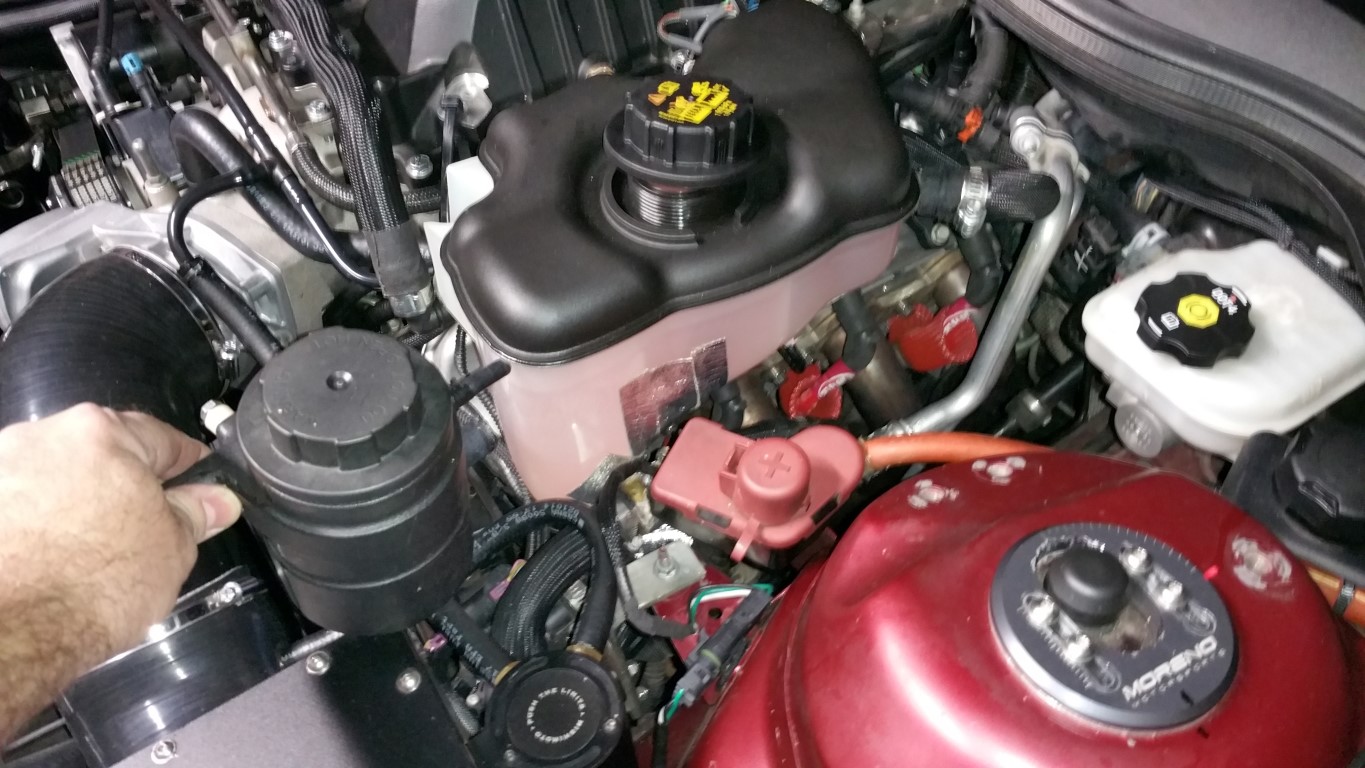 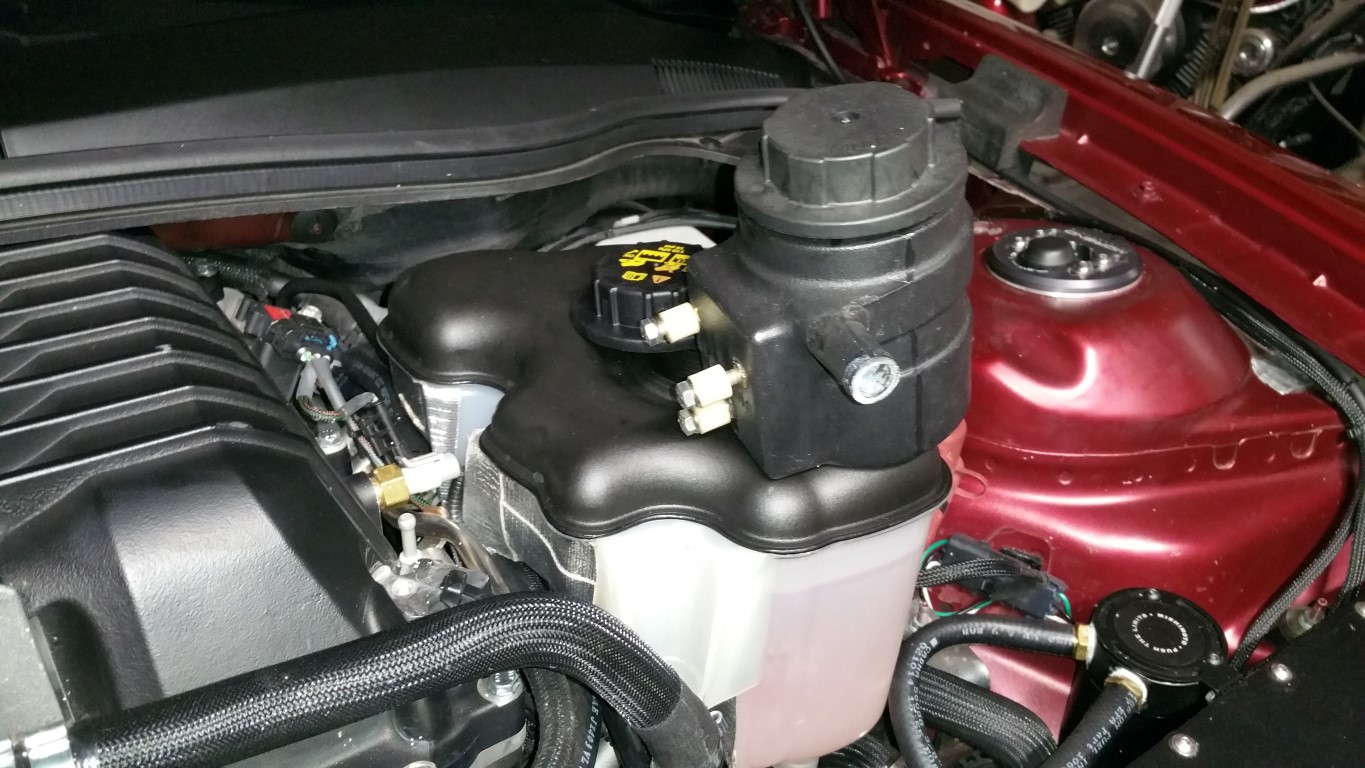 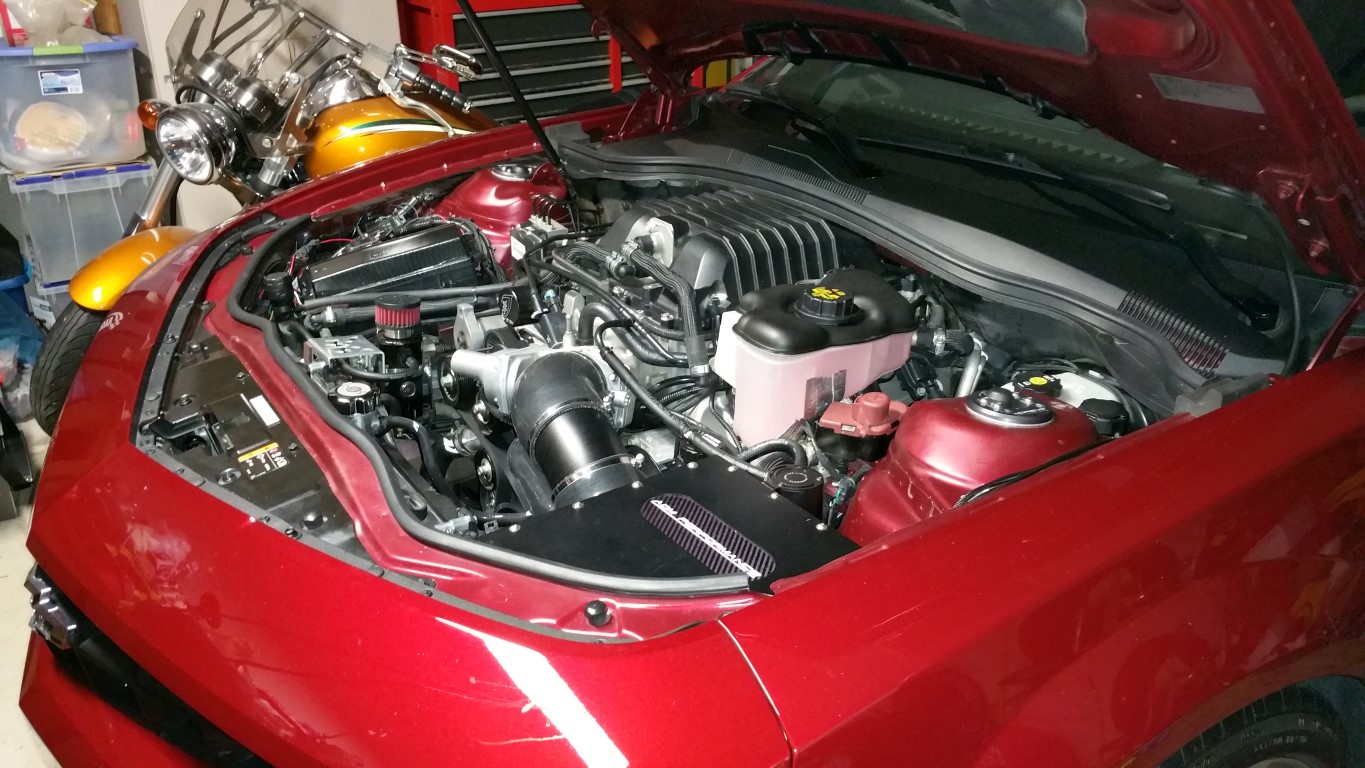 I also put heat shielding on the bottom and anywhere heat may get to the reservoir (don't want it to heat the coolant). Overall, I like it -- I pinched the existing coolant hoses from the SC Line and first Varimax pump (like I did the radiator hose) and just remove the older reservoir and mounting bracket. Didn't have to change the original hoses positions at all, just fabbed up a new hose configuration for the bottom outlet and plug it right in! I can really see the coolant, its level, and how fast its moving -- really like that! I am still running 100% distilled and just 1 cap-full of Water Wetter (foams too much if you put a lot in -- pumps won't prime right). Only down side is the #1 plug -- I'll have to lift the tank to get to it -- not a huge issue (as the other reservoir was in the way of #5)... Just part of where I had to put this big reservoir -- I'm OK with that. Yes, it does clear the hood when closed (even with the Hex Vents) -- I knew you were going to ask  So, I also ordered my new plates -- got them on too: 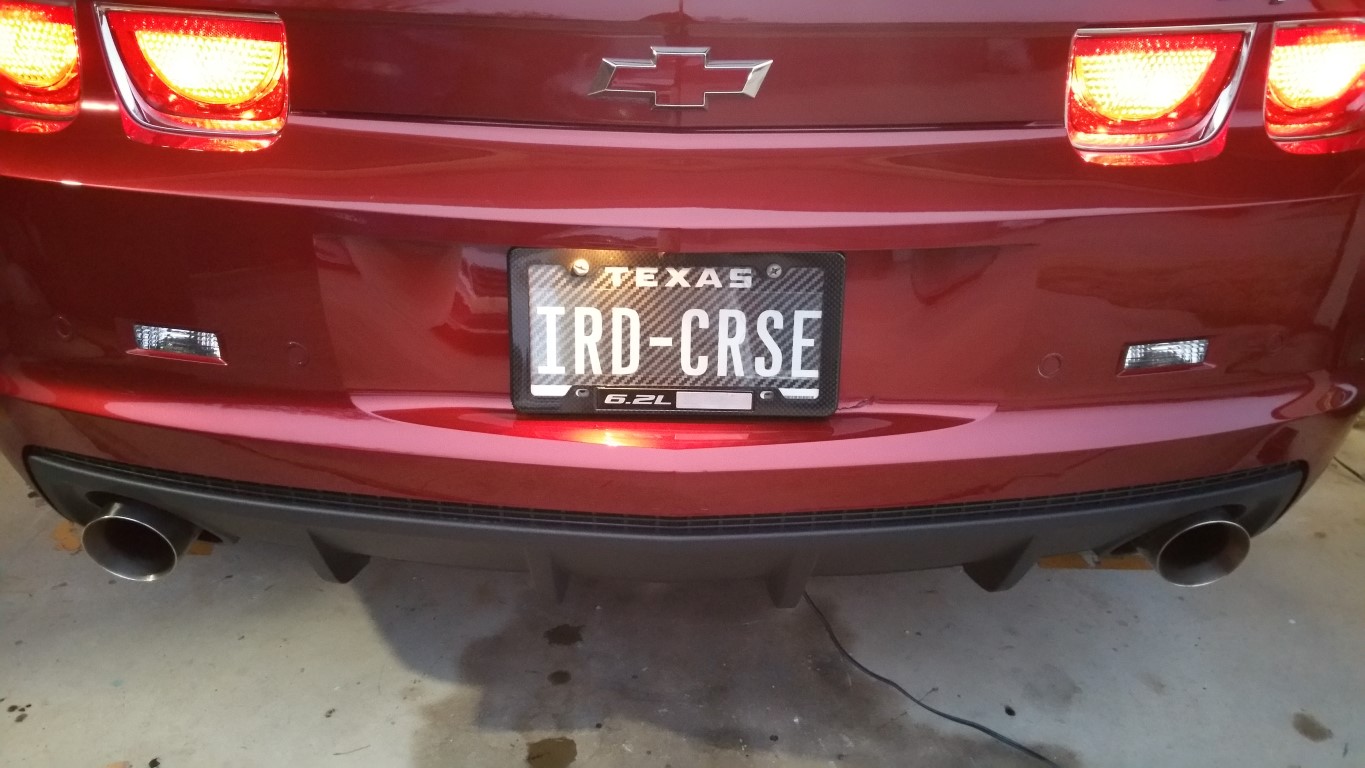 So anyway... Happy New Year:   -Don
__________________
747 RWHP 794 RWTQ
"Horsepower sells cars, torque wins races." - Enzo Ferrari See My Build: http://www.camaro5.com/forums/showthread.php?t=385577 Last edited by hammdo; 01-13-2018 at 11:05 AM. |
|
|
|
|
12-30-2017, 07:58 PM
|
#1750 |
|
ZL1 Pilot

|
Yep. Sarah's car has the Roush bottle made for the camaro. Bracket too.

__________________
 GP Tuning 2.5 Cam, RPS Carbon Twin Clutch, Ported Blower, Kook's Headers, Cold Air Inductions CAI, ID850's, 9.17 Lower, 2.5 Upper, JMS BAP, Pedders Front Radius Arm Inserts, Whiteline Subframe Inserts, Tuned by me with HP Tuners Idle Clip Link...........https://www.youtube.com/watch?v=gTL8S9eHwbs |
|
|
|
|
|
|
|
 |
|
|


