You are browsing camaro5 
|
|
 11-27-2012, 10:49 PM
|
#1611 | |
|
Drives: G5.R Join Date: Sep 2010
Location: SoCal
Posts: 2,377
|
Quote:
I have been crazy busy. I am waking up at 3 am to catch at 6 am flight from San Diego to Orlando for the PRI show. I will post updates when I get back. |
|

|

|
|
11-30-2012, 05:58 AM
|
#1612 |
   
|
Here is my wiring harness, fuse box and computer that have been relocated .....to outside of the car....now no more wiring mess under the hood

__________________
2020 Range Rover Sport HSE P525 Supercharged 5.0 - Firenze Red - 9012 wheels
SOLD 2019 Camaro SS -Wrapped in Matte Magnectic Black - Anderson Carbon Hood and Rear Spoiler Ikon front spoiler OEM ZL1 Side Rockers - ZL1 Addons Diffuser - BMR 1.0 Lowering Springs - MRR 228 Wheels 20x10 and 20x11 RIP 2016 Camaro SS https://www.camaro6.com/forums/showthread.php?t=565453 SOLD 2010 Camaro SS Featured in GM High Tech Performance and Camaro Now Magazines - http://www.superchevy.com/features/g...of-perfection/ |
|
|
|
|
11-30-2012, 08:35 AM
|
#1613 | |
|
[COTW 5/12/14]

Drives: 2012 CRT NF Cammed 2SS/RS For Sale Join Date: Oct 2011
Location: NOLA
Posts: 6,115
|
Quote:

__________________
 |
|
|
|
|
|
12-01-2012, 08:35 PM
|
#1614 |
Drives: 2010 Nickey/Chicago FLP Twin Turbo Join Date: Mar 2010
Location: Illinois
Posts: 34
|
If thats not a good start on "Cleaning the Clutter", then we are expecting the wrong thing from this thread!!
|
|
|
|
|
12-02-2012, 10:11 AM
|
#1615 | |

Drives: 2010 2SS MT, 2010 SHO, 2004 S60R Join Date: Mar 2012
Location: Houston, TX
Posts: 581
|
Quote:
 Yeah, that's a fan. I started right after driving the car. - Clayton. Official C5Fail4 hater.
__________________
Garage: 2010 Camaro 2SS/RS M6, 2010 Taurus SHO, 2004 S60R GT, 2008 F250  |
|
|
|
|
|
12-02-2012, 12:06 PM
|
#1616 | |||
|
Drives: G5.R Join Date: Sep 2010
Location: SoCal
Posts: 2,377
|
Quote:
Quote:
Quote:
Quick update: Goals to put car back together has been expedited as I am shooting to get the car into the Optima challenge next November. Spoke with the Optima guys at PRI and there is only two ways to get one of the 50 invitations. either by attending one of there events and getting invited or being chosen as one of ten at SEMA. They suggested I 'd have a better shot being chosen at one of the events. The next event in my area is in February. So I have my work cut out for me. I will need to do wheels, tires, big brake package, complete suspension, drive train, racing seats, clutch, carbon shaft, etc....... plus about 1000 miles to break it in. Thinking Mantic for the clutch specifically because of Doc's thread. So the focus is going to be to slap it back together and get it ready by Feb! I will blow it apart and finish the detail work for SEMA. Spoke with several companies that might want it at there booth. It's definitely going to be a push. Wish me luck. |
|||
|
|
|
|
12-02-2012, 02:32 PM
|
#1617 | |
|
need....more....hp

Drives: The Neighbor Hater Join Date: Dec 2010
Location: San Mateo, CA
Posts: 4,091
|
Quote:
__________________
Mast Motorsports Built LS3 Stroker 418, IPS GT35R Twin Turbos, Exedy GTO4XD Twin Disc Clutch, Aeromotive A1000 Eliminator Stealth Fuel Pump, AEM Meth Injection, DSS 1400hp Axels, BC Coilovers, Pfadt & BMR Suspension, Hawk HPS Pads, Drilled/Slotted Rotors, Hurst Shifter, Custom Roll Cage by Blu808, T3 Ports, 22" Custom Concave Mesh Rims |
|
|
|
|
|
12-03-2012, 06:05 AM
|
#1618 |
|
|
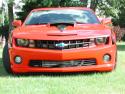
Here are some updated pics.
So far I had to lengthen about 15 wires anywhere from 1 to 2 feet. you can see the fuse box bracket was there....and now is gone, and I made some "u" shaped brackets to put the cabin filter flush against the firewall which worked out really well. I used the weather strip from the cabin air filter box that used to snap to the firewall and had to cut the air filter down a little to make it fit, but I think it turned out really nice. I think i am going to move the fuel rail inlets to the rear of the engine and re-route the fuel lines up the backside of the engine to get the lines off of the inside of the framerail where they come up into the engine compartment
__________________
2020 Range Rover Sport HSE P525 Supercharged 5.0 - Firenze Red - 9012 wheels
SOLD 2019 Camaro SS -Wrapped in Matte Magnectic Black - Anderson Carbon Hood and Rear Spoiler Ikon front spoiler OEM ZL1 Side Rockers - ZL1 Addons Diffuser - BMR 1.0 Lowering Springs - MRR 228 Wheels 20x10 and 20x11 RIP 2016 Camaro SS https://www.camaro6.com/forums/showthread.php?t=565453 SOLD 2010 Camaro SS Featured in GM High Tech Performance and Camaro Now Magazines - http://www.superchevy.com/features/g...of-perfection/ |
|
|
|
|
12-03-2012, 11:10 AM
|
#1619 | |

Drives: 2011 Camaro SS Join Date: Nov 2010
Location: Greeley, CO
Posts: 769
|
Looking good. Thanks for the pics.
 Quote:
__________________
2011 Camaro SS Synergy Green
CAI Cold Air Induction, ADM Race Scoop, Apex Washer Bottle Kit, Vengeance Racing Kaotic Cam, DOD/VVT delete and LS3 conversion, American Racing LT Headers, American Racing Headers Off Road pipes, Borla S-Type Catback, FTI Billet Triple Disk 3600 rpm Torque Converter, DSS Aluminium Drive Shaft, AAC Plasma DRL's, Showstopper LED Sidemarkers,Carbon FIber Bow Ties, 35% Window Tint, Llyod's Floor Mats, JBL MS-8 Sound Processor, 2 Alpine PDX-1.600, Alpine PDX-4.100, JL Audio C5-650, JL Audio C5-650x, Alpine T10 Type R Shallow Mount, Stinger Dry Cell Battery |
|
|
|
|
|
12-03-2012, 09:52 PM
|
#1620 | ||
|
Drives: G5.R Join Date: Sep 2010
Location: SoCal
Posts: 2,377
|
EZ, thanks for posting and great job so far. This will definitely encourage more people to attempt this.
Quote:
I'm doing the same thing. I've cut the both lines back at the fire wall. For the fuel line, I bought a AN pressure fitting that allow you to attach a braided line the the factory hard line. Kilo-9 had his tuner turn off the EVAC off. This eliminates the need for the EVAC solenoid, harness, and the need to run the hard line. You could just cut the line down low at the fire wall and add a little fuel filter at the end to keep any dust out. You don't want too close the line because the gas tank does needs to breath. What are you going to do with the harness that feeds the head lights, horns, etc.....? Having my car apart for a year has given me a lot of time to think through the easiest way you can hide that harness also so you eliminate those wires. Quote:
. |
||
|
|
|
|
12-04-2012, 08:37 AM
|
#1621 | |
|
|
Quote:
I will check into the EVAP stuff. I have HP Tuners software so it wouldn’t be a problem to turn it off in my tune. hmmmmm ....I just remembered that I deleted all the EVAP stuff back in 2004 on my 2003 Supercharged Ford Lightning. Still thinking about the headlight wiring…..but I did notice that if you unclip the alternator wire off the sub frame of the car and re-route it back under the oil pan, it will reach to the relocated fusebox right back onto the side terminal like it was before. I will take pics of that today. Sorry that I can only post pics and discuss my findings on this relocation.... Instead of a full blown "how to"....my car is SOOOOOOO far from stock that it wouldnt really help anyone to do exactly like I am doing, but I hope that my pictures will possibly help someone somewhere along the way.
__________________
2020 Range Rover Sport HSE P525 Supercharged 5.0 - Firenze Red - 9012 wheels
SOLD 2019 Camaro SS -Wrapped in Matte Magnectic Black - Anderson Carbon Hood and Rear Spoiler Ikon front spoiler OEM ZL1 Side Rockers - ZL1 Addons Diffuser - BMR 1.0 Lowering Springs - MRR 228 Wheels 20x10 and 20x11 RIP 2016 Camaro SS https://www.camaro6.com/forums/showthread.php?t=565453 SOLD 2010 Camaro SS Featured in GM High Tech Performance and Camaro Now Magazines - http://www.superchevy.com/features/g...of-perfection/ Last edited by NEGXXIS; 12-04-2012 at 01:10 PM. |
|
|
|
|
|
12-05-2012, 12:28 AM
|
#1622 | |
|
Drives: G5.R Join Date: Sep 2010
Location: SoCal
Posts: 2,377
|
Quote:
For anybody attempting this, any picture you post helps! Couple of pics from PIC where the fuse box was relocated to the glove box. The PCM was mounted below the passager seat. I'm thinking I'm going to go this route as I might not even reinstall the air box cover. Heres a couple of pics   Hope that helps  |
|
|
|
|
|
12-05-2012, 08:30 AM
|
#1623 |
|
|
Thanks for your help. but before you posted this I did some research and found a lot of guys using this fitting : http://www.swagelok.com/search/find_...t=SS-600-6-6AN
I am familiar with these fittings here at work (aerospace) and i know these are rated to like 2000 psi. So I ordered one last night. Here is where some guys are talking about them: http://ls1tech.com/forums/conversion...uel-lines.html I already have some -6 push loc hose left over from when I converted my step dads 1967 Chevy truck to a fuel injected ram jet 350, so I also ordered some -6 fittings and a "y" shaped fuel block to feed my fuel rails. hopefully I can start on that this weekend. I considered moving my fuse box to the glove box like that, but wasnt willing to give up the space for it to go there..lol
__________________
2020 Range Rover Sport HSE P525 Supercharged 5.0 - Firenze Red - 9012 wheels
SOLD 2019 Camaro SS -Wrapped in Matte Magnectic Black - Anderson Carbon Hood and Rear Spoiler Ikon front spoiler OEM ZL1 Side Rockers - ZL1 Addons Diffuser - BMR 1.0 Lowering Springs - MRR 228 Wheels 20x10 and 20x11 RIP 2016 Camaro SS https://www.camaro6.com/forums/showthread.php?t=565453 SOLD 2010 Camaro SS Featured in GM High Tech Performance and Camaro Now Magazines - http://www.superchevy.com/features/g...of-perfection/ |
|
|
|
|
12-08-2012, 06:03 AM
|
#1624 |
|
|
More wiring, this time I was working on the engine harness.
since now my fuse box rear be a the rear of engine I am running the wiring from behind the engine instead of in front...... so basically this puts my injector harness backwards, so I decided to move pins around in the connector insted of cutting and splicing ANOTHER 16 wires (2 per injector x 8 injectors) It really wasnt bad at all...and MUCH quicker than rewiring everything. I made good notes also to keep in my book so that if I ever need to troubleshoot any wiring, I can reference my notes so that I will have documented the wiring color changes for each injector. Here is a pic of the harness..ugh..LOL
__________________
2020 Range Rover Sport HSE P525 Supercharged 5.0 - Firenze Red - 9012 wheels
SOLD 2019 Camaro SS -Wrapped in Matte Magnectic Black - Anderson Carbon Hood and Rear Spoiler Ikon front spoiler OEM ZL1 Side Rockers - ZL1 Addons Diffuser - BMR 1.0 Lowering Springs - MRR 228 Wheels 20x10 and 20x11 RIP 2016 Camaro SS https://www.camaro6.com/forums/showthread.php?t=565453 SOLD 2010 Camaro SS Featured in GM High Tech Performance and Camaro Now Magazines - http://www.superchevy.com/features/g...of-perfection/ |
|
|
|
|
|
|
|
 |
|
|
 Similar Threads
|
||||
| Thread | Thread Starter | Forum | Replies | Last Post |
| Roto-Fab | Engine Covers - S/C | Fuse Relay Cover | Radiator Cover | Billet Oil Cap+ | AutoAgenda | Exterior Parts & Accessories | 14 | 02-06-2013 08:43 PM |
| New Texas Speed & Performance Engine Machining Center! | Trevor @ Texas Speed | Camaro V8 LS3 / L99 Engine, Exhaust, and Bolt-Ons | 18 | 01-16-2013 03:46 PM |
| Hawk Performance Brake Pads part HB247Z.575 $85.00 | Rogan | USA - Florida | 2 | 10-07-2011 12:10 PM |
| Acronyms? | KEEP RT | Camaro V8 LS3 / L99 Engine, Exhaust, and Bolt-Ons | 20 | 03-11-2011 08:57 PM |
| Great Read and Info on Oil Weight | Banshee | Mechanical Maintenance: Break-in / Oil & Fluids / Servicing | 1 | 11-23-2009 09:03 PM |


