You are browsing camaro5 

|
 03-25-2012, 01:12 AM
|
#701 | |
|
Dog Is My Copilot

Drives: 2011 2SS/RS LS3 Join Date: Jun 2009
Location: Pittsburgh, PA
Posts: 1,394
|
Quote:

__________________
 |
|

|

|
|
03-25-2012, 08:38 AM
|
#702 | ||
|
Drives: G5.R Join Date: Sep 2010
Location: SoCal
Posts: 2,377
|
Quote:
 . That's whats great about us sharing our idea and how we are doing things. Because the next person that comes along can piggy back and come with up with a better idea on how to do things. So we all benefit, GREAT job again Indy . To quote Ph4r, when it comes time for him to tackle his project, he has a "great reference". . That's whats great about us sharing our idea and how we are doing things. Because the next person that comes along can piggy back and come with up with a better idea on how to do things. So we all benefit, GREAT job again Indy . To quote Ph4r, when it comes time for him to tackle his project, he has a "great reference". Great write also. I agree, this biggest challenge was trying to drill the hole on the drivers side. Simply because of all the hard lines. Now if you would have taken 572HP's advice and pulled out all your front drive, then it would have been a piece of cake  Quote:
Last edited by Moreno1; 03-25-2012 at 09:02 AM. |
||
|
|
|
|
03-25-2012, 09:58 AM
|
#703 |
|
Drives: G5.R Join Date: Sep 2010
Location: SoCal
Posts: 2,377
|
OK, I was able to make some time to work on the fuse box bracket. Again big SHOUT out for Kyle aka NC-V!!!!!!!!!!! If not for his help and guidance, I would be totally lost............Thanks again Bro
 These photo are my mock up........ I going to do a final version once I get all the measurements I need. I am using a 1.25" strip of 16 gauge stainless. Some of the stuff I did, I didn't take pics because I get hung up on doing the work vs thinking to take a picture of each step. The first thing I did was to get measure the degrees I would need to bend the stainless strip. I used my I-phone to get these reading. NOTE: I will document all these angles and degrees when I'm done. This will save anybody attempting to do this from taking out their wheel wells 20 times to fit and test fit everything to make sure the box clear the hood strut, etc...... I lost count how many times I had to install and remove the wheel well. Once I had the degrees down, I clamped the strip with the vise grip and used the I-phone to tell me how much I would need to bend the strip. 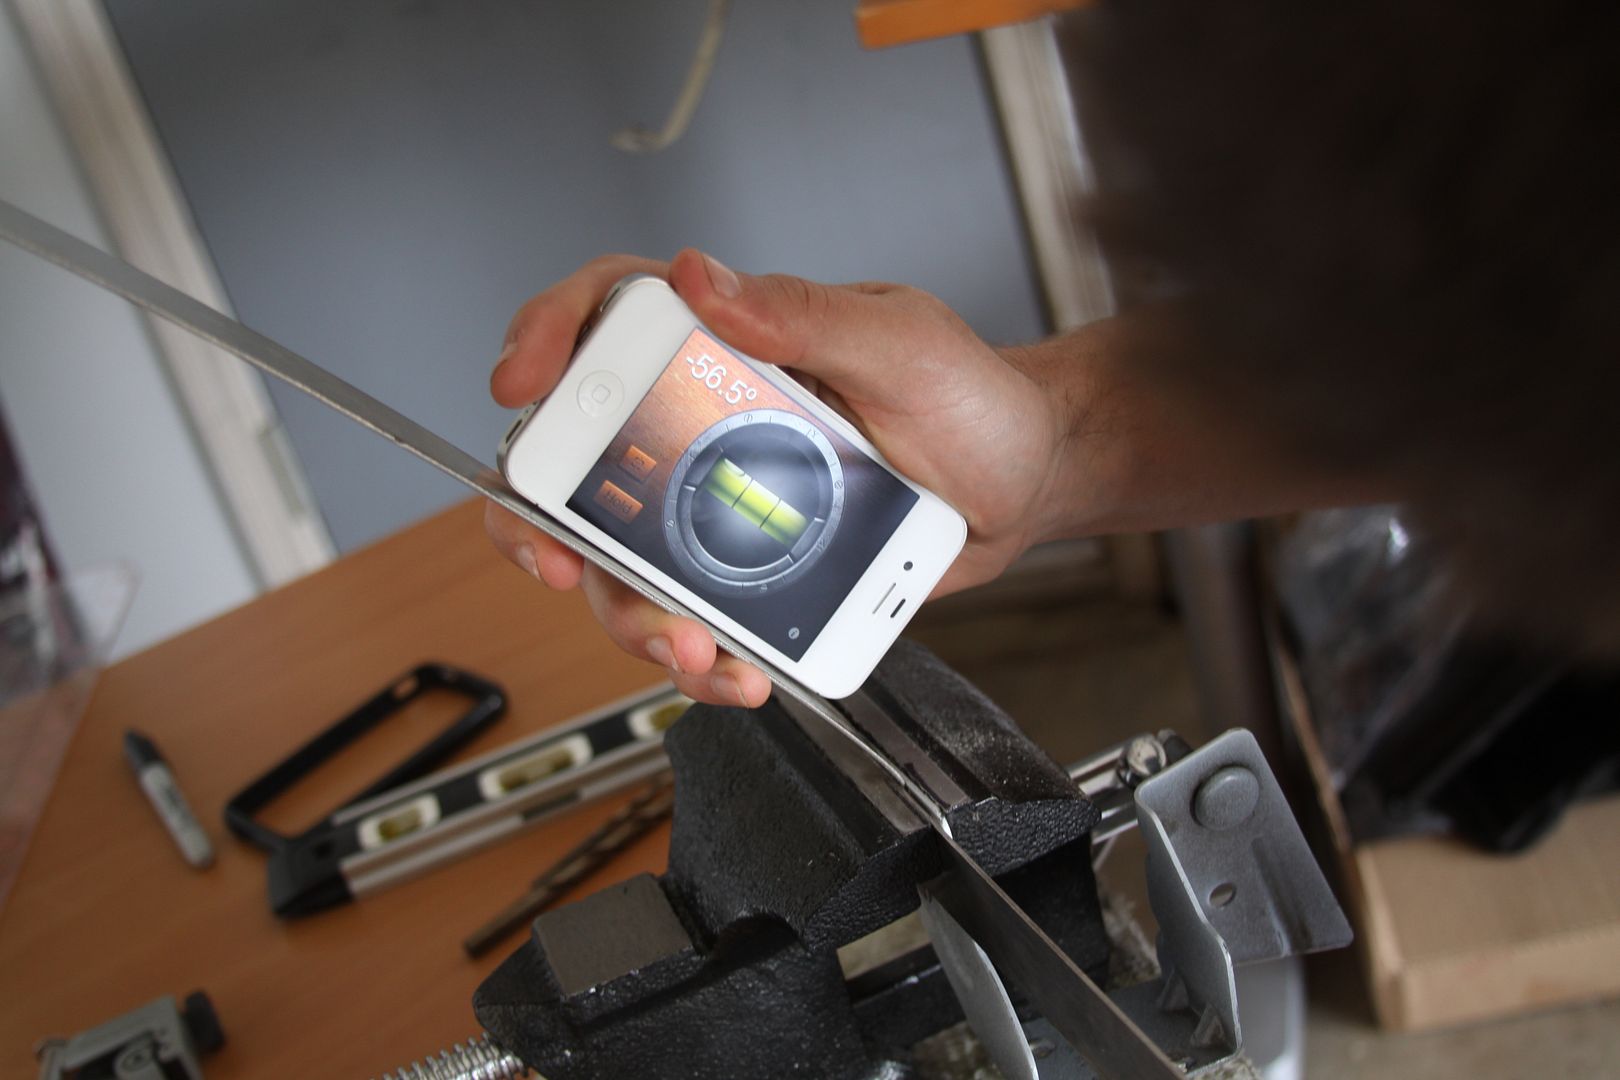 I used a piece of wood to tap on with the hammer protecting the stainless from marks. It also gave me a crisp line vs just pushing down and applying pressure on the strip to get my bend. 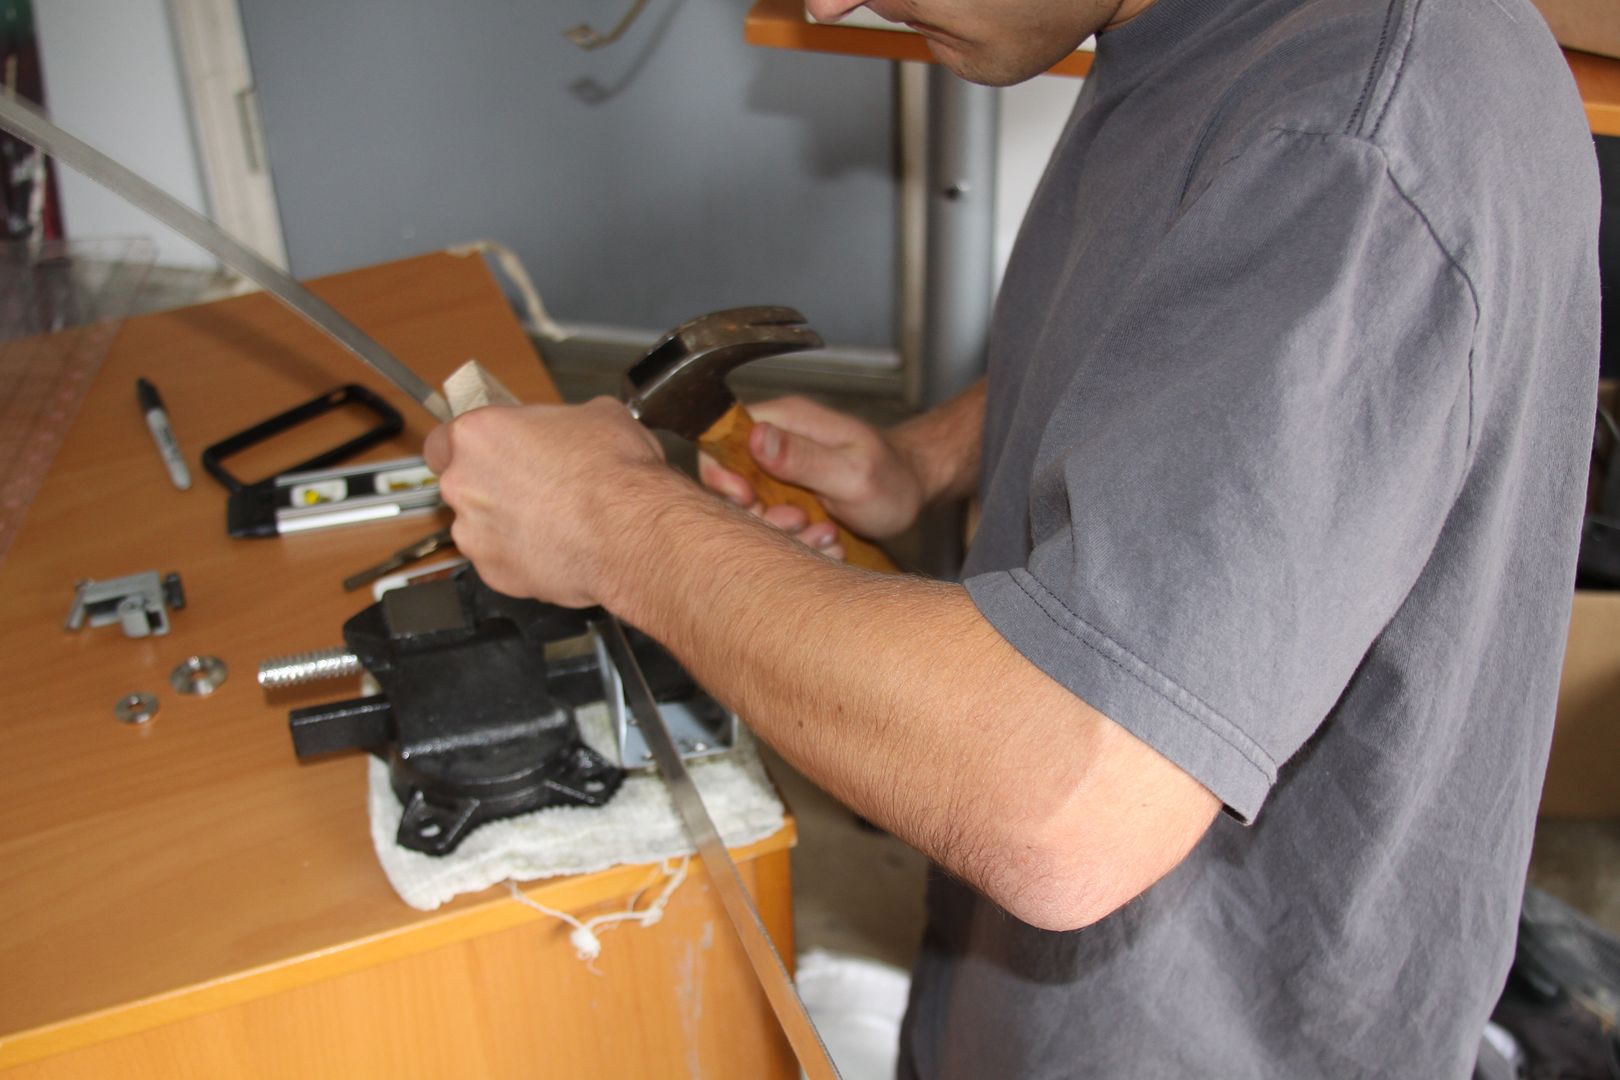 So a little more measuring....... 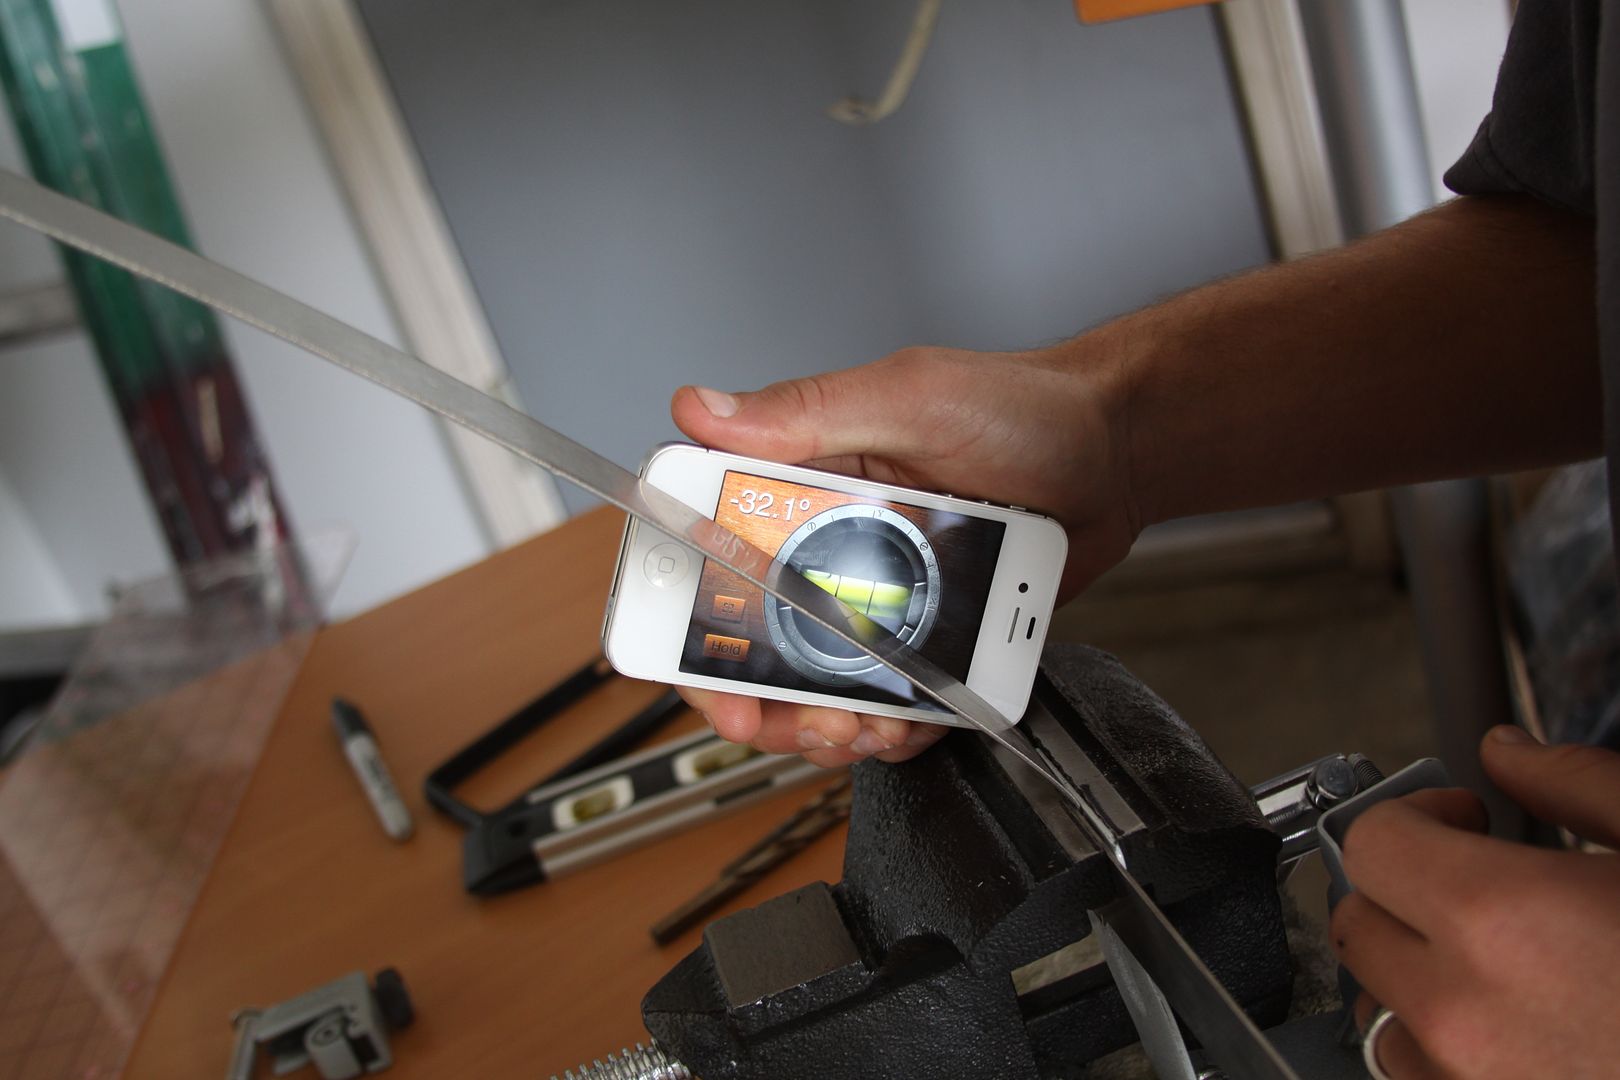 And a little more ........  I did my first bend for the upper mount in a straight line. As you can see from this picture. 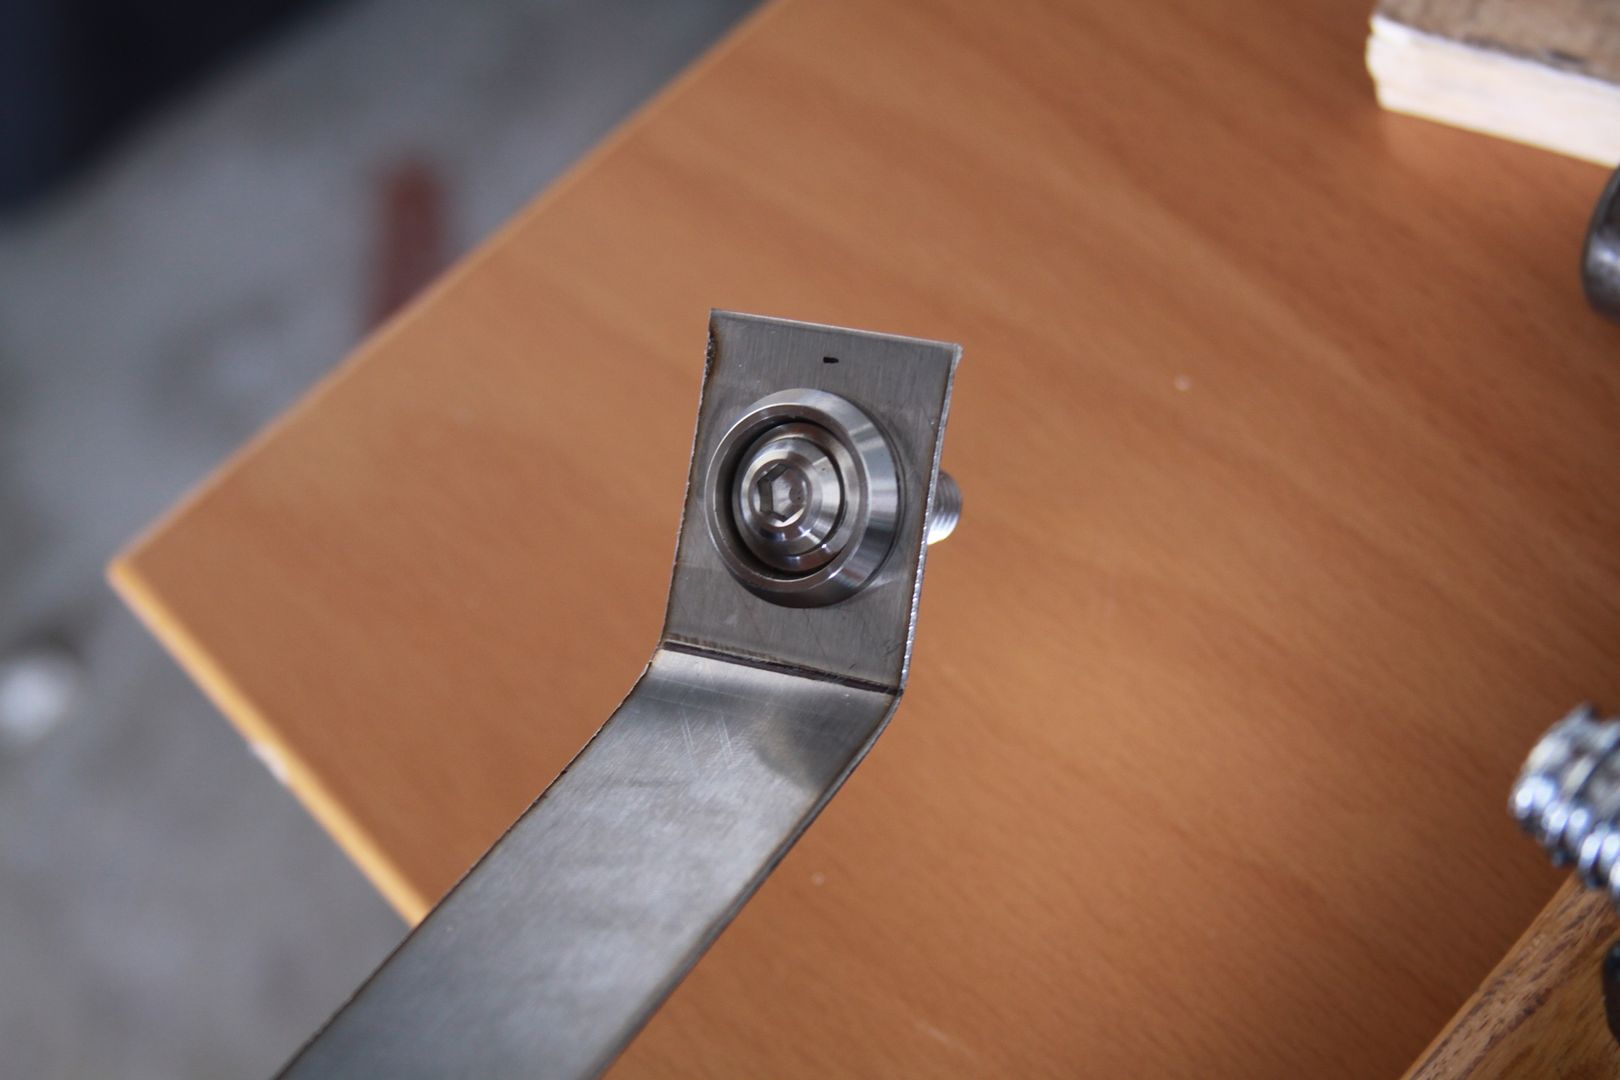 Well, after doing a test fit, what I didn't realized was the top frame were it will be mount is curved. The curvature is enough to throw off were I was going to bolt it o the lower frame rail by about an inch. To compensate, I re-straiten the strip and made a new bend at an angle.I knew how much of an angle I needed by placing the piece on the bottom were I was going to mount it. Than measuring the gap between the strip and the frame which was about a quarter of an inch. That's the difference you're seeing below. NOTE: I wish I had taken more pictures to make explaining it easier but it hard to remember when your enthralled in the mist trying to figures this out as you go yourself. What your seeing here is the top section that will be mounted to the top frame. The straight line was I made my first bend. When I did a test fit, I realized the because the frame is curved, if I just made a straight bend, the degree of the curvature in the frame would through off were I was going to be bolting the strip on the lower frame rail. So I had to compensate for the curvature by making my top bend at an angle. 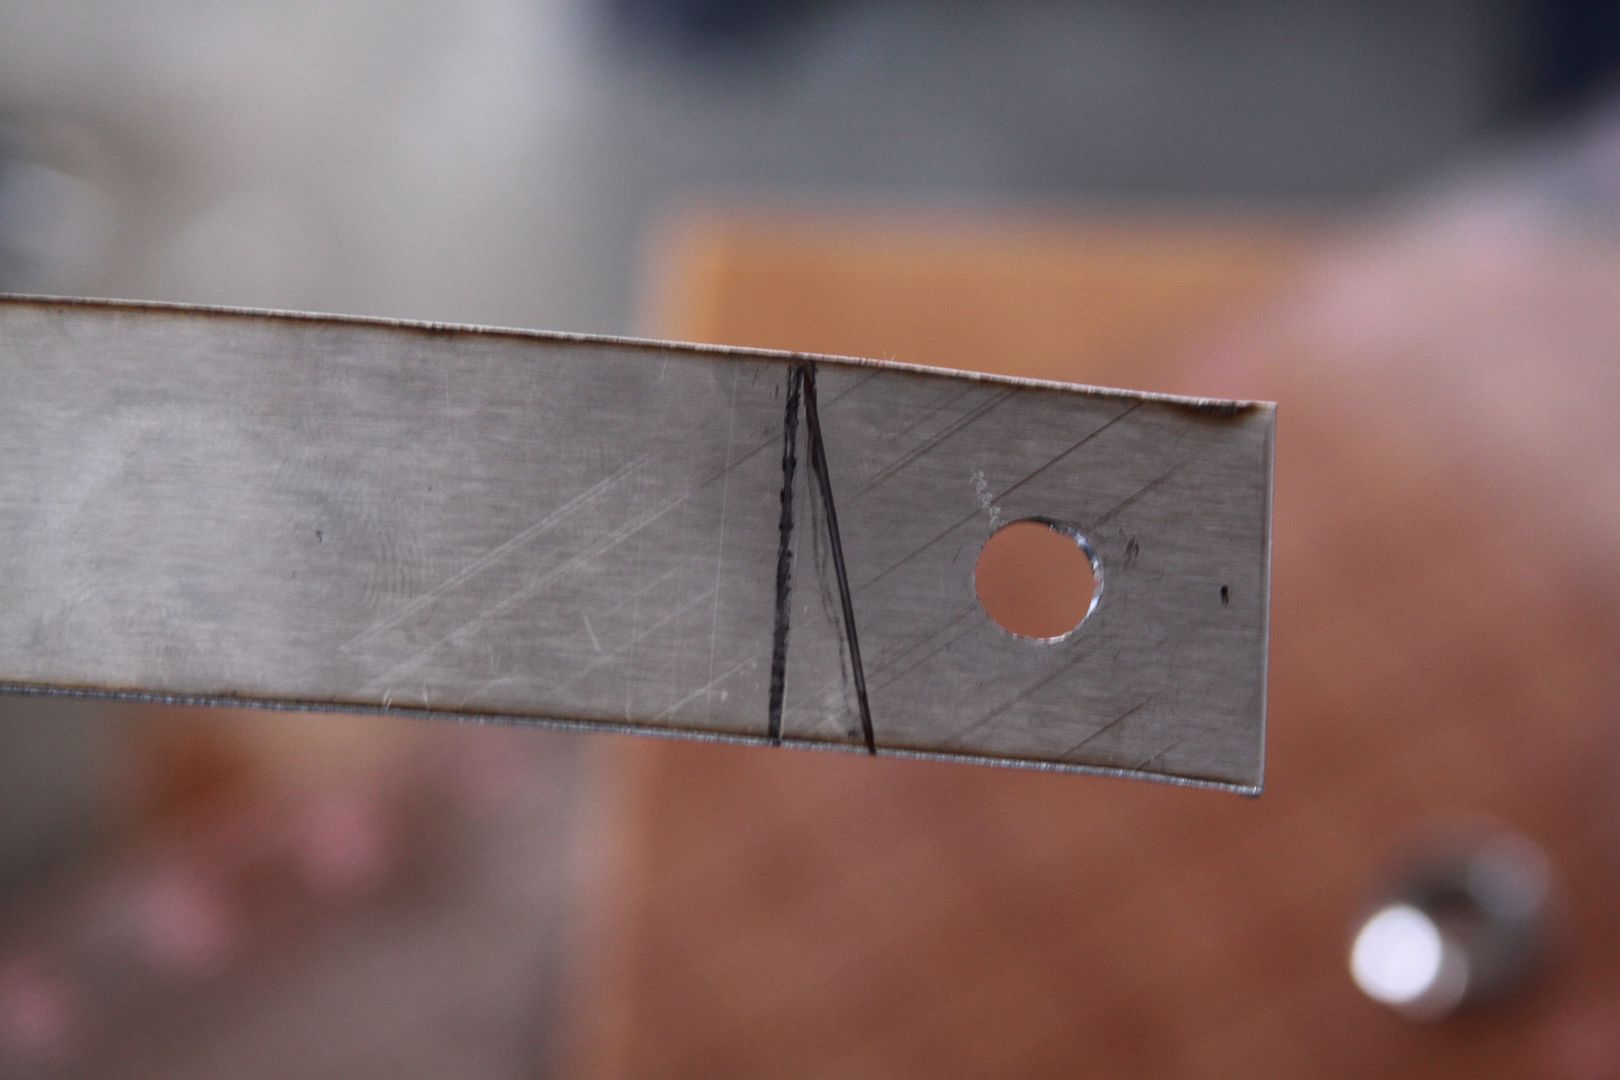 I had to stop and make a run to Home Depot and get some angle iron. I cut two pieces to put between the vise so that the teeth wouldn't mark up the strip when I clamped it down. 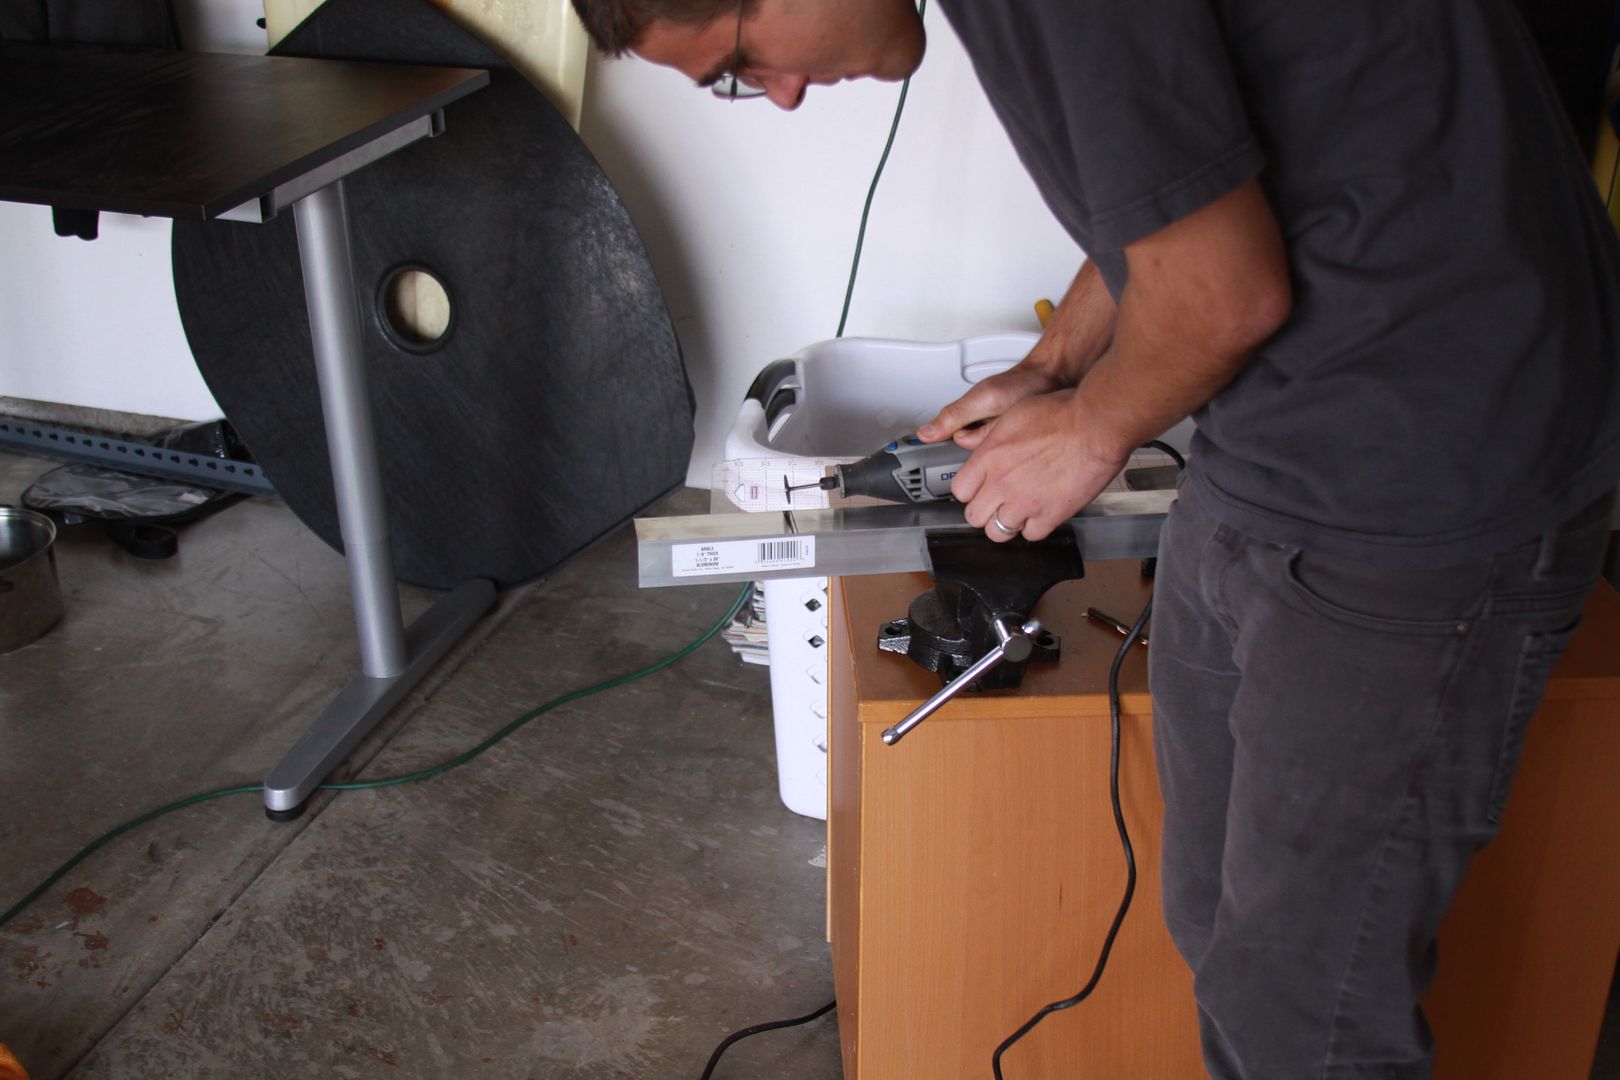 This is a shot of my mock up..... 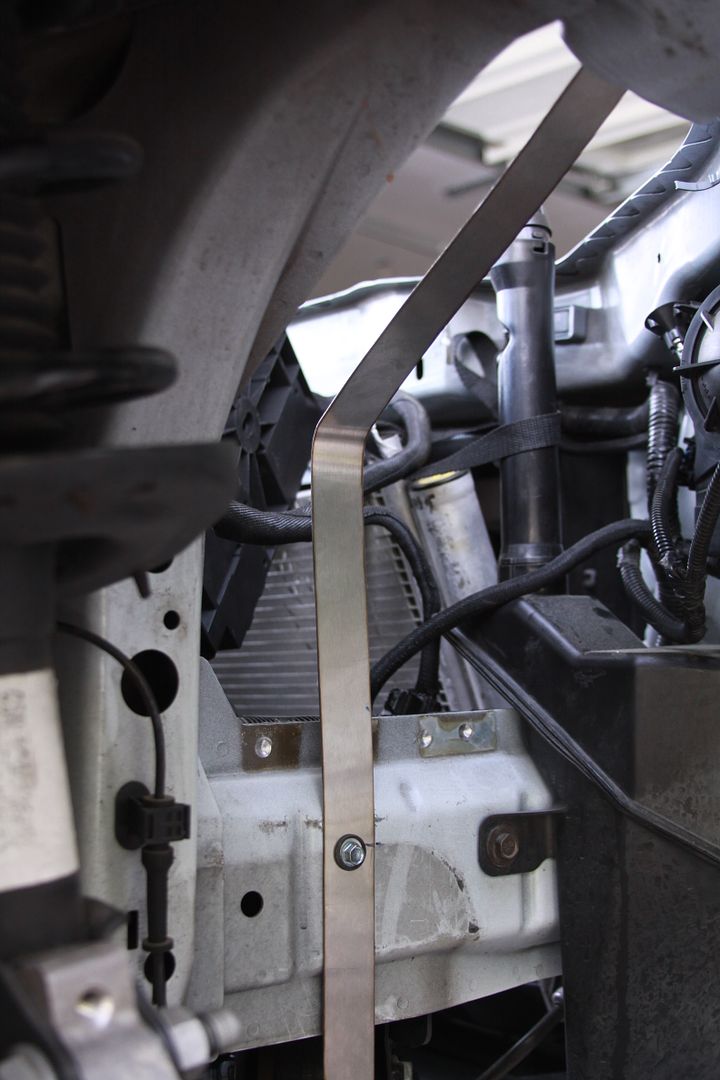 I went ahead and got rid of my over flow tank while I was at it. 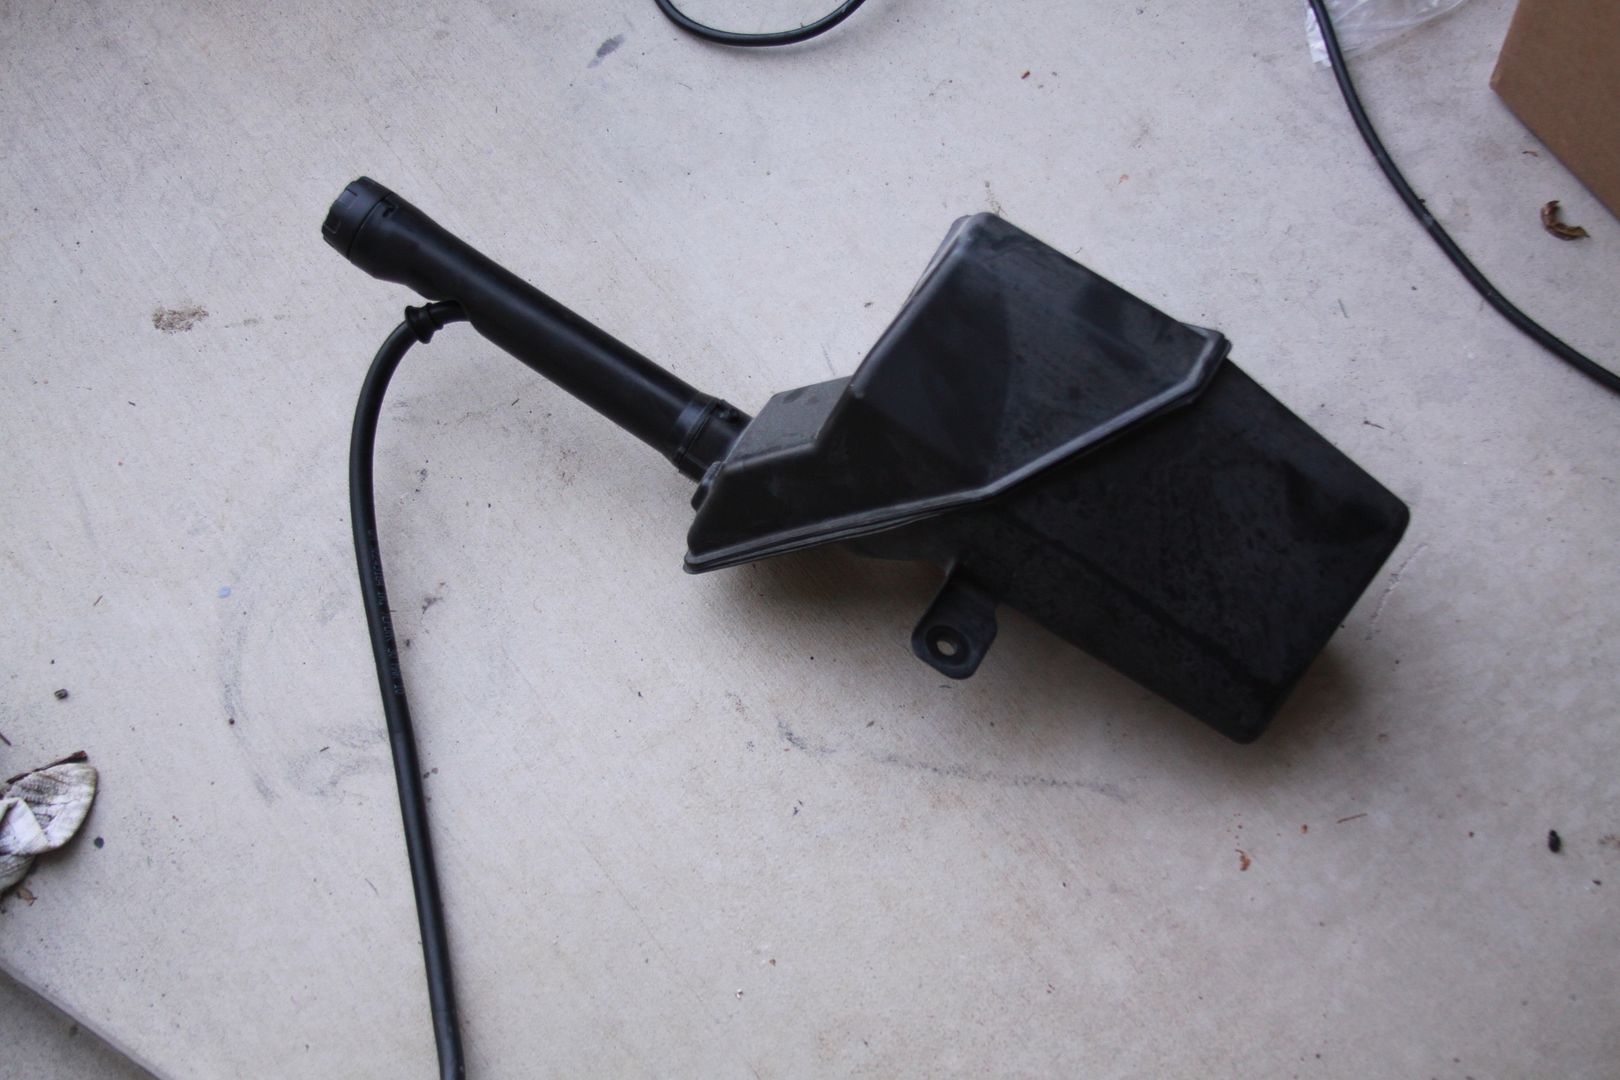 This shot shows how nasty the factory paint is. Also the harness for the head lights looks like crap. From the factory, the heads lights a marked with a several different color markers which also looks like crap. So I already know I will be removing them along with the front end and cleaning/ detailing that whole area. I know, I know 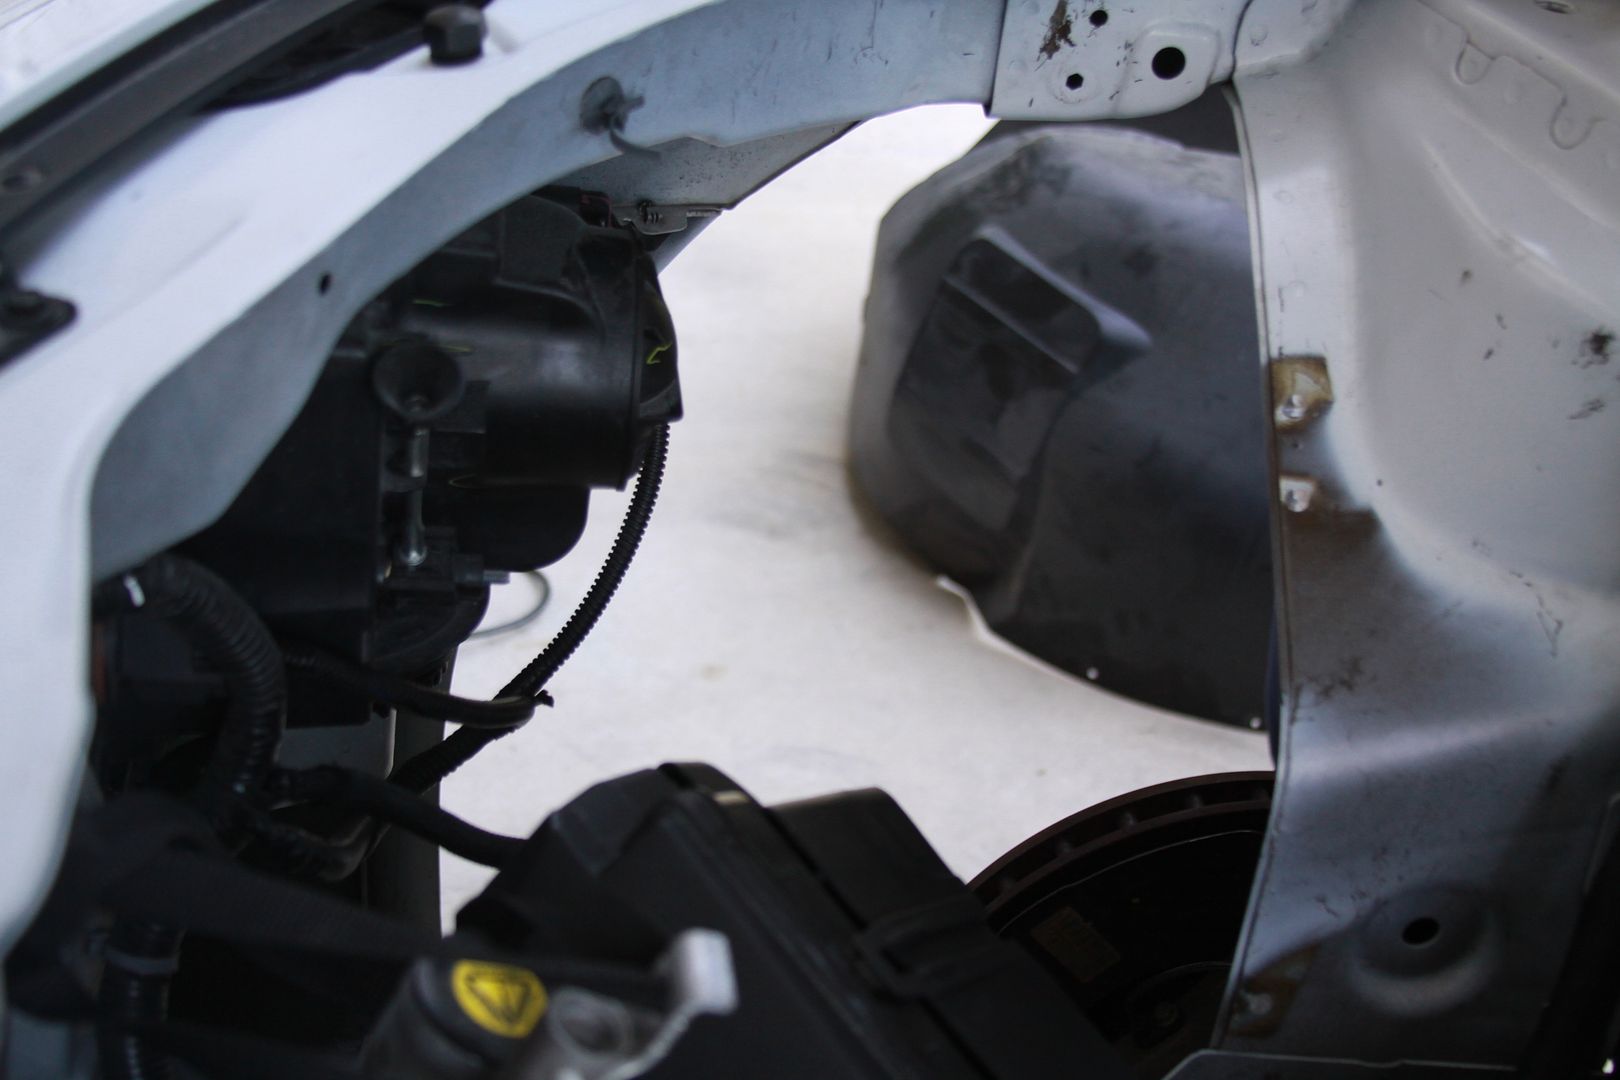 To mount the bolt to the top frame, there's no access to put a nut behind it. So again thanks to Kyle, he recommended I use a nutsert. I didn't even know what a nutsert was or what the heck he was talking about till I goggled it. I did blow about two hours going to HD, Lowes, Aces, Auto-zone, Napa and nobody carried them. I finally found a local hardware store, "Hanks" that had them. The only challenge is they were oust of the size I needed. So I'm have to called them on Monday to see if they can order me the size I need. I hope they can sell me just one, because they had them in quantities of 25 for $21, OUCH! 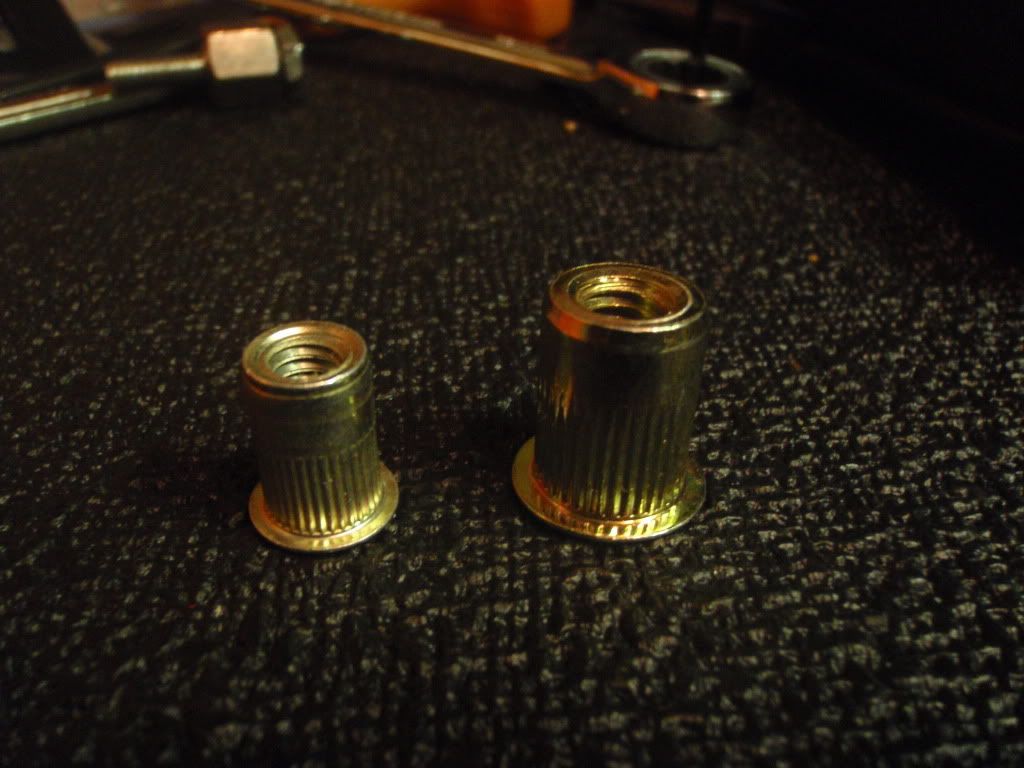 Thanks again Kyle for all the guidance and help, can't thank you enough!!! Stay tuned..... Last edited by Moreno1; 03-25-2012 at 10:50 AM. |
|
|
|
|
03-25-2012, 10:03 AM
|
#704 |
 
|
bro you are going all out huh? looking good man
__________________
 2010 camaro 2ss/rs 2010 camaro 2ss/rsAfe intake,Ported heads,ported manifold &TB,Big Cam, Arh longtubes w/3",25% underdrive,aluminum flywheel,zr1 clutch, tranzilla 6060, gforce 9" strac 430s...worst tune in the world...dc power 300amp alt, audison/kenwwod/cdt system.pfadt/eibach/hotchkis/bmr susp...vented/drilled rotors, hawk pads,s/s lines work in progress : Full electric power steering & Airride |
|
|
|
|
03-25-2012, 10:31 AM
|
#705 | |
  
Drives: 2011 Camaro SS Join Date: Nov 2010
Location: Greeley, CO
Posts: 769
|
Quote:
Great write up and pics. Going to help me a great deal when I start mine.
__________________
2011 Camaro SS Synergy Green
CAI Cold Air Induction, ADM Race Scoop, Apex Washer Bottle Kit, Vengeance Racing Kaotic Cam, DOD/VVT delete and LS3 conversion, American Racing LT Headers, American Racing Headers Off Road pipes, Borla S-Type Catback, FTI Billet Triple Disk 3600 rpm Torque Converter, DSS Aluminium Drive Shaft, AAC Plasma DRL's, Showstopper LED Sidemarkers,Carbon FIber Bow Ties, 35% Window Tint, Llyod's Floor Mats, JBL MS-8 Sound Processor, 2 Alpine PDX-1.600, Alpine PDX-4.100, JL Audio C5-650, JL Audio C5-650x, Alpine T10 Type R Shallow Mount, Stinger Dry Cell Battery |
|
|
|
|
|
03-25-2012, 10:49 AM
|
#706 |
  
Drives: 2010 CAMARO SS Join Date: Apr 2010
Location: ohio
Posts: 1,360
|
hey nathan i have some 1/4 -20 steel nutserts if you need one
|
|
|
|
|
03-25-2012, 11:53 AM
|
#707 |

Drives: cts-v Join Date: Dec 2011
Location: Mooresville, NC
Posts: 506
|
Sorry Nathan! I forgot to put that angle for the upper mounting point in the email, my bad. Looking good though! Really looking forward to seeing all this work come together!
__________________
|
|
|
|
|
03-25-2012, 06:21 PM
|
#708 |
 
|
Does anyone have a size for the factory bolts for the coil packs? I don't have access to my car at the moment and would like to get some order.
Thanks in advance! |
|
|
|
|
03-25-2012, 07:28 PM
|
#709 | |||
|
Drives: G5.R Join Date: Sep 2010
Location: SoCal
Posts: 2,377
|
Quote:
Quote:
Quote:
|
|||
|
|
|
|
03-25-2012, 07:38 PM
|
#710 |
      Drives: cars Join Date: May 2011
Location: Oversneeze
Posts: 4,544
|
6-1.00x25mm
|
|
|
|
|
03-25-2012, 08:22 PM
|
#711 | |
|
Drives: G5.R Join Date: Sep 2010
Location: SoCal
Posts: 2,377
|
Quote:
Here's the part number ARP 770-1002 and link below. http://www.summitracing.com/search/?...770-1002&dds=1 |
|
|
|
|
|
03-25-2012, 08:42 PM
|
#712 | |
|
ACE5 (Atlanta Group)

Drives: "Black Ice" Join Date: Sep 2010
Location: Suwanee, GA
Posts: 1,702
|
Quote:
__________________
Custom Two-Tone Paint, Whipple, Pedders, NightOwl RGB Halos & Other Lighting
[COTW 5/2/11] 2011 Two-Tone White/Black SS/RS Convertible See our Atlanta Social Group or home page: ACE5.org |
|
|
|
|
|
03-25-2012, 08:58 PM
|
#713 |
|
ACE5 (Atlanta Group)
Drives: "Black Ice" Join Date: Sep 2010
Location: Suwanee, GA
Posts: 1,702
|
Never heard of nutserts...learn something new every day!
Looking very good Nathan! Indy, your coils look awesome! I'm going to order me one of the black anodized overflow tanks. NC-V, where did you mount this? Down low on the frame by the radiator outlet? This isn't too far down to be able to draw coolant back up? I've got to get rid of that overflow tank! I want to use the space to install me a small fuse/relay box for add-ons. I'm planning on putting the new fuse box down close to the frame where the overflow bottle was. I'll probably have to access it by removing the wheel and inner liner. I may create a shield so that you won't see the new box from the engine bay. I have already cleaned up the back of the headlights and put on the braided sleeving for that wiring. I also installed the JDP RGB halo kit. I have torn apart their harness, and wiring it in a little better for my taste. Great kit by the way. I didn't get a whole lot done with the car this weekend, but I think I have all of the parts now. I went over to Mike's today (thepowdercoater.com) (yeah...Nathan, you know him well). He powdered my tank and a few brackets. Awesome work, as usual. I think it looks just as good as having it anodized, and it was 1/7 the cost. I spent a little time trying to get the AC belt back on. I don't have the special tool. Any tricks from anyone?
__________________
Custom Two-Tone Paint, Whipple, Pedders, NightOwl RGB Halos & Other Lighting
[COTW 5/2/11] 2011 Two-Tone White/Black SS/RS Convertible See our Atlanta Social Group or home page: ACE5.org |
|
|
|
|
03-25-2012, 09:32 PM
|
#714 | ||
|
Furious Shine
Drives: None Join Date: Mar 2011
Location: Indiana
Posts: 669
|
Quote:
Quote:
 Just like everybody - I have had a few of my own "oh crap what have I gotten myself into  " moments.. But the end result is gonna be awesome and further my cars "unique factor"! After all, CAMAROFEST3 is coming to my hometown - I gotta be ready (maybe I will even meet some of you guys)! " moments.. But the end result is gonna be awesome and further my cars "unique factor"! After all, CAMAROFEST3 is coming to my hometown - I gotta be ready (maybe I will even meet some of you guys)!
|
||
|
|
|
|
|
|
|
 |
|
|
 Similar Threads
|
||||
| Thread | Thread Starter | Forum | Replies | Last Post |
| Roto-Fab | Engine Covers - S/C | Fuse Relay Cover | Radiator Cover | Billet Oil Cap+ | AutoAgenda | Exterior Parts & Accessories | 14 | 02-06-2013 08:43 PM |
| New Texas Speed & Performance Engine Machining Center! | Trevor @ Texas Speed | Camaro V8 LS3 / L99 Engine, Exhaust, and Bolt-Ons | 18 | 01-16-2013 03:46 PM |
| Hawk Performance Brake Pads part HB247Z.575 $85.00 | Rogan | USA - Florida | 2 | 10-07-2011 12:10 PM |
| Acronyms? | KEEP RT | Camaro V8 LS3 / L99 Engine, Exhaust, and Bolt-Ons | 20 | 03-11-2011 08:57 PM |
| Great Read and Info on Oil Weight | Banshee | Mechanical Maintenance: Break-in / Oil & Fluids / Servicing | 1 | 11-23-2009 09:03 PM |


 ). I am going to really address the install of these because you can never have to much info on a project like this.
