You are browsing camaro5 

|
 03-08-2015, 01:31 PM
|
#1 |
  
Drives: Supercharged 2013 AGM 2SS/RS Join Date: Oct 2013
Location: Los Angeles, CA
Posts: 786
|
Any ideas on fixing this scratch?
Got back to my car and looks like someone bumped into my front bumper while I was parallel parked... Left a scratch on the nose (see pics).
Any ideas on how to make it look better without doing a full repaint of the front bumper? Something for Dr. Colorchip or Langka? Never used either before, but have read good things. 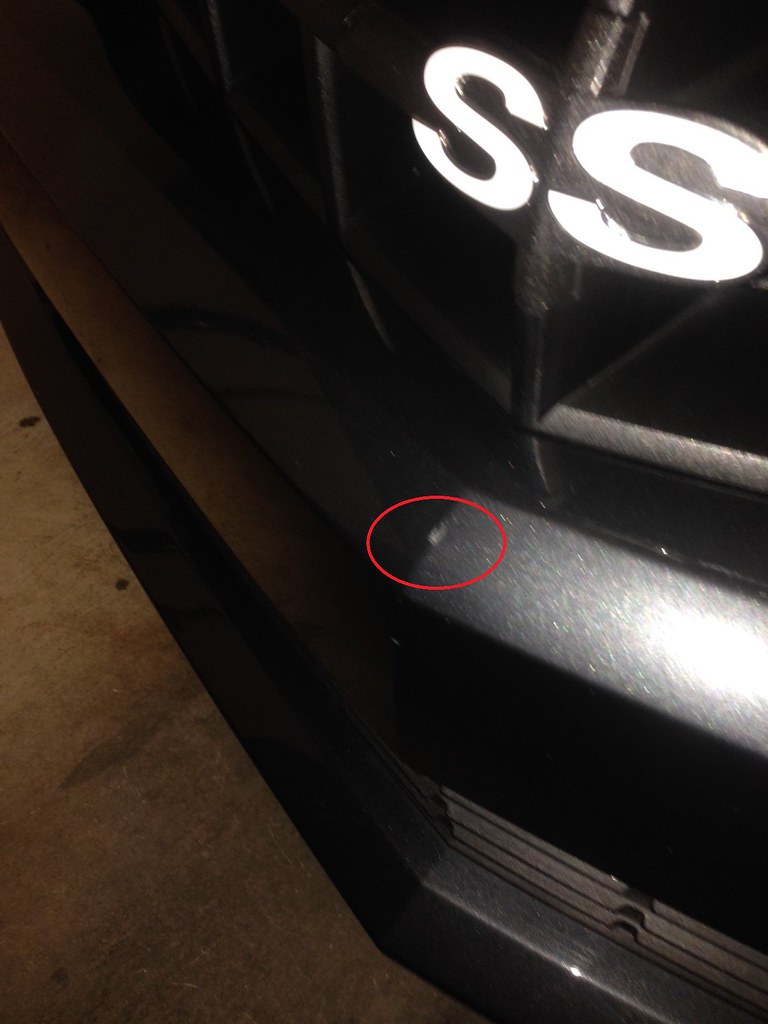 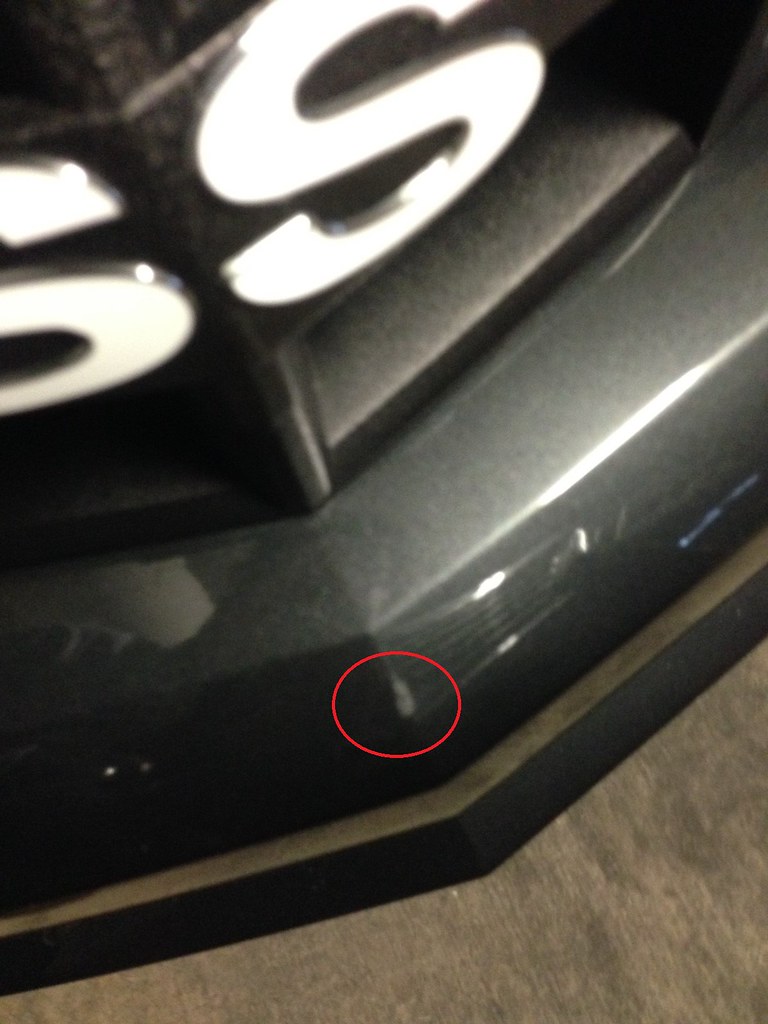
__________________
2013 AGM 2SS/RS
SLP TVS2300, Edge CAI, 3" Magnaflow catback, BC Racing BR series coilovers, HRE FF15's (20x10 square) with Michelin Pilot Sport 4S's, GM STB, BMR front and rear sway bars and toe links, Prothane subframe bushings and front control arm inserts, JDP rear upper control arm bushings, Elite Engineering catch can. Tuned by Cunningham Motorsports. 1967 Bolero Red 396 SS/RS Convertible |

|

|
|
03-08-2015, 07:39 PM
|
#2 |
   
Drives: 2014 Camaro 1LT/RS Join Date: Sep 2013
Location: Arizona
Posts: 1,693
|
Get some better pictures up close in focus. That'll help us help you.
__________________
Detailing is an involuntary obsession.
 |
|
|
|
|
03-08-2015, 07:50 PM
|
#3 |
  
Drives: early 2011 Camaro convertible Join Date: Jul 2014
Location: House Springs, Mo
Posts: 2,002
|
your chevy store has exact match spray and brush touch up, looked up with your vin. They can also provide you with the name of the local air brush man they use to touch up their trade ins.
__________________
 Early 2011 LT Convertible, ZL1 bumper, hood, side skirts, belly pan and wheels, Truecarbon ECF hood extractor, K&N CAI, Elite catch can, Big Worm Bow Tie emblems, Jacfab bracket, Vitesse TC, BMR strut brace, BMR tunnel brace, NPP exhaust |
|
|
|
|
03-09-2015, 01:48 AM
|
#4 | |
|
Drives: Supercharged 2013 AGM 2SS/RS Join Date: Oct 2013
Location: Los Angeles, CA
Posts: 786
|
Quote:
__________________
2013 AGM 2SS/RS
SLP TVS2300, Edge CAI, 3" Magnaflow catback, BC Racing BR series coilovers, HRE FF15's (20x10 square) with Michelin Pilot Sport 4S's, GM STB, BMR front and rear sway bars and toe links, Prothane subframe bushings and front control arm inserts, JDP rear upper control arm bushings, Elite Engineering catch can. Tuned by Cunningham Motorsports. 1967 Bolero Red 396 SS/RS Convertible |
|
|
|
|
|
03-10-2015, 09:50 AM
|
#5 |

|
Do you have a DA polisher? I would try to polish it first. If not that's really a small mark and can be repaired for less than the cost of the products and tools needed to correct it.
__________________
Laus Deo
|
|
|
|
|
03-10-2015, 09:53 AM
|
#6 |
  
Drives: 2011 1LT/RS A6 RJT SuperCharged Join Date: Mar 2011
Location: 87114
Posts: 3,503
|
Definately try polishing it first, if that doesn't work Dr. Colorchip or touch up paint.
__________________
Power is worthless without control. The 2nd protects the 1st.
BMR sub frame brace, BMR tunnel brace, LSR sways, LSR CM ca & tl, Sphon ExD el, GM tower brace, Megan EZ Streets, Goodridge Stainless Steel Braided brake lines, PowerStop D/S rotors & pads, Doug Thorty Ceramic Shorties, Magnaflow x-pipe, MRT V2.0, KICKER PowerStage sub & amp, Infinity speakers & tweeters, Viteese Throttle Controller, Viteese Paddle Shifters, ACS T2 Splitter, ACS T2 Ports/Quad LED lights, VDI kit, Havoc diffuser, IPF ECU/TRANS tuned, IPF/KPE Supercharged. 364RWHP/297RWTQ |
|
|
|
|
03-10-2015, 10:04 AM
|
#7 |

|
Looks like a write off, I'll give you $15000 for it...........
__________________
'14 1LE, Recaro, Cammed, Headers, Hi Flows, CAI, Tuned, 486 RWHP
https://www.youtube.com/watch?v=H57UfKCO0EY&feature=youtu.be  |
|
|
|
|
03-10-2015, 10:20 AM
|
#8 |
 Drives: 2012 ZL1 Join Date: Feb 2015
Location: Philadelphia
Posts: 229
|
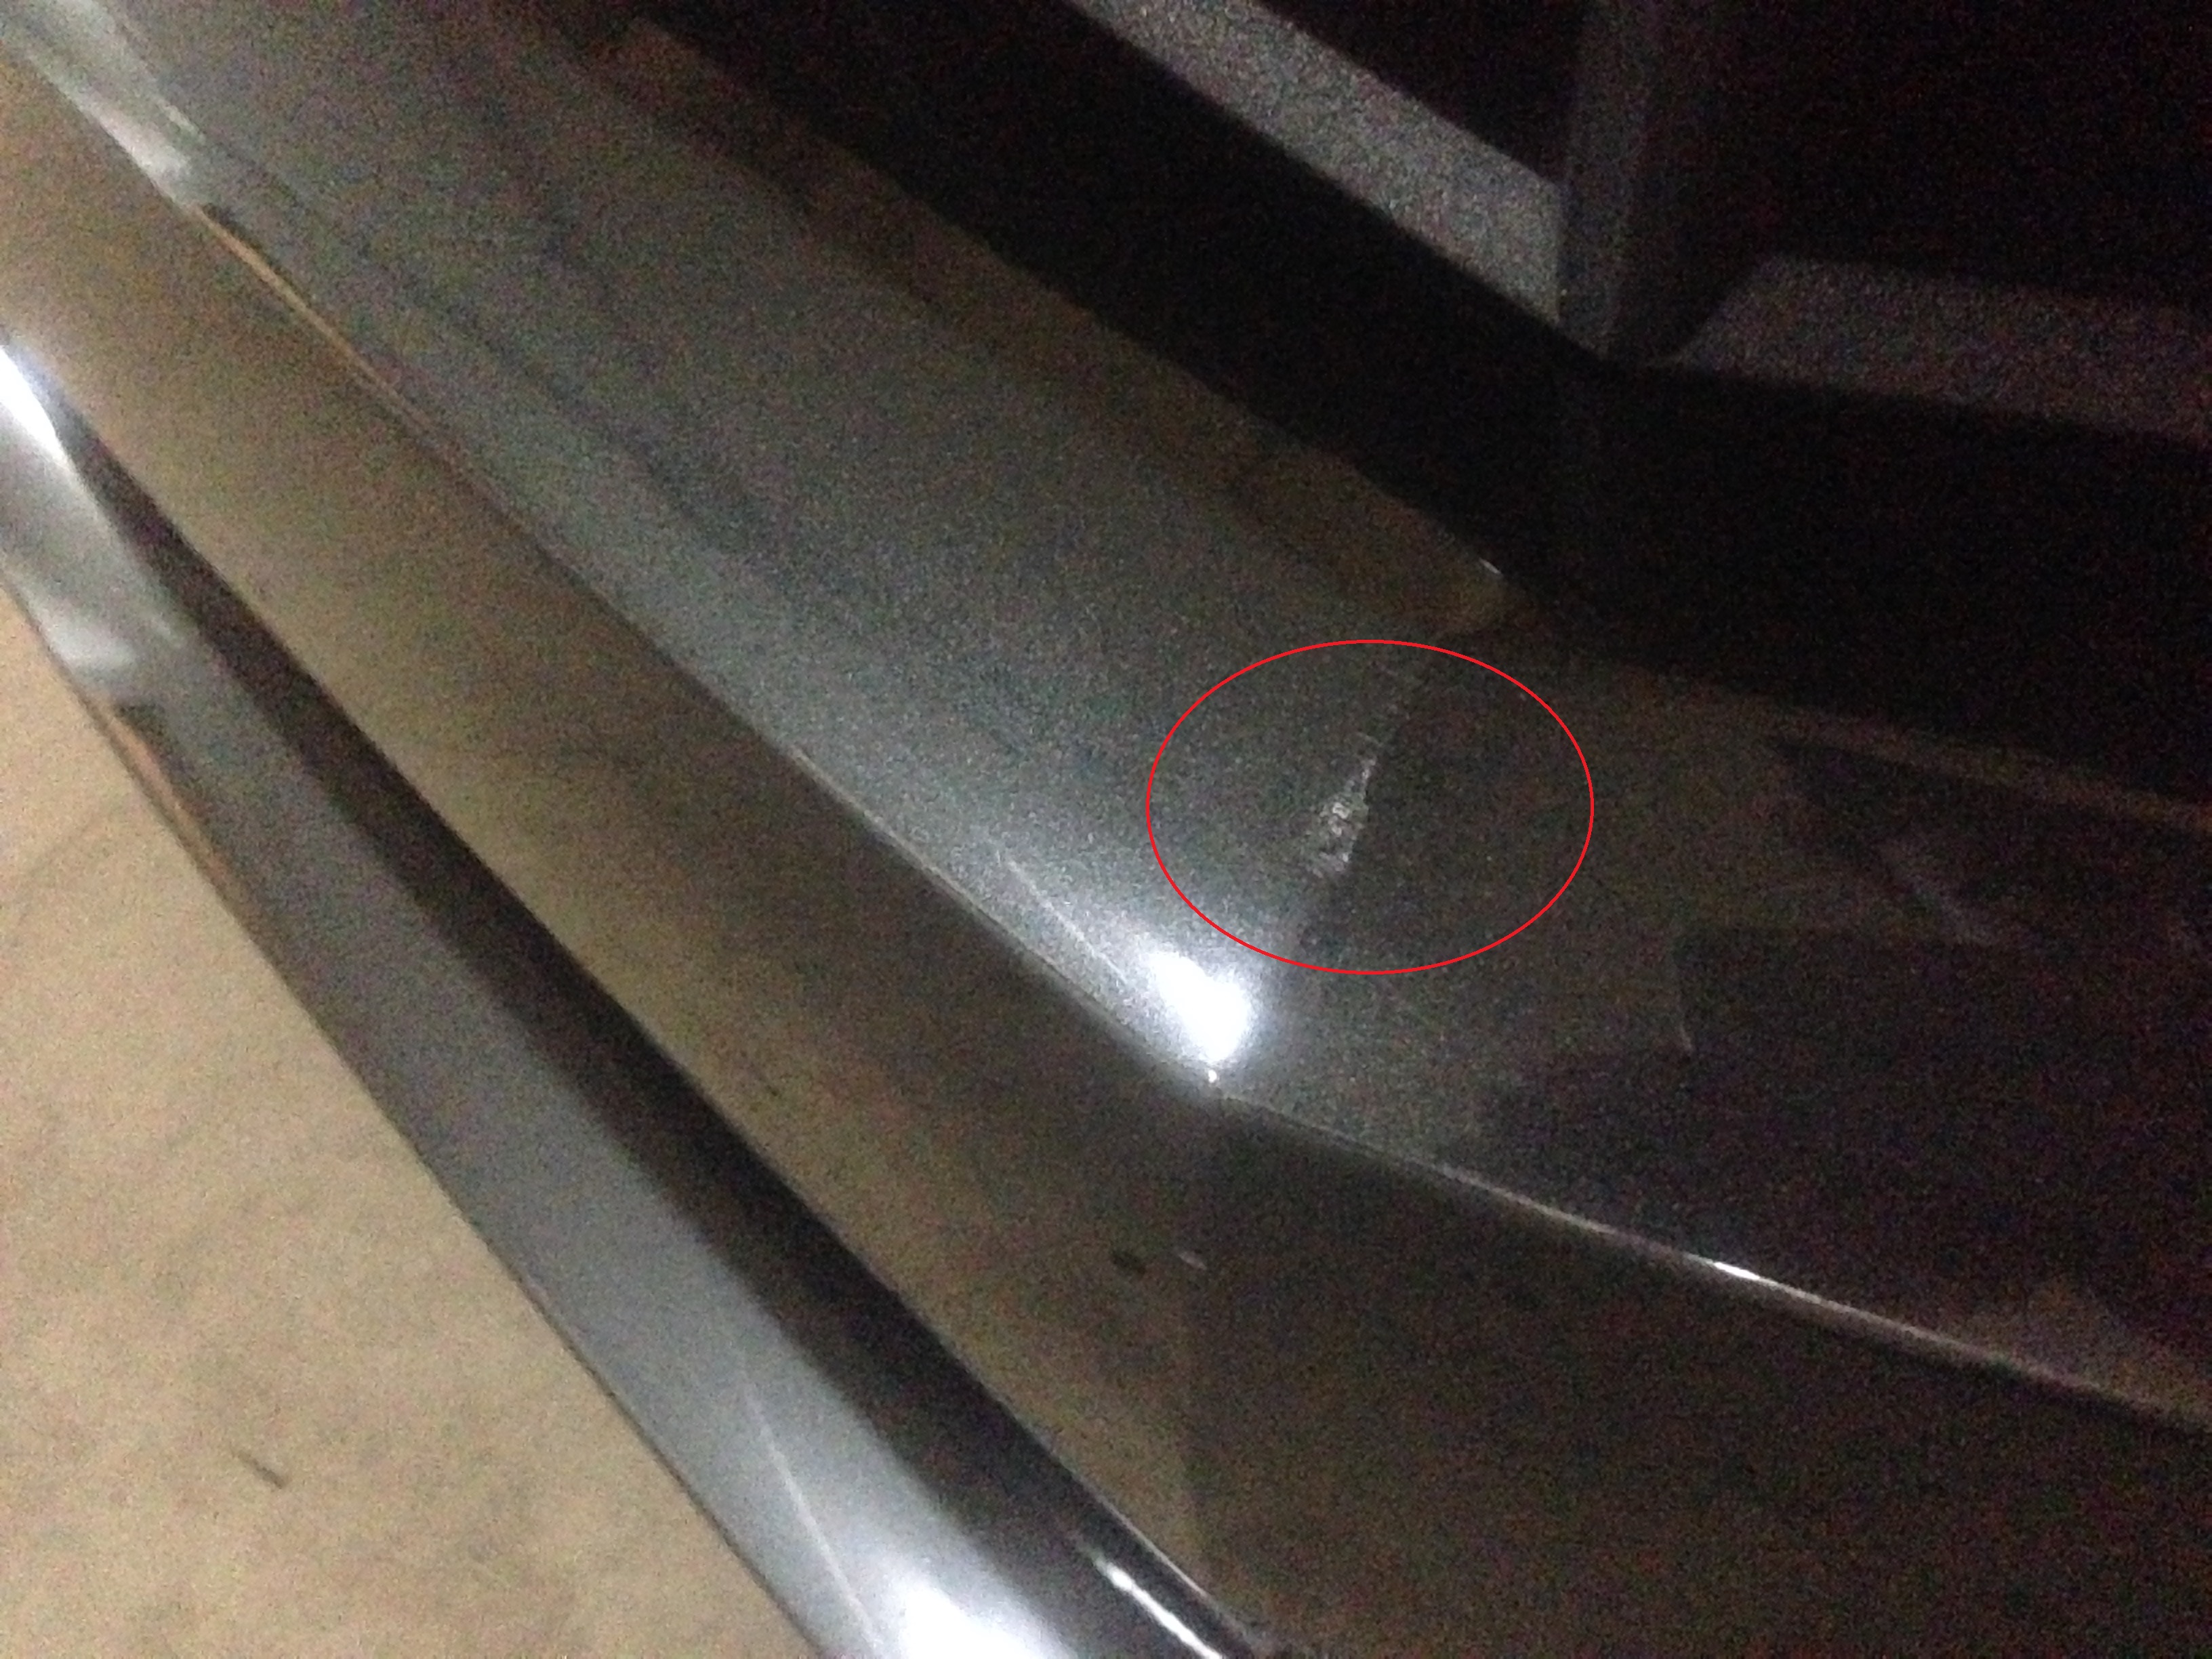
Looks like there is only a very small section in the middle of that scratch that went through the paint. I have restored scratches like this many times. This is what I would do:
Wet sand VERY lightly using 1500 grit sand paper. Wet sand again with some 2000 grit sand paper. Make sure when wet sanding that you do an area of about a centimeter surrounding the scratch too. This will take off some clear coat and leave the area faded from the scratches the sandpaper made. Next, and you don't need a polisher for this, you can do it by hand with a pad or microfiber towel, put some compound down on the entire area and rub liberally in circular motion. Use some elbow grease when doing this. Wipe it off, and repeat the process again. By now, all the scratch marks the sandpaper made should be gone and initial scratch itself should be gone. Next, get some polish to add a nice shine to the area. I would polish a few feet of the surrounding area as well to blend it in nicely. Last, use a thick coat of synthetic wax over the area you polished to protect the work you just did. If you follow these steps, I think you would not even be able to notice the scratch anymore, if at all. My girlfriend scrapped the whole side of her front bumper against a yellow pole, and with the same process I described to you I was able to get everything out no problem. Repair shop would have charged at least 100 but most likely would have recommended a full paint job. Just be careful with the wet sanding that you keep the area wet. If it gets dry, the sandpaper against the dry paint surface will go right through the paint. |
|
|
|
|
03-10-2015, 10:23 AM
|
#9 |
|
Drives: 2012 ZL1 Join Date: Feb 2015
Location: Philadelphia
Posts: 229
|
And to answer your question about touch up paint, I would not recommend using it. From my personal experience, I have tried factory matched touch up paint on small areas and it seems that no matter how careful I am, it always stand out more than the scratch itself. You can certainly try it and maybe you would have better luck than me, but from my personal experience touch up paint never really works.
|
|
|
|
|
03-10-2015, 10:35 AM
|
#10 |
|
Drives: 1967-2014 Camaro's Join Date: Jun 2010
Location: Athens, GA and Titusville, FLA
Posts: 341
|
You could try our Dr. Color Chip Solution, its the easiest and most effective way to touch-up minor automotive paint chips and road rash. Here is a link to the part! http://www.rickscamaros.com/dr-colorchip-camaro-paint-chip-repair-kit-2010-2012.html
Here is also a link to a Camaro5 member who has used the product and gave us his opinion on it http://www.camaro5.com/forums/showthread.php?t=392680 PM if you have questions, there is video to help you understand the product more as well |
|
|
|
|
03-10-2015, 12:32 PM
|
#11 |
|
Drives: Supercharged 2013 AGM 2SS/RS Join Date: Oct 2013
Location: Los Angeles, CA
Posts: 786
|
Thanks for all the suggestions. I have a PC polisher that I can try on this, though I'm no expert at using it. Would it be a two-step polish? I have been using Meguiar's M105 and M205.
As for wet sanding, I am quite nervous to do that since I've never wet-sanded before, nor am I particularly handy. How easy is it to just make the problem worse? Got a first quote by email for $240 to fix it, which seems quite high. May try to polisher and see how it comes out.
__________________
2013 AGM 2SS/RS
SLP TVS2300, Edge CAI, 3" Magnaflow catback, BC Racing BR series coilovers, HRE FF15's (20x10 square) with Michelin Pilot Sport 4S's, GM STB, BMR front and rear sway bars and toe links, Prothane subframe bushings and front control arm inserts, JDP rear upper control arm bushings, Elite Engineering catch can. Tuned by Cunningham Motorsports. 1967 Bolero Red 396 SS/RS Convertible |
|
|
|
|
03-10-2015, 02:32 PM
|
#12 | |
|
|
Quote:
Take your time with the 105. You will probably have to make a few passes to level it if it is deep(catching a finger nail). Then polish the surrounding area with 205. Let us know if you need help along the way you can do this!
__________________
Laus Deo
|
|
|
|
|
|
03-10-2015, 02:43 PM
|
#13 |
|
Drives: 2012 ZL1 Join Date: Feb 2015
Location: Philadelphia
Posts: 229
|
Wet sanding is easy. Get some 1500 grit sand paper, wet it down and the area of the car you're working on, and in easy smooth notions sand it down. You should see a little haze form after done, that is the clear coat getting scratched up. Then follow with 2000 grit. This will even out the area and get the scratch ready to be buffed.
Buff it with some good compound then polish and wax it. Should look close to perfect when done. Probably end up looking like a little pebble chip in the paint when you're done |
|
|
|
|
03-10-2015, 02:54 PM
|
#14 | |

Drives: 2015 2SS/RS vert, Spring Green Edtn Join Date: Jun 2014
Location: Sarasota, FL
Posts: 1,284
|
Quote:
__________________
2015 2SS/RS vert, Spring Edition Green Flash (2015 - present)
2014 1LT vert, Blue Ray Metallic (2014 - 2015)  |
|
|
|
|
|
|
|
|
 |
|
|


