You are browsing camaro5 

|
 11-14-2013, 07:53 AM
|
#127 |
|
THE ROD MAN

Drives: 2010 ABM 2SS/RS #631 Join Date: May 2010
Location: TENNESSEE
Posts: 558
|
They turned out great!!!
I used the tin from Lowe's and the cutters. Then I laid them out and painted them with high heat paint (for possible heat issues just in case) Then I put some semi-gloss paint over the temperature paint. Came out good! took about 2 hours taking my time. 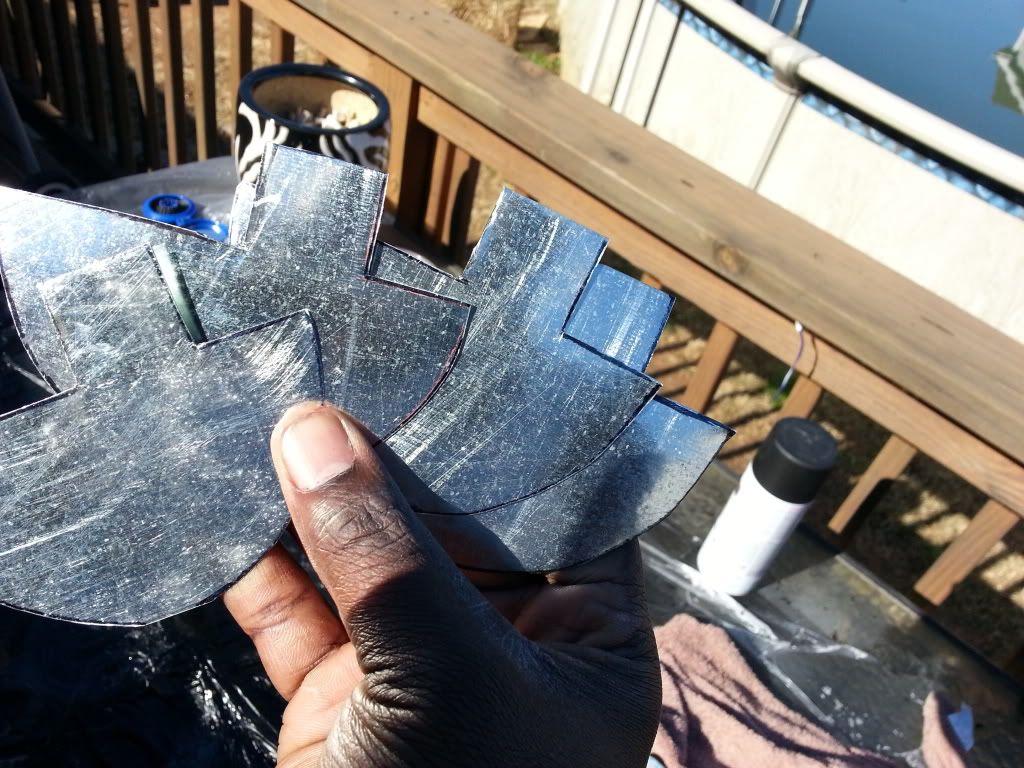 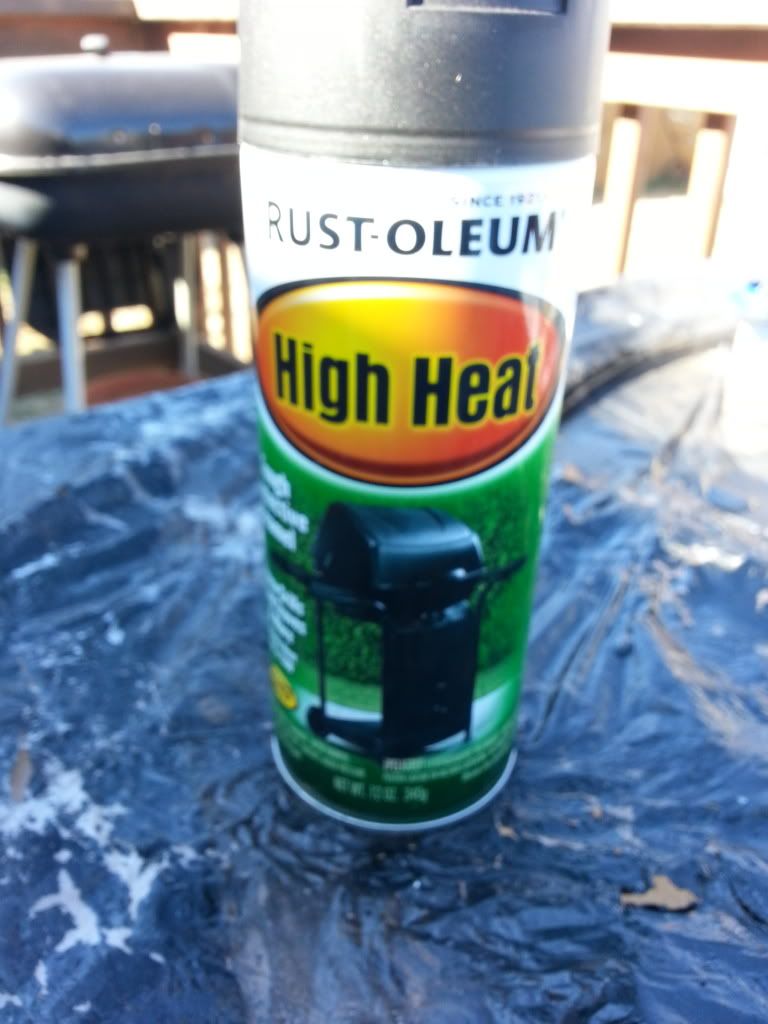 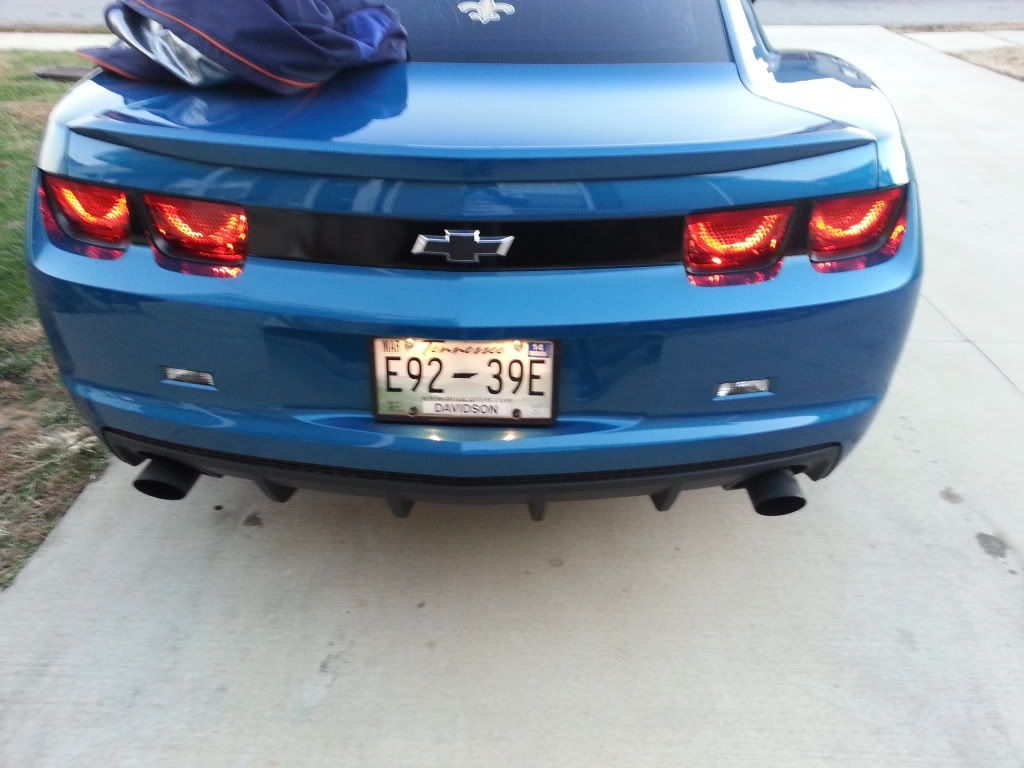 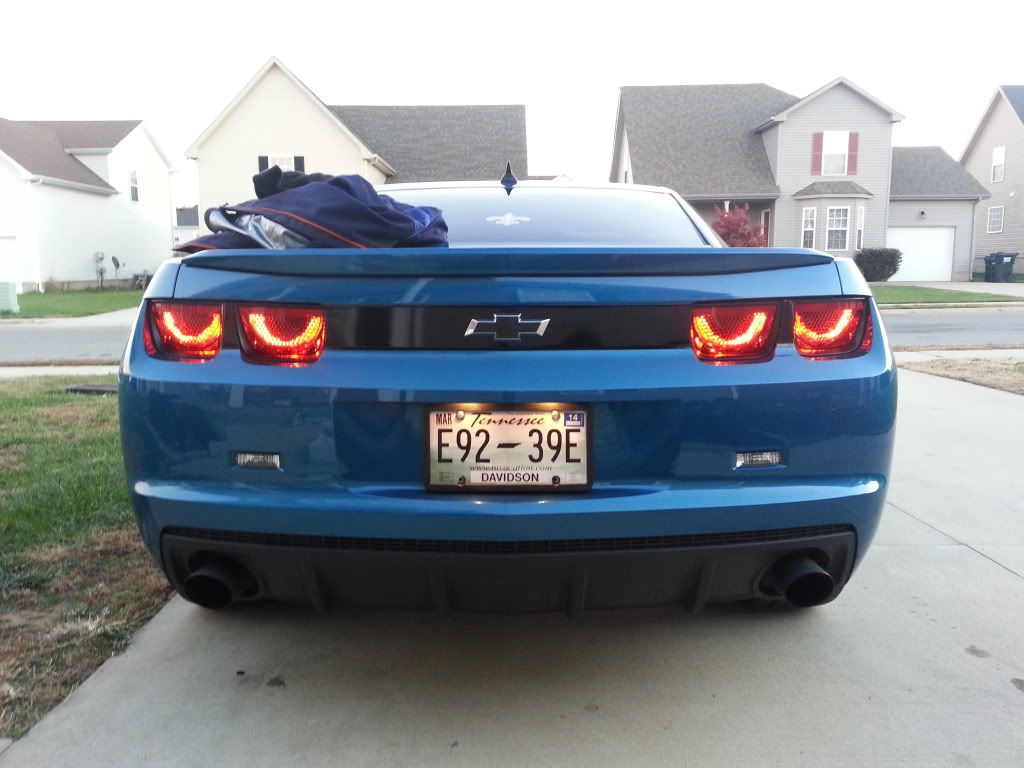 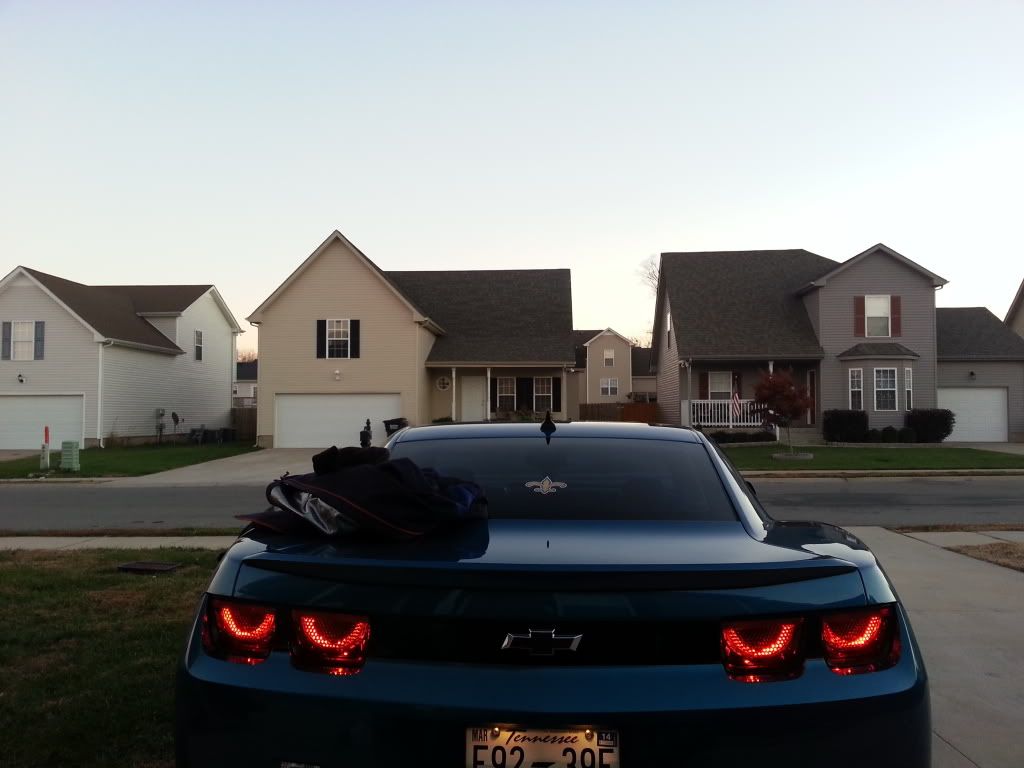
__________________
 Last edited by SROD; 11-14-2013 at 08:03 AM. Reason: Added pics |

|

|
|
11-14-2013, 09:10 AM
|
#128 |
|
[COTW 5/12/14]

Drives: 2012 CRT NF Cammed 2SS/RS For Sale Join Date: Oct 2011
Location: NOLA
Posts: 6,115
|
Nice! Look great
__________________
 |
|
|
|
|
11-14-2013, 09:49 AM
|
#129 |
|
THE ROD MAN
Drives: 2010 ABM 2SS/RS #631 Join Date: May 2010
Location: TENNESSEE
Posts: 558
|
thanks!
__________________
|
|
|
|
|
11-27-2013, 10:00 AM
|
#130 |
 
Drives: 2013 GAZ 2SS/RS Join Date: Feb 2012
Location: Fremont, CA
Posts: 418
|
The weather has turned, and this morning I noticed condensation in one of mine, so I must not have a good moisture seal. Make extra sure you seal them good.
__________________
If you see it, get it, for tomorrow it may be gone!
 |
|
|
|
|
11-27-2013, 10:24 AM
|
#131 |
|
THE ROD MAN
Drives: 2010 ABM 2SS/RS #631 Join Date: May 2010
Location: TENNESSEE
Posts: 558
|
mine too. im gonna take them out and reseal them
__________________
|
|
|
|
|
12-10-2013, 03:49 PM
|
#132 | |
         
Drives: 2016 SS w/2SS A8 Blue Velvet Join Date: Dec 2009
Location: 39.793153,-86.238223
Posts: 3,678
|
Quote:
As said, these are NOT THE SAME! I got these back in 2010 in CCFL as AAC didn't have the SMD then. It was a freaking joke! Cutting the lenses open and the lights didn't work as I thought they should and AAC wasn't giving me my money back either. Worst cash ever spent and in the truest form of good money for bad! I've since gotten the Technostalgia which I'm happy with, so much so I'm on my second Camaro and had to buy another set because the dealer didn't want me to remove them and trade with the OEMs. That said, I love what you've done here. The concept Camaro had the right idea with the lights and I'm finally glad to see someone has made it possible in a simple form. That said, I have two sets of OEM tail lights from having bought two sets of Technostalgia's, one set smoked with film and the others I just removed from my SS in August when I got it. I'm going to do a set per your great instructions. I'm also thinking of painting the aluminum plates a flat black to reduce reflection they may cast. Thanks again and once again this forum has proven there is a warehouse of knowledge within.
__________________
Never grow up, it's a trap!
|
|
|
|
|
|
12-12-2013, 08:57 PM
|
#133 |
|
Drives: 2013 GAZ 2SS/RS Join Date: Feb 2012
Location: Fremont, CA
Posts: 418
|
I just re-sealed one of mine that had condensation after work tonight. I found a trick to get the condensation out. At first I tried shaking the water out, then I tried blowing it out with the wifes blow dryer, but the lens just kept fogging up.
So while sitting there in the bathroom looking at the foggy lens, I seen a bottle of 50% rubbing alcohol, and got an idea. I poured some in, shook it up real quick to absorb the water, then dumped it down the toilet and turned on the blow drier, and after 10 minutes it was clear, dry, and fog free. The alcohol being only 50% did not disolve the paint on the shadow plate, and evaporated clear. I added a layer of clear exterior grade windows seal RTV (3 hour cure stuff) over the leaking area, and put it all back together before it got dark.
__________________
If you see it, get it, for tomorrow it may be gone!
|
|
|
|
|
12-13-2013, 06:36 AM
|
#134 |
|
THE ROD MAN
Drives: 2010 ABM 2SS/RS #631 Join Date: May 2010
Location: TENNESSEE
Posts: 558
|
I may have to try that. my top is sealed so maybe my side has a crack or something in it. troubleshooting today!
__________________
|
|
|
|
|
12-13-2013, 01:23 PM
|
#135 |

Drives: 2010 Camaro Join Date: Mar 2011
Location: Colorado
Posts: 412
|
@RRAY
The alcohol is a great idea. I checked the seal, shook them out and let a fan blow across mine all night. I havent had a moisture issue yet. @SROD Very Nice. |
|
|
|
|
12-17-2013, 02:29 PM
|
#136 |
|
Drives: 2010 Camaro 2lt RS Join Date: Sep 2009
Location: Calgary, AB, Canada
Posts: 548
|
this is an awsome mod. look sgreat when done. i dont have the balls to do it unless i had an extra set of lenses though. i may have to try if i can score a set of tail lenses in the future
__________________
2010 Camaro 2lt RS, IOM on IOM, M6, eibach springs, eibach sways, ported throttle body, black ice-olator, RX catch can, OBX headers - no cats, Pypes cat back, Vibrant resonators, injen intake, DRL over ride, decepticon fender emblems, transformer sill plates, transformer script on cowl, more to come.
|
|
|
|
|
12-17-2013, 05:04 PM
|
#137 |
|
Thabigdeuce

Drives: 2012 chevrolet Camaro 2LT/RS IBM Join Date: Jul 2012
Location: Buford, GA
Posts: 18
|
Work on it this weekend
came out looking great after all

__________________
2012 2LT/RS Imperial Blue metallic W/ Silver Stripes
2004 Tahoe BLK  |
|
|
|
|
01-08-2014, 10:54 AM
|
#138 | |
|
Drives: 2010 Camaro Join Date: Mar 2011
Location: Colorado
Posts: 412
|
Quote:
Glad you liked the idea. |
|
|
|
|
|
02-24-2014, 07:42 PM
|
#139 |
 Drives: 2022 SS 1LE Join Date: Jan 2014
Location: michigan
Posts: 178
|
Just did this mod. Looks great. To bad i still have a month and a half before i get it out .
|
|
|
|
|
02-26-2014, 08:59 AM
|
#140 | |
|
Drives: 2010 Camaro Join Date: Mar 2011
Location: Colorado
Posts: 412
|
Quote:
|
|
|
|
|
|
|
|
|
 |
| Tags |
| afterburner, afterburners, diy, lights, taillights |
|
|


