You are browsing camaro5 

|
 12-18-2012, 04:55 PM
|
#1 | |
 
Drives: 2013 chevrolet camaro rally yellow Join Date: Nov 2012
Location: United States
Posts: 170
|
NON RS -> RS HEADLIGHT GUIDE
Hey everyone, this is my first DIY! I will try and keep it short and sweet. This DIY is to take your regular Non-RS (halogen) headlamps and switch them out with the RS (Halo/HID) headlamps. FINISHED PRODUCT: 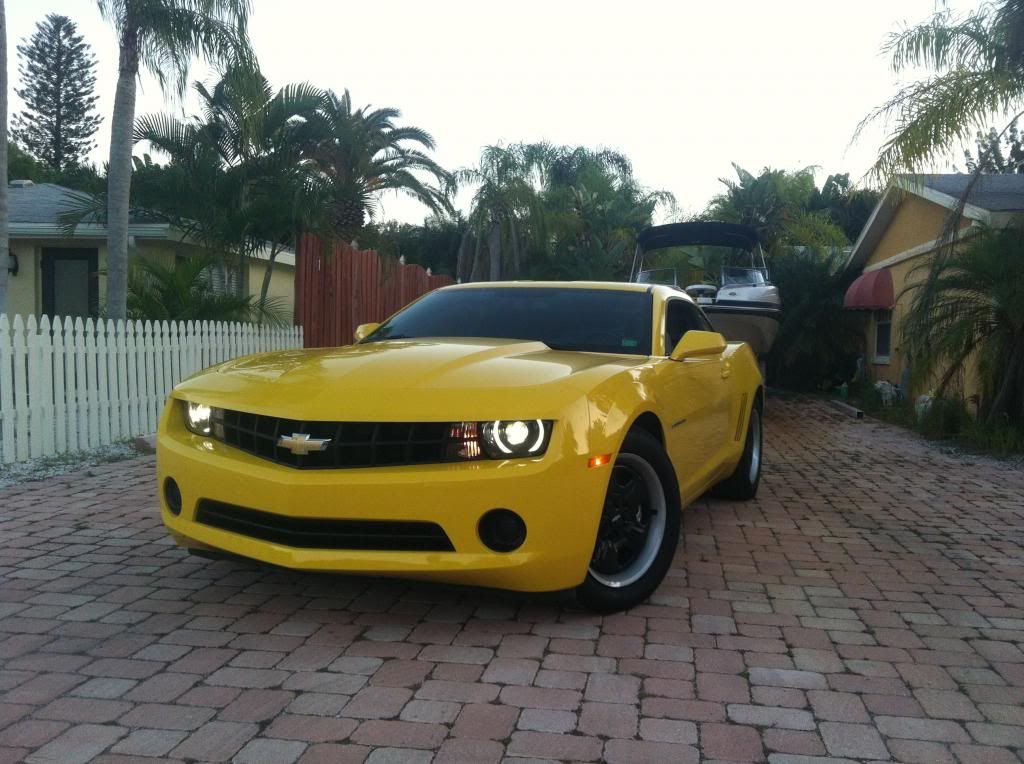 Tools Required: 10mm socket wrench 7mm socket wrench (Sock wrench extension helps) Flat head screwdriver T-20 torque screwdriver *Essential Item* You must have a wiring harness to convert your Non-RS power supply into a RS power supply. You can buy this wiring harness from www.gen5diy.com Plug and Play harness ($150) http://www.gen5diy.com/PnP_harnesses...ight-harness-2 IF YOU WANT DRL HALOS (LIKE MINE) YOU MUST CUSTOM MAKE YOUR HARNESS. TALK TO GEN5DIY.COM FOR A CUSTOM HARNESS. Quick Summary of what to do: 1) Remove front bumper 2) Remove stock halogen lights 3) Install wiring harness 4) Install new RS lights 5) TEST LIGHTS 6) Put front bumper back on I used this video to take off the front bumper, you can use it too. You can see exactly how to take everything off and in what order to do it. This is not my video and I do not take any credit for it. It is simply an extra "helper" Detailed Summary With Pictures: If you have any questions about a step, or do not understand me, or you are stuck and need help. Feel free to ask questions and/or PM me. Good luck! STEP 1: LAY BLANKET DOWN & POP HOOD 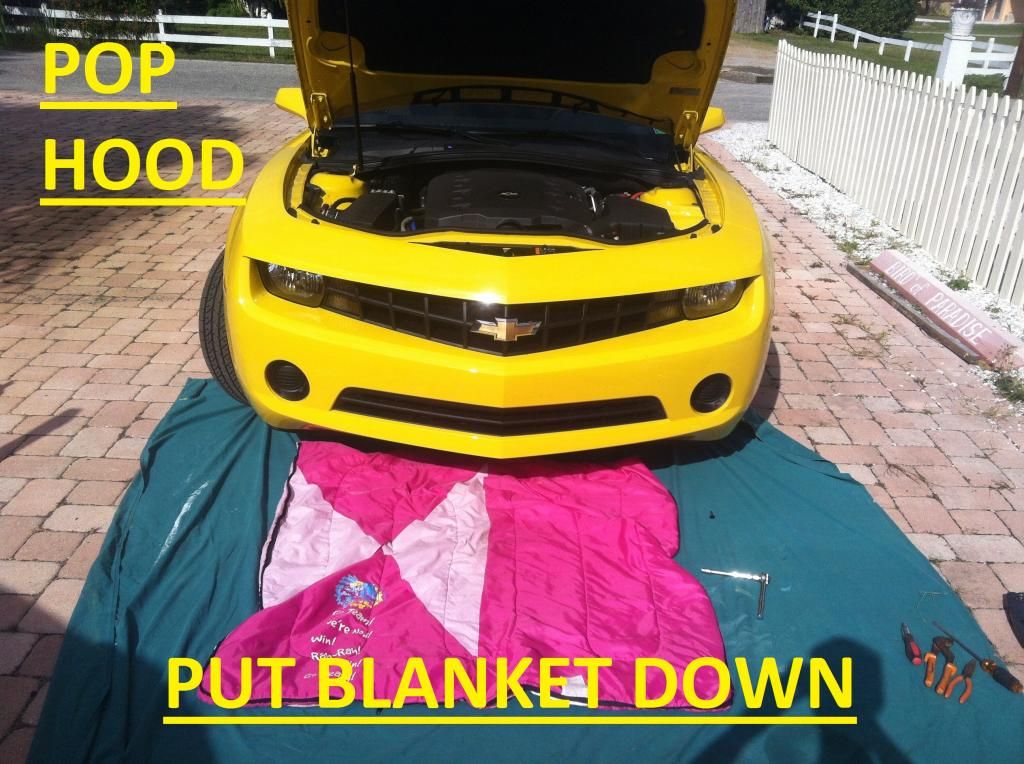 STEP 2: TURN WHEEL TO FAR RIGHT/LEFT (Some people use a car-jack to lift it to make it easier, I did not want to mess around with a jack-lift so I switched between far left and far right to get the screws) 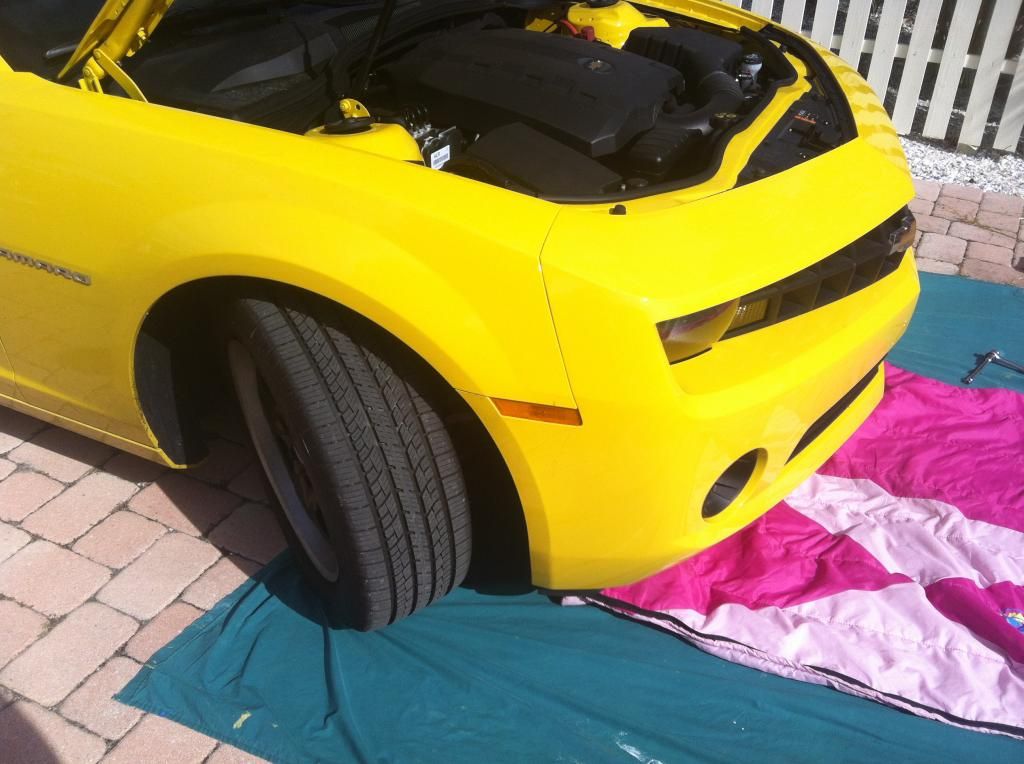 STEP 3: REMOVE 2 BOLTS FROM BOTTOM OF BUMPER 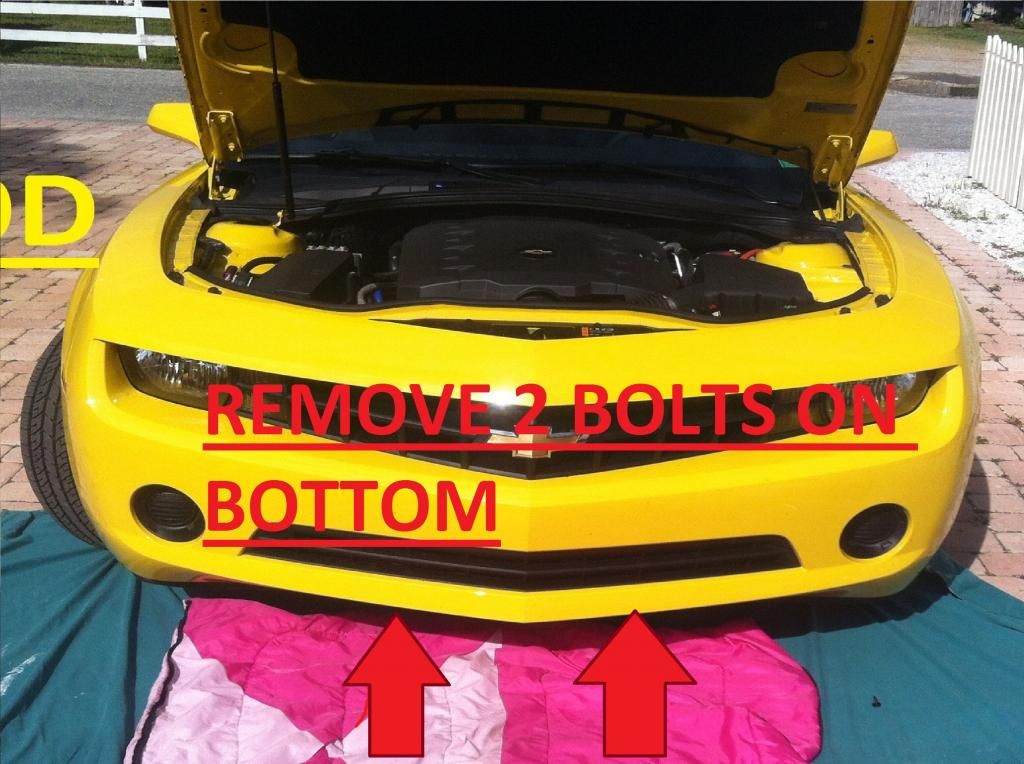 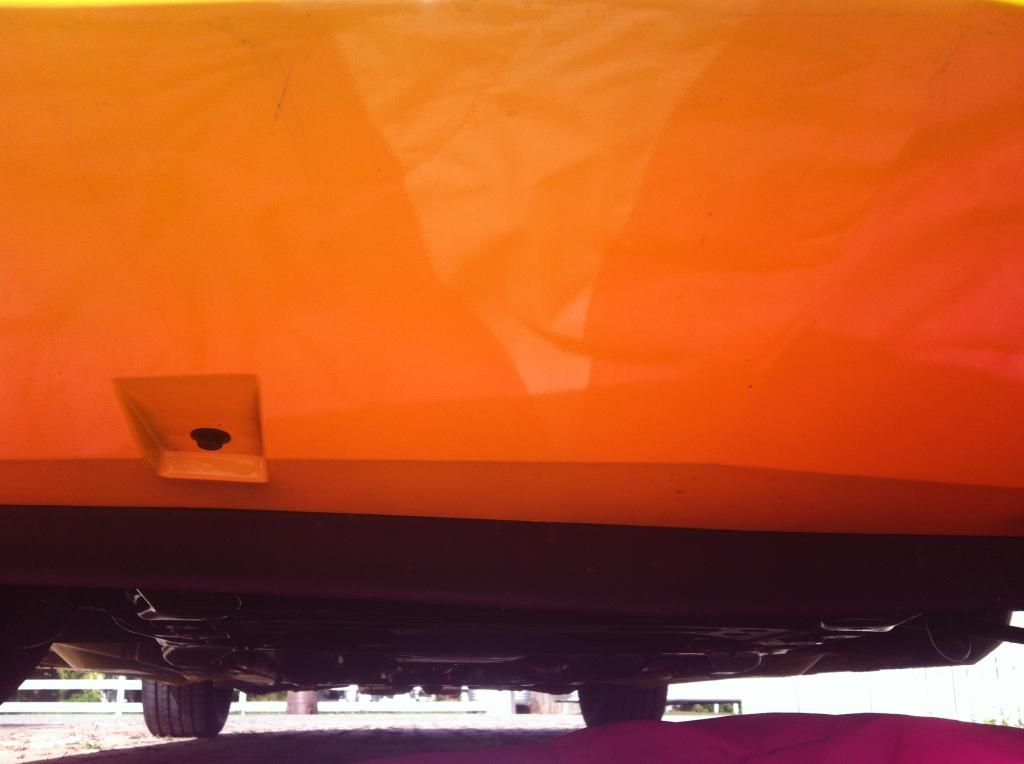 STEP 4: REMOVE 6 SNAP SCREW ON BLACK PART (TOP OF BUMPER) 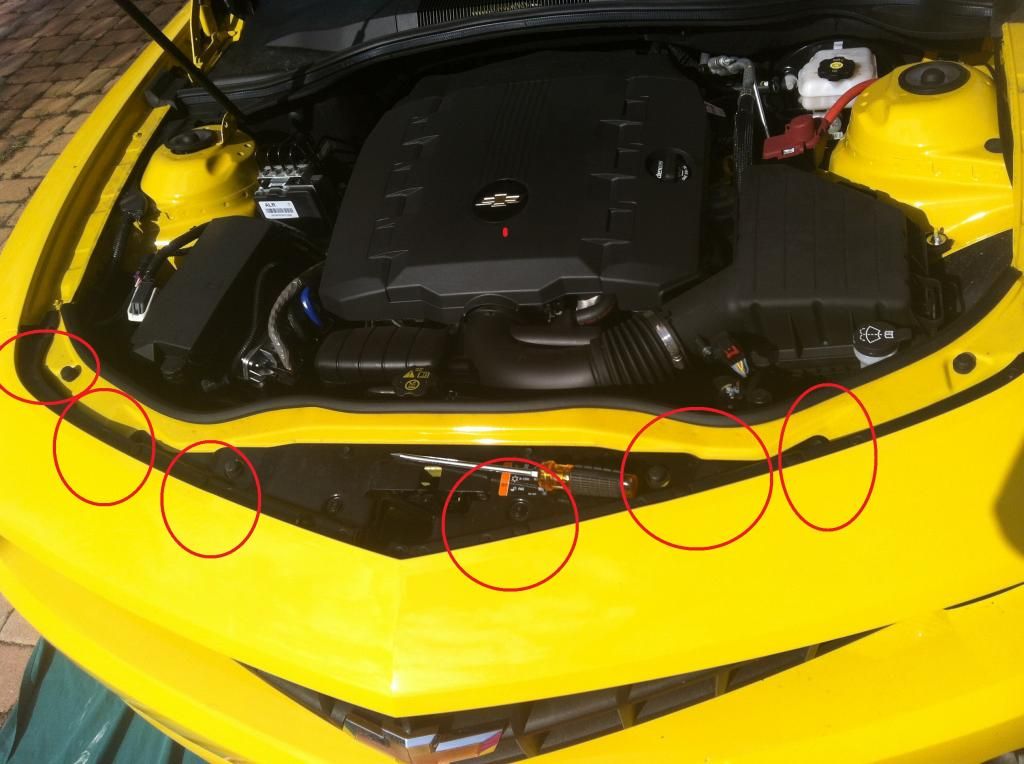 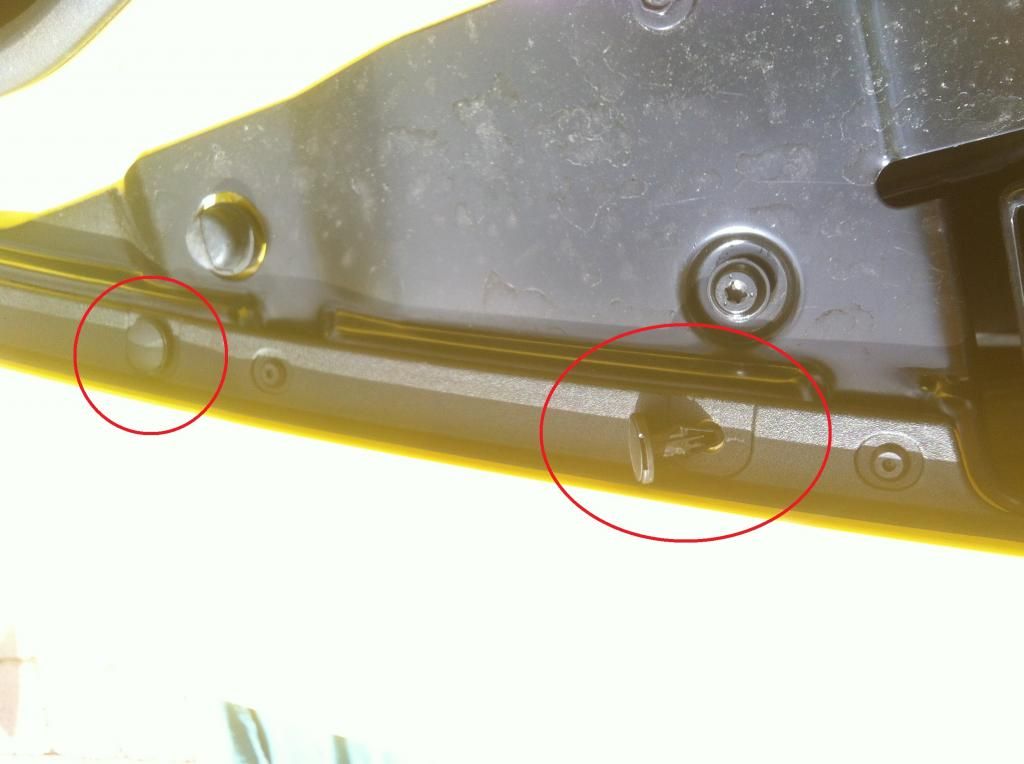 STEP 5: REMOVE 3 TORQUE SCREWS IN WHEEL WELL (PLASTIC) 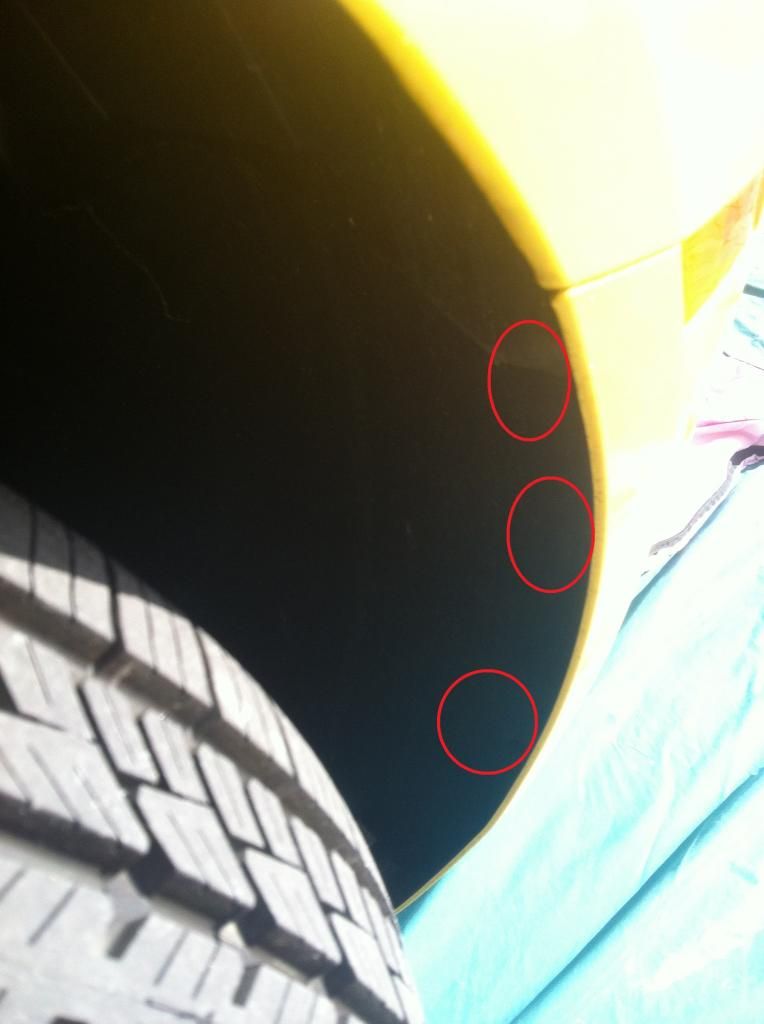 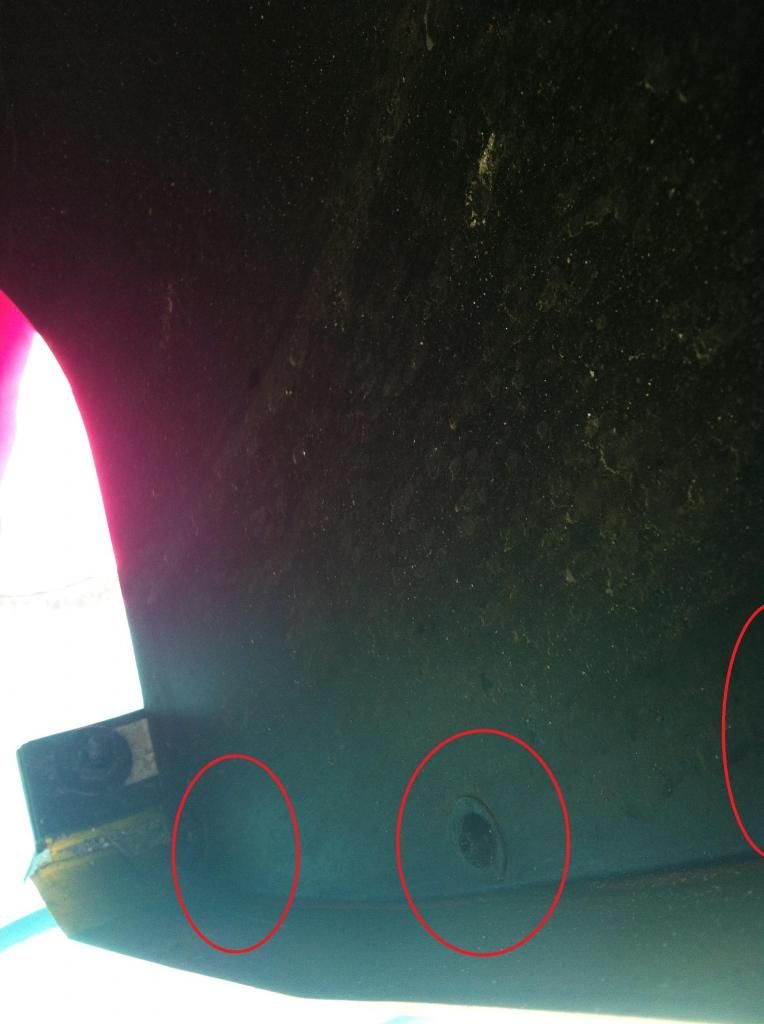 STEP 6: REMOVE 2 BOLTS- 1 BEHIND THE YELLOW BOLT & 1 BELOW BLACK PART OF SIDEMARKER LIGHT (INSIDE WHEEL WELL) 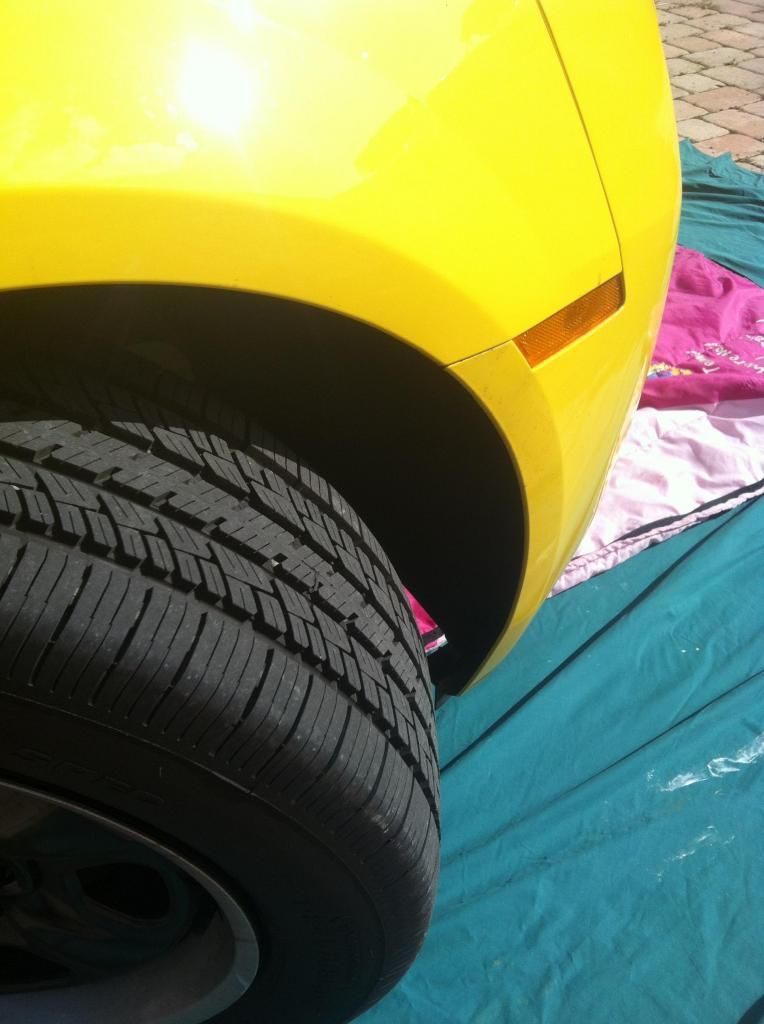 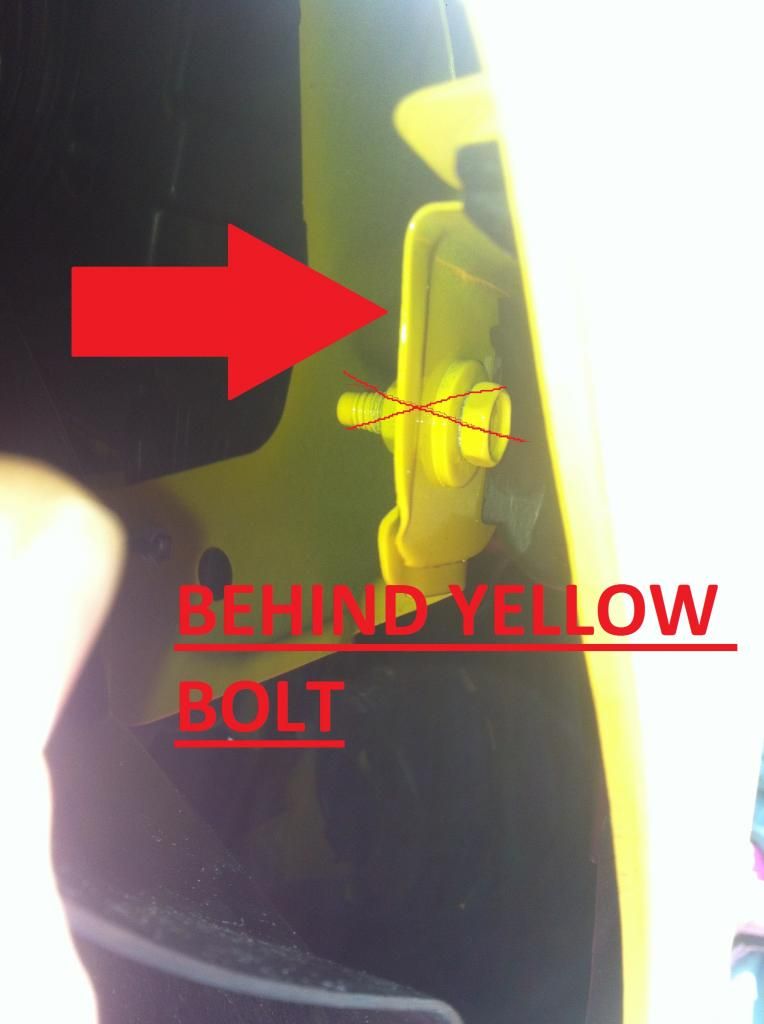 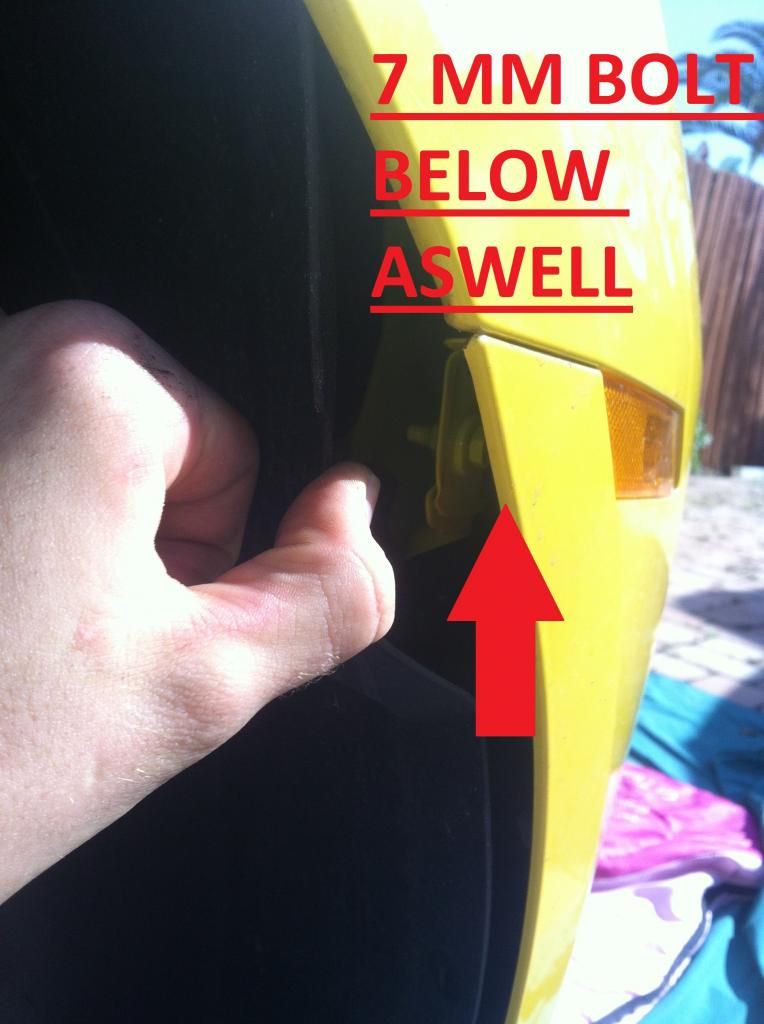 STEP 7: REMOVE 3 – 10MM BOLTS FAR IN WHEEL WELL (TOWARDS TOP OF BUMPER ON THE INSIDE) I do not have pictures of this, but look around the wheel well and you will see these plastic "pop out" pins that hold the wheel well tight on the car. You can remove as many of these as you would like to move the wheel well more easily so you can get to the bolts easier. 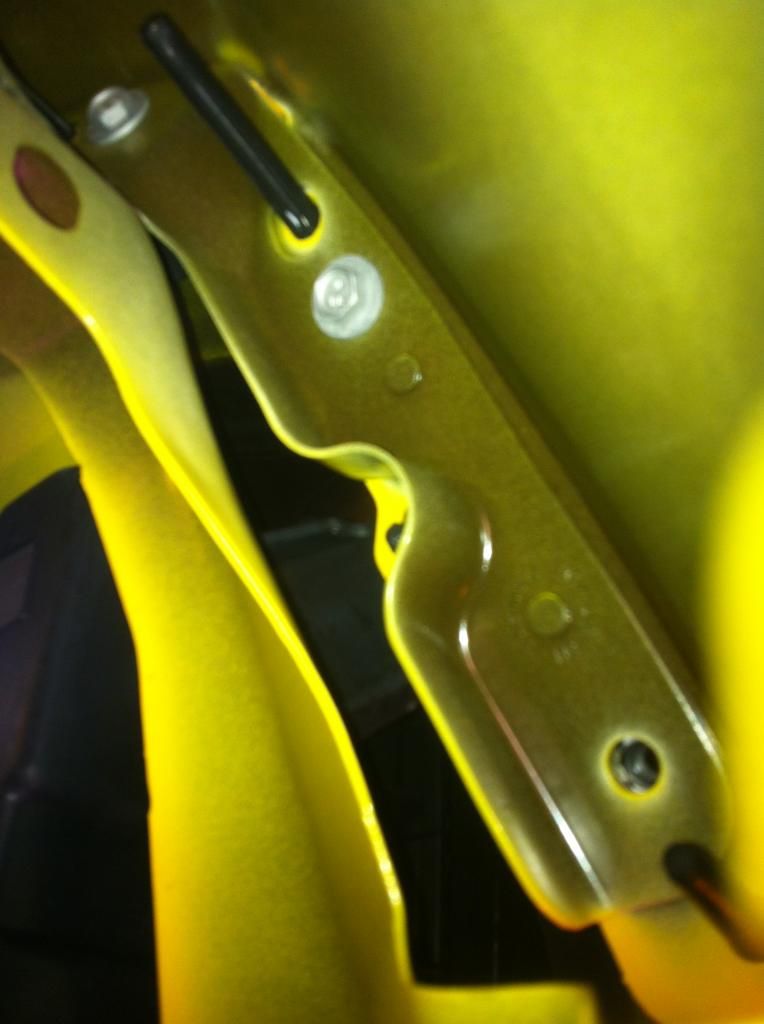 STEP 8: REMOVE 2 BOLTS ON EACH SIDE OF TOP OF BUMPER. WHEN THIS COMES OFF, IT IS FREE! 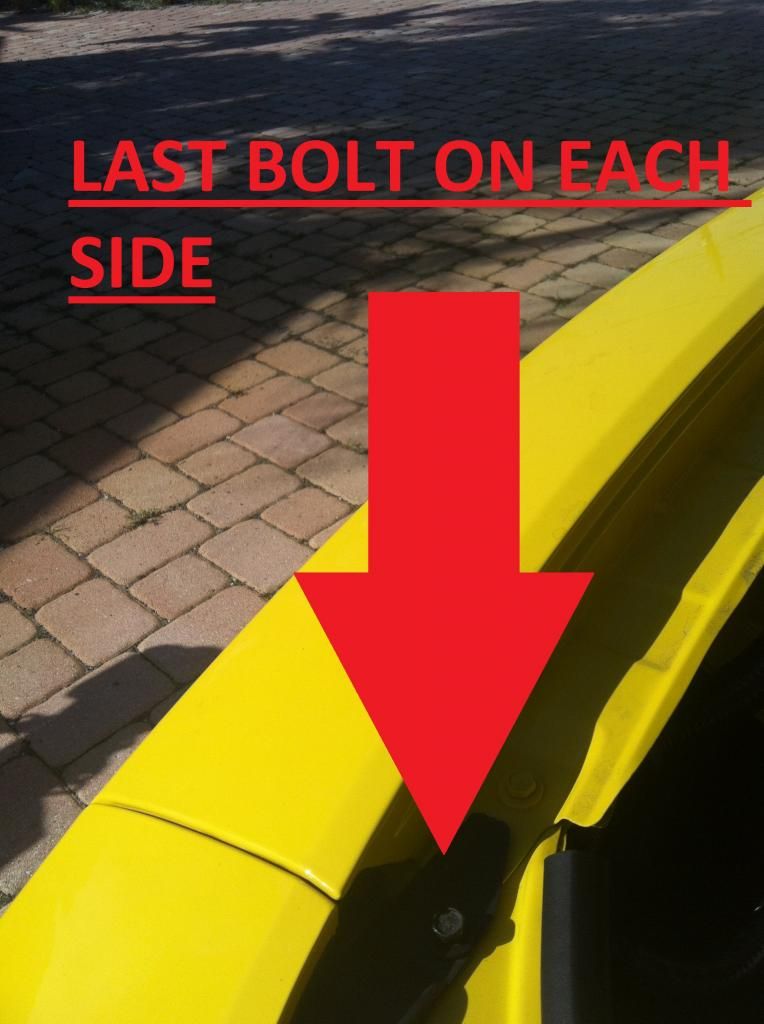 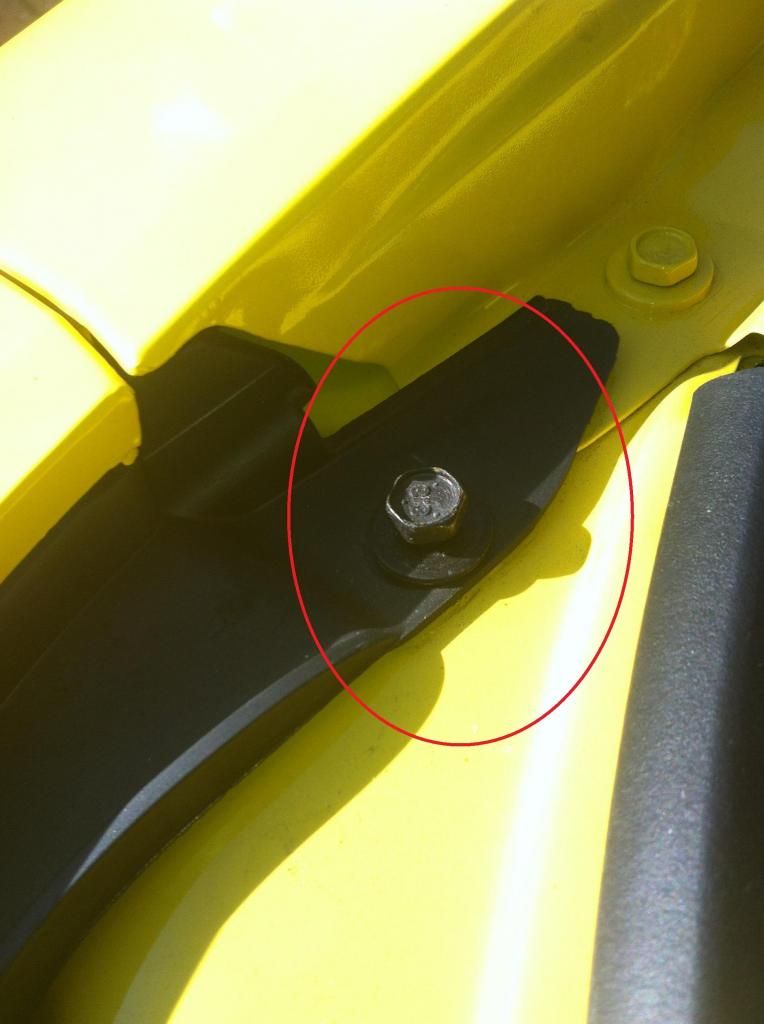 STEP 9: REMOVE BUMPER BY UN-PLUGGING SIDEMARKET LIGHT WIRING HARNESS ADAPTER (FRONT LEFT OF CAR) *IMPORTANT* MAKE SURE YOU PUT YOUR BUMPER ON A TOWEL/SHEET SO IT DOES NOT GET SCRATCHED!!! 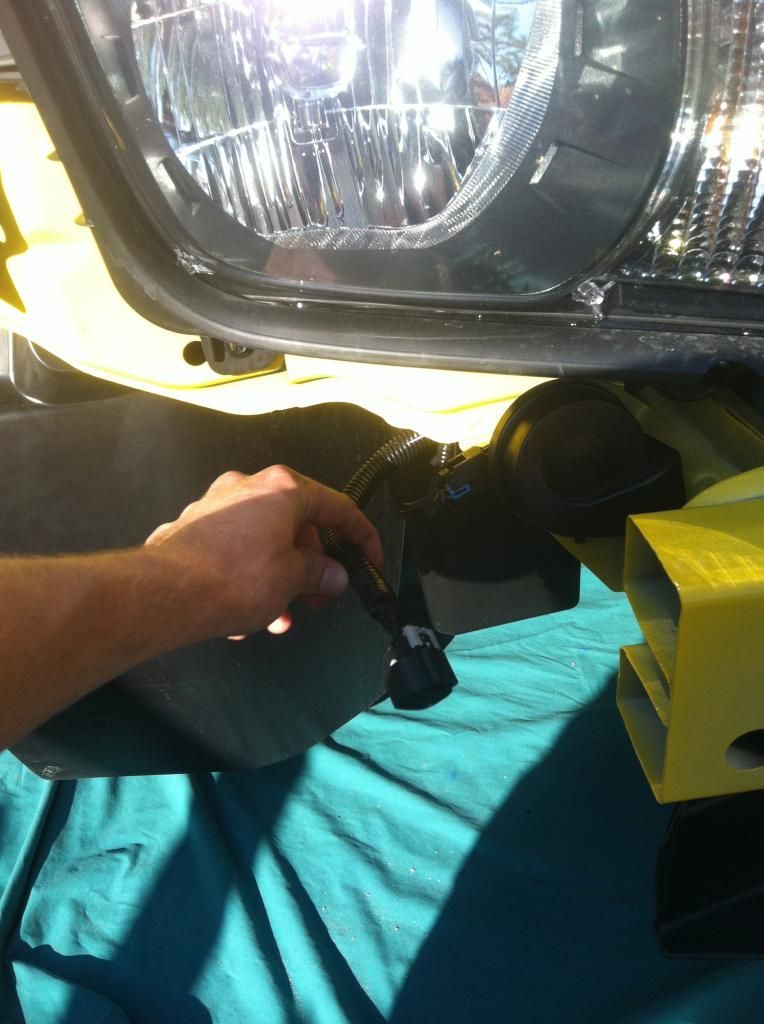 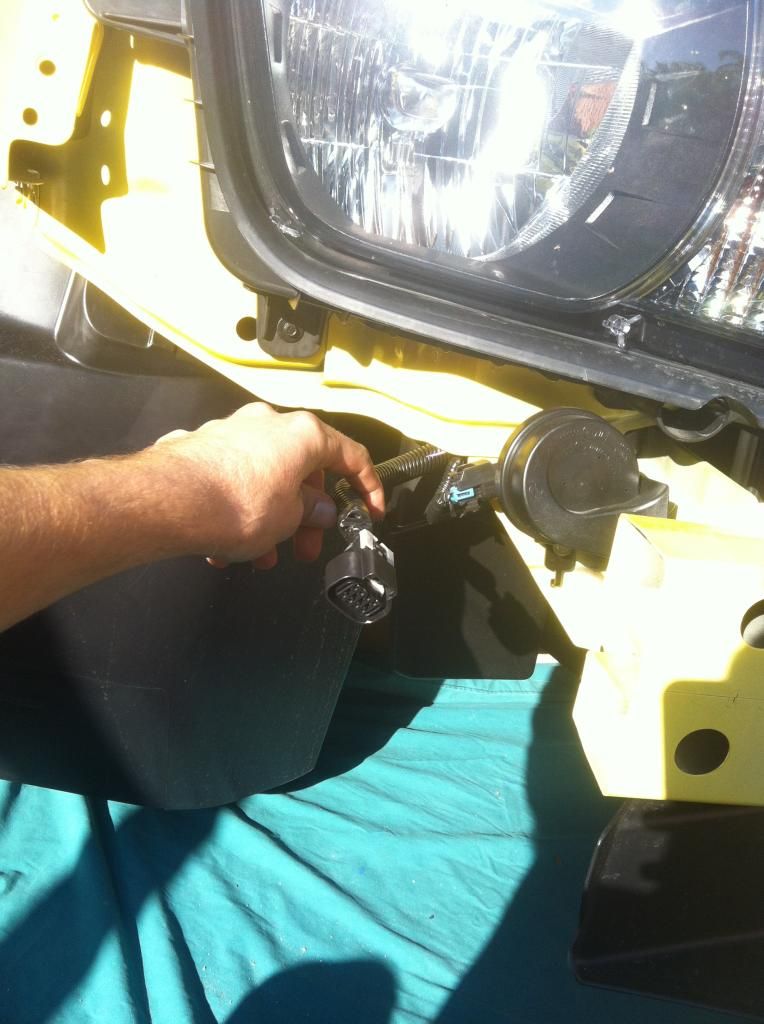 CAR WITH BUMPER OFF AND HALOGENS IN... 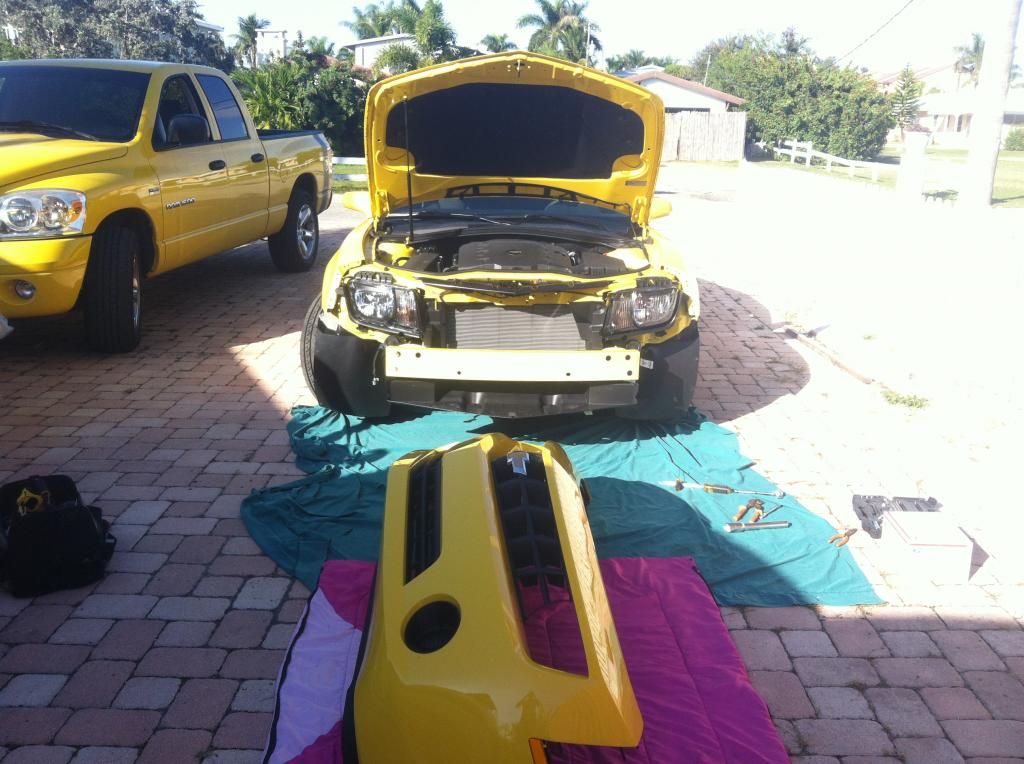 STEP 10: REMOVE OLD HEADLIGHTS: TWO BOLTS ON TOP OF LIGHT AND TWO ON BOTTOM 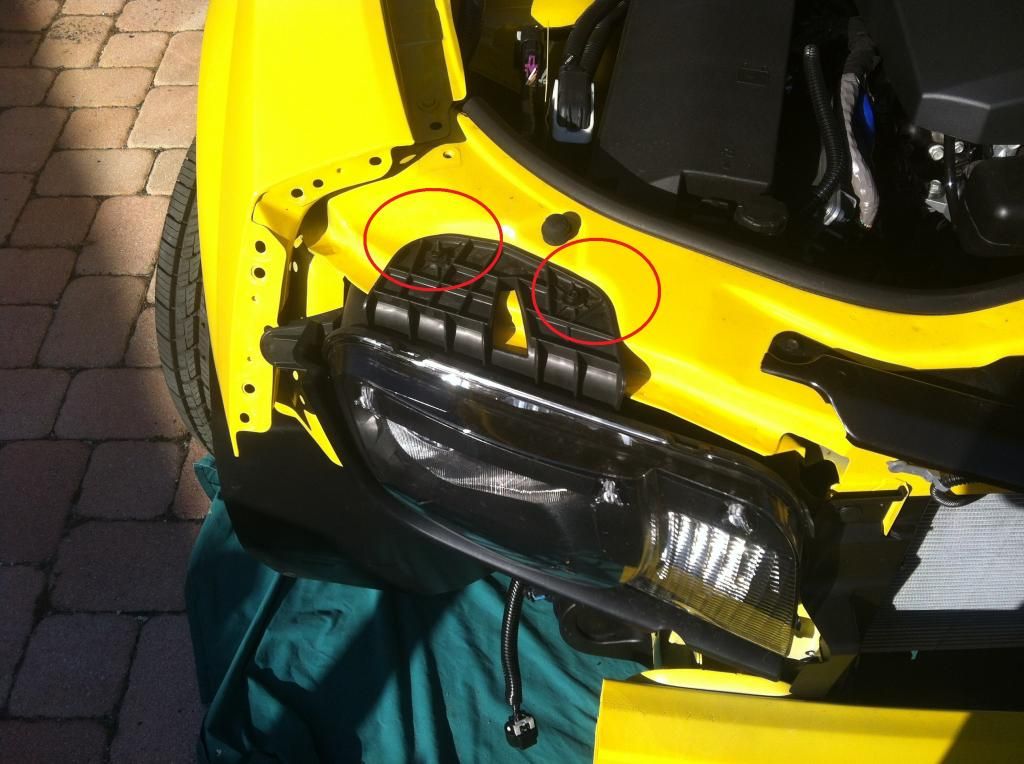 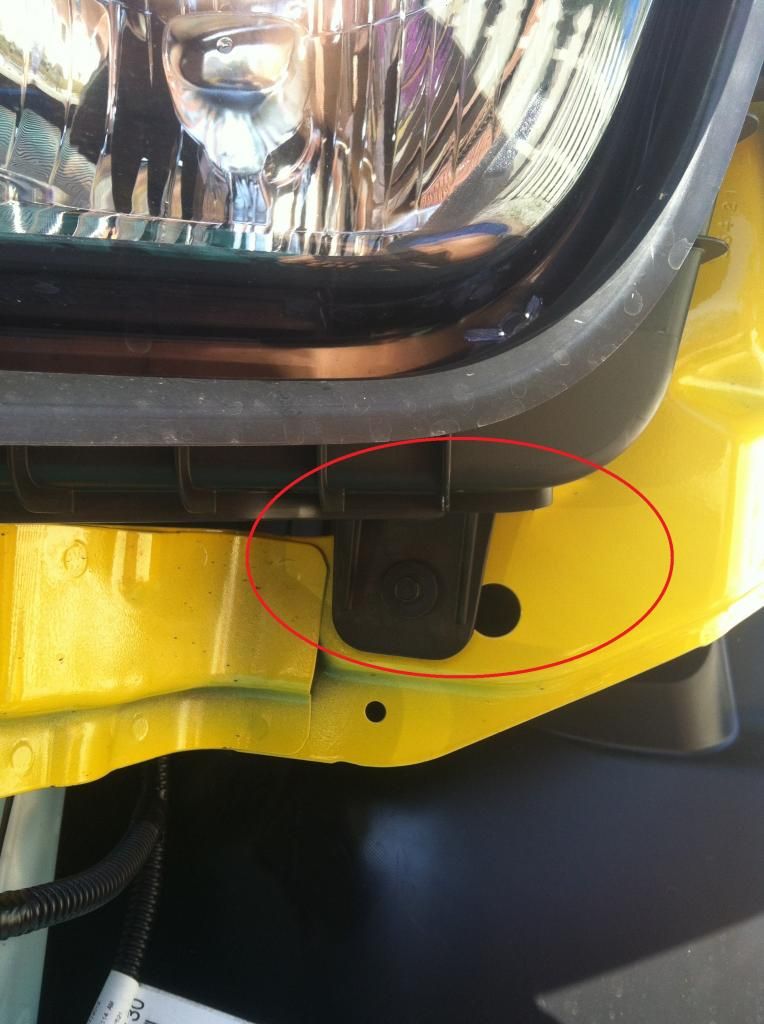  CAR WITH FRONT BUMPER + HEADLIGHTS REMOVED 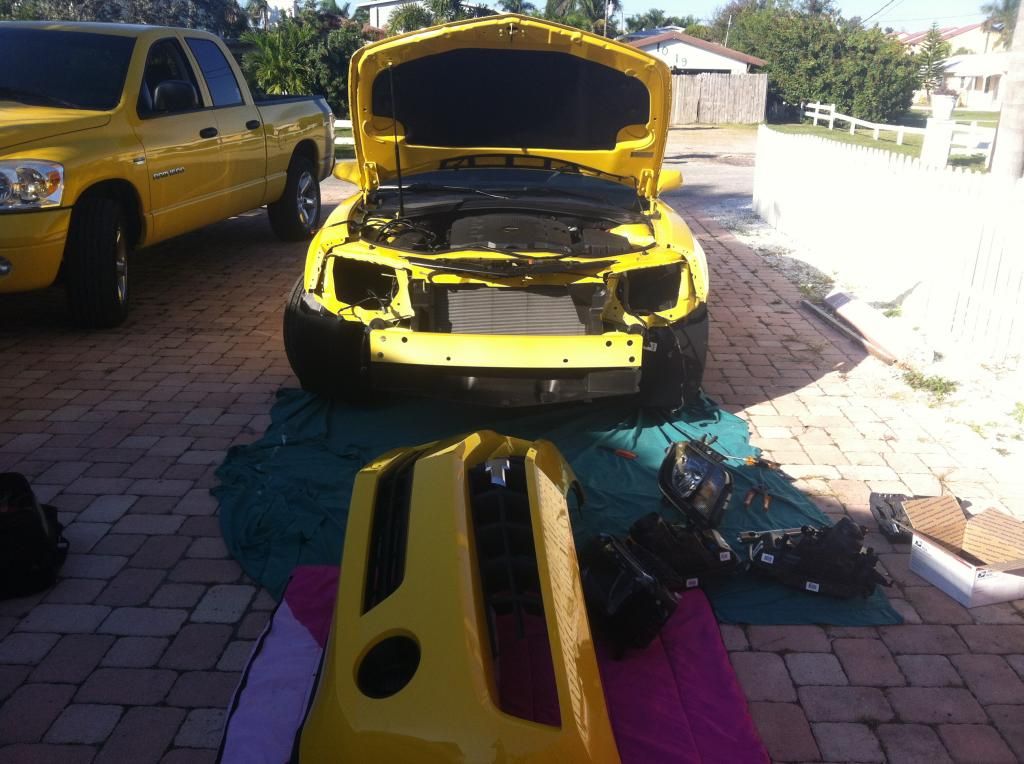 STEP 11: INSTALL NEW “RS” HEADLIGHTS (SCREW IN 4 BOLTS) STEP 12: PLUG IN OLD AMBER LIGHT ADPATER STEP 13: PLUG IN GEN5DIY HARNESS FROM OLD HALOGEN LIGHT POWER-> NEW HARNESS - > NEW RS HID LIGHT STEP 14: FOR DRL HALOS: PLUG IN ADAPTER BETWEEN FRONT BUMPER AND SIDEMARKER ADAPTER 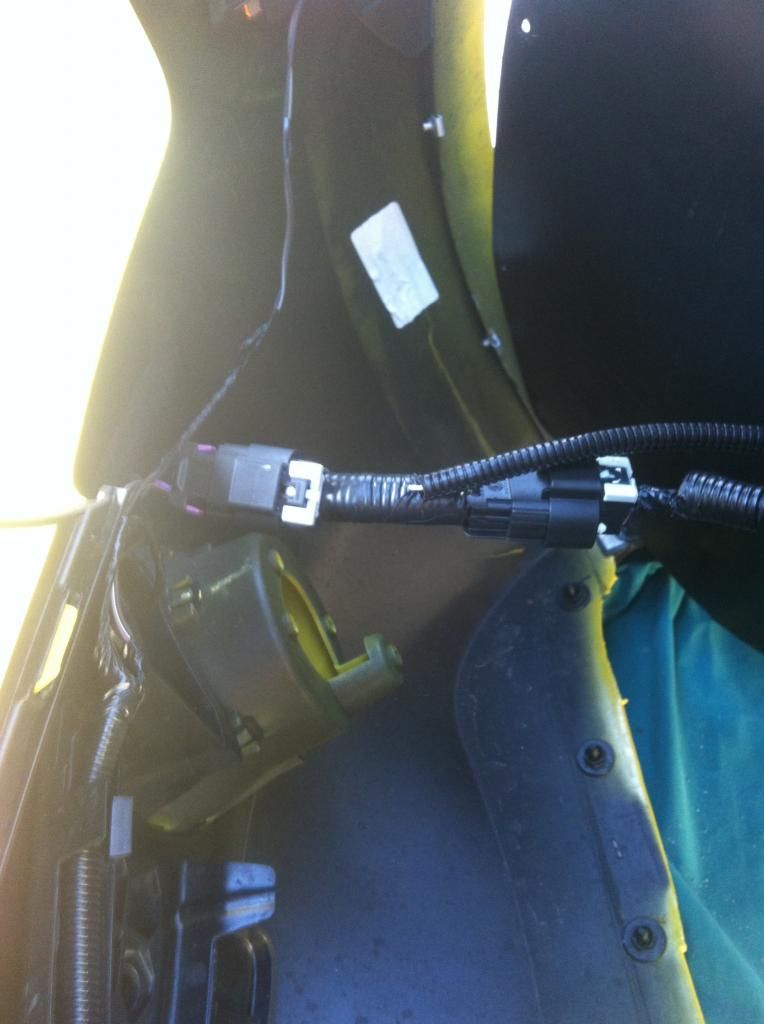 STEP 15: FOR DRL HALOS: PLUG IN “ADD A FUSE” 10 AMP TO THE 5 AMP IGNITION FUSE POSITION - SHOWN IN PICTURE 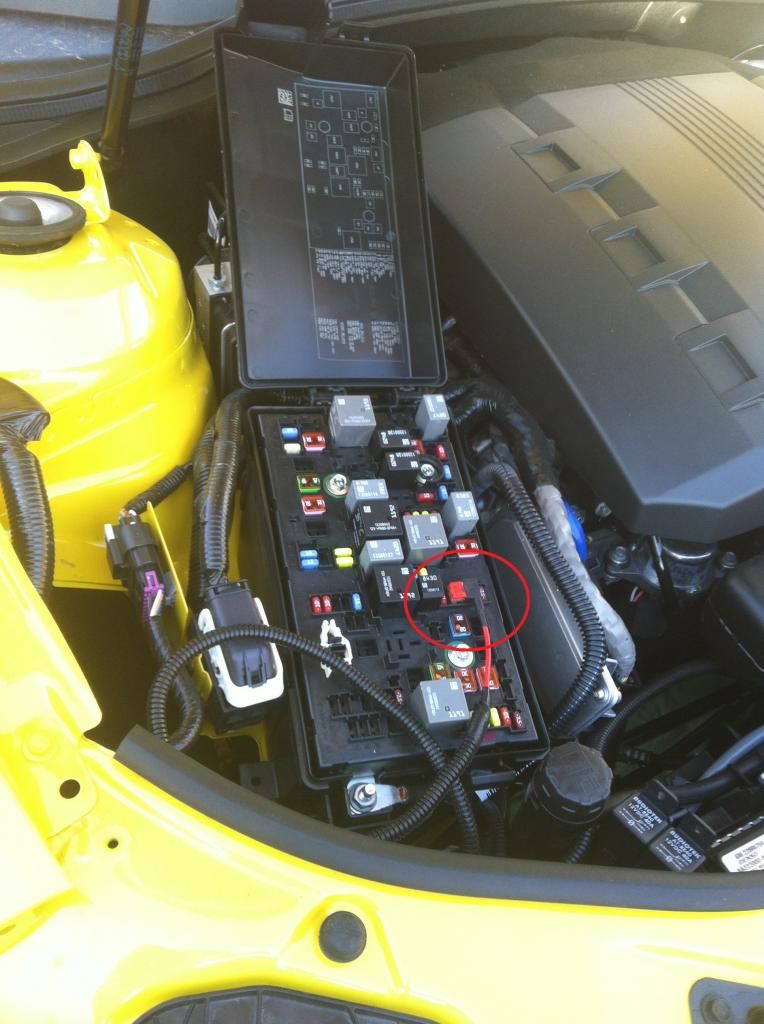 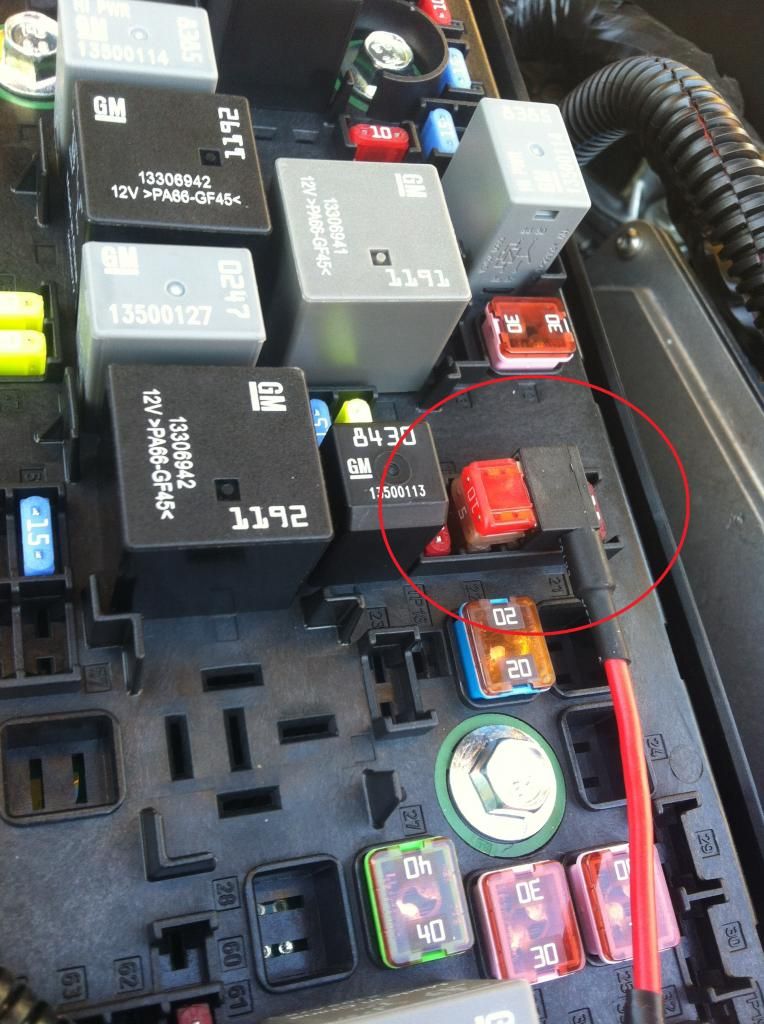 STEP 16: TEST LIGHTS!!! 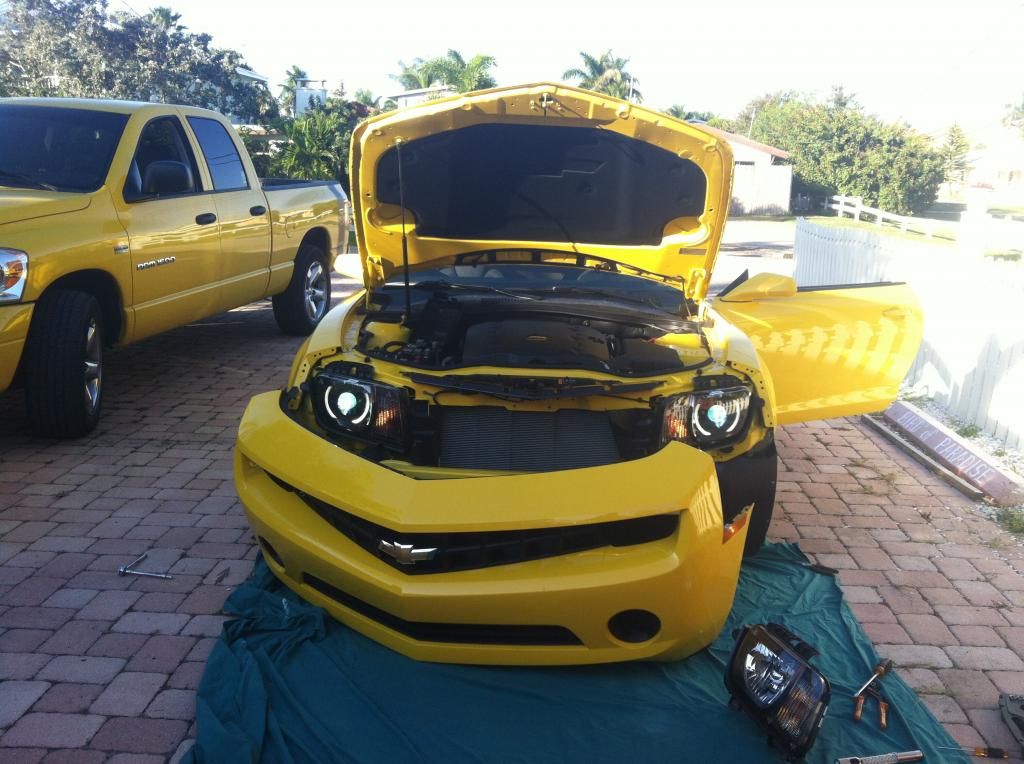 IF LIGHTS WORK...... REINSTALL FRONT BUMPER BY GOING BACK 1 BY 1 ALL THE SCREWS... 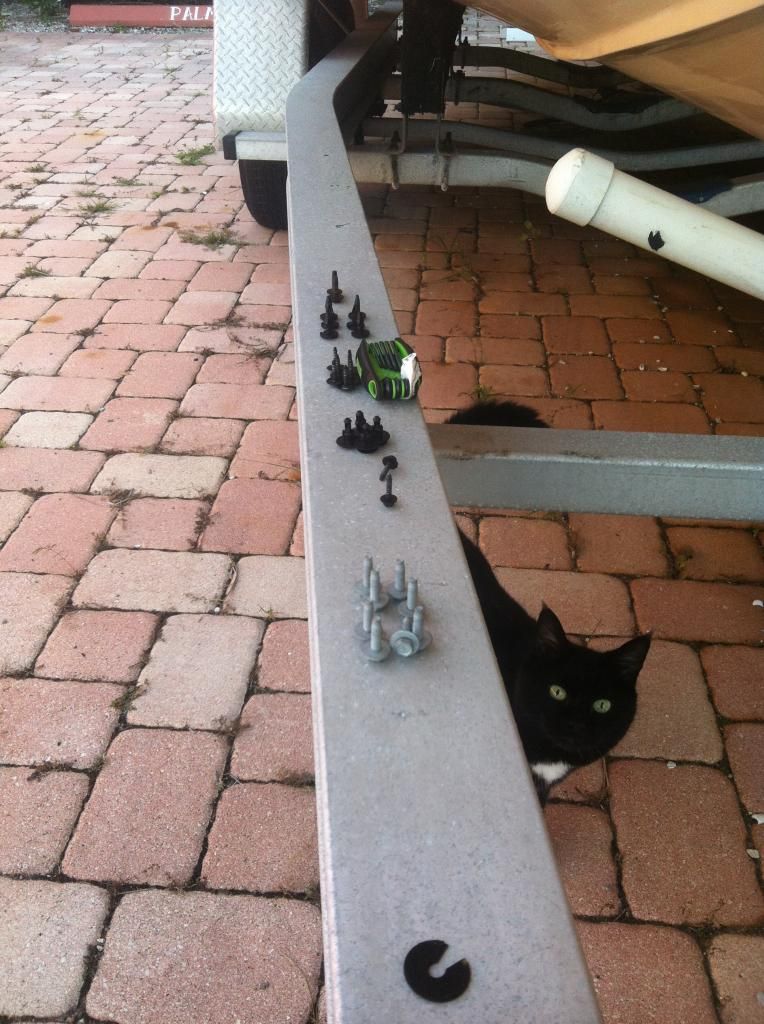 STEP 17: MOUNT RELAY HARNESS ONTO FUSE BOX HOLE (I used a zip-tie) 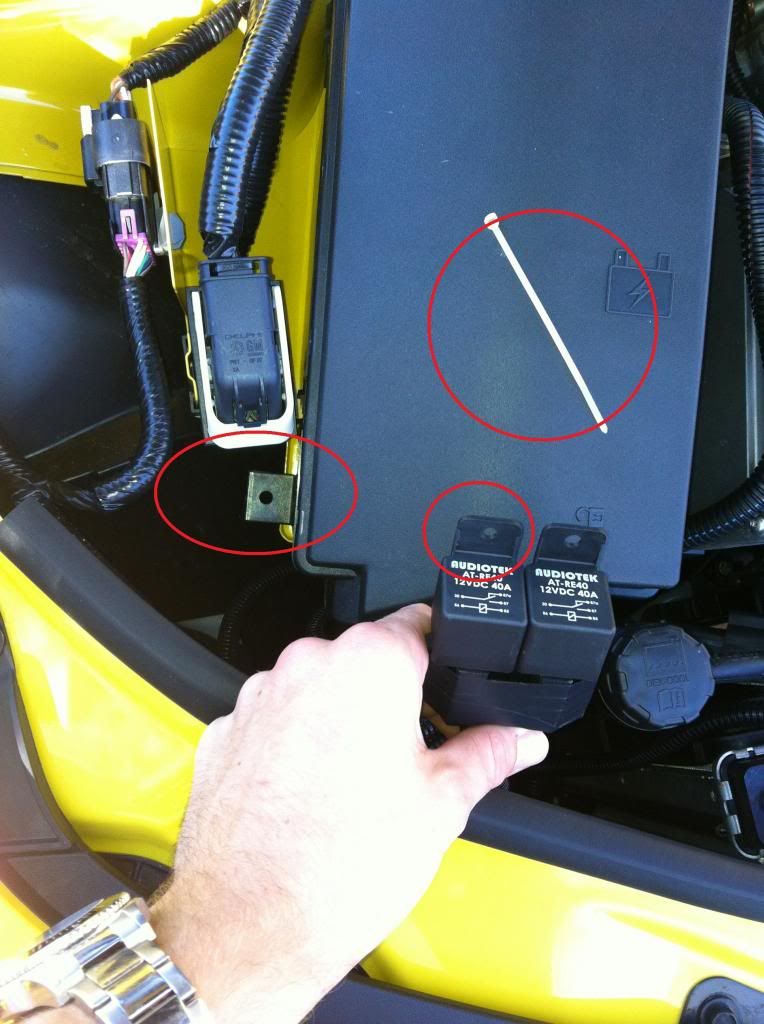 Cut zip-tie to desired lenght... 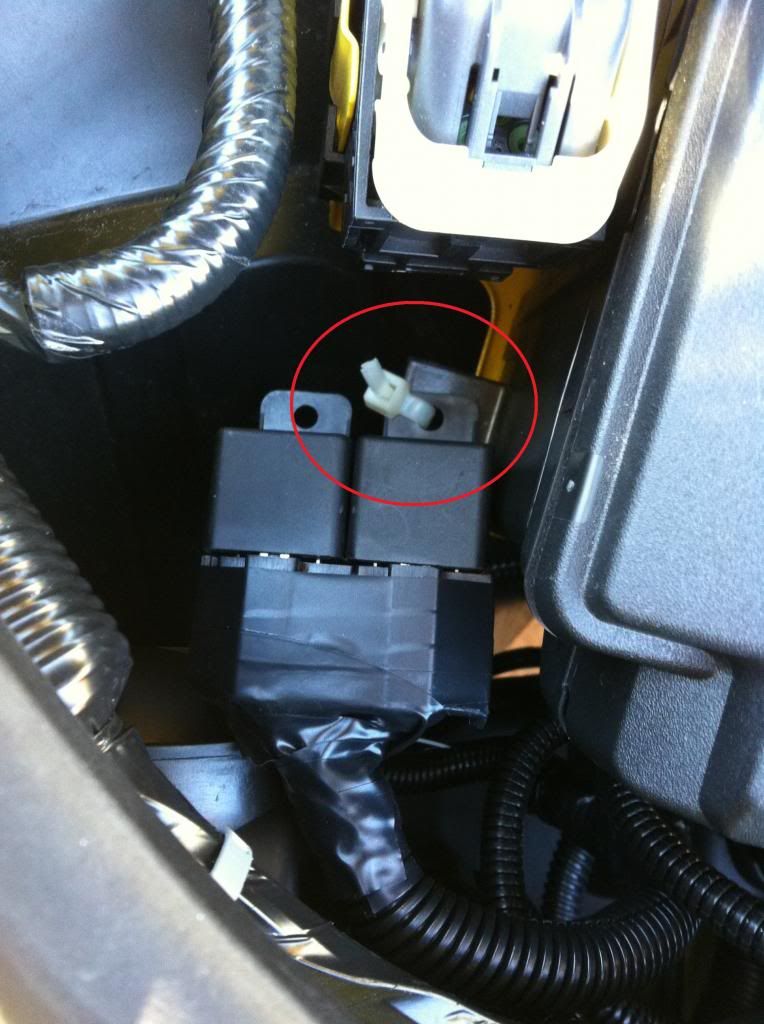 FINISHED PRODUCT: 1ST PIC- DAYTIME “AUTO” DRL HALOS 2ND PIC- LIGHTS TURNED ON 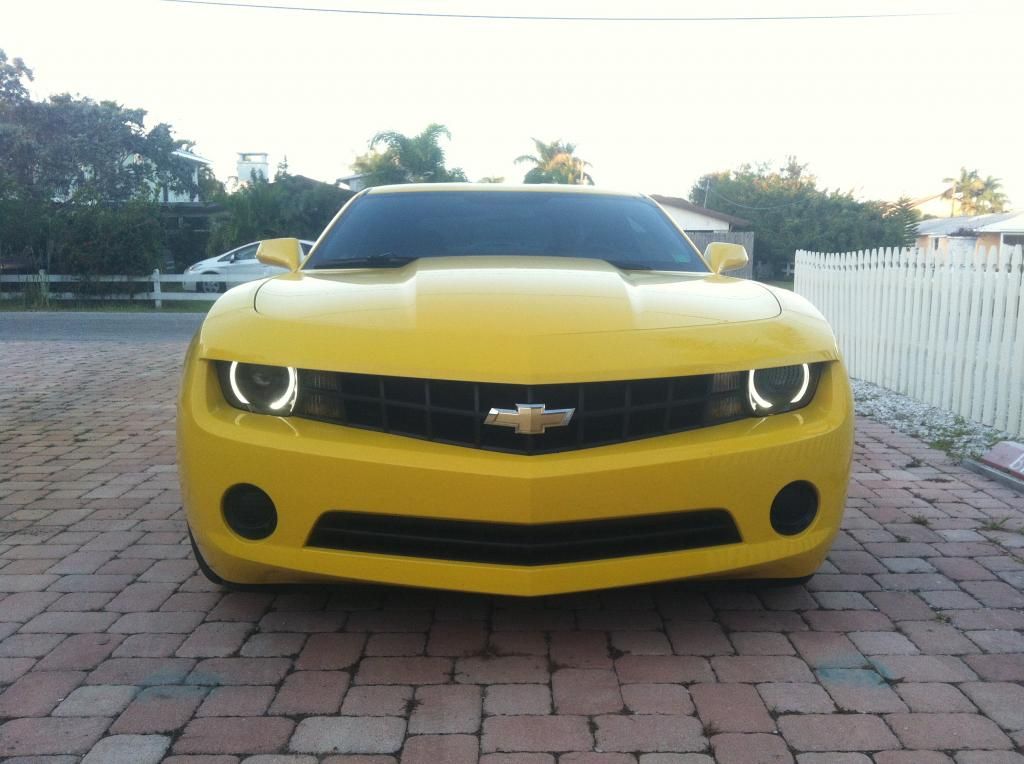 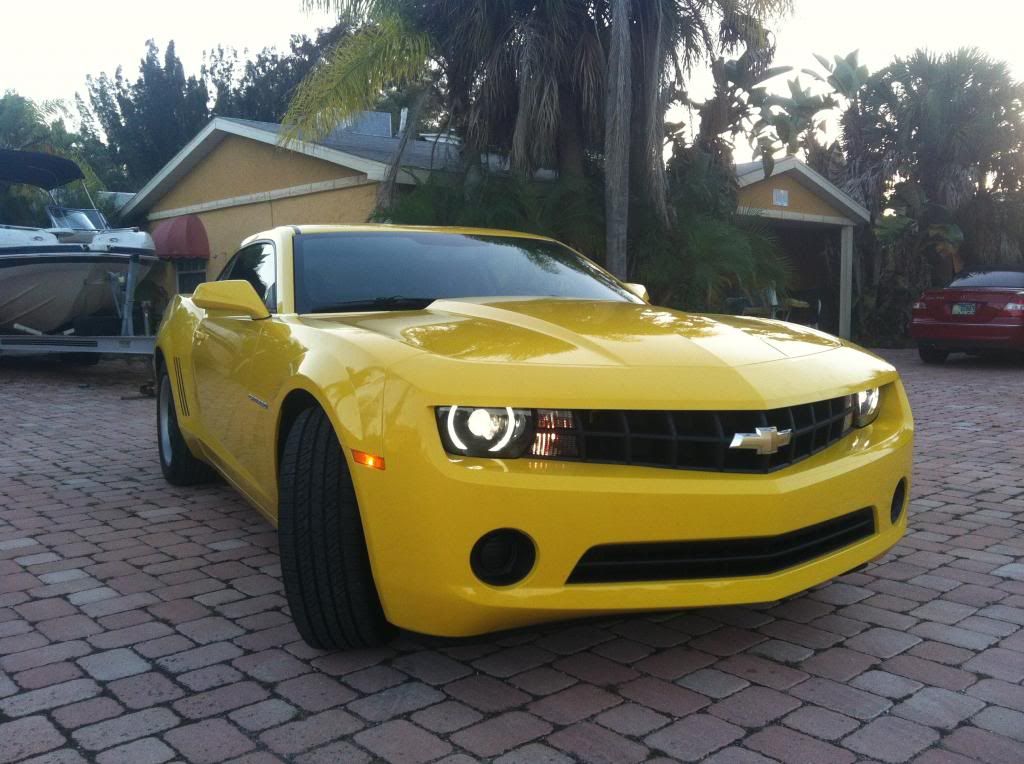 Me and my Car.. Just for fun :P 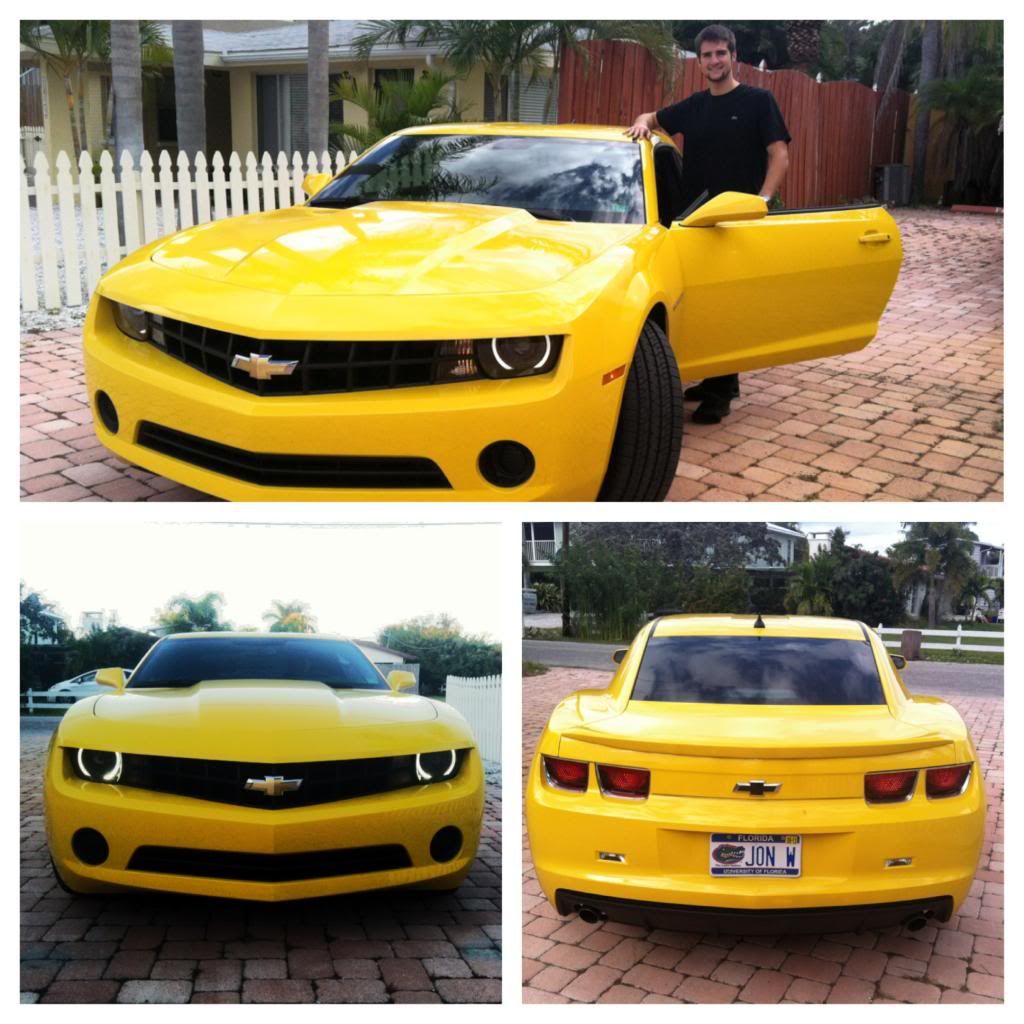
Last edited by jdwarren; 12-19-2012 at 02:35 PM. |
|

|

|
|
12-18-2012, 05:09 PM
|
#2 |
|
ZLT!!! COTW (8/5/13)

Drives: 2011 IOM 1LT RS M6 Join Date: Mar 2012
Location: Slatington, PA
Posts: 4,773
|
Excellent DIY!!!!

__________________
|
|
|
|
|
12-18-2012, 06:35 PM
|
#3 |

Drives: 2014 Z/28 #82+#192, 18ZLE 66Nova Join Date: Oct 2008
Location: By the lake in AZ
Posts: 15,719
|
You did a good job on this can i use it on the site?
|
|
|
|
|
12-18-2012, 07:23 PM
|
#4 |
 
Drives: 2013 Chevy Camaro 1SS LS3 Join Date: Oct 2012
Location: Burbank, CA
Posts: 251
|
Nice DIY I will be installing mine this weekend. The only thing Is I didn't know about having the harness custome to run DRL halos I thought the harness already did that.
|
|
|
|
|
12-18-2012, 10:25 PM
|
#5 | |
       
Drives: ‘16 1SS & ‘19 1LT Join Date: Aug 2012
Location: Windermere, FL
Posts: 2,086
|
Quote:
|
|
|
|
|
|
12-19-2012, 12:42 AM
|
#6 |
|
Drives: ‘16 1SS & ‘19 1LT Join Date: Aug 2012
Location: Windermere, FL
Posts: 2,086
|
Great DIY!!!!
|
|
|
|
|
12-19-2012, 10:20 AM
|
#7 |

Drives: 1968 Coupe, 2010 2SS, 2011 2SS/RS Join Date: Oct 2011
Location: WIsconsin
Posts: 1,252
|
Great write up Jon. You've really got me on the fence now about doing this. Question though. Did you bake your lights or buy a stock pair of RS lights to replace your orginals?
__________________
 |
|
|
|
|
12-19-2012, 10:25 AM
|
#8 |
     
Drives: 2011 CGM Camaro LS A6 Join Date: Jan 2011
Location: San Antonio, Texas
Posts: 10,305
|
He bought a stock pair of rs lights
__________________
 Click Picture for Build Thread |
|
|
|
|
12-19-2012, 02:31 PM
|
#9 | ||||
|
Drives: 2013 chevrolet camaro rally yellow Join Date: Nov 2012
Location: United States
Posts: 170
|
Quote:
 Quote:
You helped me so much with the harness that I will help you out in anyway possible. Thank you!Quote:
 Quote:
*EDIT* I have added pictures of where to mount the relay for your harness. If anyone has any questions, please feel free to PM me or ask them in this thread
|
||||
|
|
|
|
12-19-2012, 03:10 PM
|
#10 | |
|
Drives: ‘16 1SS & ‘19 1LT Join Date: Aug 2012
Location: Windermere, FL
Posts: 2,086
|
Quote:
|
|
|
|
|
|
12-20-2012, 11:03 AM
|
#11 | |

Drives: 2015 Camaro 1SS Join Date: Dec 2011
Location: Houston, TX
Posts: 835
|
excellent write-up. I'm thinking of going down this route in the future and this is a great DIY to learn from. Also, when I saw all the bolts lined up... I had a moment where I said, "oh s***! cat eyes! where'd that cat come from!"
 Quote:
|
|
|
|
|
|
12-20-2012, 04:01 PM
|
#12 | |
|
Drives: 2013 Chevy Camaro 1SS LS3 Join Date: Oct 2012
Location: Burbank, CA
Posts: 251
|
Quote:
|
|
|
|
|
|
12-20-2012, 11:03 PM
|
#13 |
|
Tampa Gulf Coast Family
Drives: Sold c7, in the market! Join Date: Mar 2010
Location: San Jose, CA
Posts: 1,250
|
i did this a while ago, awesome mod. the lights are a million times better
|
|
|
|
|
12-24-2012, 09:18 AM
|
#14 | |
|
Drives: ‘16 1SS & ‘19 1LT Join Date: Aug 2012
Location: Windermere, FL
Posts: 2,086
|
Quote:
 ...I will look at it then...I think JD's is a custom harness from Ofer... ...I will look at it then...I think JD's is a custom harness from Ofer...
|
|
|
|
|
|
|
|
|
 |
| Tags |
| bumper, headlight, non-rs, removal, rs conversion drl halo |
| Thread Tools | |
|
|


 My Journal:


