You are browsing camaro5 

|
 04-07-2016, 08:52 AM
|
#1 |
 
|
HOW TO: Custom Fog's and Headlamps with Oracle Halo's
Thought I would post how I did my Fog's and Headlamps. They look great, and are part of my Mod Flog. I added some custom touch's based on some Posts I found.
FOGS - I will not go into cutting them open as this is well covered in the Forum, other than I used a Dremmel and a very thin diamond wheel. Easy 2 do. I also wet sanded the Lens with 2000 grit and polished them with plastic polish with my buffer clamped in a Vice. This is the Fog Lamp disassembled with the Oracle Dual color Amber/White LED ring pushed into the housing. I had to drill the hole larger for wire clearance, and slightly grind some relief into the housing at the base of the wires until the LEDs would fully seat down into the housing. I did this so the 80mm Diffuser Ring from Diode Dynamics would fit inside the Housing and allow the Lens to seat flush for bonding.   I then installed the Diffuser Ring into the housing, centered it with some toothpics, and added small dabs of Plastic Epoxy to secure it.  Then I put a few dabs of Plastic Epoxy at 4 quadrants to assure adhesion, and used clear silicone to seal the circumference of the lens to eliminate any leaks. Pics are the Lamps lit with White, then Amber using a 9v battery. 12v is 4x as Bright!  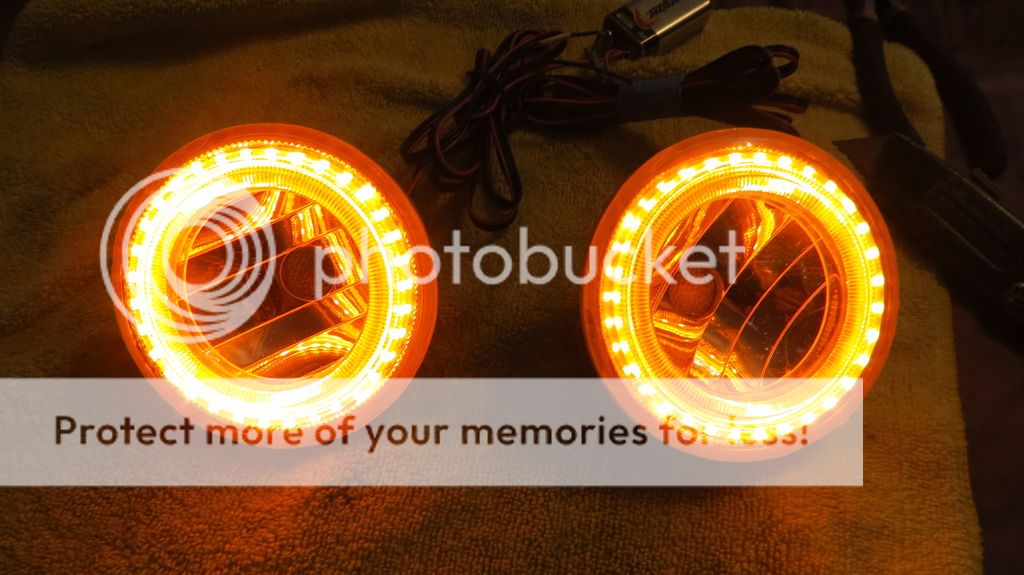 Next was the Headlamps. Again, there are plenty of Videos on how to remove the Lens, but I will add some comments based on my experience. First of all, I did not use the Oven Method, since the part cools too rapidly and I don't think "Baking" them is a good idea. I used a heat gun and worked a 3-4" section at a time. You have to pry the crap out of the housing and get the screwdriver or pry tool up and under the lens as it sits in a "U" channel of the housing, and dig out as much adhesive as possible. You will distort and even create minor deformation and damage to the housing, but by hitting the housing again with the heat gun after the Lens is removed you can reshape the "U" channel by squeezing it back together with pliers. This is a really brutal and frustrating job, but it can be done with lots of patience. First thing I did was wet sand the Lens with 2000 grit and polish it like I did with the Fog Lens's.  This is the Headlamp Insert Assembly removed from the Lens. I elected to add a inner Fog Lamp LED and a Diffuser to give it a "Eye" effect. First I installed the large Dual Color White/Amber Halo Ring. Some grinding to the housing is necessary to make it seat flush, and a few dabs of Epoxy to secure it. Tip - also Epoxy the wire connections at the Ring as they can break off easily. I decided to reuse the Large Diffuser Ring, and you have to cut it per the directions. Then I installed the Fog LED Ring, and ground some relief into the housing where the wire connections are so it would fit flush, drilled a hole for the wires to pass through, and added a few dabs of Epoxy. I then installed the Diffuser Ring on top of the LED Ring, centered it, and secured it with some Epoxy. It actually sits on top of the outside of the LED Ring, but covers 90% of and still works as intended.  I repeatably tested the LEDs every step of the way to assure function. This is a test with the Amber and Green.  Then assemble the LED housing into the Lens. I used a soft cloth to clean the inside of the Lens before assembly. The Large Diffuser Ring go's in first, and I added a few small washers under the housing between it and the Diffuser Ring to provide the proper clearance before torquing down the 4 fasteners, as the LED ring has a slight interference with the Diffuser and you don't want to distort or crack the LED Ring! I used electrical tape on a foot of the wires, poked a hole in the Vent, and fished them through. Then it is time to glue the Lens to the Headlamp Housing.  This is the Sealant I used. It is Crystal Clear, flexible, but takes a little longer to cure. Any 100% clear Silicone will work. Fill the "U" channel FULLY with adhesive. Then press the Lens into the Housing, clamp where possible, and let it dry overnight.   Seal the vent where the wires exit.  These are the finished product Lit in White/Green and Amber/Green. Looks Killer. It will be a while before I install them to the Vehicle, and I am going to finish my extensive Suspension Mods first.  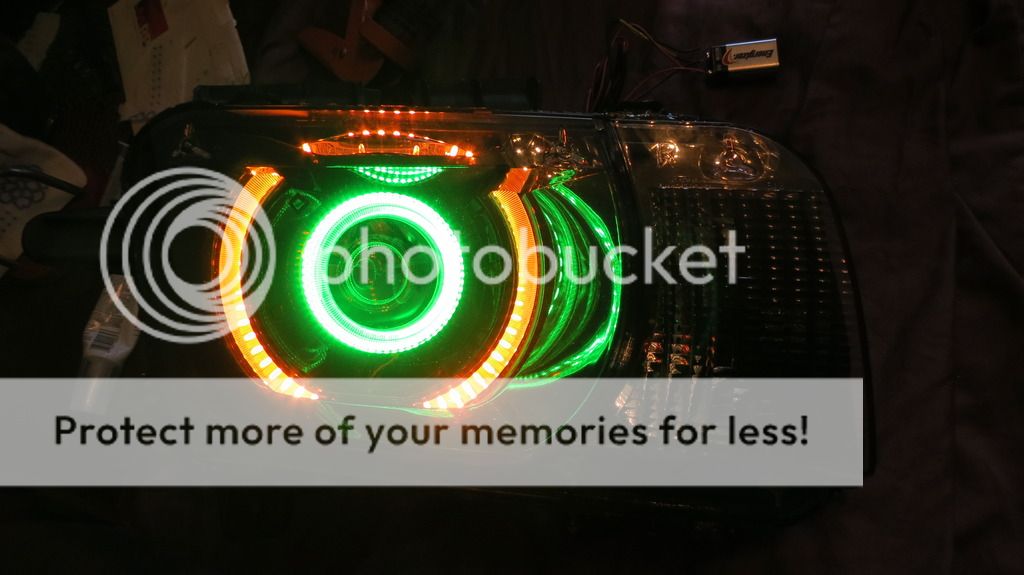
Last edited by hesster; 04-07-2016 at 09:26 AM. |

|

|
|
04-07-2016, 12:52 PM
|
#2 |
 
Drives: 2010 Camaro 2SS Join Date: Sep 2015
Location: Richmond Hill ,Ontario, Canada
Posts: 780
|
Excellent job, that looks great. I did both my fogs and headlamps this spring as well and can appreciate the time and effort. Looks very professional!
|

|
|
|
07-26-2016, 07:59 PM
|
#3 |
 
Drives: 2013 Camaro 1LT RS Join Date: Aug 2015
Location: Frankenmuth, MI
Posts: 25
|
I'm looking at doing a very similar thing with the fog lamps on mine. How do you have the fogs wired in? I was going to try and hook up a switchback led fog light bulb too.
|
|
|
|
|
09-10-2017, 12:12 PM
|
#4 |
|
Gray Eagle

Drives: 2010 Camaro 2SS/RS IBM, 1994 Camaro Join Date: Dec 2009
Location: Sierra Vista, AZ
Posts: 331
|
Why can't I see the pictures?
Is it just my computer?
__________________
 Ordered - 14 Aug 2009 Born - 4 Nov 2009 Delivered - 17 Dec 2009 |
|
|
|
|
09-11-2017, 07:49 PM
|
#5 | |
|
Those who need me got me

Drives: 2022 ZL1 A10 Join Date: Aug 2017
Location: Southwest, MN
Posts: 624
|
Quote:
|
|
|
|
|
|
|
|
|
 |
|
|


