You are browsing camaro5 

|
 09-17-2010, 03:10 PM
|
#15 |
|
Account Suspended
Drives: SuperCharged 2SS/RS IOM MN6 Join Date: May 2009
Location: CA
Posts: 5,094
|
did it come with any installation hardware and you just didn't feel like installing them because it involves removing the front fascia? If it came with installation hardware, I would use them. You don't want that thing coming off at highspeed and causing damage to your car, and/or cars behind you. Testing it by applying pressure and letting go is not the same as constant pressure/force applied during prolonged driving.
|

|

|
|
09-17-2010, 03:22 PM
|
#16 | |
Drives: Camaro LS Join Date: Apr 2010
Location: Columbus GA
Posts: 354
|
Quote:
It came with 4 screw.....yes i put them in.....I did the install the same, just didnt take off the front. |
|
|
|
|
|
09-17-2010, 03:59 PM
|
#17 |
|
YDLYLB
|
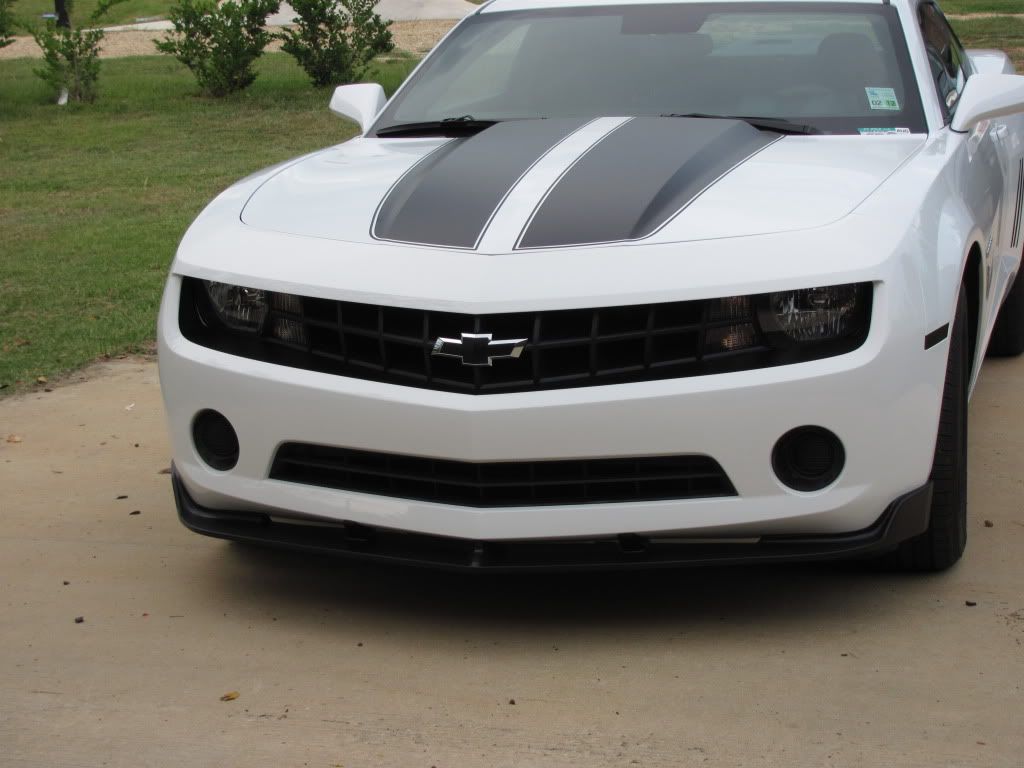
Looks good.
__________________
 |
|
|
|
|
09-17-2010, 04:38 PM
|
#18 |
|
BLESSEDCHEF10

|
Looks like my street scene
__________________
 |
|
|
|
|
09-17-2010, 05:23 PM
|
#19 | |
|
Account Suspended
Drives: SuperCharged 2SS/RS IOM MN6 Join Date: May 2009
Location: CA
Posts: 5,094
|
Quote:
|
|
|
|
|
|
09-17-2010, 05:32 PM
|
#20 |
|
Account Suspended
Drives: 1991 Z28, 2015 SS & 2017 SS Join Date: Aug 2009
Location: Fort Worth, Tx
Posts: 800
|
Looks good!
|
|
|
|
|
09-17-2010, 06:54 PM
|
#21 |
 Drives: 2010 CYBER GREY 2LT RS Join Date: Nov 2009
Location: NEW JERSEY
Posts: 77
|
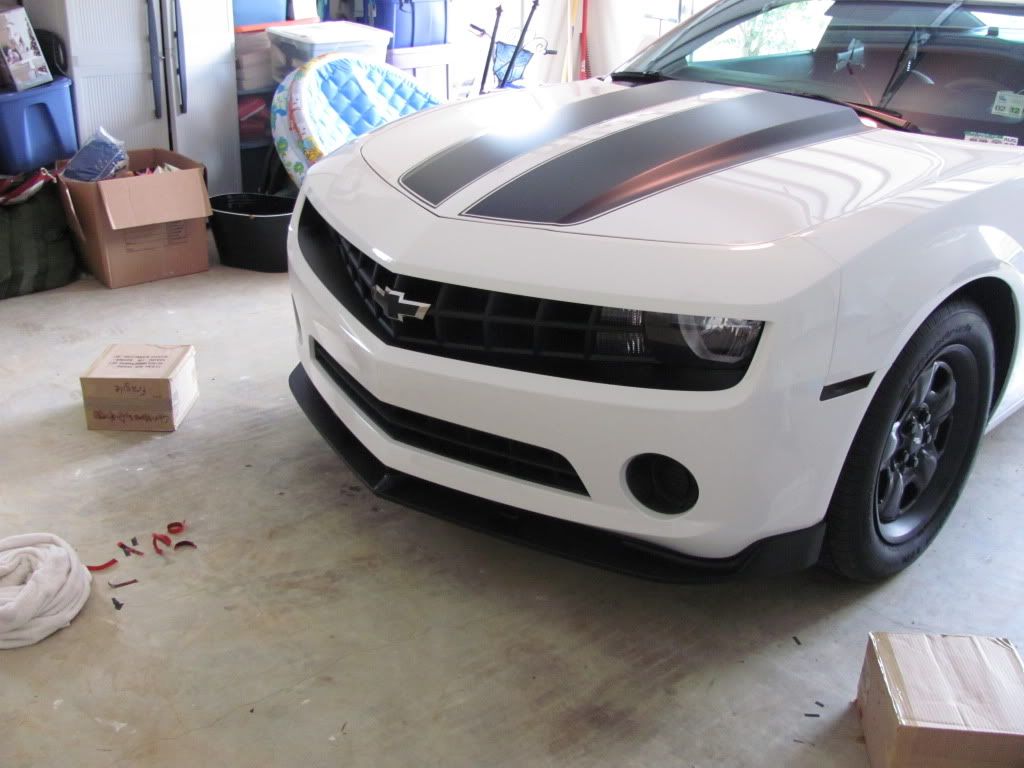
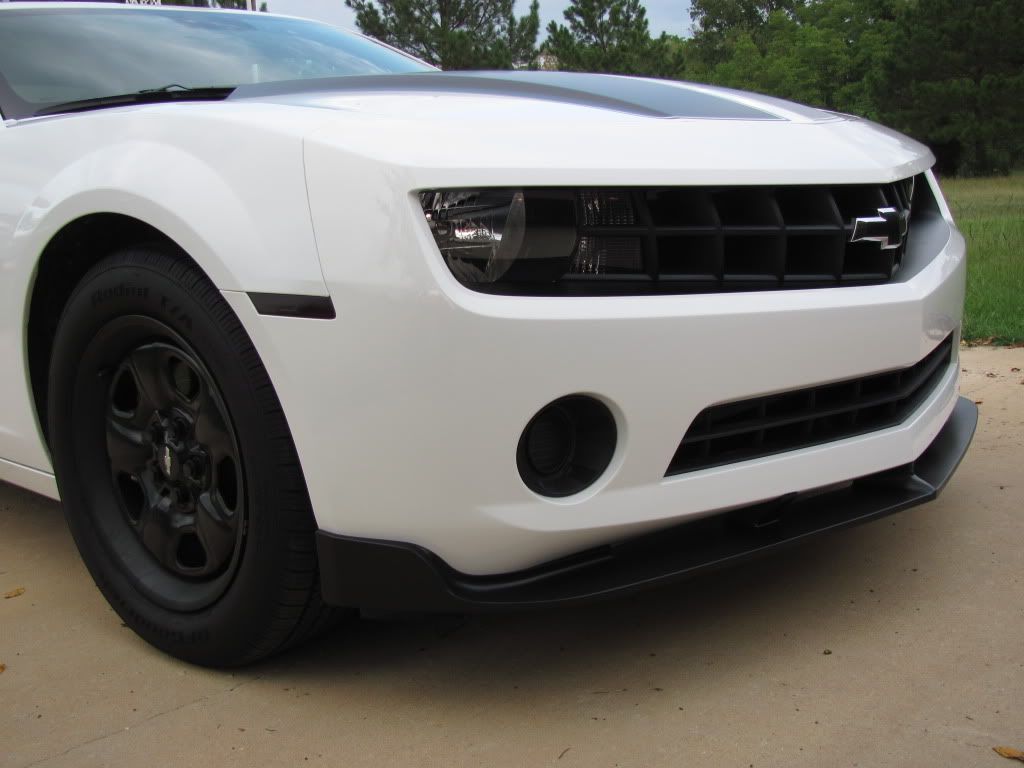
Did you have any problems with it fitting to the contour of the bumper. I had to use caulk to fill in the gaps in the area below the running lights my fit was very poor.
|
|
|
|
|
09-17-2010, 07:18 PM
|
#22 | |
|
I have no life

Drives: 06' Subaru STI, ex-Camaro V6 LLT Join Date: Apr 2010
Location: Top Gear Test Track
Posts: 3,189
|
Quote:
__________________
|
|
|
|
|
|
09-17-2010, 07:23 PM
|
#23 | |
|
OKCamaros

Drives: 4 banger Diesel Join Date: Mar 2010
Location: Philippines
Posts: 4,572
|
Quote:
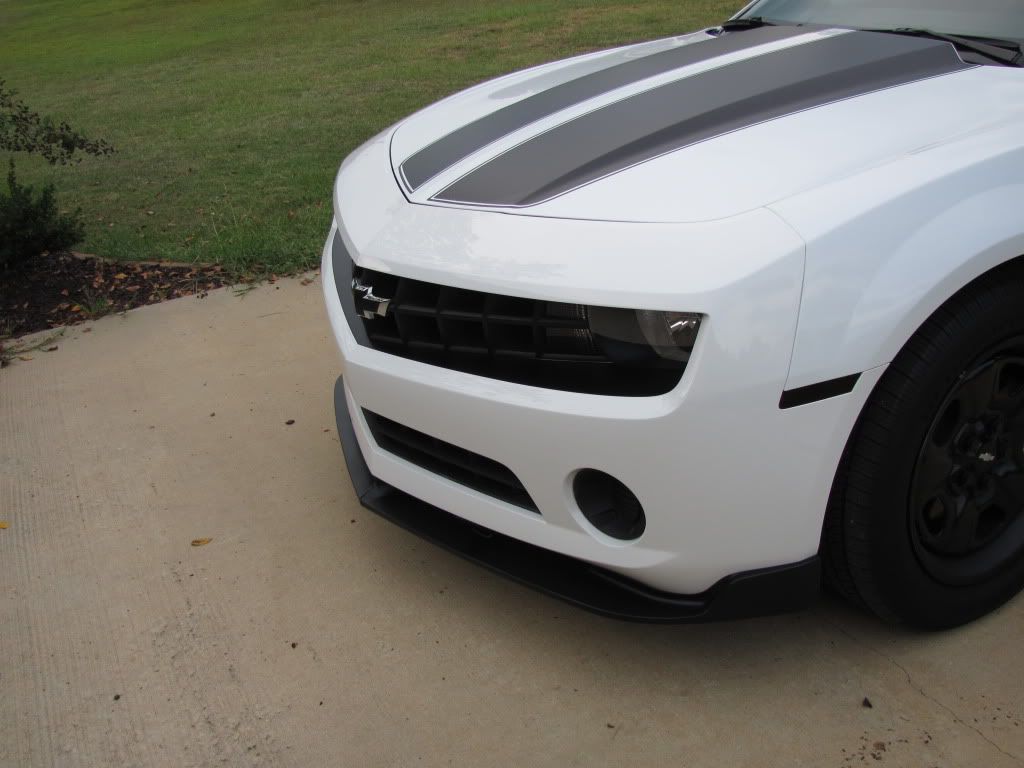
add some gloss black 20's your car is perfect! 
|
|
|
|
|
|
09-17-2010, 07:38 PM
|
#24 | |
|
Drives: Camaro LS Join Date: Apr 2010
Location: Columbus GA
Posts: 354
|
Quote:
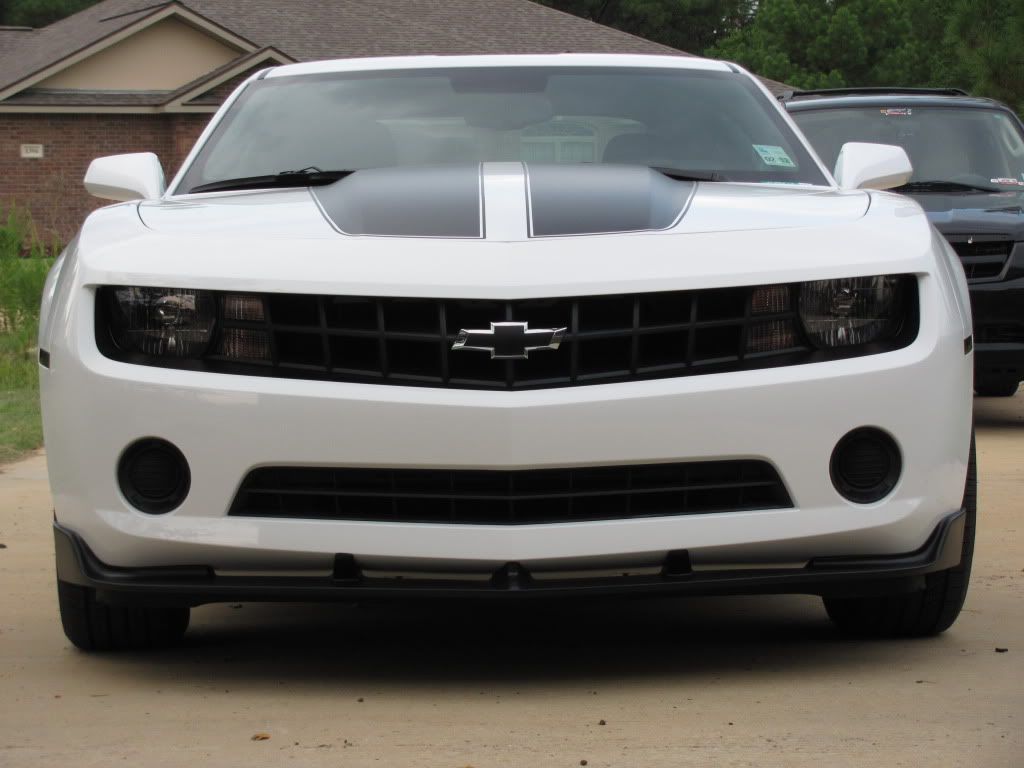
Nope, i think i got it in the perfect position, there are no gaps under the fog lights (or the lack of fog lights on my car  ). The only issue i see is on the driver side right where the splitter ends at the fender edge....The splitter has a lip on that side and doesnt lay flush.....which is causing alittle tape pull up. So i have 2 options as of right now, File down the lip on the edge of the splitter so it lays flush and tape sticks. Or just add another layer of 3M Automotive Acrylic Plus Attachment Tape to fill in the gap. Its not a huge gap, but i am super picky about these things.....you dont even notice, unless you get right down close to it. I would just pull that part away, Add a couple inches of tape, over the already installed tape....then it will lay flush cause like i said, its barely an issue. ). The only issue i see is on the driver side right where the splitter ends at the fender edge....The splitter has a lip on that side and doesnt lay flush.....which is causing alittle tape pull up. So i have 2 options as of right now, File down the lip on the edge of the splitter so it lays flush and tape sticks. Or just add another layer of 3M Automotive Acrylic Plus Attachment Tape to fill in the gap. Its not a huge gap, but i am super picky about these things.....you dont even notice, unless you get right down close to it. I would just pull that part away, Add a couple inches of tape, over the already installed tape....then it will lay flush cause like i said, its barely an issue. Tape still going strong everywhere else. Drove to work at 80mph....30min drive today too. Thinking about picking up a 5 ft roll of 3M Automotive Acrylic Plus Attachment Tape. So that way if anything start coming off, i just double up on the tape to close gaps before i go doing the silicone. |
|
|
|
|
|
09-17-2010, 10:59 PM
|
#25 |
|
I have no life
Drives: 06' Subaru STI, ex-Camaro V6 LLT Join Date: Apr 2010
Location: Top Gear Test Track
Posts: 3,189
|
Yeah, with the silicone, i've done a drive up to 118MPH and the splitter is fine. Shouldn't be a problem!
__________________
|
|
|
|
|
09-18-2010, 12:41 AM
|
#26 | |
|
Est.1775

Drives: '15 Challenger Hellcat (sold) Join Date: Sep 2009
Location: SoCal
Posts: 5,502
|
Quote:
|
|
|
|
|
|
09-18-2010, 01:34 AM
|
#27 |
|
I have no life
Drives: 06' Subaru STI, ex-Camaro V6 LLT Join Date: Apr 2010
Location: Top Gear Test Track
Posts: 3,189
|
It's polyurethane, so it comes black stock.
__________________
|
|
|
|
|
09-18-2010, 07:43 AM
|
#28 |
|
Drives: Camaro LS Join Date: Apr 2010
Location: Columbus GA
Posts: 354
|
^ yep, came in that color.
|
|
|
|
|
|
|
|
 |
|
|
 Similar Threads
|
||||
| Thread | Thread Starter | Forum | Replies | Last Post |
| Camaro Dove Tail Spoilers Compilation | daphatgrant | Cosmetics and Lighting Modification Discussions | 470 | 10-28-2020 02:35 PM |
| ***** RK Sport SS and V6 Body Kits On Sale ***** | SicMSP | Exterior Parts & Accessories | 13 | 10-28-2010 04:36 PM |
| Solo Performance V6 Mach-XL (Manual) and Mach-XLT (Auto) Exhaust Kits | GOINGSOLO2 | V6 Bolt-Ons & Tunes | 13 | 07-13-2010 01:28 PM |
| Airaid V6 Just Installed! | faninc | Camaro V6 LLT Engine, Exhaust, and Bolt-Ons | 94 | 12-17-2009 09:33 PM |
| Anyone with Stainless Works V6 Headers Installed? | Abygale | Camaro V6 LLT Engine, Exhaust, and Bolt-Ons | 19 | 10-15-2009 11:49 PM |