You are browsing camaro5 

|
 06-18-2013, 06:28 PM
|
#57 | |
|
Account Suspended
Drives: 2012 Camaro RS, RX supercharged Join Date: Dec 2009
Location: Bradenton, FL
Posts: 6,063
|
Quote:
But.....GM states their is no issue with intake valve coking (except in the service bulletins to the dealers....) But.....If it needed a catchcan, wouldn't it come with one from the factory? But..... You all know the rest of the arguments. 
|
|

|

|
|
06-18-2013, 07:25 PM
|
#58 |
|
Account Suspended
|
I don't understand why you do all that work & chance screwing something up, why not just have the dealer do their induction cleaning and be done with it?
|
|
|
|
|
06-18-2013, 07:55 PM
|
#59 | |
 Drives: 2012 SS/RS 45th & 1970 SS/RS 350 Join Date: Jul 2012
Location: Fredericksburg, VA
Posts: 140
|
Quote:
Because most of them are turds and do not care enough about our cars like the owners do.
__________________
2012 Camaro 2SS/RS 45th foot well&cup holder Ambient Lighting package, K&N Intake, Hurst Shifter, Kooks 1 7/8 LT Headers w/High Flow Cats 3" Kooks Street Screamer, ADM Scoop, Roto-Fab W/W relocation.
1970 SS/RS 350 - 1187 Steel Crank, Pink Rods, TRW flat tops, 10.5 to 1 w/ AFR 195 heads, GM Stage III off road solid cam, Air Gap Intake with a Holley 750 DP.  Kenny Powers: Sure, Ive been called a xenophobe, but the truth is, Im not. I honestly just feel that America is the best country and the other countries arent as good. That used to be called patriotism. |
|
|
|
|
|
06-18-2013, 08:55 PM
|
#60 | |
     
Drives: 2012 SIM 2LT/1970 Camaro Join Date: Nov 2012
Location: Near Minneapolis, MN
Posts: 1,578
|
Quote:
2) Trust me, for a dealer to perform the cleaning I performed on my valves last weekend would have cost an arm and a leg. 3) I enjoy wrenching on my own car, and this procedure, if done carefully, is pretty dang low-risk, if you can twist a wrench.
__________________
All bleeding stops eventually -- 2012 2LT Auto w/sunroof -- My journal thread
Roto-Fab Intake & W/W Relocate Kit -- ADM Race Scoop -- Dynomax VT Axle-Back Exhaust -- Vitesse Throttle Controller RX Catch Can -- Drake Bowtie Delete -- JacFab Radio Face Cover -- LED Fog Lights -- LED Dome/Trunk/Plate Lights -- Gen5DIY Dash ABL -- Diode Dynamics Cupholder Lighting Wishlist: ACS T5 Splitter -- Hood Vent Mod -- Footwell/Door Pull/Homelink Button Lighting |
|
|
|
|
|
06-18-2013, 08:58 PM
|
#61 | |
|
Drives: 2012 SIM 2LT/1970 Camaro Join Date: Nov 2012
Location: Near Minneapolis, MN
Posts: 1,578
|
Quote:
And good idea on the combo kit!
__________________
All bleeding stops eventually -- 2012 2LT Auto w/sunroof -- My journal thread
Roto-Fab Intake & W/W Relocate Kit -- ADM Race Scoop -- Dynomax VT Axle-Back Exhaust -- Vitesse Throttle Controller RX Catch Can -- Drake Bowtie Delete -- JacFab Radio Face Cover -- LED Fog Lights -- LED Dome/Trunk/Plate Lights -- Gen5DIY Dash ABL -- Diode Dynamics Cupholder Lighting Wishlist: ACS T5 Splitter -- Hood Vent Mod -- Footwell/Door Pull/Homelink Button Lighting |
|
|
|
|
|
06-18-2013, 09:05 PM
|
#62 | |
|
Drives: 2012 SIM 2LT/1970 Camaro Join Date: Nov 2012
Location: Near Minneapolis, MN
Posts: 1,578
|
Quote:
They probably won't ever publicly admit there's a problem with current products, thanks to our litigious society. But I think we're already seeing design changes to deal with it, such as: *Redesigned baffling in the PCV system to reduce oil consumption *Changes in valve timing/cam phasing to reduce coking *Changes in valve coatings to reduce deposit accumulation *Adding factory remedies, like the clean side catch can on the high-performance Camaros
__________________
All bleeding stops eventually -- 2012 2LT Auto w/sunroof -- My journal thread
Roto-Fab Intake & W/W Relocate Kit -- ADM Race Scoop -- Dynomax VT Axle-Back Exhaust -- Vitesse Throttle Controller RX Catch Can -- Drake Bowtie Delete -- JacFab Radio Face Cover -- LED Fog Lights -- LED Dome/Trunk/Plate Lights -- Gen5DIY Dash ABL -- Diode Dynamics Cupholder Lighting Wishlist: ACS T5 Splitter -- Hood Vent Mod -- Footwell/Door Pull/Homelink Button Lighting |
|
|
|
|
|
06-18-2013, 11:47 PM
|
#63 | |
|
Drives: '12 2LT Convertible Join Date: Mar 2012
Location: Belmont, California
Posts: 1,701
|
Quote:
Not only deposits after the cleaning, pooled oil in the gaskets, lots of crap in the intake ports and on the valves. Check the DIY link a few posts up for pics.
__________________
Mods: GM Locking Gas Cap, RS License Plate Frame, SS Brembos, ZL1 FrontEnd, 14/15 Convertible Top
 Last edited by intensifi; 06-19-2013 at 12:31 AM. |
|
|
|
|
|
06-18-2013, 11:50 PM
|
#64 | |
|
Drives: '12 2LT Convertible Join Date: Mar 2012
Location: Belmont, California
Posts: 1,701
|
Quote:
Offer two kits. One like you said and another with the tools/chemicals needed for a manual cleaning of the valves/intake ports.
__________________
Mods: GM Locking Gas Cap, RS License Plate Frame, SS Brembos, ZL1 FrontEnd, 14/15 Convertible Top
|
|
|
|
|
|
06-19-2013, 07:59 AM
|
#65 |
       
Drives: 16 Camaro SS, 15 Colorado Join Date: May 2009
Location: Jefferson City, Missouri
Posts: 13,943
|
So it sounds like your finished with the cleaning. Unless I missed something, do you have any after pictures of your valves, or any new impressions of engine performance or anything like that?
__________________
2016 Camaro 1SS - 8-speed - NPP - Black bowties
2010 Camaro 1LT V6 (Sold. I will miss her!) |
|
|
|
|
06-19-2013, 12:54 PM
|
#66 | |
|
Drives: 2012 SIM 2LT/1970 Camaro Join Date: Nov 2012
Location: Near Minneapolis, MN
Posts: 1,578
|
Quote:
As far as performance, maybe slightly smoother/stronger acceleration, but not a night and day difference. Going to log some more data to compare to the dirty data. Also going to continue to monitor fuel economy, but it's too early to tell on that front.
__________________
All bleeding stops eventually -- 2012 2LT Auto w/sunroof -- My journal thread
Roto-Fab Intake & W/W Relocate Kit -- ADM Race Scoop -- Dynomax VT Axle-Back Exhaust -- Vitesse Throttle Controller RX Catch Can -- Drake Bowtie Delete -- JacFab Radio Face Cover -- LED Fog Lights -- LED Dome/Trunk/Plate Lights -- Gen5DIY Dash ABL -- Diode Dynamics Cupholder Lighting Wishlist: ACS T5 Splitter -- Hood Vent Mod -- Footwell/Door Pull/Homelink Button Lighting |
|
|
|
|
|
06-22-2013, 10:31 AM
|
#67 |

Drives: 2012 Camaro LS Join Date: Sep 2012
Location: Scott AFB
Posts: 597
|
It still baffles me that with all these pictures of how filthy the intake manifold gets without a catch can why Chevrolet didn't just put one in there.
If it's so mandatory, why was it even allowed to leave the factory? Seems like they cut corners. |
|
|
|
|
06-22-2013, 02:27 PM
|
#68 | |
|
Drives: 2012 SIM 2LT/1970 Camaro Join Date: Nov 2012
Location: Near Minneapolis, MN
Posts: 1,578
|
Quote:
Oh, and it's cheaper for them, too.
__________________
All bleeding stops eventually -- 2012 2LT Auto w/sunroof -- My journal thread
Roto-Fab Intake & W/W Relocate Kit -- ADM Race Scoop -- Dynomax VT Axle-Back Exhaust -- Vitesse Throttle Controller RX Catch Can -- Drake Bowtie Delete -- JacFab Radio Face Cover -- LED Fog Lights -- LED Dome/Trunk/Plate Lights -- Gen5DIY Dash ABL -- Diode Dynamics Cupholder Lighting Wishlist: ACS T5 Splitter -- Hood Vent Mod -- Footwell/Door Pull/Homelink Button Lighting |
|
|
|
|
|
06-22-2013, 02:27 PM
|
#69 |
|
Drives: 2012 SIM 2LT/1970 Camaro Join Date: Nov 2012
Location: Near Minneapolis, MN
Posts: 1,578
|
I'm in the process of writing a big update for this thread, so stay tuned.
__________________
All bleeding stops eventually -- 2012 2LT Auto w/sunroof -- My journal thread
Roto-Fab Intake & W/W Relocate Kit -- ADM Race Scoop -- Dynomax VT Axle-Back Exhaust -- Vitesse Throttle Controller RX Catch Can -- Drake Bowtie Delete -- JacFab Radio Face Cover -- LED Fog Lights -- LED Dome/Trunk/Plate Lights -- Gen5DIY Dash ABL -- Diode Dynamics Cupholder Lighting Wishlist: ACS T5 Splitter -- Hood Vent Mod -- Footwell/Door Pull/Homelink Button Lighting |
|
|
|
|
06-22-2013, 03:25 PM
|
#70 |
|
Drives: 2012 SIM 2LT/1970 Camaro Join Date: Nov 2012
Location: Near Minneapolis, MN
Posts: 1,578
|
Tear Down #2 and Manual Cleaning
All right, after a busy week, I finally have a bit of time to update this thread.
Last Saturday, my dad was down for Father's Day weekend and we removed the IM again to see how effective the Seafoam was at removing the carbon from my intake valves. As I mentioned back in post #33, I wondered if using the brake booster vacuum hose to introduce Seafoam into the IM would actually introduce it to both cylinder banks, or just primarily one side. As you can see in the photo below, the IM is internally divided into two banks, which in turn feed the intake runners on the opposite side of the engine:  The brake booster vacuum attachment (red arrow) comes in on the driver's side rear of the IM, which feeds the passenger side bank of cylinders (remember, the IM is upside-down in the pic, so things are reversed). I wondered if the internal division of the IM was continuous from where it splits near the throttle body, or if there was opportunity for the sides to "communicate" other than the very front of the IM. So after pulling the IM, the first thing I did was turn it upside down and run my lighted borescope up each side of the IM. Running it up the passenger side showed light out each runner on the driver's side of the IM. I saw no light anywhere in the passenger side runners at all. Next I ran it up the driver's side of the IM. When the borescope got right next to the brake booster vacuum connection, there was some very faint light visible in the rear runner opening on the driver's side (which is fed by the passenger side of the IM, remember?). As soon as the scope was moved slightly away from the vacuum connection, the light disappeared. So it appears that there may be a small communication between the two halves of the IM near the vacuum attachment. I am not sure how much Seafoam would make it to the driver's side bank of cylinders via this communication; it seems to be very very small based on the amount of light that passed and how any small movement of the scope would make the passed light disappear from the other side. In my opinion, to ensure a good Seafoam treatment on the LFX, you should not rely solely on the brake booster vacuum attachment. You should definitely use the Seafoam spray from the throttle body side of the manifold to ensure treatment of both cylinder banks, either in addition to the brake booster vacuum line or instead of it. OK, on to the evaluation of the effectiveness of the treatment. First thing I noticed was that the inside of the IM was coated with a clear, oily substance. I believe this was residual Seafoam and not PCV-related oil ingestion, as the appearance of the substance was clear and not oil-colored at all. I'm not thrilled about this coating after cleaning the IM previously with intake cleaner--which left no residue--but it's unavoidable. I also found the same substance where the IM gasket meets the metal intake runners on the head:   Note in the close up the barely visible ring of clear fluid around each opening. Compare this to the pics of the same area I posted in the first post in this thread, and you'll see why I'm convinced this was Seafoam and not PCV products. Later in this thread I'll show what I drained from my catch can when I did my post-Seafoam oil change, and you'll see it's far from clear. All right, on to the appearance of the valves themselves:       So, the Seafoam helped remove the big chunk of carbon off of the one valve, but still left a lot of residue on each valve trumpet and a "collar" of deposits on each valve stem. Not as clean as I had hoped. While we had the IM off and the valves accessible, we decided to manually clean them. Again, we referred to intensifi's guide, although we sort of modified the technique a bit. I purchased a gun cleaning kit at Walmart for about $20: 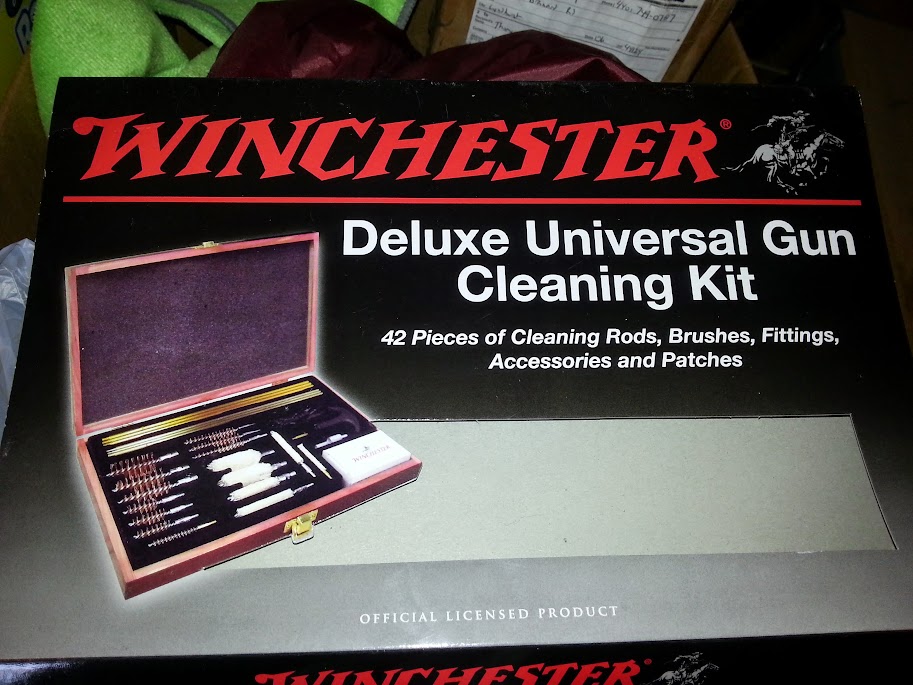  The various diameter brushes and extension handles worked well for accessing the valves down through the runners. I was able to bend the brushes into an "L" shape to get the rear of the valve stem and the back of the valve trumpet. The bristles bent/deformed easily, though, and I went through several of them during this procedure. Another note about using the brushes: as they began to wear, I found an occasional stray bristle laying on the valve after cleaning. I was able to suck them out using the shop vac, which I will describe later. Just be aware and look for them if you use this procedure. For a cleaning chemical I used my remaining Seafoam spray. I had purchased some intake/carb cleaner for this purpose, but after talking with my dad decided to use the Seafoam instead. The concern was that the stronger cleaner would potentially wash the cylinder walls and leave them dry at the next startup. The Seafoam has some lubricity, so even if it washed the cylinder walls there would be some level of lubrication remaining. First, I sprayed a small amount of Seafoam into each runner that looked like it might be closed. If the fluid pooled and remained, the valves were closed and those were the areas we cleaned first:  In the pic above, the left valve shows how the Seafoam looked when sprayed onto the valve. It has a blue appearance. The right valve has been scrubbed on a bit, turning the seafoam gray. Eventually it would turn dark gray to black as the deposits were removed. We had 4 of the 6 sets of intake valves closed initially, so we cleaned those first. The cleaning procedure consisted of:
  Holding a flashlight in one hand and scrubbing with the other worked well, but by the end the hand holding the narrow brush handle was pretty fatigued. I don't have any shots of using the rags, but I can tell you that narrow strips worked much better than larger pieces. It was easier to stuff them around the back of the valve stem and work them back and forth. They came out dripping with black gunk, so be prepared. Next we used the shop vac adapter and with masking tape attached about a 2 foot length of 1/2" diameter tubing:  We could then insert the tubing down near the valve stem to suck up any remaining Seafoam, debris, or the occasional brush bristle from the valves. After we did the initial 4 sets of valves, we used a 19mm socket and a breaker bar to rotate the crankshaft bolt by hand and close the remaining two sets of valves. We did not remove the spark plugs to release the compression, and while it was stiff to turn, it wasn't horrible. One of us turned the crank while the other watched the open valves slowly close. At some point, the valve would seem to stop moving, even with further crank turning, and that's when we would test them for Seafoam pooling. After all the valves were cleaned, here's what they looked like:      For some reason I only took 5 pics, but essentially they all looked similar. A couple of notes about this technique:
After the cleaning was all done, I changed the oil/filter and drained the catch can. This is what my RX catch can collected in a little over 2,000 miles:  As you can see, it's definitely not the same stuff I found in the IM or around the port openings. Yuck. After I emptied it, I removed the hose from the center (input) fitting on the can and we carefully/slowly sprayed some intake/carb cleaner down into the can and out the open drain valve to flush the can and drain hose. (The pic above shows only what the can collected, not any additional liquid from flushing the can/hose.) OK...there you have it, folks. My car ran ~28,000 miles without a catch can. You saw the resulting deposits, the effects of a Seafoam treatment on them, and how I manually cleaned them. Hopefully my catch can will prevent any further deposits from forming. Perhaps in the future I will pull the IM again and check. Thanks for reading!
__________________
All bleeding stops eventually -- 2012 2LT Auto w/sunroof -- My journal thread
Roto-Fab Intake & W/W Relocate Kit -- ADM Race Scoop -- Dynomax VT Axle-Back Exhaust -- Vitesse Throttle Controller RX Catch Can -- Drake Bowtie Delete -- JacFab Radio Face Cover -- LED Fog Lights -- LED Dome/Trunk/Plate Lights -- Gen5DIY Dash ABL -- Diode Dynamics Cupholder Lighting Wishlist: ACS T5 Splitter -- Hood Vent Mod -- Footwell/Door Pull/Homelink Button Lighting Last edited by 911medic; 06-22-2013 at 04:10 PM. |
|
|
|
|
|
|
|
 |
|
|


