You are browsing camaro5 

|
 01-13-2010, 10:29 PM
|
#1 |
  
|
DIY Raptor Dual Stage Shift Light.
I have seen several post/threads about people asking how to hook this particular shift light up.
After several emails back and forth with Raptor Performance I was able to get the correct wiring and correct pin on the PCM to install this correctly. here goes. material 1 Raptor shift light w/accessories Wire loom about 20ft. Butt-splice connectors 16-14 guage 16-14 gauge T_Tap connectors. 16-14 Spade connectors 1- 16-14 gauge d-ring connector for 5/16 bolt One 5/32 machine screw and nut, about 3/8" long zip ties shrink wrap 16 or 14 gauge wire white and green Tools you will need heat gun Drill 1/2 drill bit, 5/32 drill bit Electrical tape. 10 mm socket with ratchet 1. First thing to do is decide where you would like to mount your shift light. I chose the far upper corner of the driver windshield, as it is out of site, but yet still in my peripheral. I did have to drill 1 5/32 hole and obtain a machine screw, and nut to fit the corresponding hole. 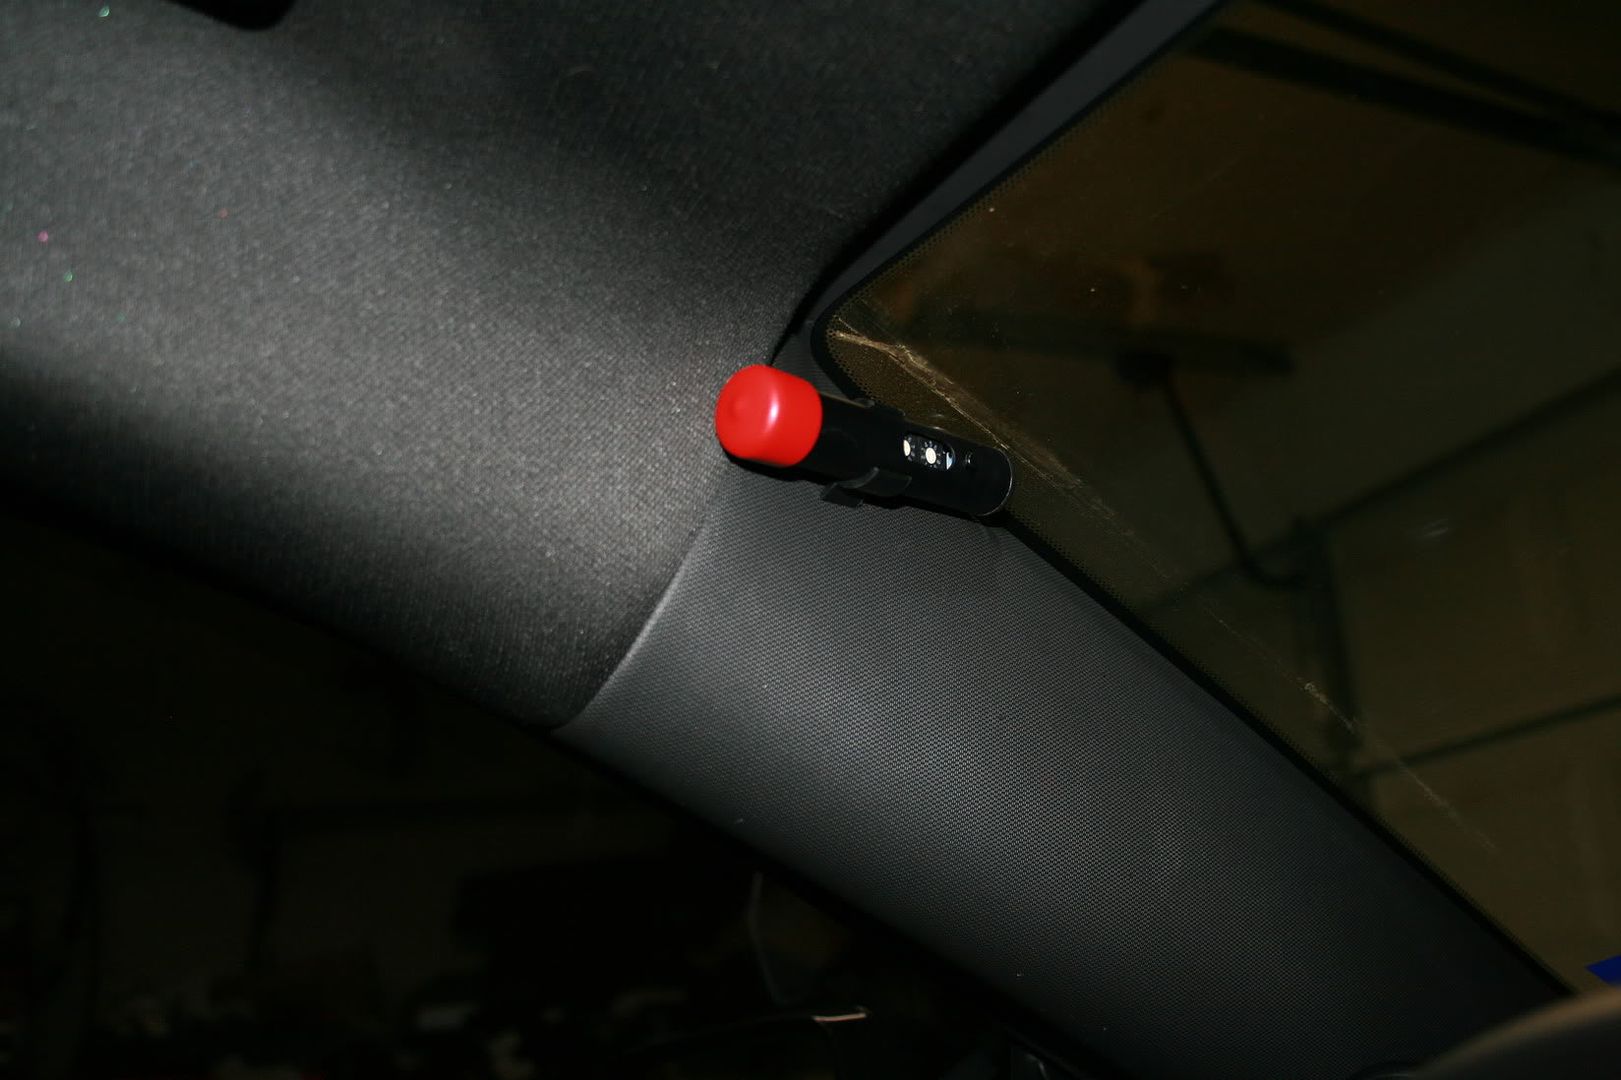 So now that the decision to mount it here has been made, Place the light with the base attached, and hold the light in it's position. Once you like it. make a mark along the base of the stand. Next remove the A-pillar cover, and align the base up with the line you made( with out the shift light in the base). Once you have it lined up, take a Sharpie and make a mark for the hole. Now drill out the hole. Bolt the base to the A-pillar cover. Now take the light, and mount it back in the base. Remove the Fuse panel cover on the side of the dash, and re-install the A-pillar cover, while doing this fish the wire down behind the cover, and down into the Fuse Block area on the side of the dash. Snap the A-pillar cover back into place, making sure that you don't have any excess wire hanging out. Just enough to not put a lot of tension on the connector on the back of the light. 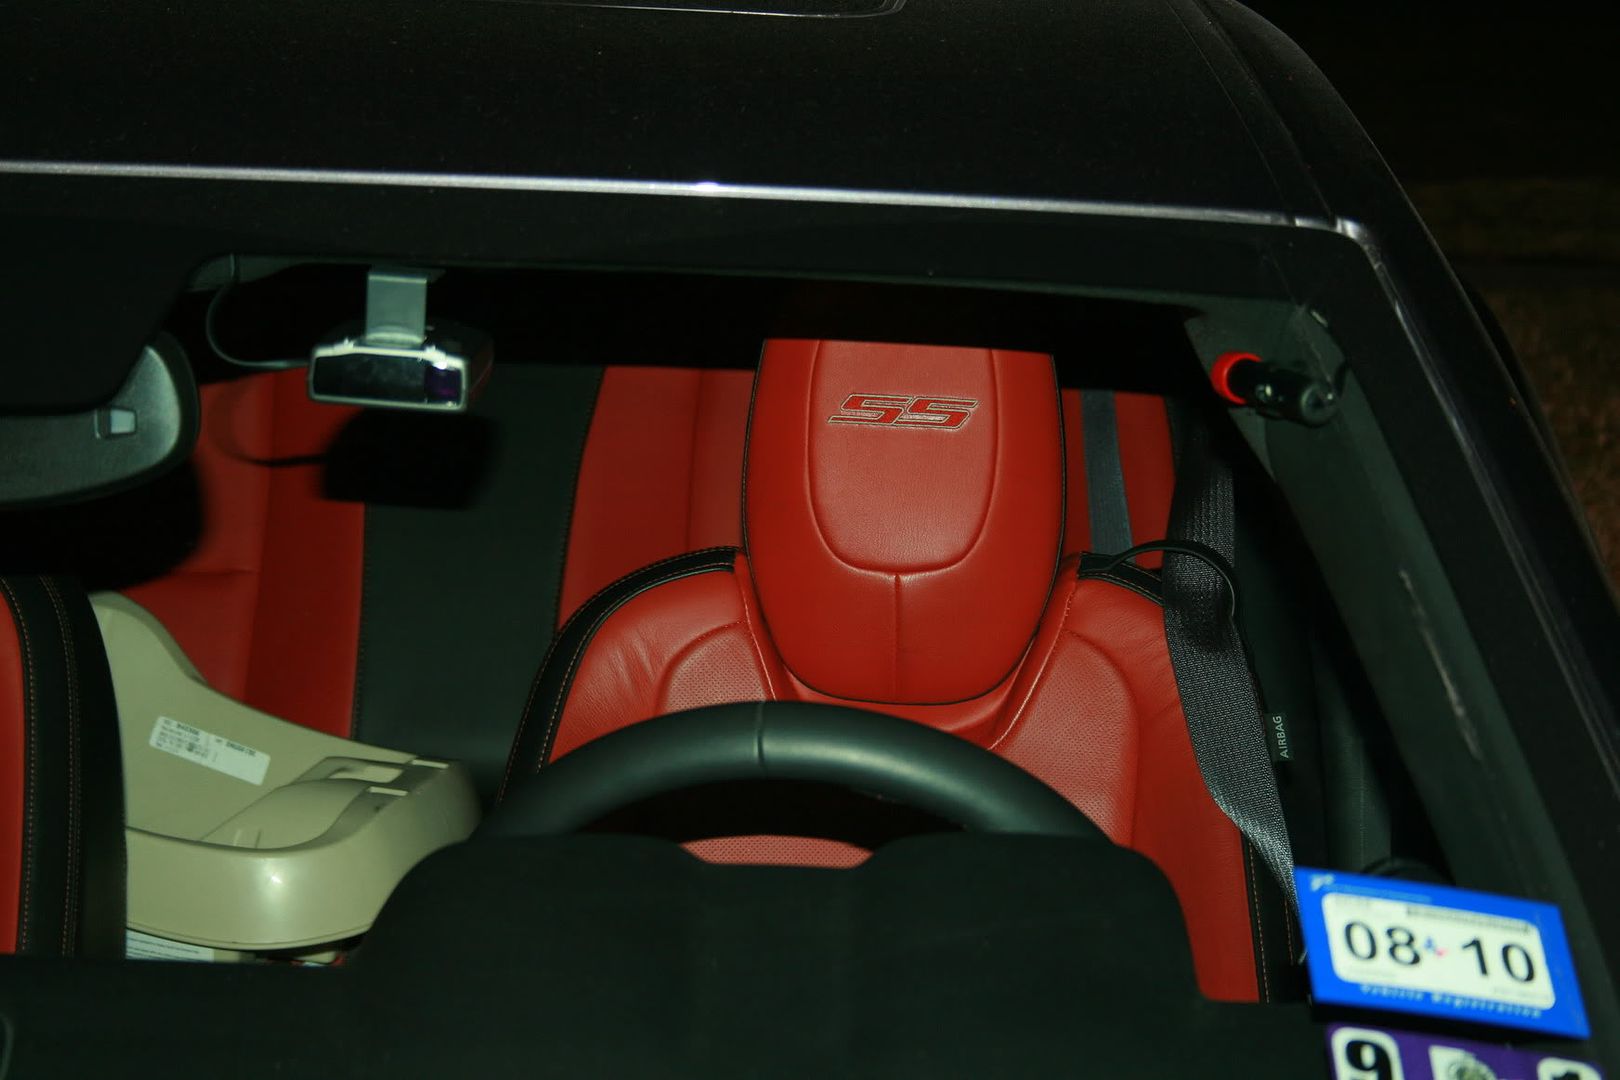 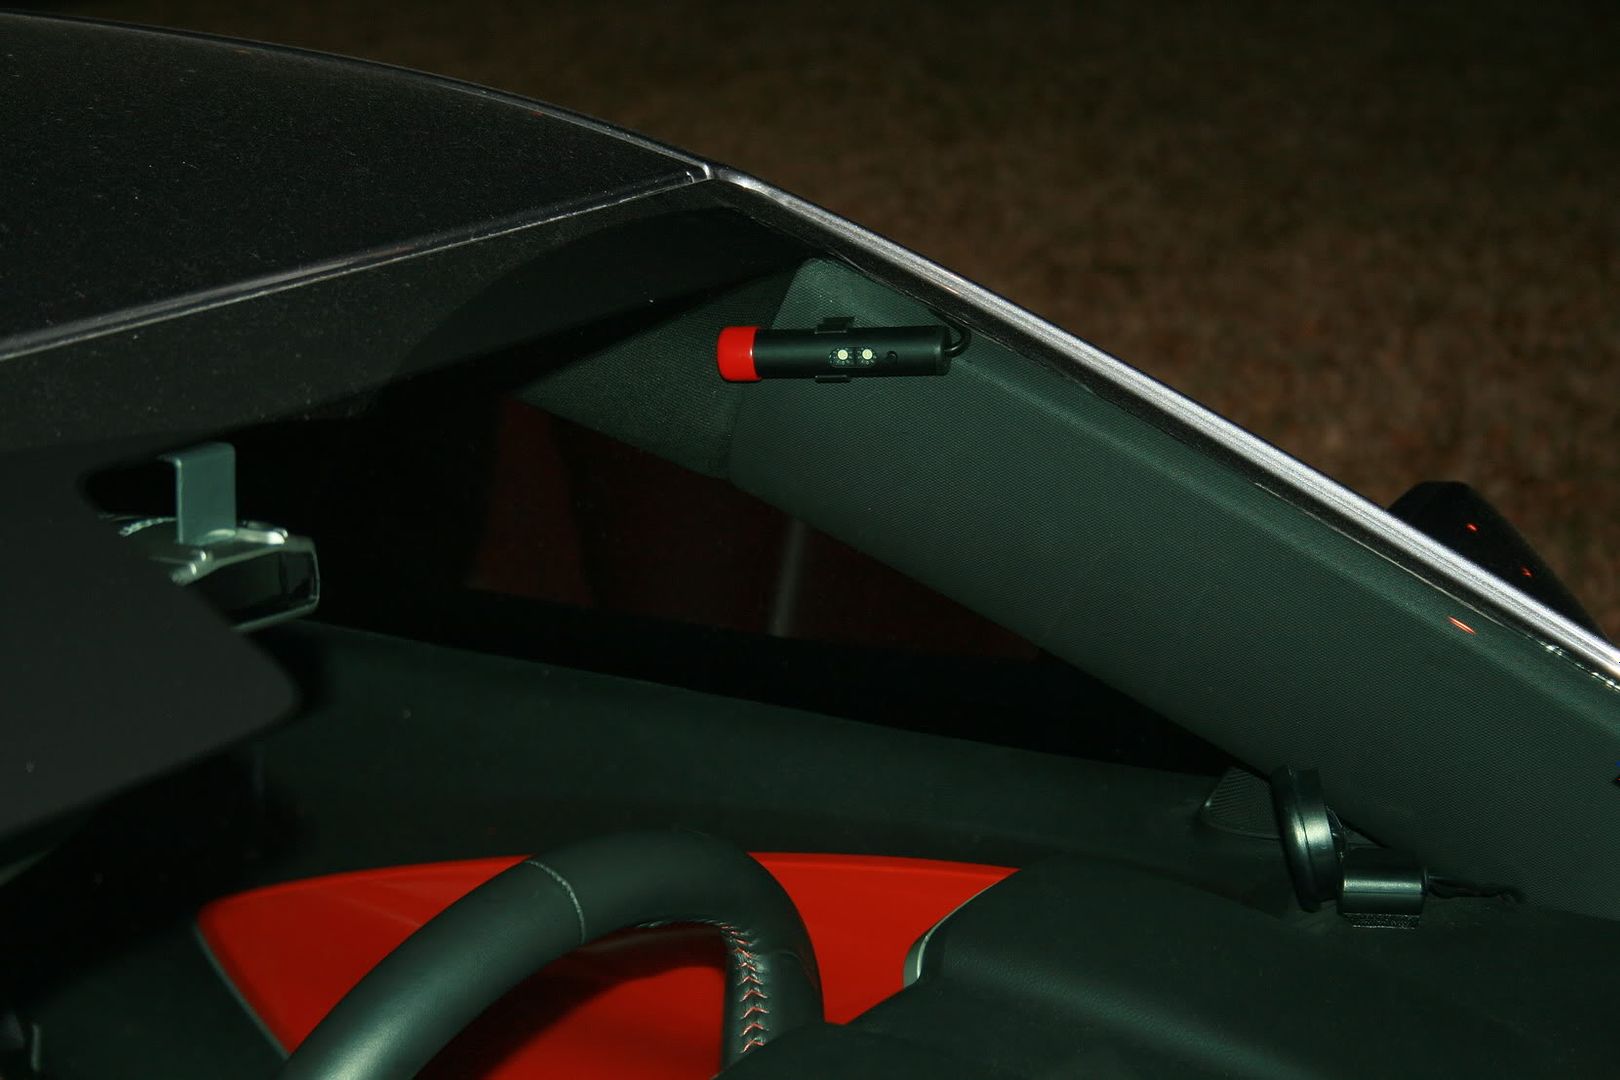 Now comes the fun part. Disconnect the Negative side of the Battery Strip the black protective coating back as far as you can ( I stripped mine till about 6inches before it went up into the A-pillar. I had already had tapped into the fuse block on the secondary side of the fuse( protected side) in a previous install. So I had an available switched hot circuit available to me. If you don't you will need to locate one. whether it be from the ignition source, or some other spot.( Cut the red wire to fit, save the excess you will need it later). I would stay away from anything that has to do with Onstar, or any safety aspect of the car.(airbags etc.) Now for the Ground there is a bolt here. (Cut the black wire to mount here. (save the excess wire you will need it later). 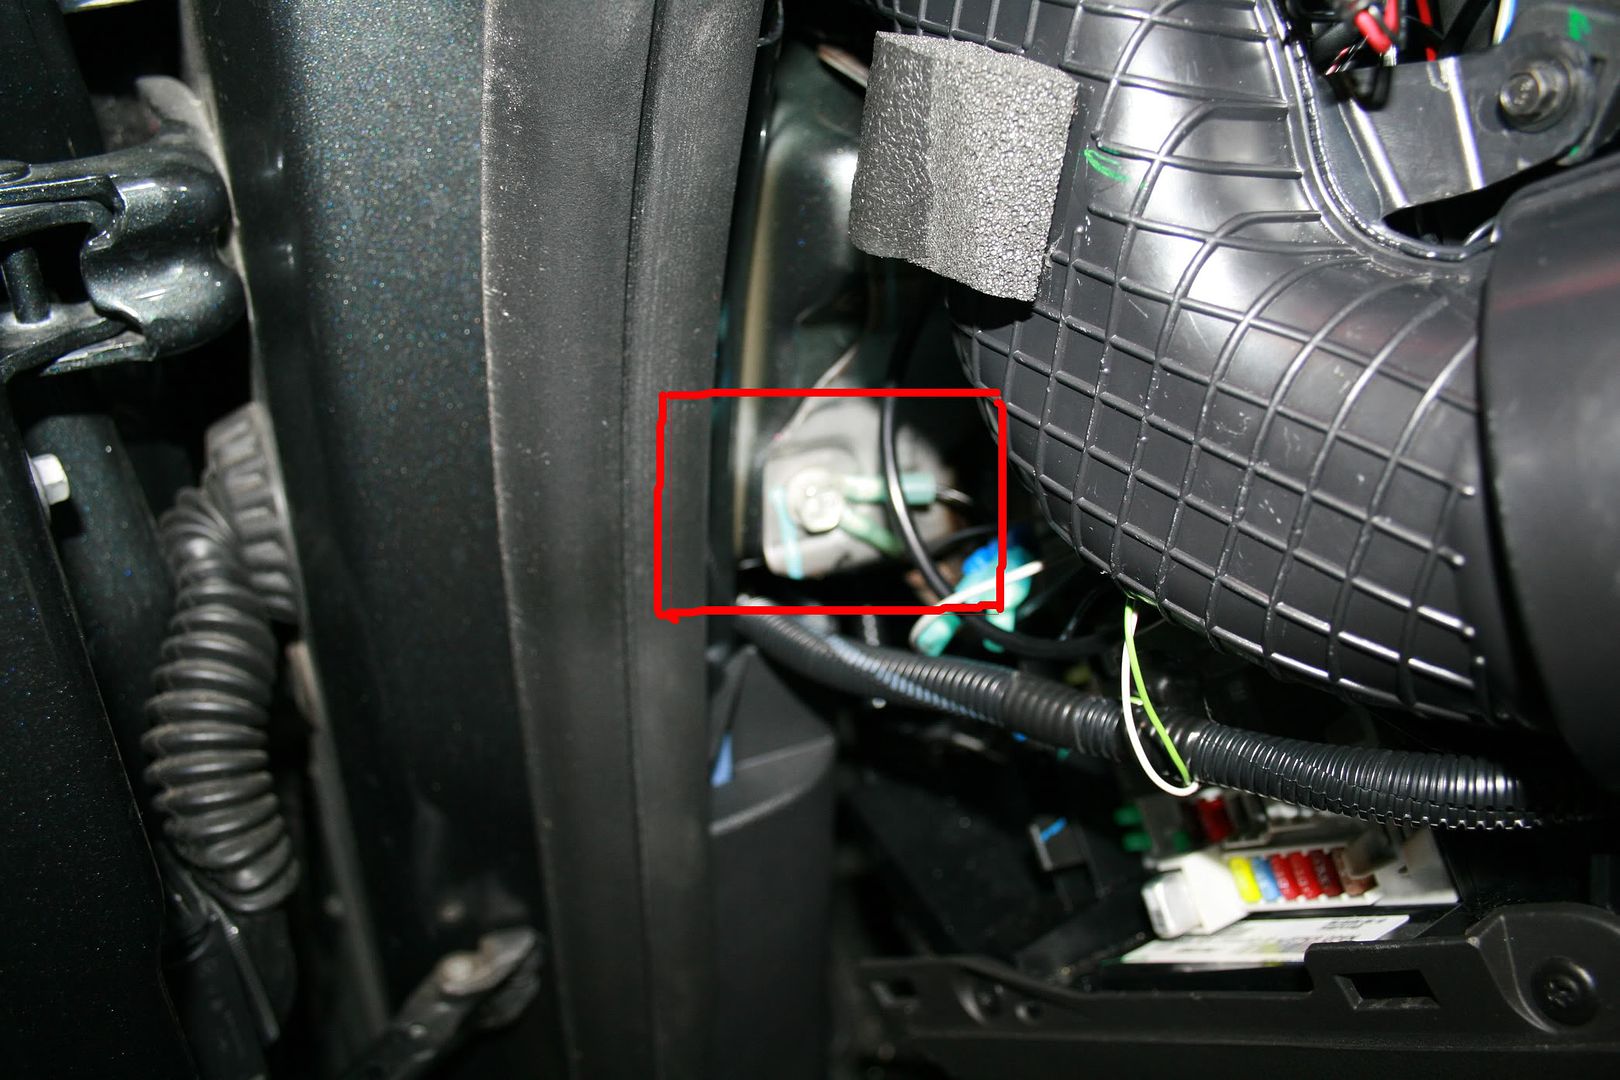 Use this for your ground. Now that we have 2 out of the 4 wires hooked up, we need to get the White, and Green wire around to the PCM. You will need to get the 2 wires into the engine compartment. I had drilled a 1/2 hole (once again from a previous install, but you will probably need to drill one here to get the wires through the firewall. unless you can find some other way.. It was just easier to drill. To do this remove the kick plate cover, and the threshold cover. Using a 1/2 drill bit drill your hole.. You will need verify you aren't drilling into the brake booster, or anything else here. I would give measurements, but don't wont to be held accountable if they are different for you. YOU WILL NEED TO MEASURE OUT WHERE A CLEAR SPOT IS. 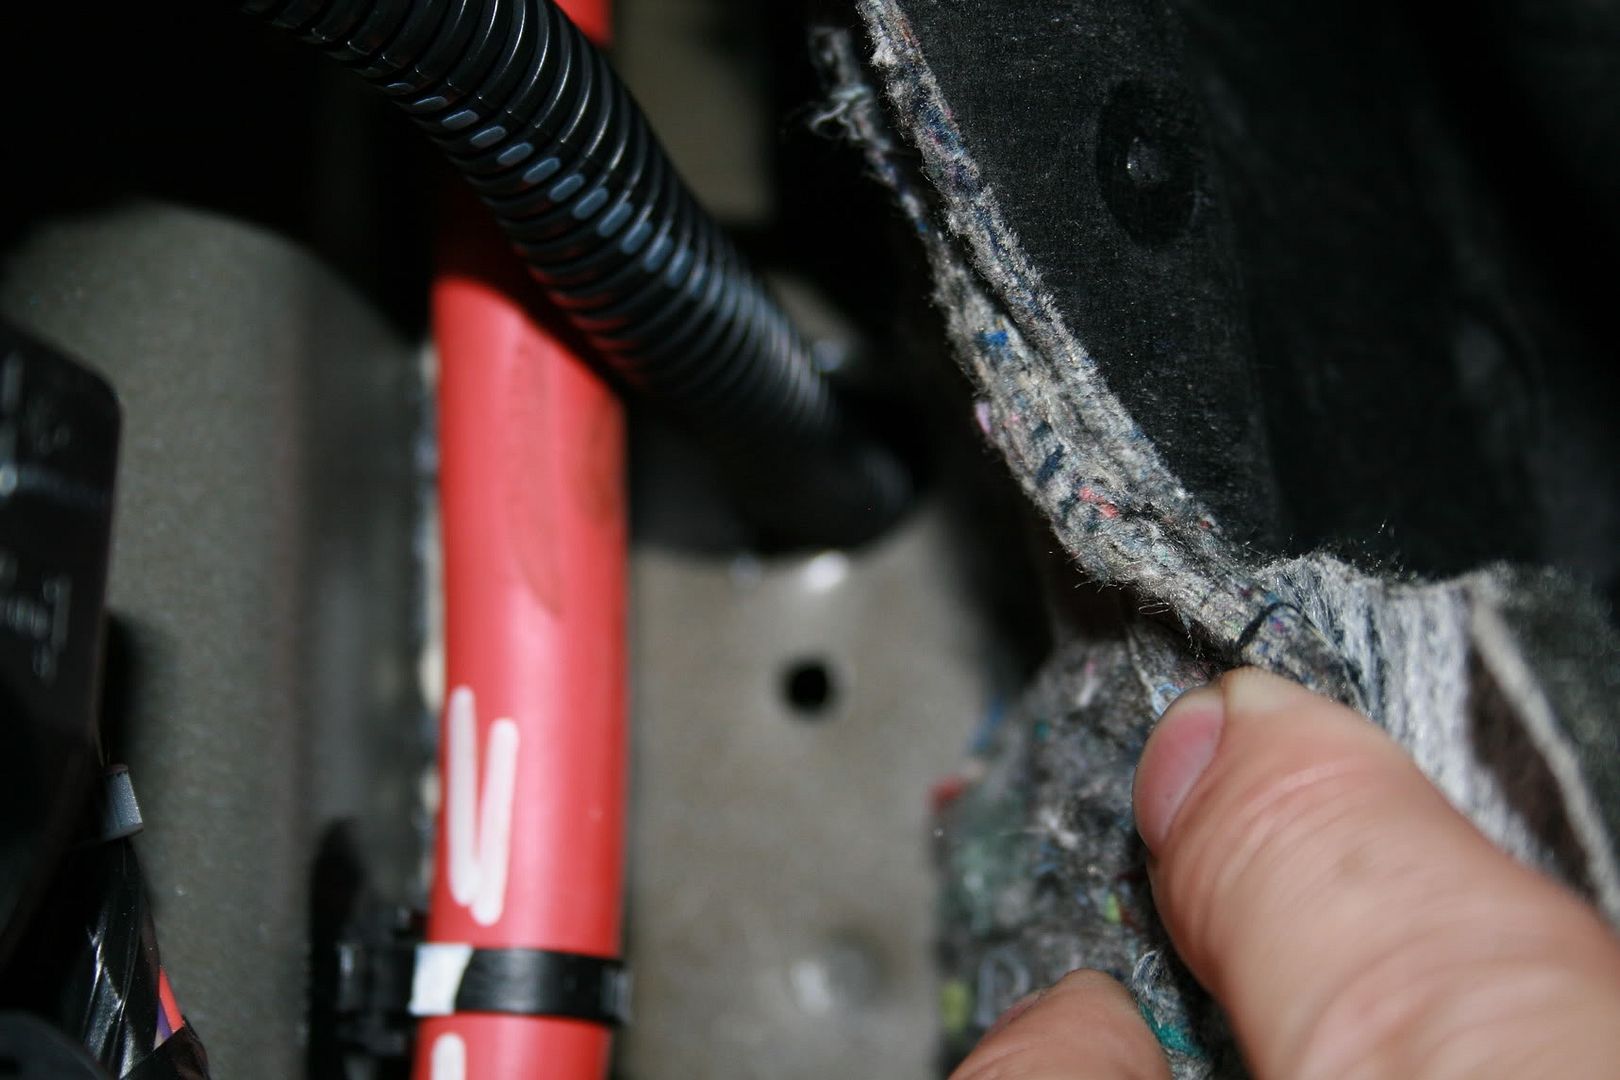 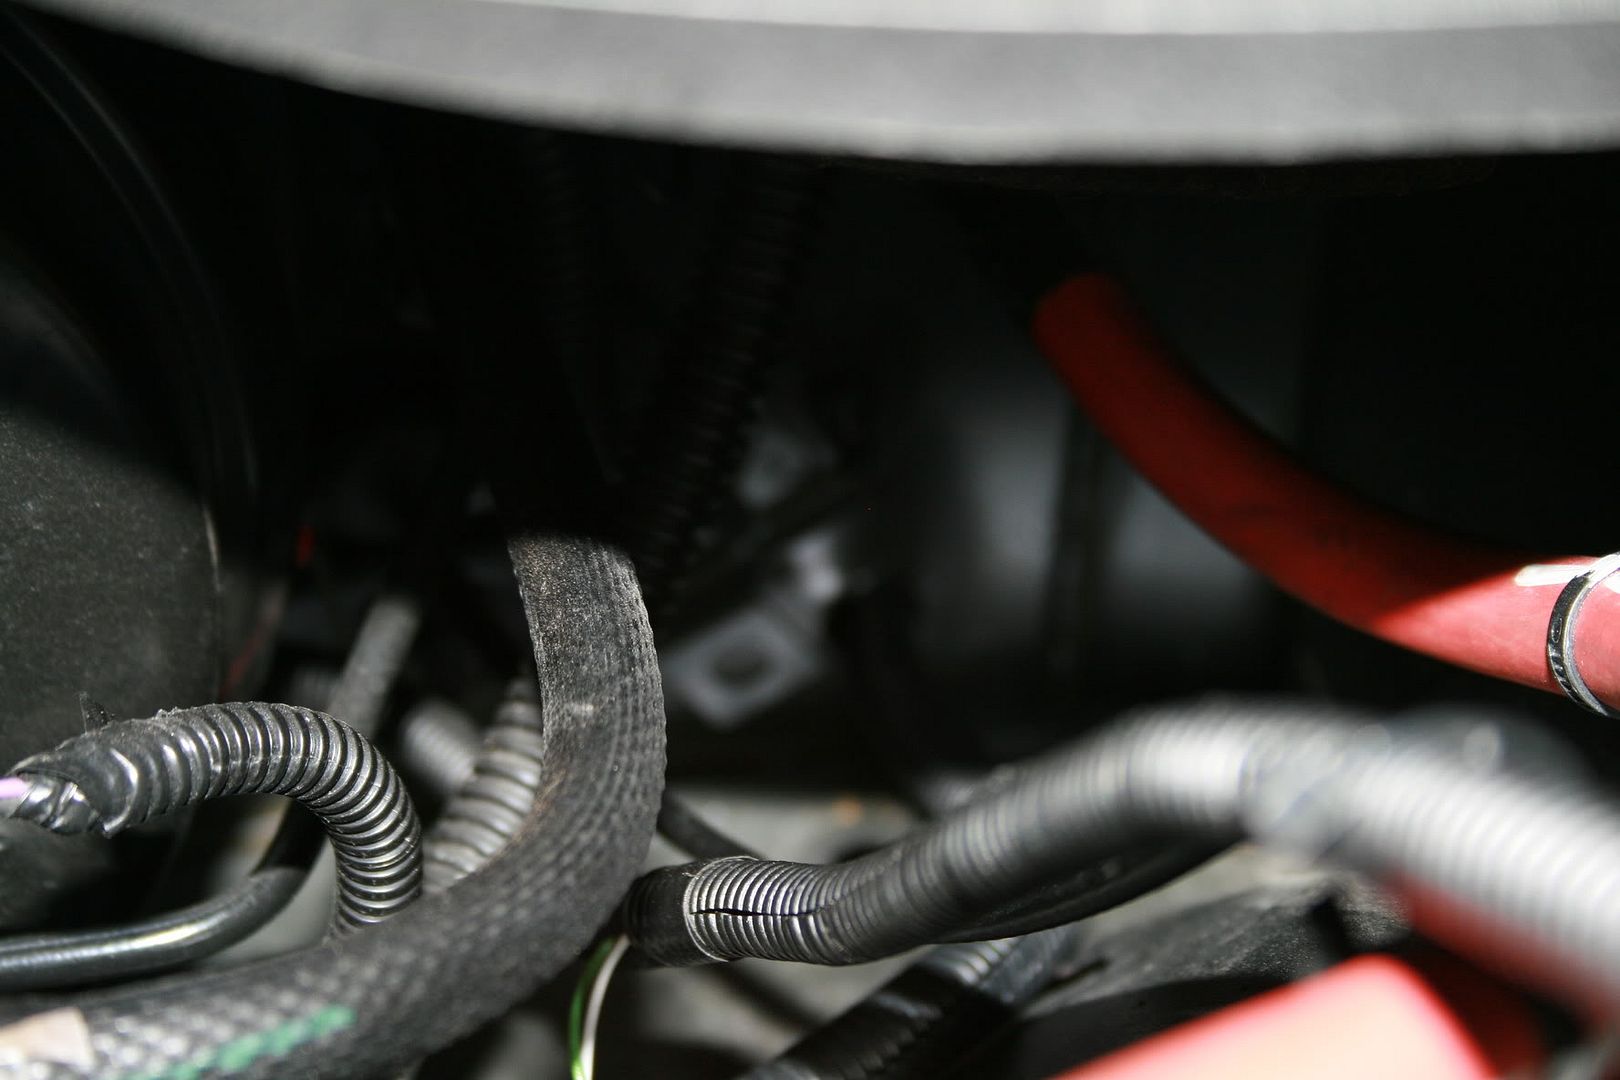 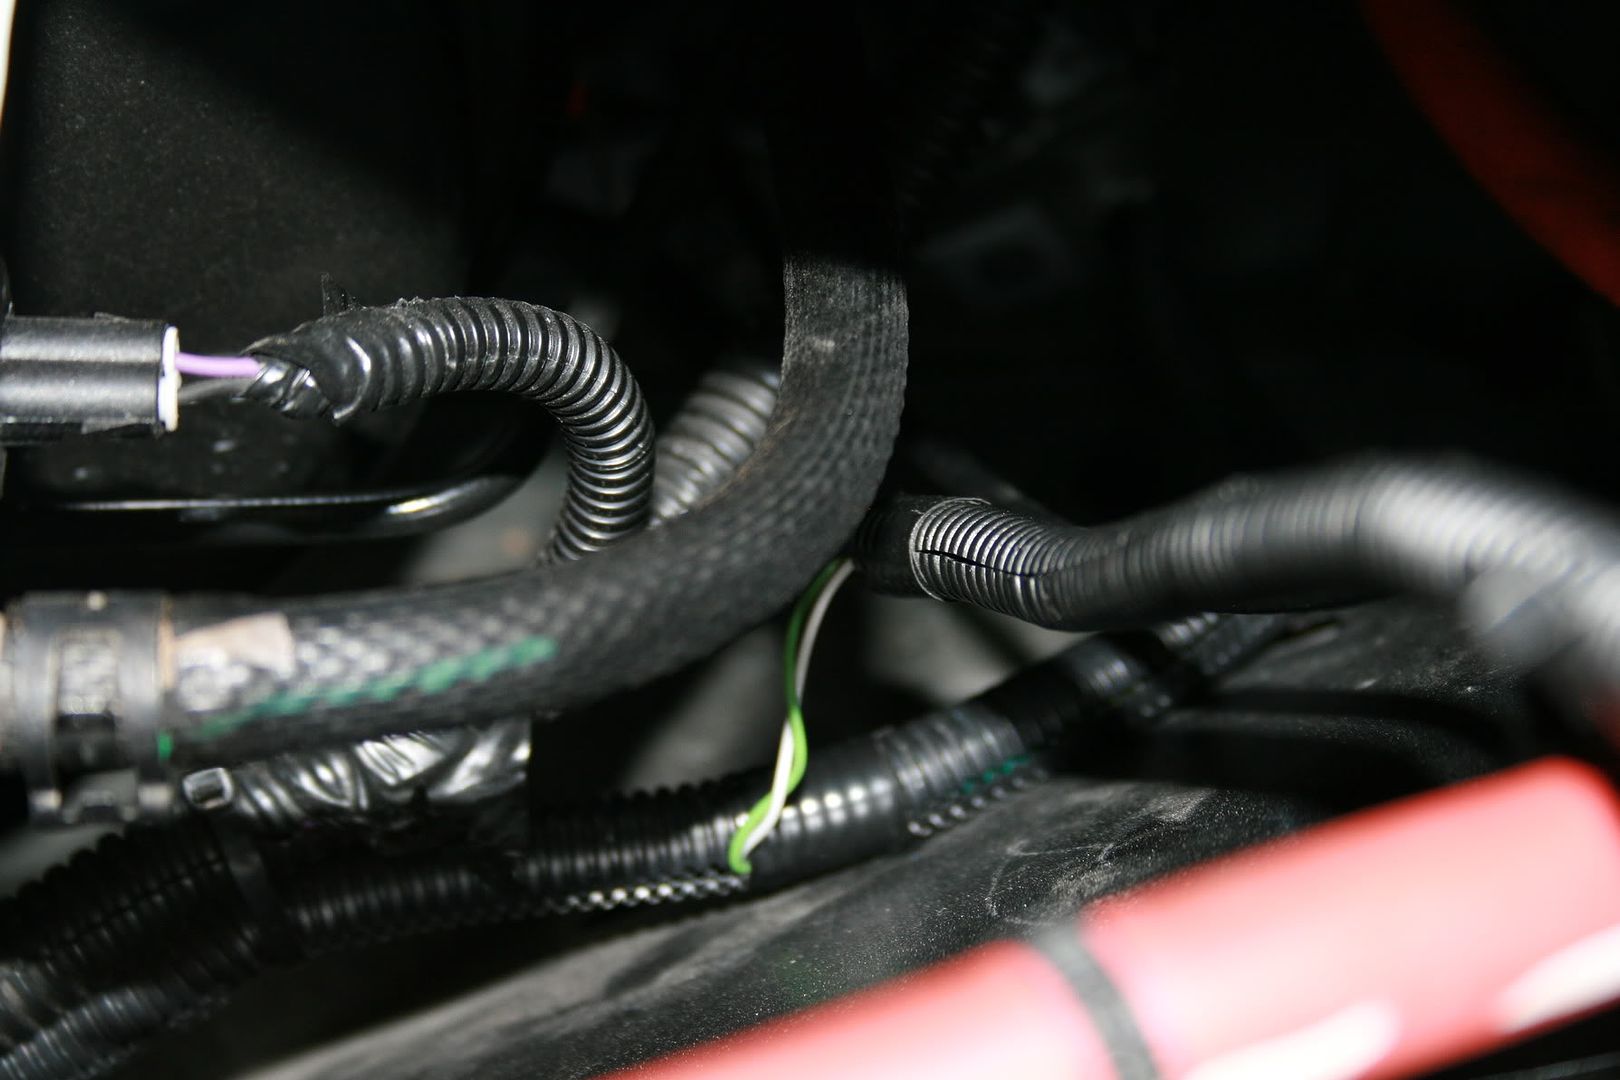 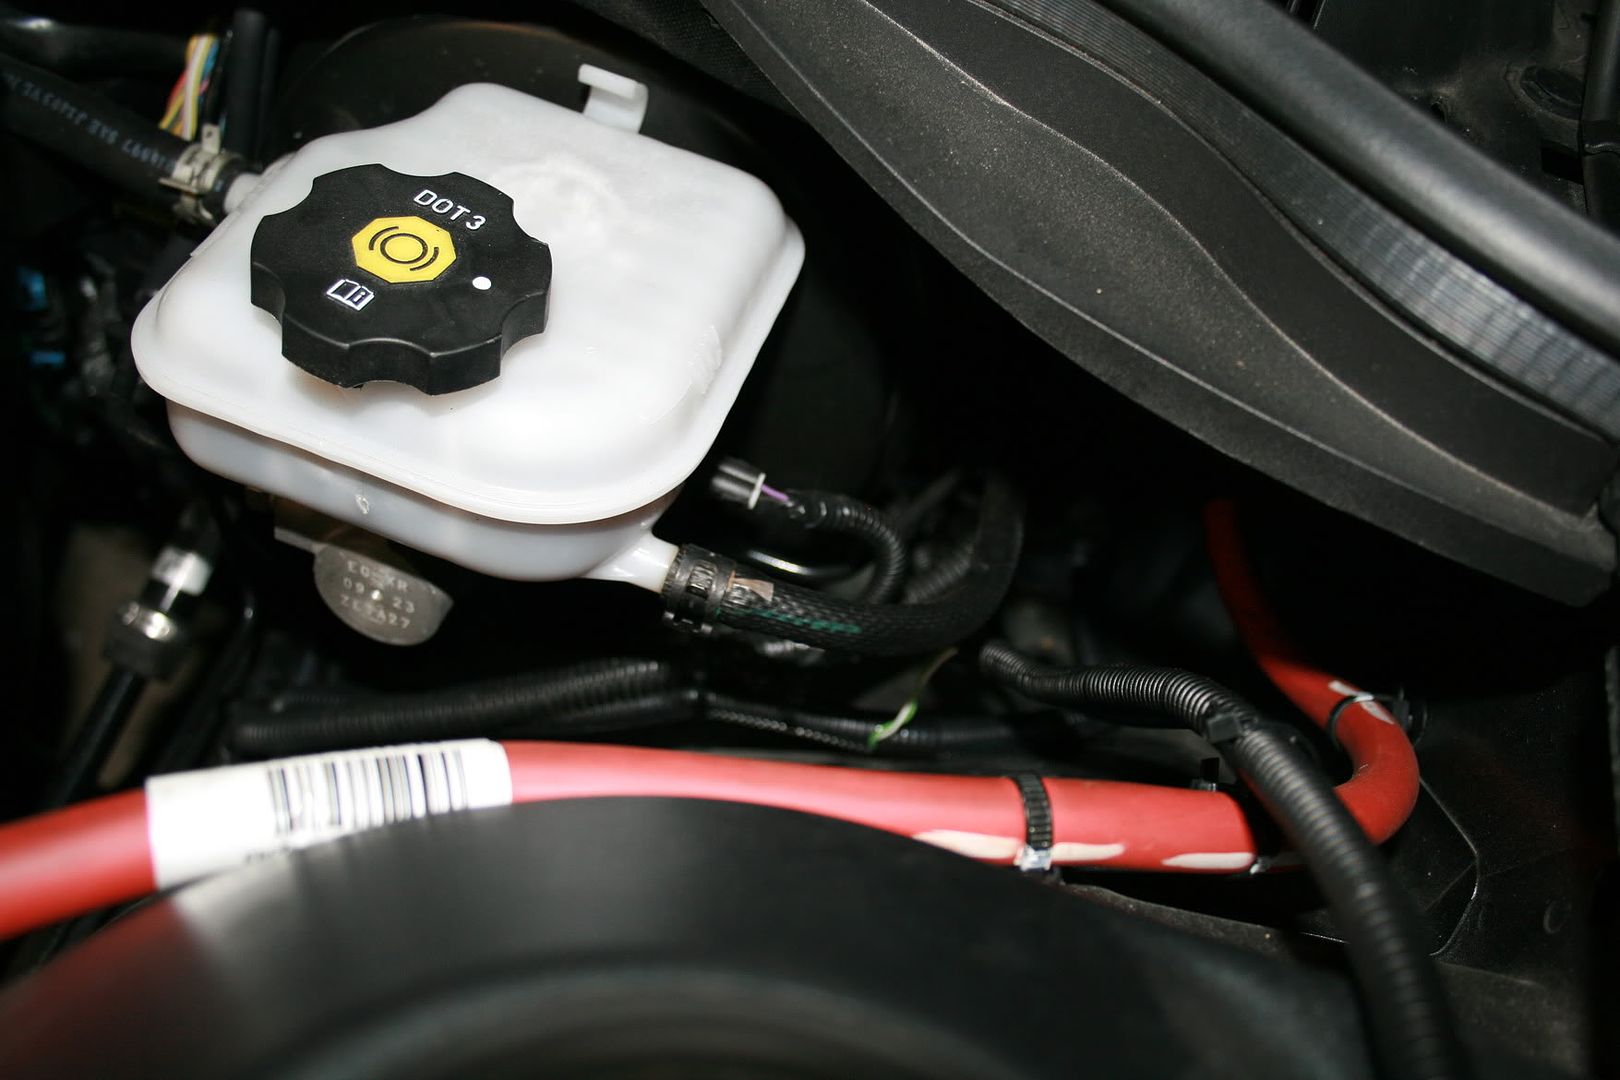 Once your hole is drill using some wire loom snake the to wire through the hole, concealing the wire as much as possible to make a nice clean setup. From here I took the 2 wires around the driver front of the car. along the radiator, and out right past the radiator fluid level check cap. This is where your excess red, and black wire comes in. You will need to splice on some additional wire. If you want you can go obtain some more Green and white wire, but I felt the black and red was sufficient, and just used it. Remember if you do use the red, and black wire, remember which color you spliced together. I spliced white with red, and Green with Black. 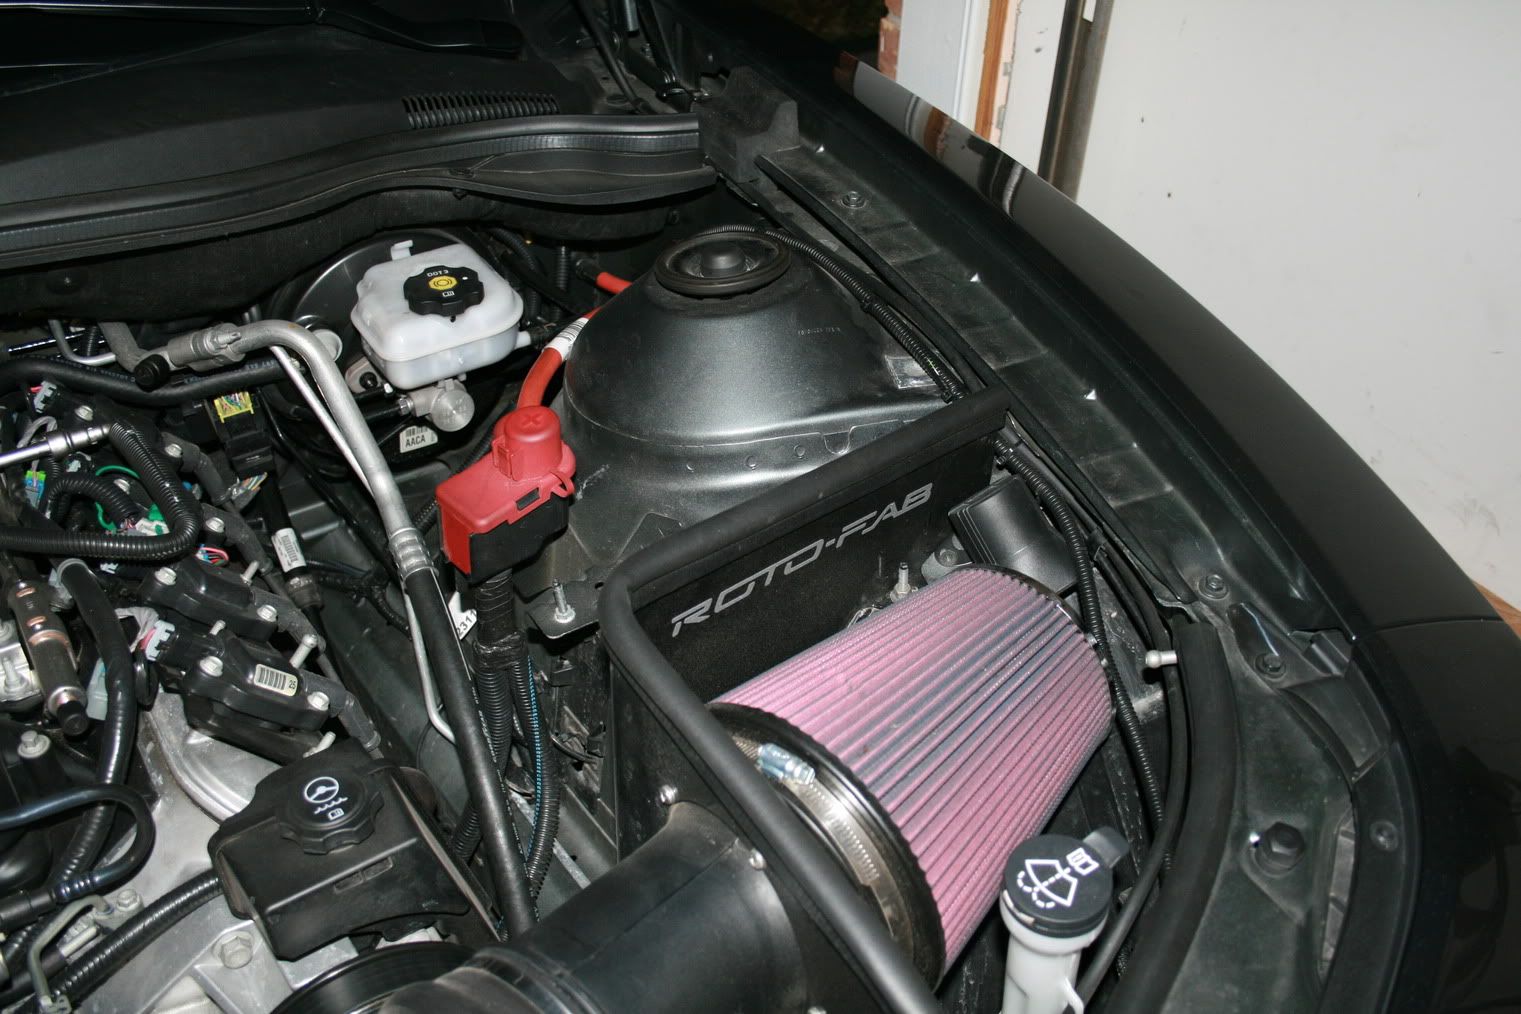  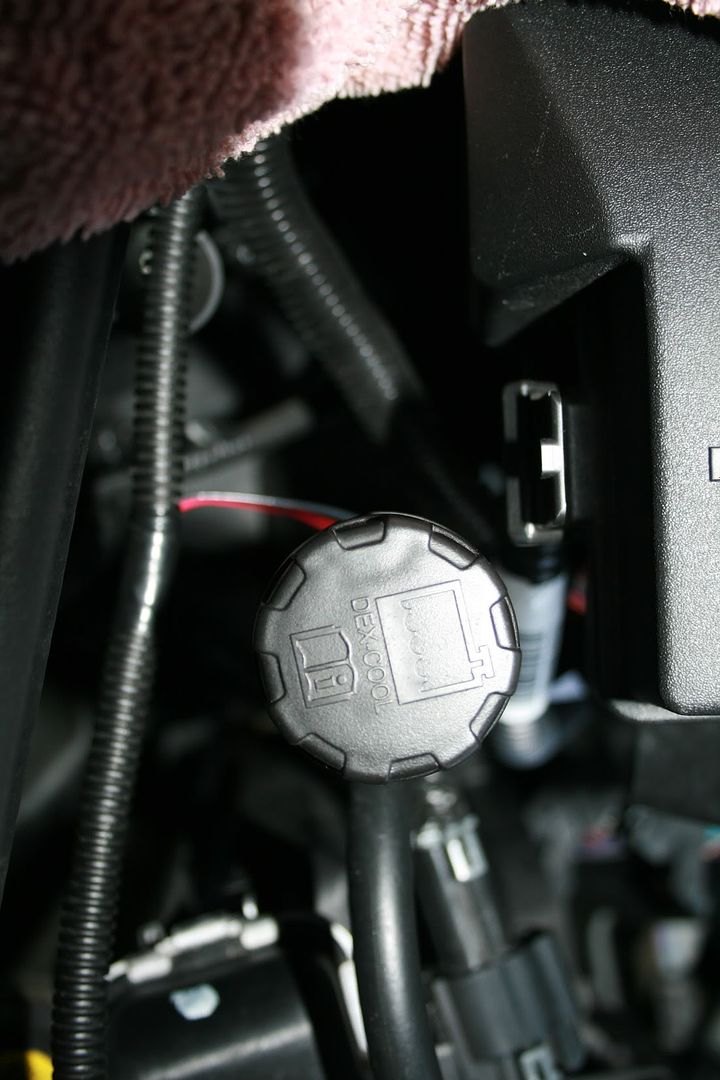 Now here is where everyone is getting confused on where to hook the white, and green wire up..( if you only bought the shift light, and not the dual launch light, then you only have to worry about the green wire, you wont have a white wire) Now once you have the 2 wires over to the PCM, you need to remove the 2 connectors. Here is a nice little video on how to do this. http://www.motorz.tv/blog/1330/how-t...-chevy-camaro/ Once you have the connectors off. the black Connector is X1, and the Gray Connector is X2 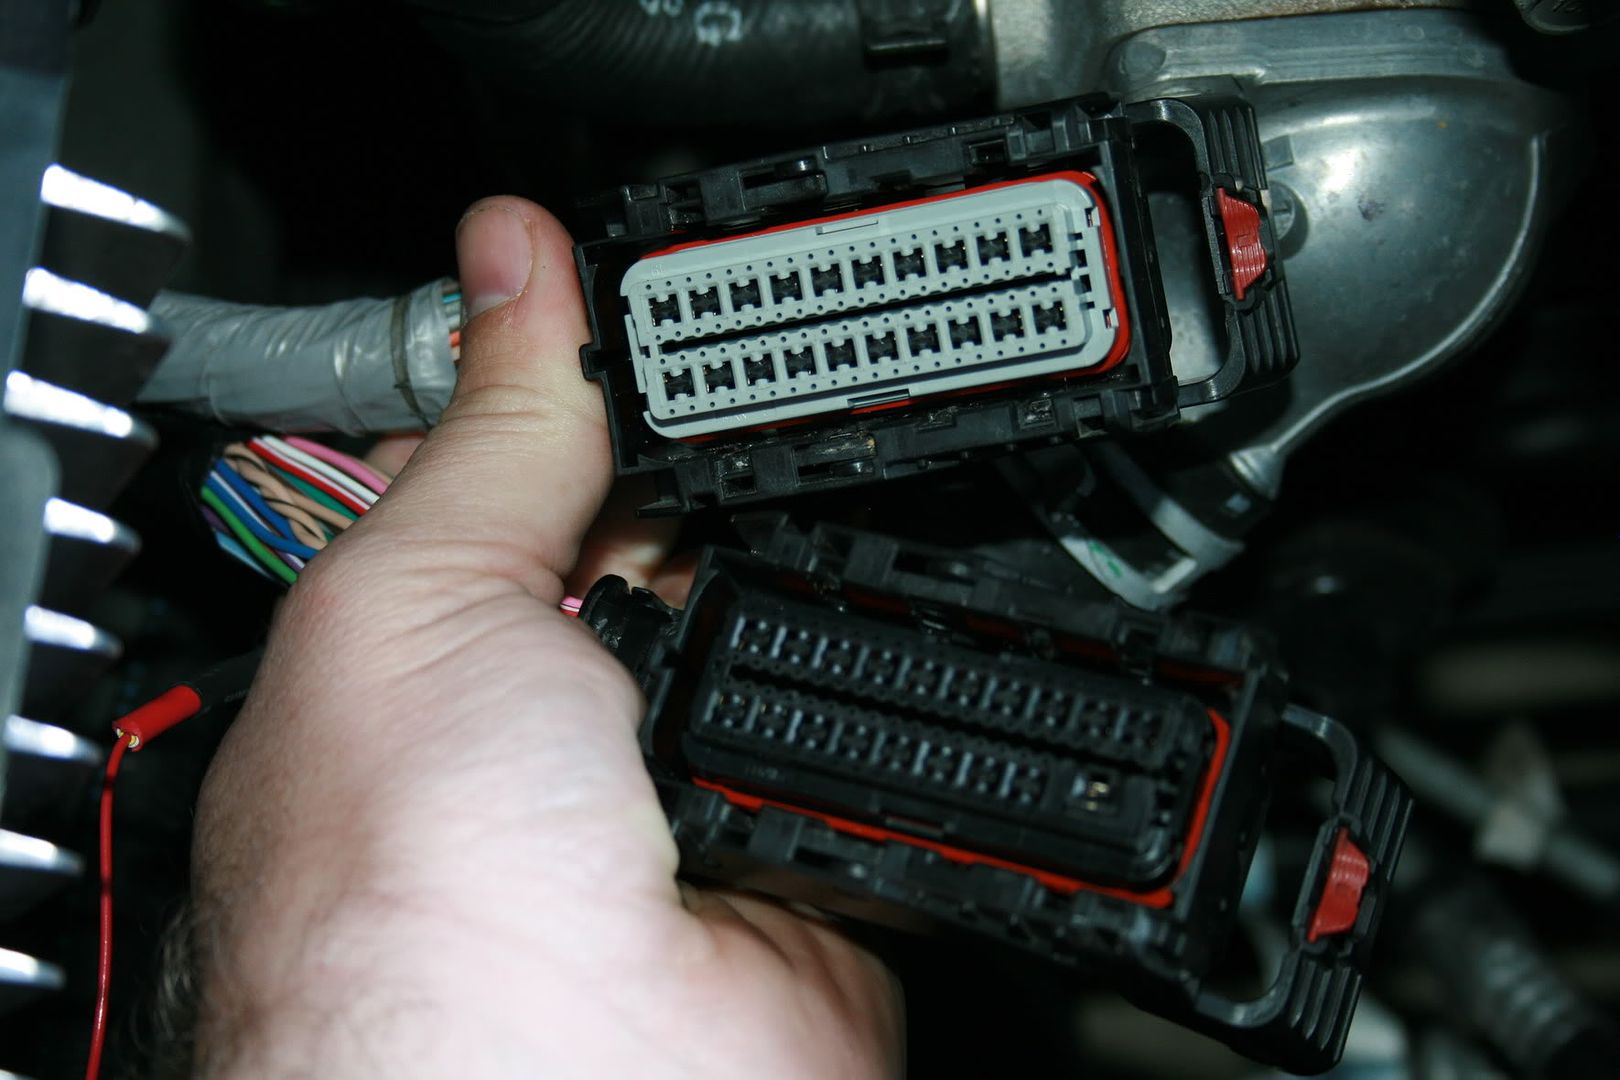 Remove the black plastic cover. it is held on by a tab on either side of the connector. 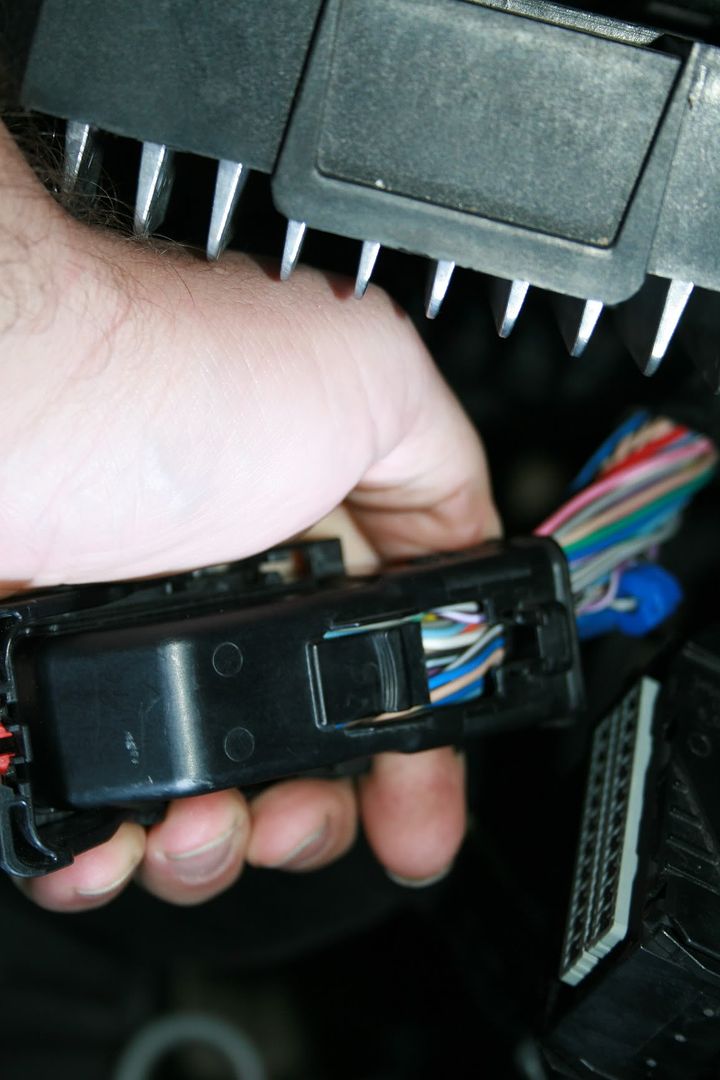 Now take X1, what you are looking for is Pin 71. It is a Gray w/black stripe wire. This is your VSS Signal wire. 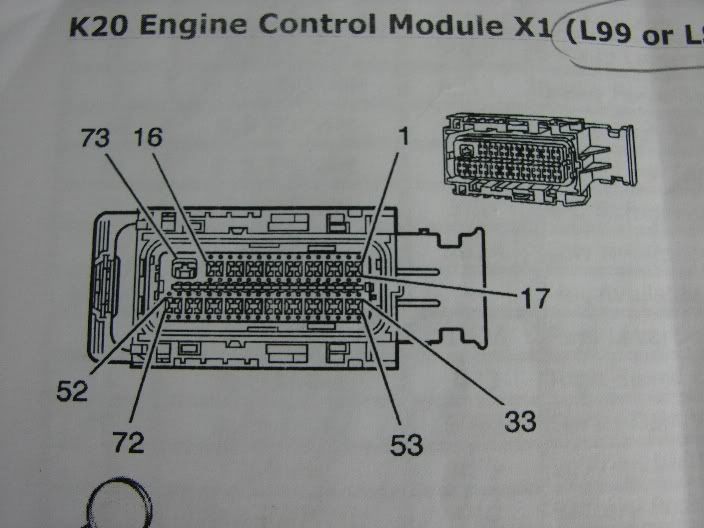 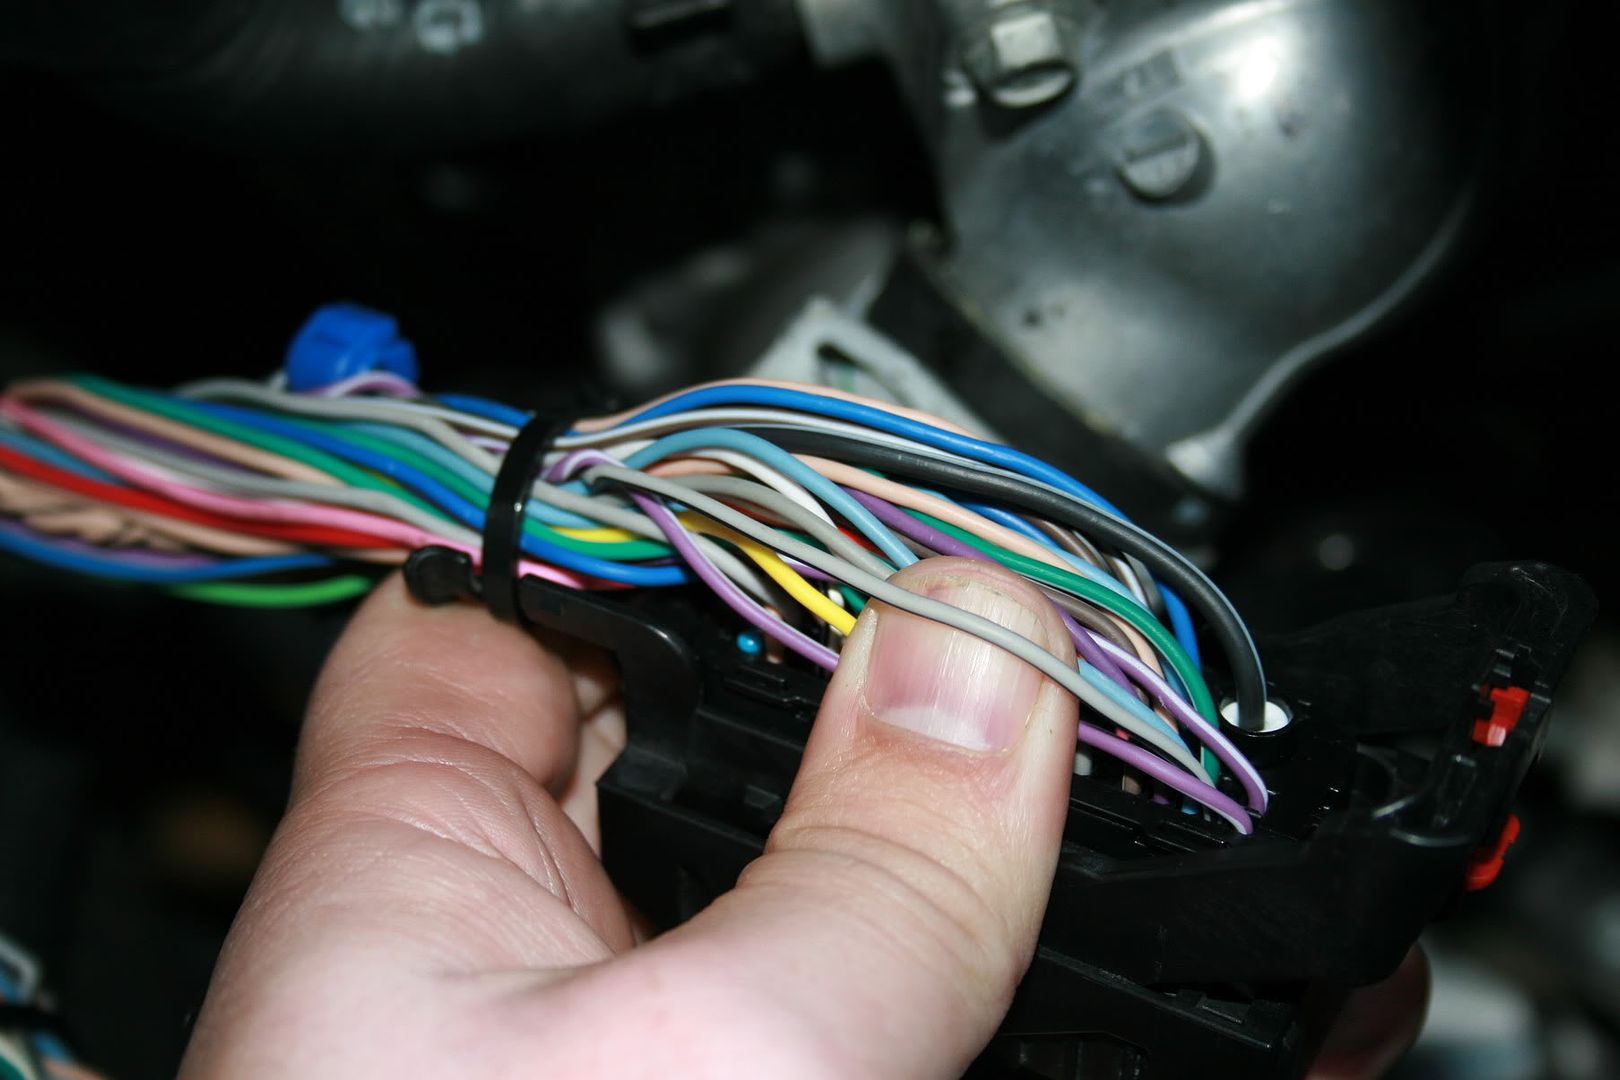 Using a 16-14 gauge T-Tap attach your white wire to here. 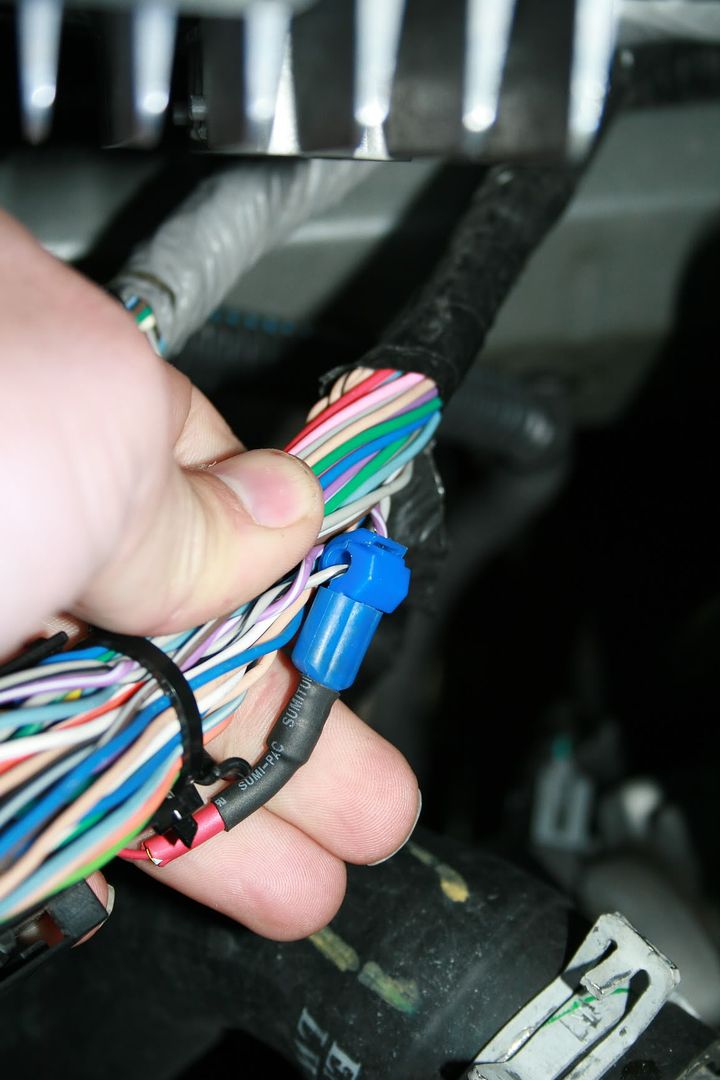 Now for the X2 Connector You are looking for Pin 20. It is a tan wire. Located here.  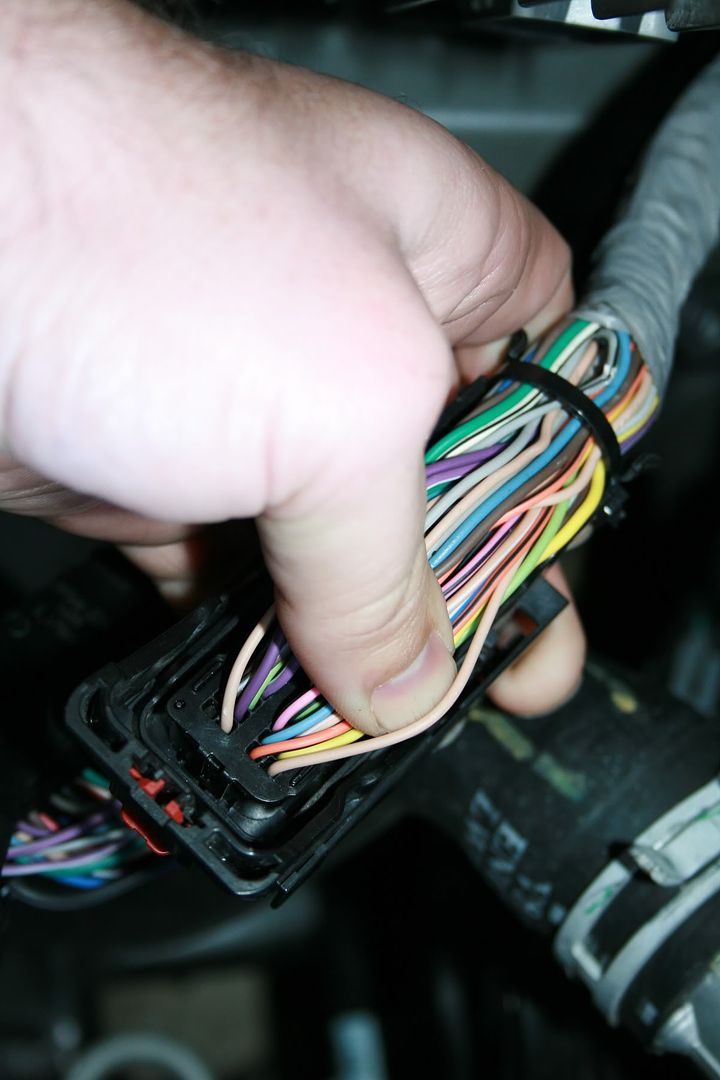 repeat what you did for X1 here. Almost done. replace the 2 black plastic covers on the connectors. Then reinsert the connectors into the PCM. Once everything is back together is should look similar to this. 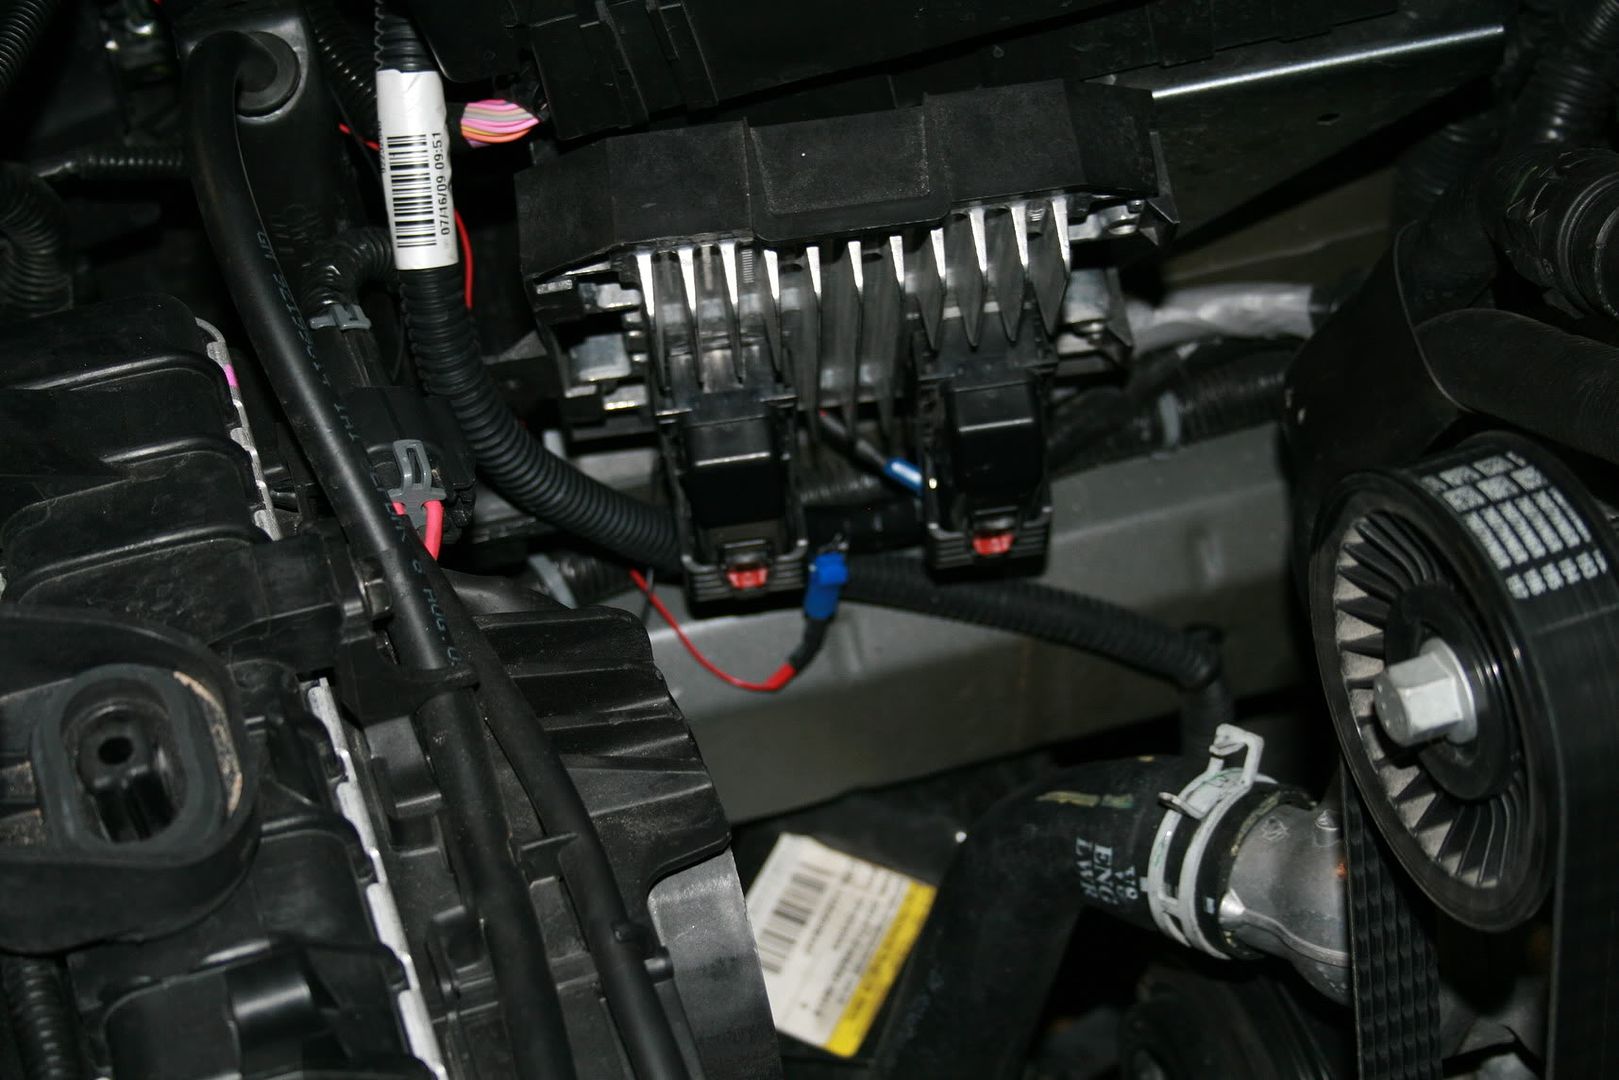 I would advise using the covers supplied with the light.. as at night the Red LED lights are very blinding without the cover.. with the cover on it is still very visible but doesn't light the whole cab of the car up. couple of pics with the cover light on 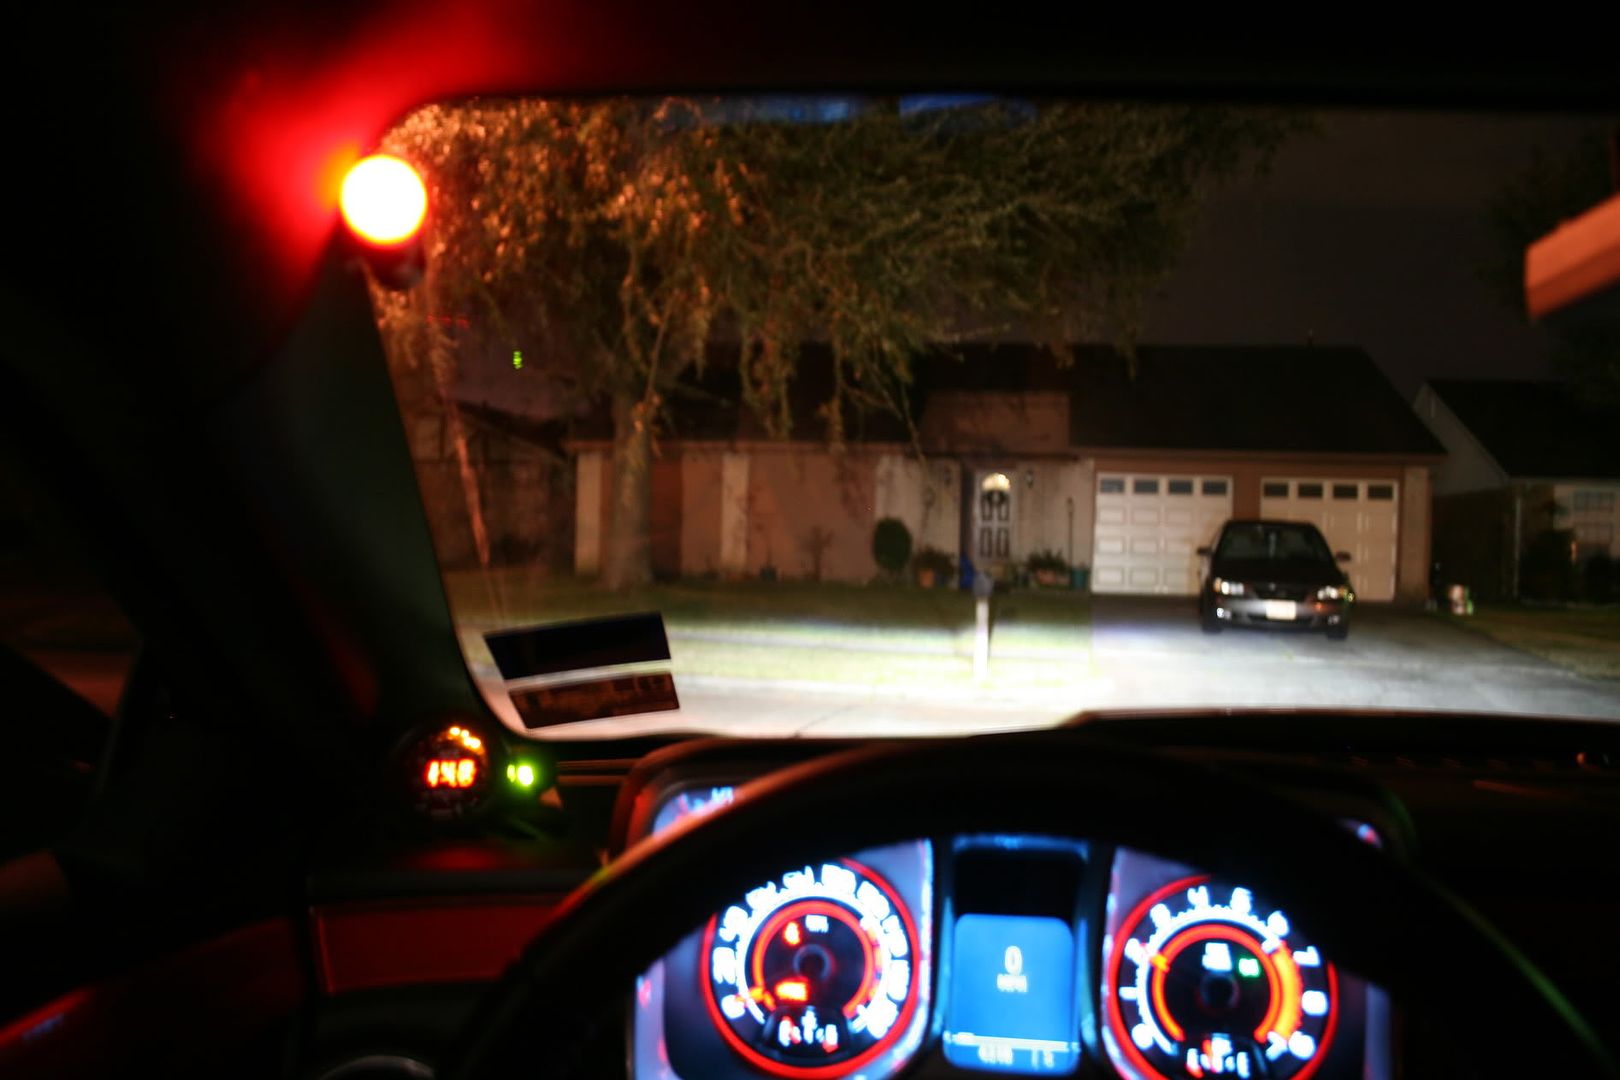 With out the cover on 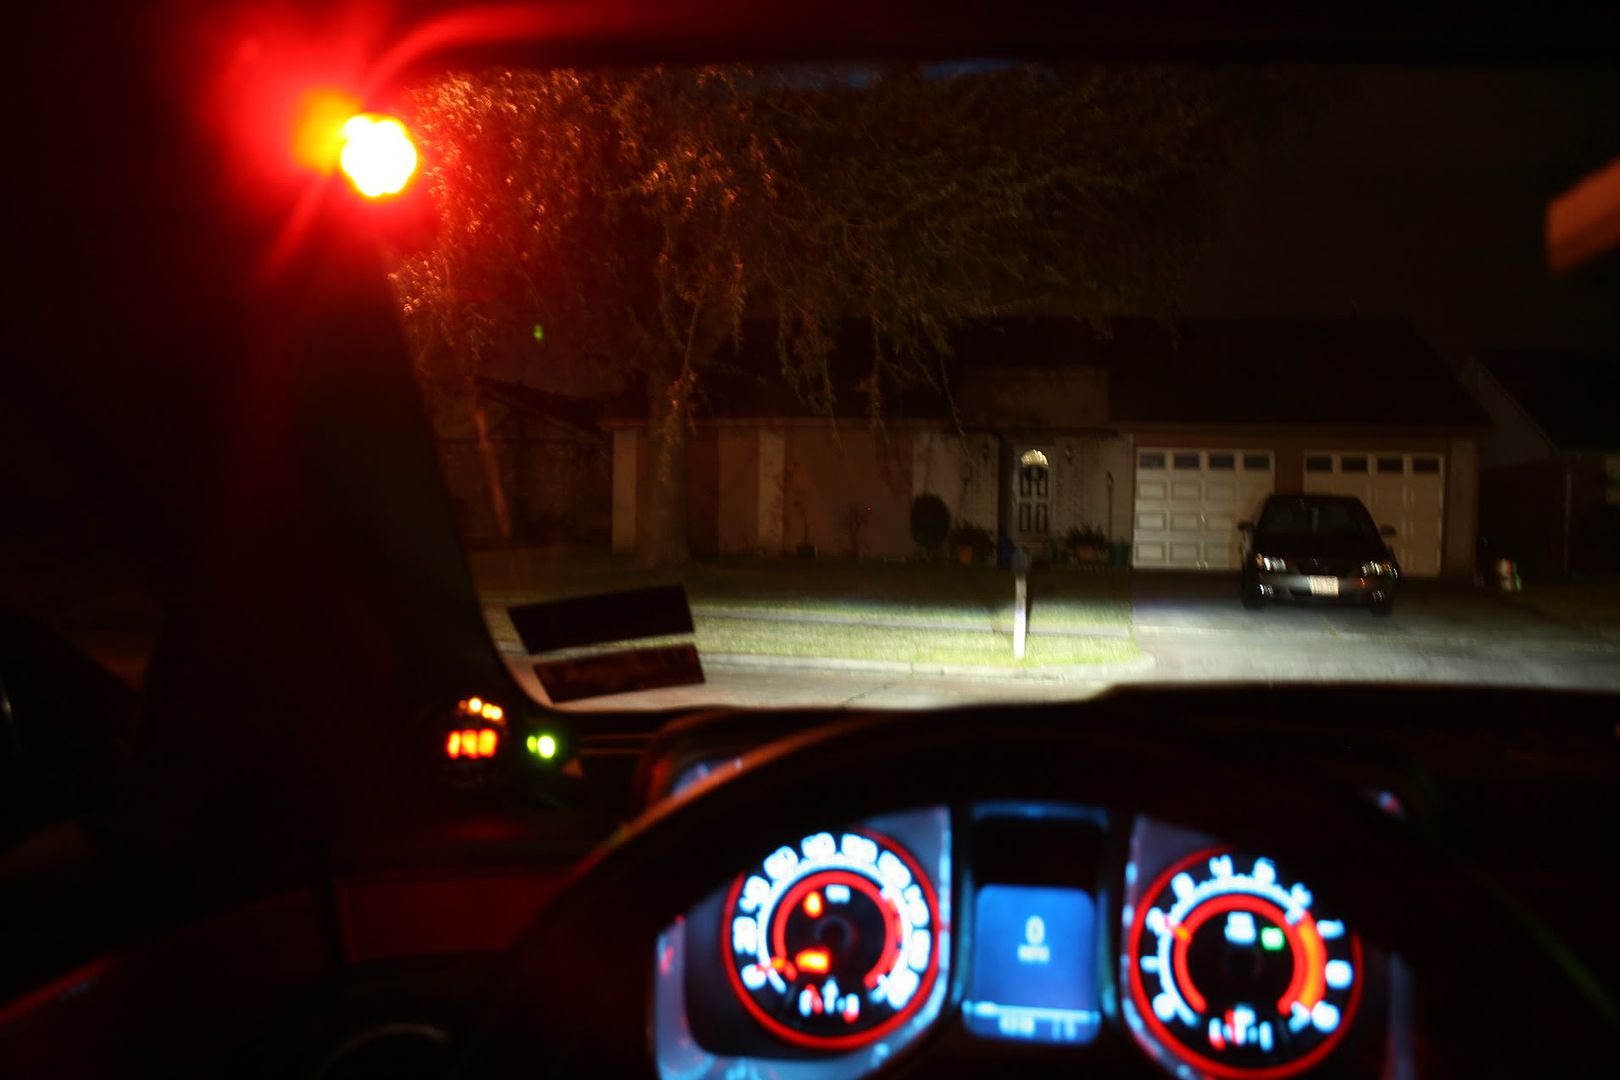 I hope this helps everyone is trying to figure out what wire goes where, with installing a Raptor Shift Light. Daniel..... 
__________________
|

|

|
|
01-13-2010, 11:39 PM
|
#2 |

Drives: 2014 Z/28 #82+#192, 18ZLE 66Nova Join Date: Oct 2008
Location: By the lake in AZ
Posts: 15,719
|
Nice work i was hoping some one did this now i can order the light.
Thank you. |
|
|
|
|
01-14-2010, 01:24 AM
|
#3 |
|
Account Suspended
Drives: 4 wheels Join Date: Mar 2009
Location: Here
Posts: 1,404
|
finally,finally.....Black10 will also be happy someone finally found the answer to this question!
|
|
|
|
|
01-14-2010, 07:01 AM
|
#4 |
        
Drives: 2010 CAMARO. 10.04@133mph, 1.4 60' Join Date: Jul 2009
Location: Lafayette, Louisiana
Posts: 4,585
|
THANKYOU!!!!!!!!!!!!!!!!!!!!!!!!!!!!!!!!!!!!!!!!!! !!
|
|
|
|
|
01-14-2010, 07:54 AM
|
#5 | ||||
|
Truth Enforcer

Drives: anything I can get my hands on Join Date: Sep 2006
Location: anywhere and everywhere
Posts: 22,797
 |
Nice writeup.
__________________
Never race anything you can't afford to light on fire and push off a cliff
A group as a whole tends to be smarter than the smartest person in that group until one jackass convinces everyone otherwise. Quote:
 Quote:
Quote:
|
||||
|
|
|
|
01-14-2010, 02:33 PM
|
#6 |
|
SoCal Mayhem

Drives: 2010 Camaro 1SS/RS Join Date: Aug 2008
Location: Foothill Ranch, CA
Posts: 5,488
|
Thanks for the write up
 I know what I'll be doing this weekend. I know what I'll be doing this weekend.
__________________
 |
|
|
|
|
01-15-2010, 11:17 AM
|
#7 |
 Drives: 2008 Corvette Join Date: Jul 2009
Location: Pikeville, KY
Posts: 126
|
Very nice writeup.
|
|
|
|
|
01-15-2010, 03:47 PM
|
#8 |
|
|
Thanks guys...
__________________
|
|
|
|
|
01-16-2010, 05:45 PM
|
#9 |
|
Drives: 2010 CAMARO. 10.04@133mph, 1.4 60' Join Date: Jul 2009
Location: Lafayette, Louisiana
Posts: 4,585
|
BTW- LS3 or L99, set shift light to "1 cylinder" mode (reads off injector wire).
|
|
|
|
|
01-16-2010, 06:48 PM
|
#10 |

Drives: 10 LT2/RS-08 SILVERADO-05 COBALT Join Date: Jun 2009
Location: OHIO
Posts: 929
|
 Hat. Thunderss. What is the other gauge on your dash? Hat. Thunderss. What is the other gauge on your dash? Cool write up. Thanks for the info.  
__________________
 Retired |
|
|
|
|
01-17-2010, 01:00 AM
|
#11 | |
|
|
Quote:
the only way to accuratley dial in your A/F when tuning. you want your A/F around 12.7 @ WOT. and to run 14.7 when cruising.. It lets me see what the computer is doing while driving.. More than once I have caught a problem, before it became a major problem by noticing the PCM was pulling fuel.
__________________
|
|
|
|
|
|
01-30-2010, 11:52 AM
|
#12 |
 
Drives: 2010 Camaro Join Date: Jul 2009
Location: Long Island
Posts: 244
|
Nice wirte up and install. . .
I just hooked my shift light up, its not the dual mode. I used the signal from injector 7 control and the light will blink every time I blip the throttle and also intermittenly at low RPM's. It will also light and stay lit when the desired RPM is hit. Do you have this problem? I called raptor and they said they saw this happen on 350Z's and a few other cars. They now are sending me somthing so I can hook the light up to a coil control wire.
__________________
Mods: TVS2300, 3.2 pulley, American Racing Headers, Custom Cam, Coil Overs, Tuned for E85, 610RWHP* 570RWTQ
Follow me on Twitter www.e85lsx.com  |
|
|
|
|
02-21-2010, 03:56 PM
|
#13 | |
|
Drives: 2010 CAMARO. 10.04@133mph, 1.4 60' Join Date: Jul 2009
Location: Lafayette, Louisiana
Posts: 4,585
|
Quote:
please keep us updated |
|
|
|
|
|
03-01-2010, 08:24 PM
|
#14 |
|
Drives: 2010 Camaro Join Date: Jul 2009
Location: Long Island
Posts: 244
|
The light can not use an injector for its signal. The injectors somtimes fire multiple times per cyl event and this will cause the problems.
You have to use a coil control wire for the signal. A voltage amplifier has to be used as well because the coil control is very low voltage. Call Raptor and they shuld send you the voltage amplifer for free then use any one of the coil control wires. Raptor should comment here and take care of everybody who already bought the light as they did for me. They really should send the voltage amplifier to you for free.
__________________
Mods: TVS2300, 3.2 pulley, American Racing Headers, Custom Cam, Coil Overs, Tuned for E85, 610RWHP* 570RWTQ
Follow me on Twitter www.e85lsx.com |
|
|
|
|
|
|
|
 |
|
|
 Similar Threads
|
||||
| Thread | Thread Starter | Forum | Replies | Last Post |
| Manual shift - 1-4 ? | calflan | V8 and V6 Transmissions / Driveline (6L80 / 6L50 / TR6060 / AY6) | 27 | 01-19-2015 10:39 PM |
| Super Sale on Raptor Shift Lights @ KY SPEED | FRCBobby | Audio / Visual / Electronics/ Gauges / Nav | 44 | 11-25-2011 10:34 AM |
| Speed inc. skip shift harness installed | Ringo | V8 and V6 Transmissions / Driveline (6L80 / 6L50 / TR6060 / AY6) | 8 | 09-21-2009 02:21 PM |
| Anybody get a shift light yet. what brand? | mstrfdsstr | Dragstrip and Launch Techniques Discussion | 2 | 09-20-2009 06:38 PM |


