You are browsing camaro5 

|
 04-04-2013, 06:59 PM
|
#1 |
 
Drives: SS, CTS & SRT-4 Join Date: Aug 2009
Location: Pittsburgh
Posts: 427
|
Had these pieces of functional art sitting at my door when I came home today.
I can't tell you how good the quality is. Almost feel bad hiding them under a strut tower... I'll be updating this thread with a step-by-step walk-through of the installation process, so check bad for pictures of cars, tools & empty beer cans. Thanks Pete!   So finally made some time to get this project started:  For a reference, I used the Pedders' installation manual for their coilovers to disassemble everything properly, and Wretched Rob offered his advice too. Thanks Rob! You can find the Pedders' manual here: Pedder's Coilover Manual First thing to do is remove adjustment knob on top by loosening the retaining nut directly below it (Rob assured me I wouldn't break it. Other coilovers I had never had the retaining nut. I was scared...):  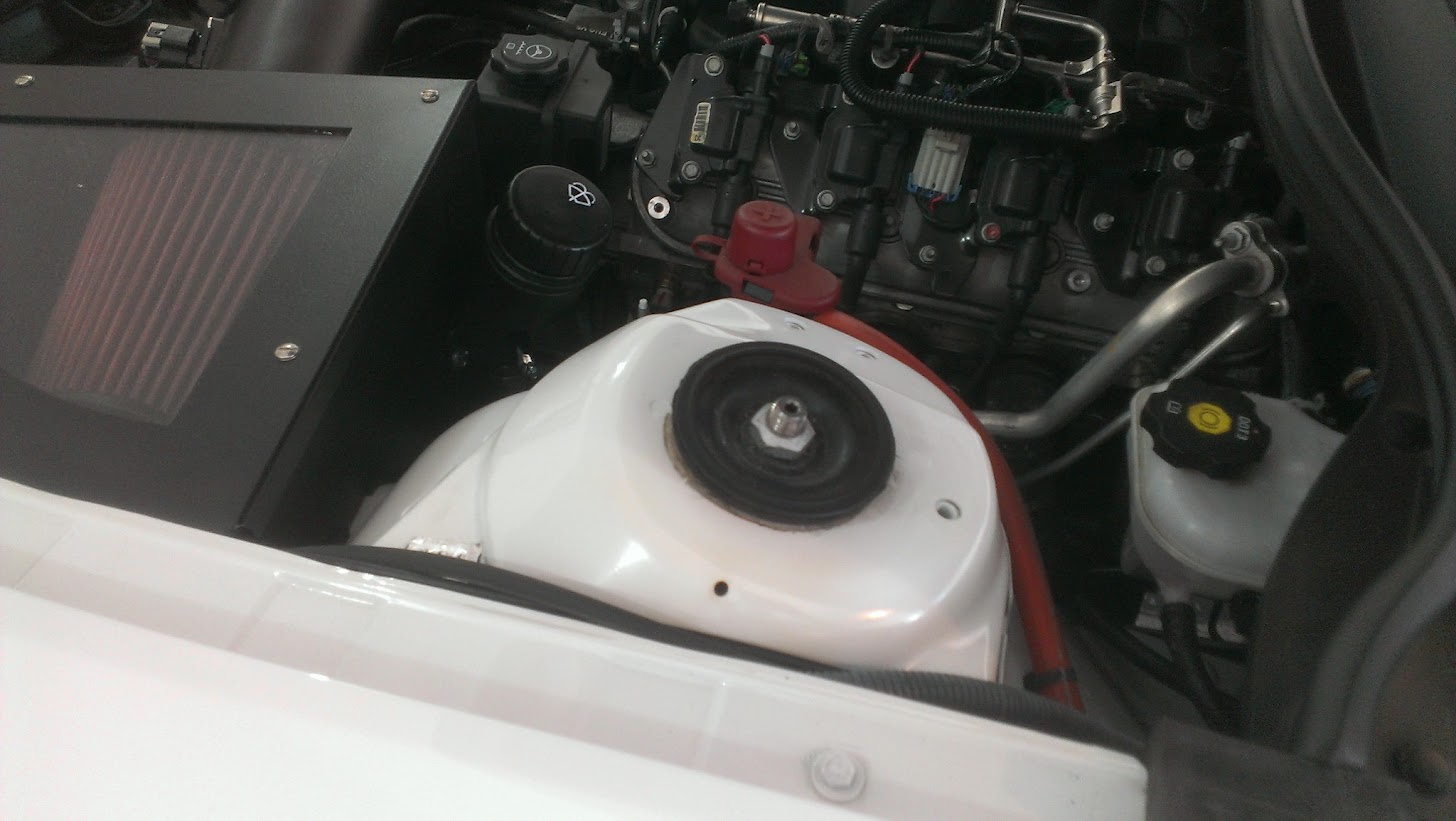 Next, loosen the strut's top nut. I already had car on stands with the wheels off, so I used the jack to create a little pressure on the strut to keep the shaft from spinning:  When removing the sway bars, I highly recommend using another wrench to secure the back of the threaded post of the end-link. I try to avoid using the allen wrenches whenever possible:  Again, I used the jack on the sway bar to relieve some tension from the end-link so they would slide right out:  Before I removed the clevis bolts and dropped the strut by removing the top nut, I lowered the perch to free the spring and remove pressure on the stut's top hat. Wipe the threads on the strut down so there's not any debris that could get caught in the rings. I made sure to measure everything before I loosened it, so I wouldn't mess up the alignment by Back Street Performance ( gratuitous plug... ) I also removed the two 10mm bolts holding the brake line & the ABS wire:  Used a spare jack stand to support the assemble after I removed the strut: 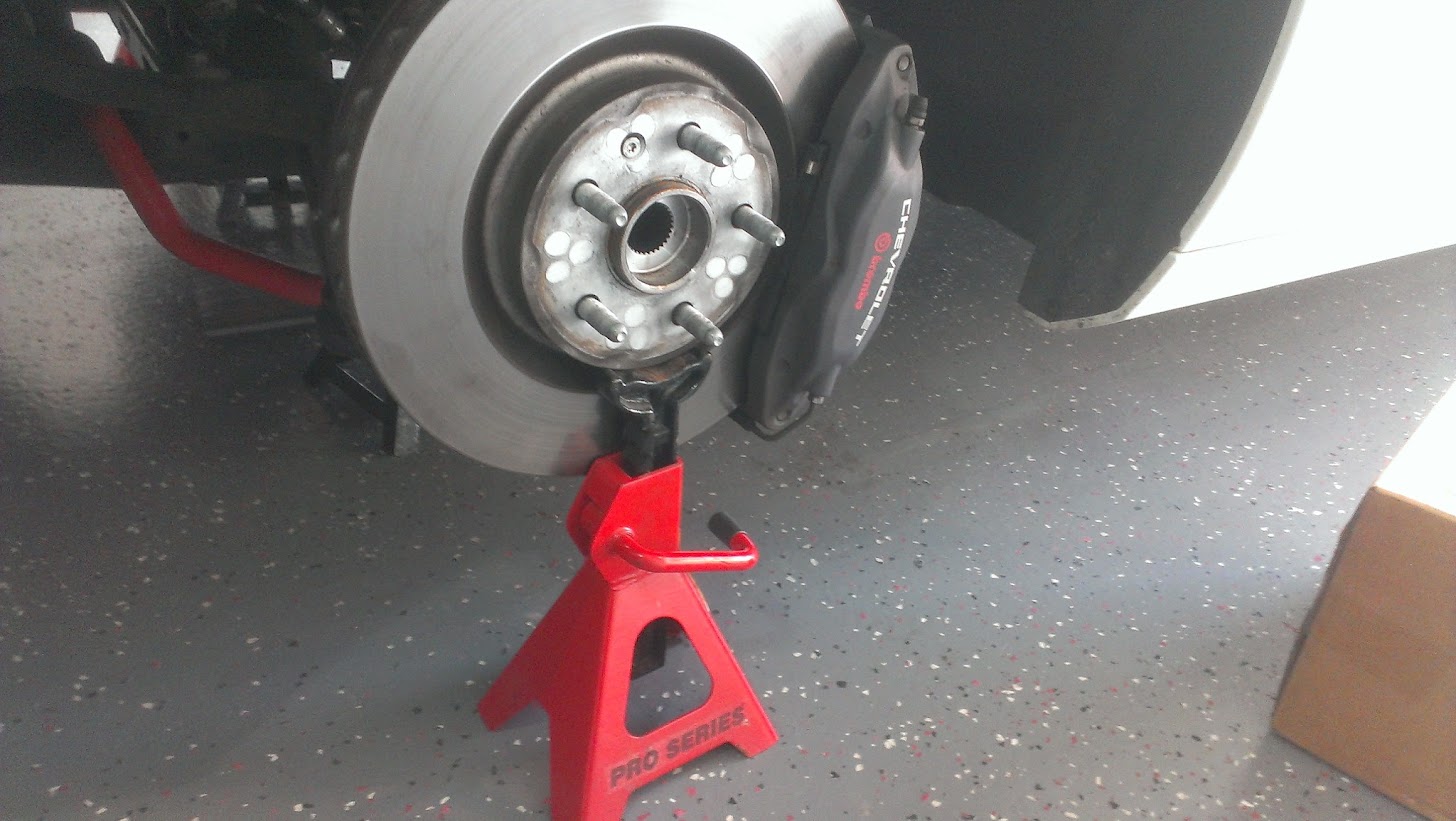 I like to put bolts back in where they came from after I remove parts so I know exactly where everything goes and so you don't have any "Oh, shit... Where did that go?" moments:  Once out, I cleaned them up:  I then cleaned the towers, top and bottom, from any dirt & goo that had found its way up there:   Sorry I didn't get a picture of removing the strut's top hat. I couldn't work the camera and use 2 hands... I got the top nut off by laying the strut on its side (on cardboard, as not to scratch or mar) and standing on the end with one foot. If you stand on the side that you're turning towards, you can wedge it between your foot and floor, so you can get some torque on the nut. After your remove the old rubbery top hat, replace it with the new & improved one. Remember: Rubber is for condoms, not suspension joints:  Again, I'm sorry for not getting pics of this next process, but I either need a third hand or an unbelievably patient girlfriend. After I aligned the plates from the top, I marked the tower itself on where the plated alignment marking lined up, and I marked a lower spot on the plate itself, again in line with the alignment mark. I then placed the plate beneath the tower and used C-Clamps to hold it in place. I used the mark on the tower and the mark on the lower portion of the plate to align it. I then drilled from the bottom up (used safety glasses). It was more time consuming, but it paid off. I was able to make sure my pilot holes were dead center when I drilled. On top of that, to really show off my OCD, the bolts are 5/16", and I only drilled the holes to 1/4". I then used a round file to open up the holes to exactly match the plates. If you choose to use this technique, don't do what I did and scratch the tower with the file... Still hating myself for that: 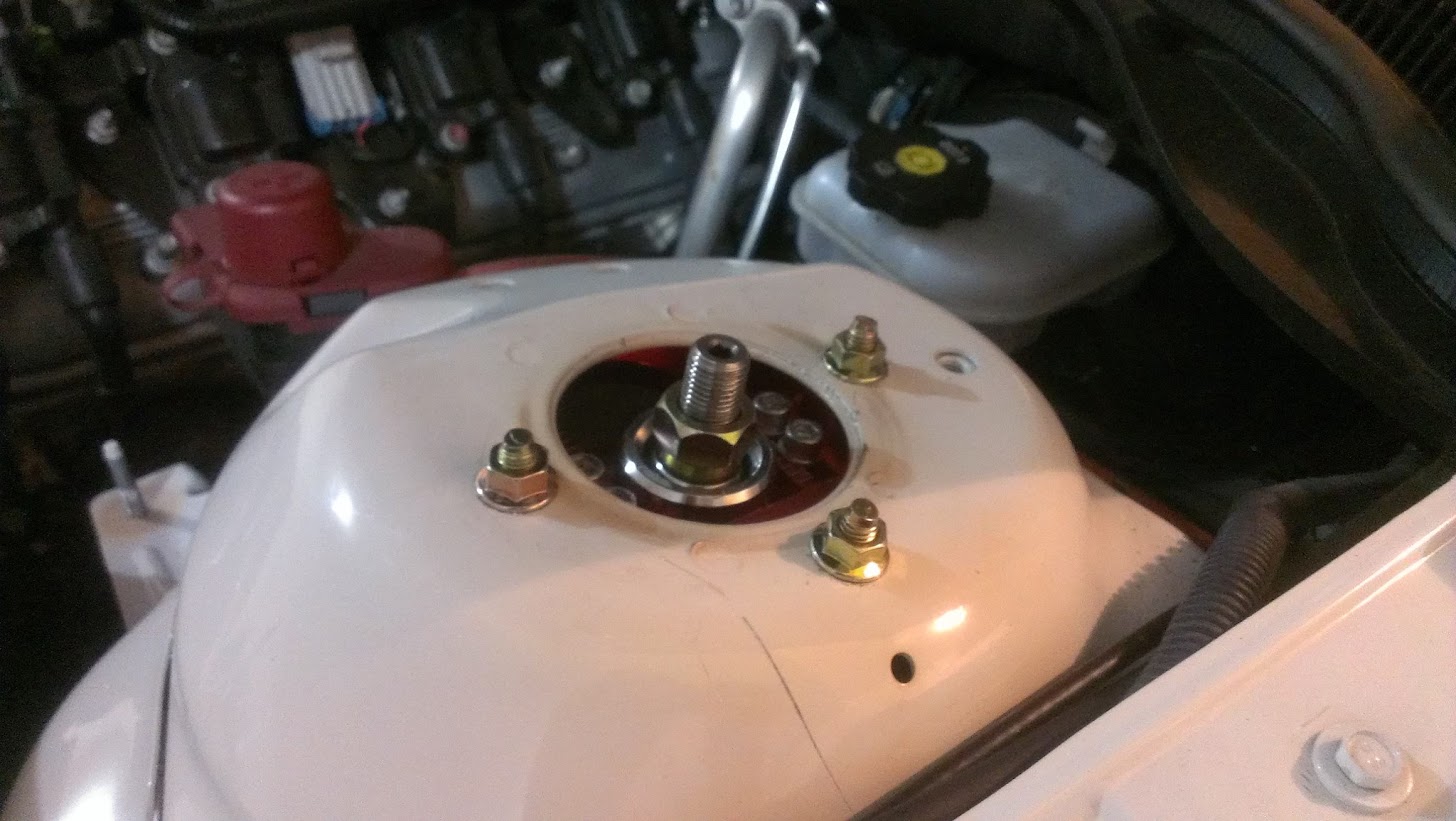 I got everything mocked fit last night, and I plan on torquing everything down tonight. Thanks again to Pete @ Pedders, Rich @ Back Street, & Rob @ Wretched for all the amazing parts and assistance!
__________________
Last edited by Stitch; 04-18-2013 at 09:32 AM. Reason: Updated with installation |

|

|
|
04-04-2013, 07:21 PM
|
#2 |
|
Drives: His Wife Crazy Join Date: Jan 2008
Location: Silas Deane Auto,CT Name: Rob Anderson
Posts: 1,789
|
Let us know how it goes, if you have any questions feel free to ask.
|
|
|
|
|
04-04-2013, 08:46 PM
|
#3 |
  Drives: 2010 SS RS Join Date: Apr 2009
Location: Honolulu, Hawaii
Posts: 930
|
I would suggest flipping the washer on the hex head screws so the stamping faces up. This will minimize the washer from cutting into the plate when you tighten them. I thought about it afterwards and got ring marks.
|
|
|
|
|
04-05-2013, 12:12 AM
|
#4 | ||

Drives: Camaro Justice Join Date: Jun 2007
Location: Virginia
Posts: 20,174
|
Quote:
Quote:
|
||
|
|
|
|
04-05-2013, 05:12 AM
|
#5 | |
|
Drives: 2010 SS RS Join Date: Apr 2009
Location: Honolulu, Hawaii
Posts: 930
|
Quote:
 Running a conservative -0.8* for street. Inbound 5 notches so around -2* for AutoX. Added camber helped steering and tire roll-over. Running the same staggered setup with 275/40 315/35 NT05 at 45psi. I need better tires and a stiffer rear bar to address staggered setup. Better driving skills would help, too. As they say, leave ego at the door and have fun. Stitch, double check the center punch marks. I was a little off and had to slightly grind out a hole for the stud to clear. No regrets. |
|
|
|
|
|
04-05-2013, 09:22 AM
|
#6 | |
|
Drives: SS, CTS & SRT-4 Join Date: Aug 2009
Location: Pittsburgh
Posts: 427
|
Quote:
Pete, would there be any downside to turning the washers over? I would think the teeth are intended to be there for a reason. I'd rather my strut stay where I put it and have a couple marks. Function over form.
__________________
|
|
|
|
|
|
04-05-2013, 12:36 PM
|
#7 |
|
Drives: Camaro Justice Join Date: Jun 2007
Location: Virginia
Posts: 20,174
|
None at all. You guys get the pretty red ones. I have only used the bare aluminum. Turn them over :-)
|
|
|
|
|
04-05-2013, 01:36 PM
|
#8 | |
|
Drives: SS, CTS & SRT-4 Join Date: Aug 2009
Location: Pittsburgh
Posts: 427
|
Quote:
Thanks Pete!
__________________
|
|
|
|
|
|
04-05-2013, 08:25 PM
|
#9 |

|
How long did you have to wait? Mine have been on order for over a week, normally my pedders orders are 2-3 days since I live in Texas.
|
|
|
|
|
04-12-2013, 11:49 AM
|
#10 |
|
Drives: SS, CTS & SRT-4 Join Date: Aug 2009
Location: Pittsburgh
Posts: 427
|
Sorry for the delay in updates, had to wait for my spanner wrenches. They came in yesterday, so hopefully I'll be able to get this completed this weekend.
__________________
|
|
|
|
|
04-13-2013, 12:12 AM
|
#11 |
|
Drives: Camaro Justice Join Date: Jun 2007
Location: Virginia
Posts: 20,174
|
We completed a 1LE with Dual Bearing Camber Plates, Supercars, 32mm 1LE Rear Balance Bar, Radius and Sub-Frame bushes. It came out rather well. I'll get details posted soon.
|
|
|
|
|
04-13-2013, 10:47 AM
|
#12 |
 Drives: Black Camaro 2SS/RS 1LE Join Date: Jun 2011
Location: Belleville, Ontario, Canada
Posts: 1,145
|
Sort of a thread hijack but......what does these camber plates do exactly? Do they allow the user to customize the amount the tire "angles in"? These are designed for people who track/autocross frequently? They are pretty

|
|
|
|
|
04-13-2013, 12:57 PM
|
#13 |
 Drives: wife says to many Join Date: Feb 2012
Location: Medina Oh
Posts: 65
|
Let me know if you want some help with them.
|
|
|
|
|
04-14-2013, 10:35 AM
|
#14 |
Drives: One of the baddest handling Gen 5s Join Date: Feb 2011
Location: Masachusetts
Posts: 4,177
|
Installed mine and they also help with breaking, firmer steering with way more precision and very stable under very hard braking as well as offer camber settings that is out of this world. I did however install them for caster adjustments though. Car tracks very very very well and is very firm. Now I ask , do Camaros have sloppy steering, hmmmmm I forgot what that is
 . .
|
|
|
|
|
|
|
|
 |
|
|


