You are browsing camaro5 

|
 08-01-2013, 01:20 AM
|
#1 | |
      Drives: 2011 Camaro LS Join Date: Sep 2008
Location: NJ
Posts: 1,917
|
engine bay question
So I watched this video from Adams:
She has a stock Camaro so she doesn't tape or cover anything up. I have a v6 with a K&N CAI so I know I need to cover that but is there anything else that should be covered or am I good to go with just covering up the CAI? I haven't cleaned this bay in the 2.5 yrs I've owned the car and I have 60k miles on it being my DD so it is filthy and needs to be cleaned. |
|

|

|
|
08-01-2013, 02:00 AM
|
#2 |
|
Adan

Drives: 2013 Hot Wheels edition V6 Join Date: May 2013
Location: United States
Posts: 136
|
I did almost exactly what the video showed with no issues with water. BUT, they don't tell you about water spots. Make sure to blow out the water and/or dry it with old towels and run the engine (with the hood closed) to dry it out.
|
|
|
|
|
08-01-2013, 05:57 AM
|
#3 |
     
|
I cover my CAI and fuse box. Fuse box probably isn't 100% necessary, but it makes me feel better.
__________________
[B]
 |
|
|
|
|
08-01-2013, 06:02 AM
|
#4 |

Drives: 1968 Coupe, 2010 2SS, 2011 2SS/RS Join Date: Oct 2011
Location: WIsconsin
Posts: 1,252
|
I wouldn't recommend running the engine right away. I would suggest cleaning and drying as follows: Get some plastic grocery bags and wrap anything electric. Battery terminal, fuse box, intake filter etc. Lightly soak engine bay followed by APC on foam setting. Then use a boars hair brush to agitate the APC over the engine and all reachable areas. Rinse the bay and inspect. If not all clean, reapply APC and brush accordingly, rinse again. (sounds like a shampoo bottle)
Once you're satisfied that the bay is clean, blow dry with an electric leaf blower to get the big pools of water. Remove bags and blow dry again. From there I will still spot clean with a Waterless Wash to avoid any remaining water spots and to clean the areas that were covered by the bags while the engine bay is cool. I also dress anything black in the bay with SVRT. From there out each time I wash the car, I inspect to see if it needs to be dusted off and use The Waterless Wash to keep it clean. VRT as needed Hope that helps.
__________________
 |
|
|
|
|
08-01-2013, 11:45 AM
|
#5 |
|
Drives: 2011 Camaro LS Join Date: Sep 2008
Location: NJ
Posts: 1,917
|
WiSSDiver that helps a lot, thanks!
|
|
|
|
|
08-01-2013, 11:46 AM
|
#6 | |
|
|
Quote:
My process is the same wash process but then I let the engine idle while I was the car. I feel the heat helps dry the bay. Then I just go in an WW wipe down for spotting and finish drying. I know nothing mechanically so if there's a reason why this is bad, I'm genuinely asking.
__________________
[B]
|
|
|
|
|
|
08-02-2013, 10:02 PM
|
#7 |
|
Drives: 1968 Coupe, 2010 2SS, 2011 2SS/RS Join Date: Oct 2011
Location: WIsconsin
Posts: 1,252
|
I don't personally like the way the engine drys the area because any remaining water still on the engine slings up into the area I just cleaned. Also I think it causes any water that stays around to spot more and because of the heat From the engine, dries quicker and to me it's harder to remove a heat dried water spot.
I prefer to remove the water with the leaf blower, blowing everything down toward the ground and it seems to work better than running the car.
__________________
|
|
|
|
|
08-03-2013, 02:08 PM
|
#8 | |
|
LongTimeLurker

Drives: 2011 SIM 2SS/RS Convertible L99 Join Date: Dec 2012
Location: Napanee, Ontario
Posts: 434
|
Quote:
I had a craftsman shop vac knock off that was a HORRIBLE vacuum! It sux'd at sucking! No good for vacuuming up hair or fine dirt from carpets. I have since replaced it with a Pro Series Shop Vac, but my craftsman vac is now a DEDICATED blowing machine and its A LOT easier to use then a leaf blower! I find that I am using this more and more. I don't use it to DRY my car. I will use a drying MF towel(s) to dry the car but before a show or a meet I will use it to blow out the license plate area, all the lights and side markers, door handles, front grill area, the rear spoiler area, the side mirrors, the rims and especially the lug nut areas. Also there is nothing worse then washing the car, then drying it with a MF towel and then adding wax only to have small wet spots around the car when you are laying down wax and hit water with the wax sponge. This year I just happened to be up early at lot on the weekends and passed by a lot of yard sales, I see people selling old vacuums for as little as like $5-$10, again they are so much easier to use then a leaf blower.
__________________
2011 2SS/RS  |
|
|
|
|
|
08-05-2013, 07:32 AM
|
#9 |
|
Drives: 1968 Coupe, 2010 2SS, 2011 2SS/RS Join Date: Oct 2011
Location: WIsconsin
Posts: 1,252
|
Thanks for the suggestion Mayhem.
For me I'm not going to bother cleaning out my vac every time I want to blow dry the engine. Besides, I do want that kind of power to get rid of what a can't reach or could reach with a vac hose. Add to that the thought of stretching the vac hose over the front bumper or fenders to get all the water thst gets trapped in there and that's just a scratch waiting to happen. I'll stick with the leaf blower after every wash, it hasn't let me down yet.
__________________
|
|
|
|
|
08-05-2013, 09:45 AM
|
#10 |

Drives: The shiny ones. Join Date: Mar 2010
Location: In the detail shop!
Posts: 5,979
|
Covering an exposed element air filter is all that's really necessary. Weather-pak electrical connectors have been used for years and are perfectly water tight.
Two no-nos when washing an engine bay:

|
|
|
|
|
08-06-2013, 10:43 AM
|
#11 | |

Drives: 2016 Garnet Red 2SS Join Date: Feb 2012
Location: Upstate NY
Posts: 723
|
Quote:
__________________
 |
|
|
|
|
|
08-06-2013, 12:28 PM
|
#12 |

Drives: 2010 Camaro SS, 2018 Colorado Join Date: Nov 2009
Location: NC
Posts: 2,207
|
That car was a V8.
|
|
|
|
|
08-06-2013, 02:12 PM
|
#13 | |
|
Drives: The shiny ones. Join Date: Mar 2010
Location: In the detail shop!
Posts: 5,979
|
Quote:
|
|
|
|
|
|
08-06-2013, 04:56 PM
|
#14 |
|
LongTimeLurker
Drives: 2011 SIM 2SS/RS Convertible L99 Join Date: Dec 2012
Location: Napanee, Ontario
Posts: 434
|
Monday we had a local car show. My friend Dave has a 2010 LT1 V6 Camaro. He takes pretty good care of his car but he has never detailed or cleaned his engine bay before. Sure he wipes some stuff off the plastic covers, like the air filter box, the engine cover and the fuse box. He basically gives it the minute rice wipe down. I thought I would do a write up for people who have not done a engine bay clean up/detailing before. Mind you, in this case engine bay area is absolutely filthy! I am sure Junkman would likely refuse to even work on it at this state!
 A few weeks ago we were talking and I offered to detail his engine bay. I told him It would likely take me a few passes to get it up to a level where he won't be embarrassed to lift the hood at the car show. These are the before and after photos. The after photo's really don't do it justice. It was basically filthy when I got it Monday morning. The background. Dave LOVES his Camaro. Dave's Camaro is what inspired me to buy MY camaro. He and I have been friends for almost 20 years. He has a fairly early run of the 2010 Camaros, most people with in about 100 miles likely consider this one of the first camaros anyone saw. The camaro is a DD, its not covered and its not garaged. His house has a garage, but the camaro just won't fit. Trust me, there are 200 other houses in our neighborhood and the only car that is in a garage is a smart car!! He would if he could! The car has 51,000km (approx 31,000 miles), the car has never been truly detailed before. It's never been waxed, sealed or glazed. He basically hand washes it and use a very nice drying towel. He has never really detailed/cleaned the rims or dressed the rubber before. The interior is in excellent condition. The big issues for Dave's car are engine bay, wheels and wheel well areas, paint and finally the ****in disaster of an oiling/UNDERCOATING job the dealer did to his poor car!! When Dave bought the the dealer sold him and undercoating package and some special magical unicorn and dragon piss paint protection package. The dealer told Dave that he does not even need to use soap to wash his car! just use water and a wash mit!! Then to top it all off he told Dave that he will NEVER need to wax his car! Dave is an older guy, and when someone with somewhat of authority or expertise tells him something, he is from the generation that tends to assume these dick heads know what they are talking about. Thank goodness, Dave uses soap to wash his car. I was able to explain how soap lifts the dirty off the car and he was OK with that. It took me a while to convince Dave that using soap would not damage his magical GM Unicorn tear and dragon's piss paint protection, but he never did use wax. So, history basically out of the way. The next issue is the "undercoating". In Ontario a lot of people get what you call "rust check" or Oiling or undercoating to protect the car from winter salt. Normally I am Ok with it. Some places go a little overboard or get careless and coat the entire car. In Dave's case, and knowing some of the dealer history (basically they are ****ing lazy and unknowledged) they did a shit poor job and the oil/grease substance they use to protect the car is all over the engine area. Oh, I also have a 3 hour window! this is his car and he has shit to do, so I had to pick my battles. I explained to Dave, that I will likely need one or two more passes in the engine bay to get it to 95%. To get the car to 100% in the engine bay, Its just not realistic for either of use because there are places I just can not get to. The goal is to make the car clean, if people see GUNK, they will understand its undercoating and in places very hard if not impossible to get to. I think I got the engine bay to about 85%, good enough that Dave can now show people the engine bay and not be embarrassed about the mess under the hood. Again, I did not have the whole day, but only 3 hours to do the entire car. I spent about 30 solid minutes cleaning and scrubbing. Dave was extremely happy with the out come! He was so happy he trusted me to WAX his car!! He has turned down my offers before to wash/wax his car. THREE summers and he never let me wax his car! Wash it sure! But clear instructions DO NOT WAX it! lol, But after seeing the improvement from the engine bay he allowed me to wax the entire car top to bottom with carnuba wax (minus the vinyl stripes of course!). He knew I knew what I was doing as he has seen millions of cars being detailed in my driveway over the years. But until I showed him that his car could be as clean as my car, he was not a believer. Everyone thinks that my car was factory clean, never driving in the rain/snow, but it has been dirty, I just stay on top of the engine bay. What did I used? 1. You see that I covered the fuse box and the air filter box. 2. Cleaner used: Simple Green APC .. and it has a really nice smell as well! I have used this before and have never had it effect paint/clear coat. 3. Various horse and what I think is boar hair paint brushes of various sizes 4. Be prepared to throw MF towels into the garbage can after you are done. Some will have to be sacraficed for the good of the engine bay area! Do not clean these and use anywhere else on the car. I threw away at least 5 MF towels. I only had 2 Engine bay towels to start with! 5. WATER and WATER pressure! with the fuse box and air filter covered, i just used light water pressure. DO NOT use a pressure washer! just a garden hose. The water pressure should just be enough to rinse the cleaner off, my hose attachment has several settings, I used what is called shower. Basically its the mode to water plants and not kill them with water pressure. *Note: I removed the air filter box after I was done and washed the top cover and vacuumed out the air filter and the bottom of the air filter box! Steps: 1. Motor must be cold 2. If needed vacum and loose leaves/dirt out of the engine bay area first. 3. Cover fuse box and air filter. 4. Rise off the entire bay area. Note: depending on your "cleaning time" decide whether or not you want to clean the engine bay HOOD liner. you can spray it with water and clean it with soap/APC, but it takes a fair while to dry when wet and drips a lot. Just keep that in mind. I would not tackle the engine bay hood liner in the same day I planed on taking the car anywhere, I would want it to at least sit over night to dry. 5. Attack with APC/Soap of your choice. I don't have stocks in Simple green and its not really cheap either, but I have used it before and it works great and I am not worried about it killing my paint. And its JunkMan Approved!  6. Scrub the BLANK out of the areas! In a few tough spots or extra grimy areas i will have to add more APC and then more scrubbing before I move on. 7. Rinse. 8. Steps 5,6,7 You may have to repeat a few times in some areas. What I did in this case was to hit the entire bay with APC, and then scrub everything good and then rinse. This got all the easy areas clean for me. Then I focused about 60% of my 30 minutes on the tough spots where i would soap/scrub/rinse smaller focused areas. 9. Dry. in this case, I just rinsed and left it. The engine was cold so I did not have to rush. I did not run the car while I washed it. It is summer out and hot. The engine bay was dry and clean when I was finished washing the car. There were some minor water puddles and a few bits of water. So I just used some detailer spray and a old/dry MF towel. Engine bay done! Here is the Link to Junkman's Youtube video. Junkman's Engine Detailing How To Video And now for the pics .. Here we are before we do anything! You can see from the pictures this is what I covered up for the engine bay. 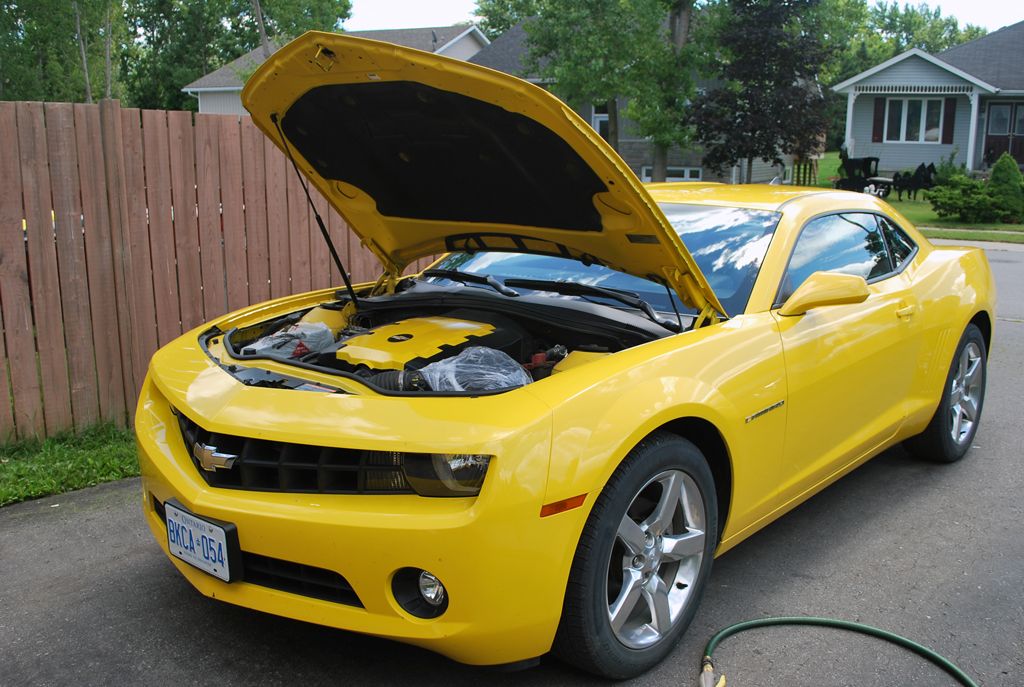 Here you can see I am using a plastic grocery back to cover the fusebox and I used a clear plastic recycling bag to cover the air filter box. 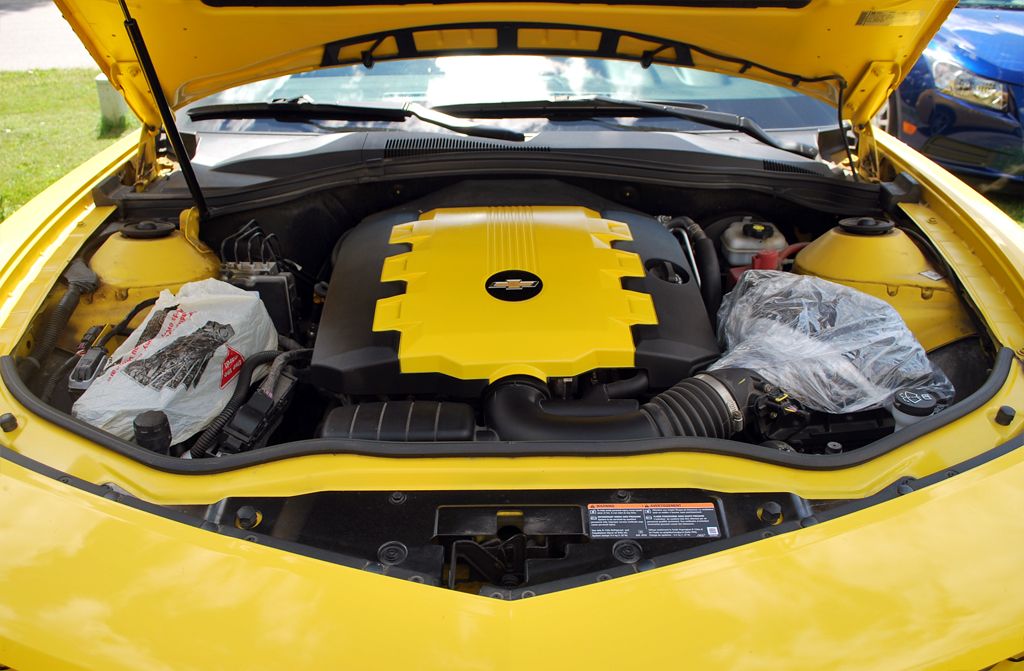 On the Red Postive post, what you see is the over spray from the undercoating (or Rust proofing oil). That is not your run of mill engine dirt and its not engine oil. I zoomed in to the Strut area so you could really see the horrible mess! 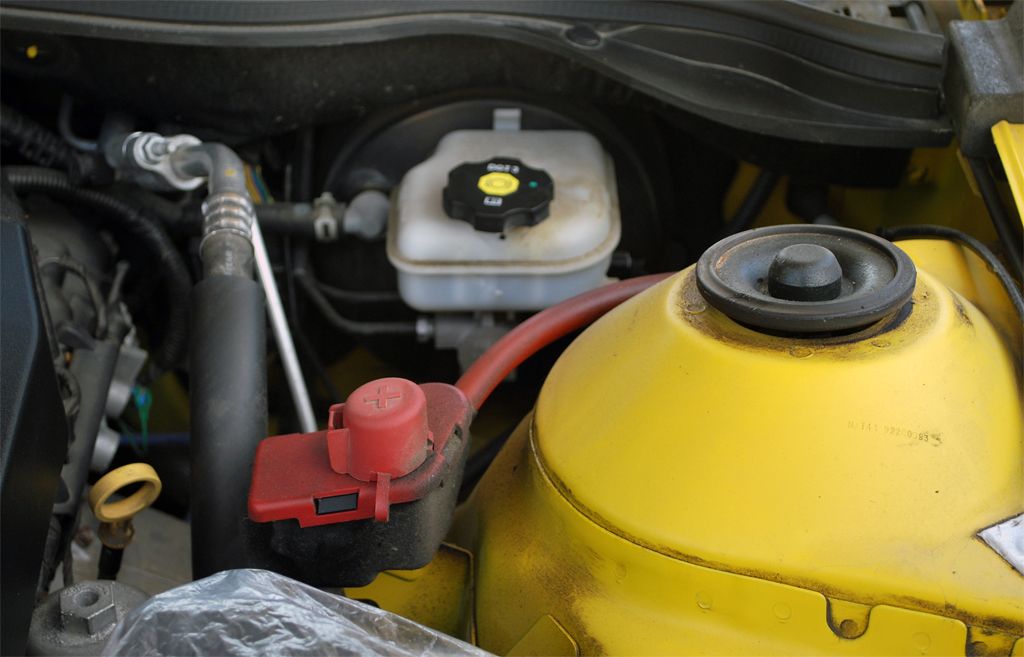 Here is a better view of the air filter covered up. 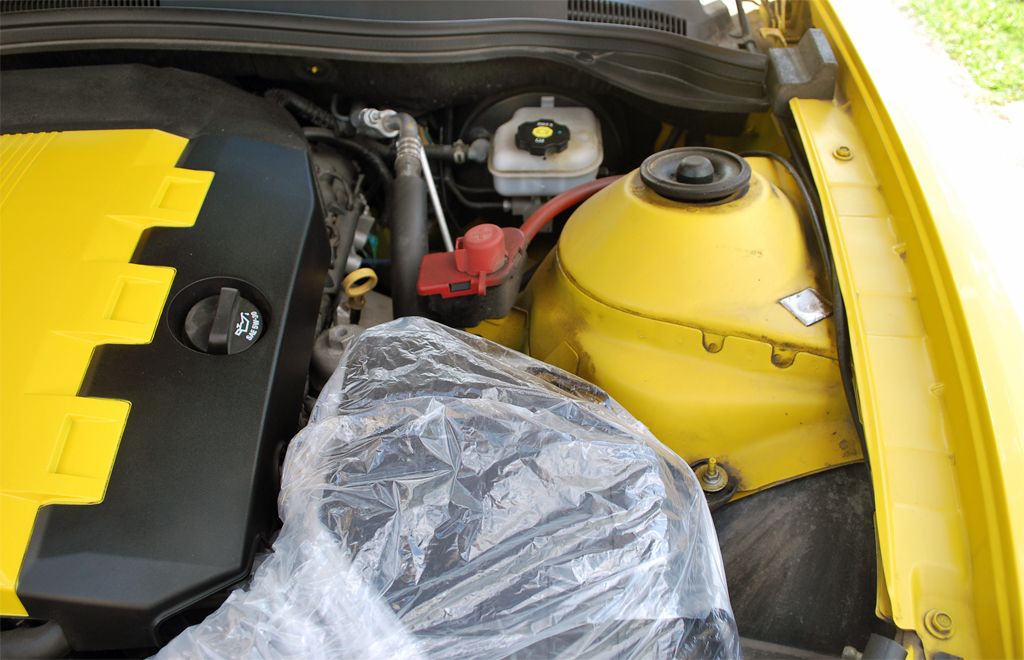 This is the hood hing area. This is one of those areas that is very hard to GET clean! 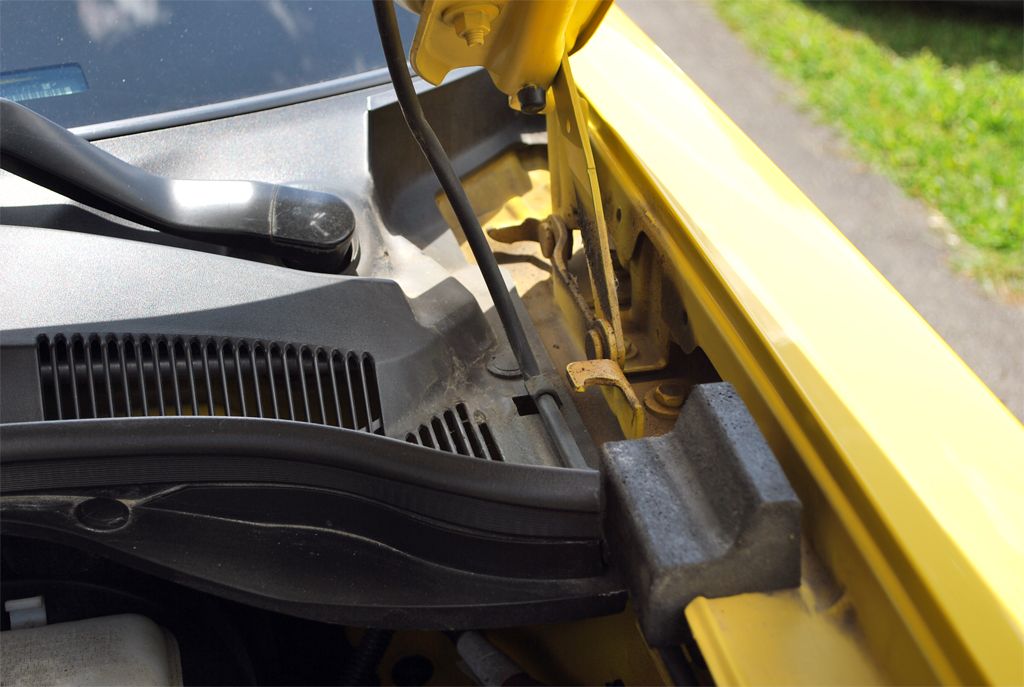 Passenger side strut area. 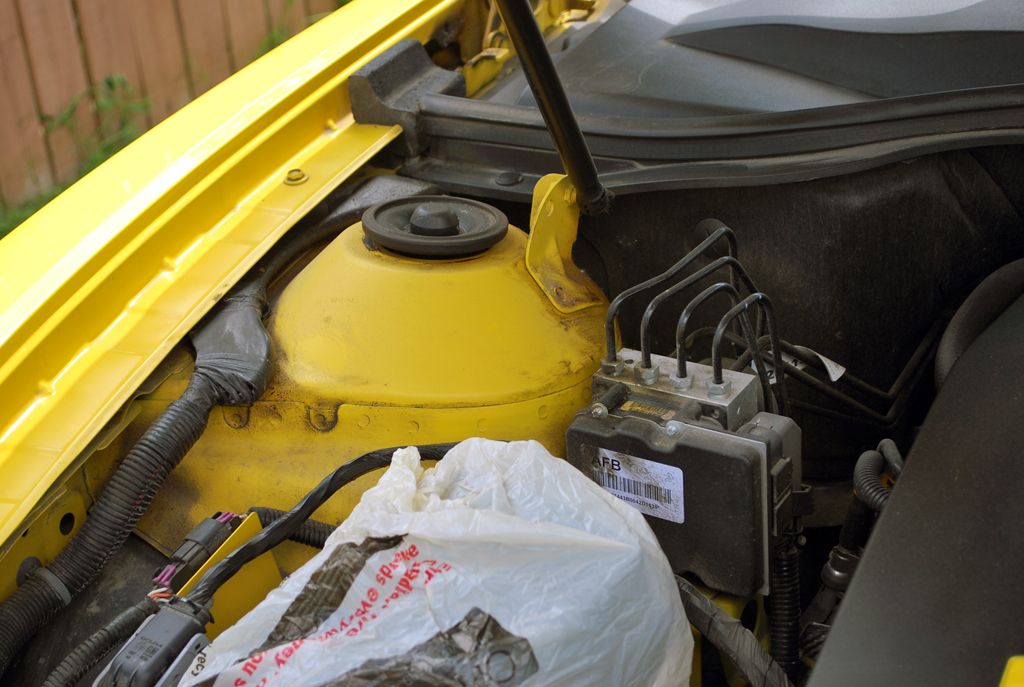 Passenger side hing area. 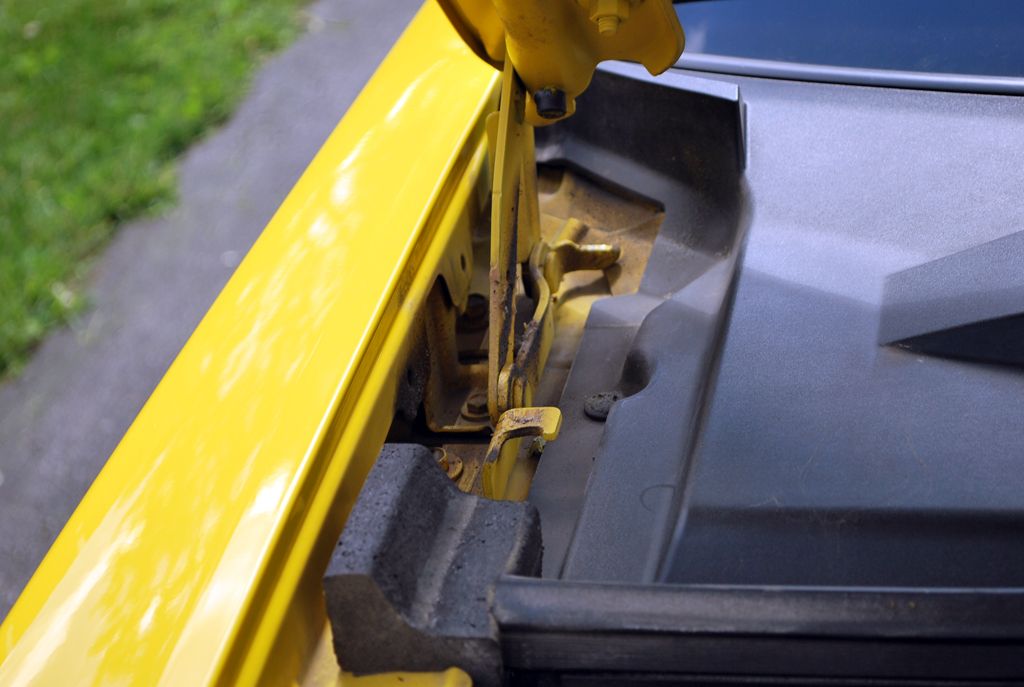 This is the area and wiring just below the passenger side strut area.  I tried to get a picture of the Radiator area. This area is just your basic road dirt in the engine bay. No undercoating to contend with, this will come up like new! 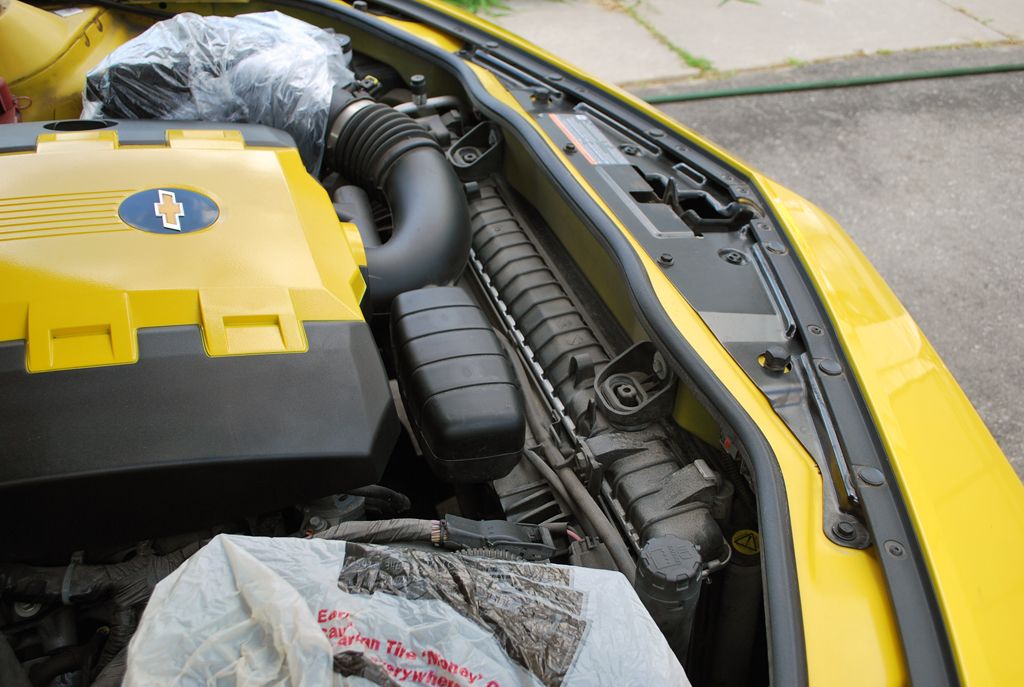 All done and dry! What an improvement! Not show room condition but it is now at least parking lot car show ready!! 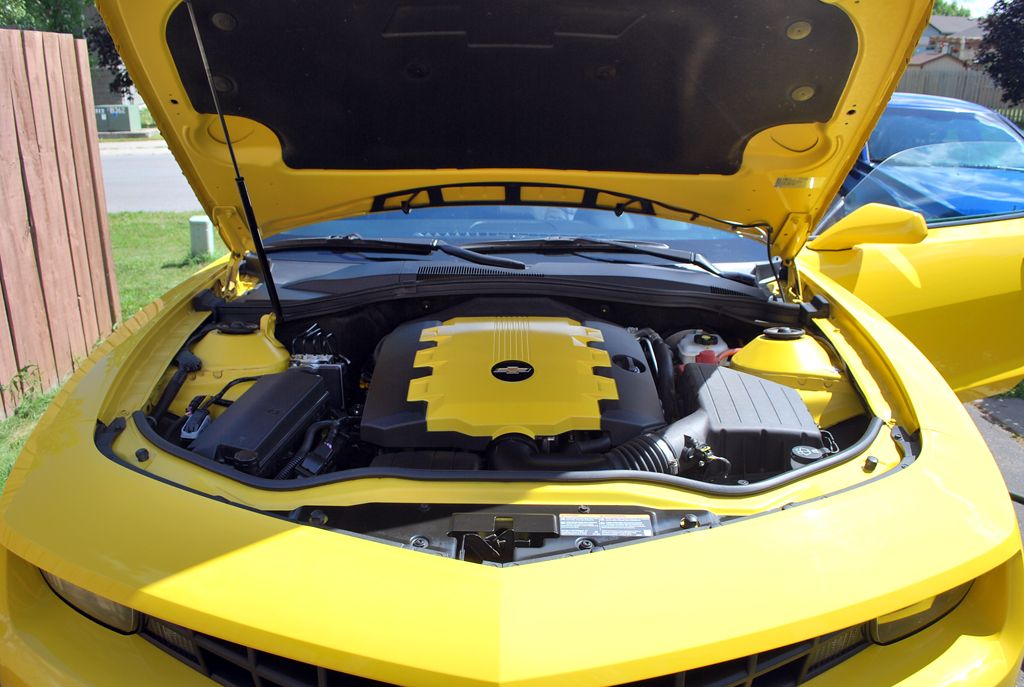 Here I started some extra detailing around the strut cap. A bit more time, cleaner and elbow grease it should be 100% clean. Just ran out of time for the engine bay. 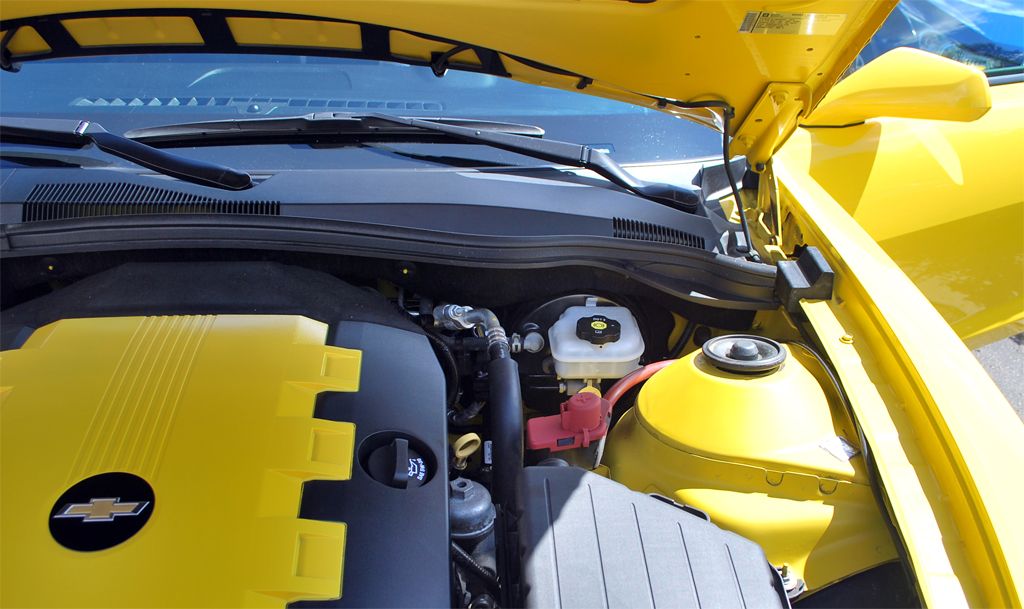 here you can clearly see the improvement. Brake fluid area is like new. Most of the gunk came of the Red Positive Post cap. That gunk really really sticks to the wiring, that will take a bit more heavy duty cleaner and some more rags and elbow grease! Also there is still some grease in some of the seams. But for a first pass, I think it's fine. 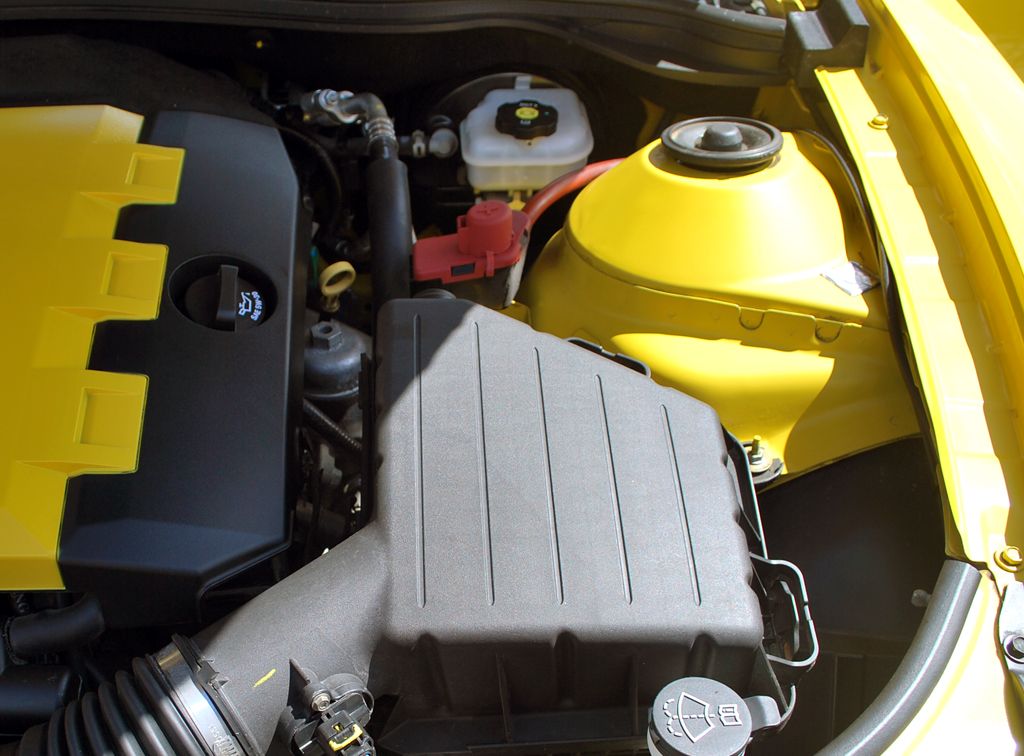 Not great but good! I am not sure what that box is with the 4 black lines feeding into it is, but it had a lot of GREASY residue. I cleaned a but more off after the photos. but that grease just makes a mess and destroys MF towels. Even ones already pushed off to Engine bay area! they are basically ready for the garbage can after that gunk gets on them! 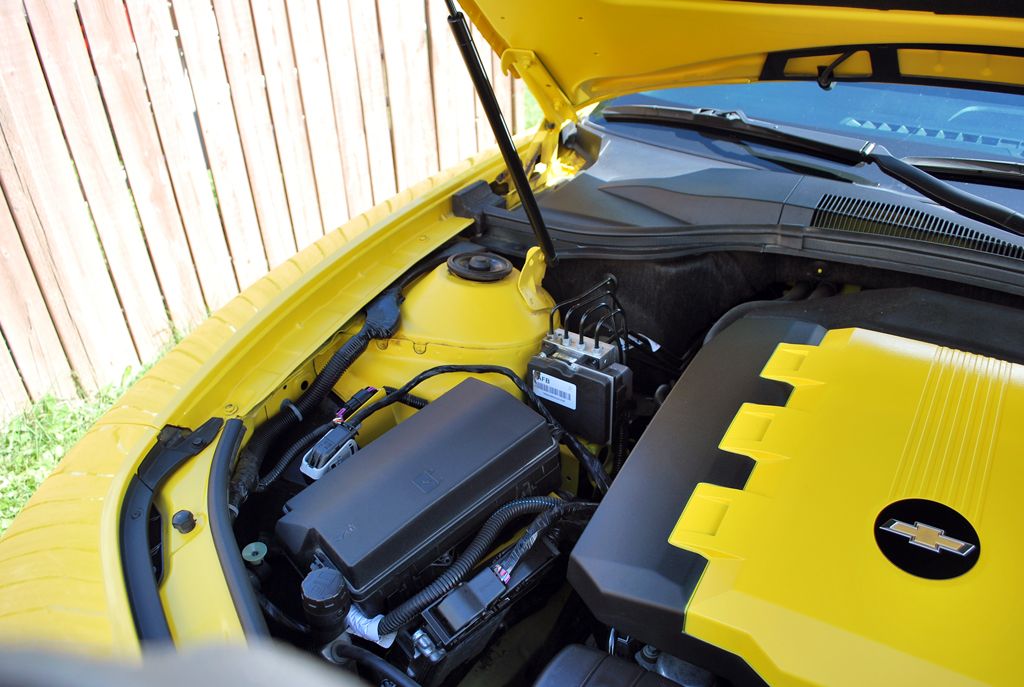 I really did not have the brushes or cleaning tools to get into the hing areas. There is a lot of grease build up there. 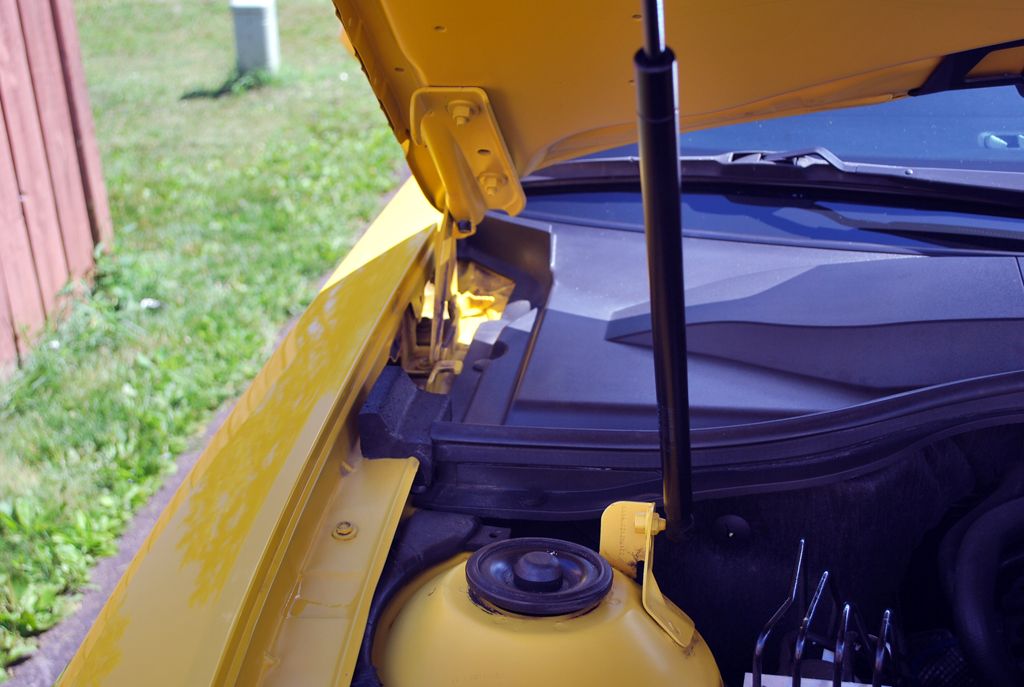 The black semi ring under the strut cap area is just condensed undercoating gunk and dirt. I was able to get some of it off. Some spots like this I used as a test to see how hard it was to get off for next time. 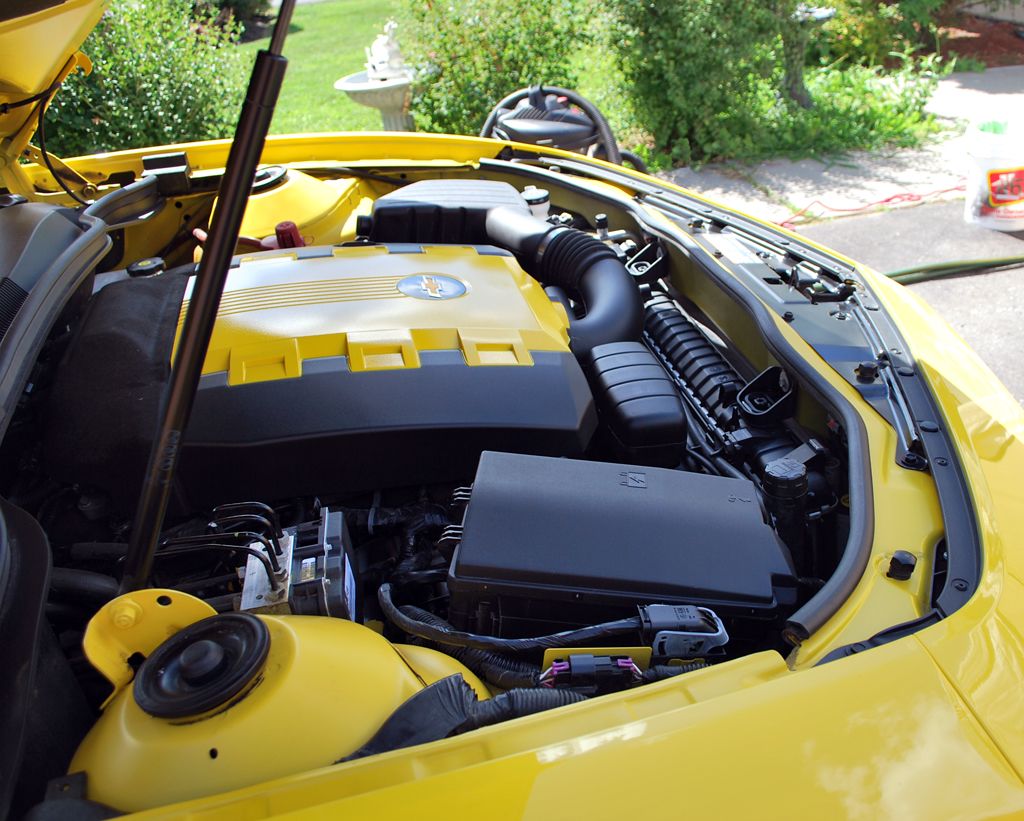 All done, wax on! 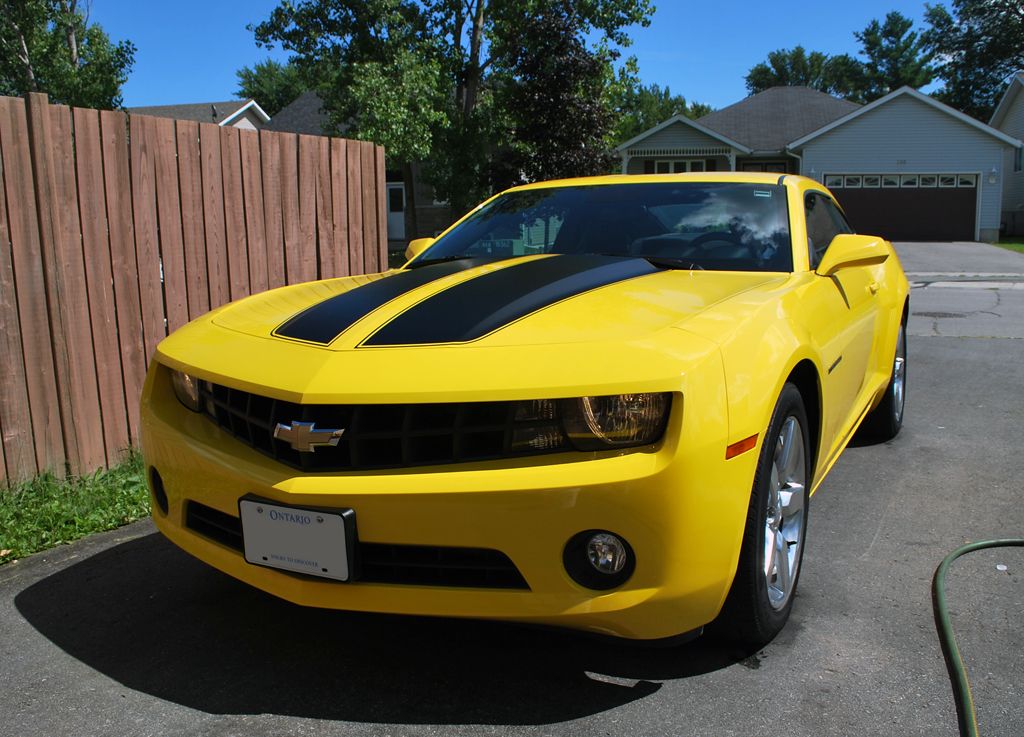
__________________
2011 2SS/RS Last edited by AbsoluteMayheM; 08-06-2013 at 08:19 PM. |
|
|
|
|
|
|
|
 |
|
|


