Well i ordered the dash kit back in Sept 2013 and i finally got the time to install it.
Old Setup:
I was one of the veterans that did the old el wire setup that camarorick started. Congrats on having the vision and being innovative for being the first to start the project that go this all started.

The setup was good but did have its flaws which soon became apparent. Some were reporting no problems after months, but mine made it about a week or two and thats when the problems started. I had to replace the el wire on the passenger side several times and it just became a chore and more time spent then what it was worth.
I started disassembly on the old setup, pulling the power wires from the kick panel area, took the el wire and its power wires out and the converter box, and had to remove the glued down tubes that held the el wire...etc...etc. I think your starting to get the picture.
New Setup:
I opted for the plug and play harness to make the installation clean and simple. I used 3/8" wide and 1/4" thick foam weatherstripping for the shelf and i put it on the edge of the acrylic area that holds the clips and i had to curve it at the ends. I have a later production # 2010 model so i have the holes in the dash. (TIP) I used a big screwdriver end and put it in the holes and turned it to make them bigger. On the right end of the passenger side the hole on the very end is a passage way hole thats not a clip for the panel. The left side end is being blocked by some panel that is bolted up behind inside the dash. I had it in the next available hole but then i changed it because i wanted it on the most extreme ends
(TIP) I unscrewed the screw on the left end and put a screwdriver in between the trim inside the dash and the dash itself and pulled it back long enough to run the led and the wire thru there and screwed back in the screw. Even without modifying the trim piece and having the screw back in it doesnt smash the wires.
I put the shrink wrap tubing over the leds (TIP) I used a lighter to heat up the led end with very little heat to shrink the tubing so it will stay on the led but still allow it to spin for adjustments and still leave the other end of the shrink wrap its normal size to slide the tubing in and then heat that end when your done fine tuning it.
Pros and Cons:
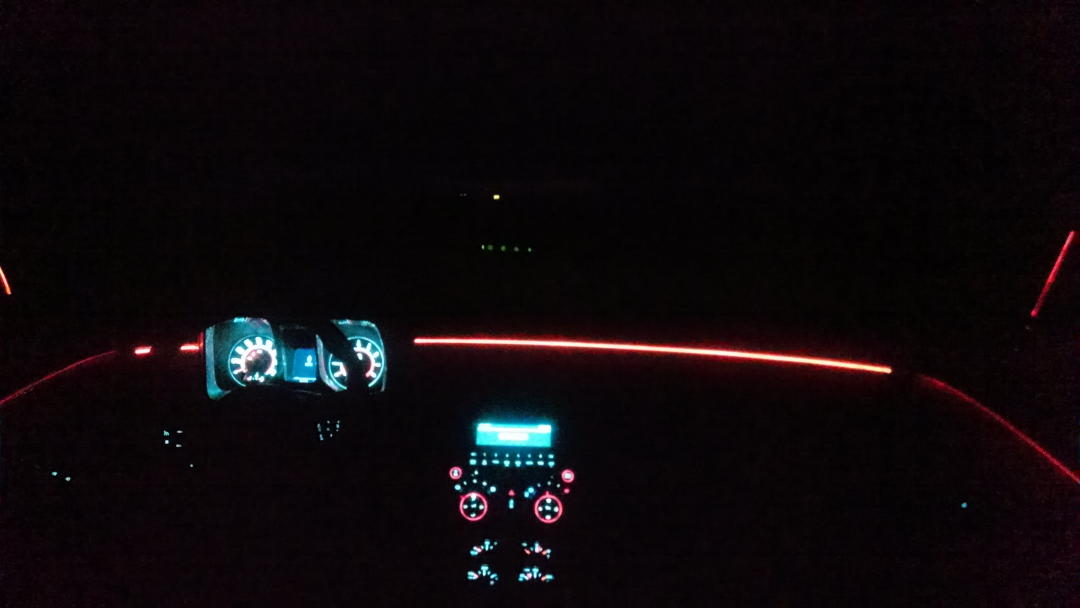
After playing and fine tuning the tube and light i decided to go with the style where the reflective line on the tube is on the back side and you can see it when looking at the tube. Since ive done the previous setup my panels are already sanded, so i aimed the light directly at the sanded area. This style made the light very bold and bright, even, and i feel it looks better with the light directly coming out instead of that reflective under the surface look. I can also dim the light with the control panel if its too bright. I didnt want to drill anything so the light doesnt go all the way because of the shrink wrap tubing but i feel it gives it a unique look. With the reflective line on the passenger tube aiming forward you can see where it is a solid line and then in other areas its like a dotted line which helps with the light dimming im guessing, it also gives it a rugged look.
The problem with this method is that because the light is coming directly out that means the tube has to sit high and it makes the panels stick out slightly and even more noticeable on the ends by the doors. The clips for the panels are snapped in so its not going to come out. When sitting in the car you dont notice it all so im happy with it.
Changes:
Im not sure if it was setup to be this way but in the directions it shows that the led for the driver side panel is on the right side. With my style and the way the panel on the end doesnt sit back all the way, you can see the tube and the light. There was a circle of color on the door panel so i decided to put the led on the left side. The shrink wrap tubing covers up all the defects of my style by covering up the tubing and the light coming out the top of the panel and the light out the end of the panel is now hitting the dash where the gauge cluster is and it looks way better.
I also changed out of the door ambient lighting from GM's super orange harness to SjmAutoProd's actual orange led harness to match the dash leds. They still look a little on the red side though but i think thats because of the door panel color.
 sjmautoprod