Well, having watch several folks build a 'DIY' catch can, I took a little bit different way.
I'm using a Stainless Steel Thermos from Crate N Barrel and various parts from Lowes and Autozone to build my own.
The parts are:
3/8 x 4 ft fuel hose (not injector hose) $6.00 from AutoZone
2 PCV grommets 42058 from AutoZone ($6.50 for both)
2 1/2 Elbows (Brass) from Lowes ($3.50 for both)
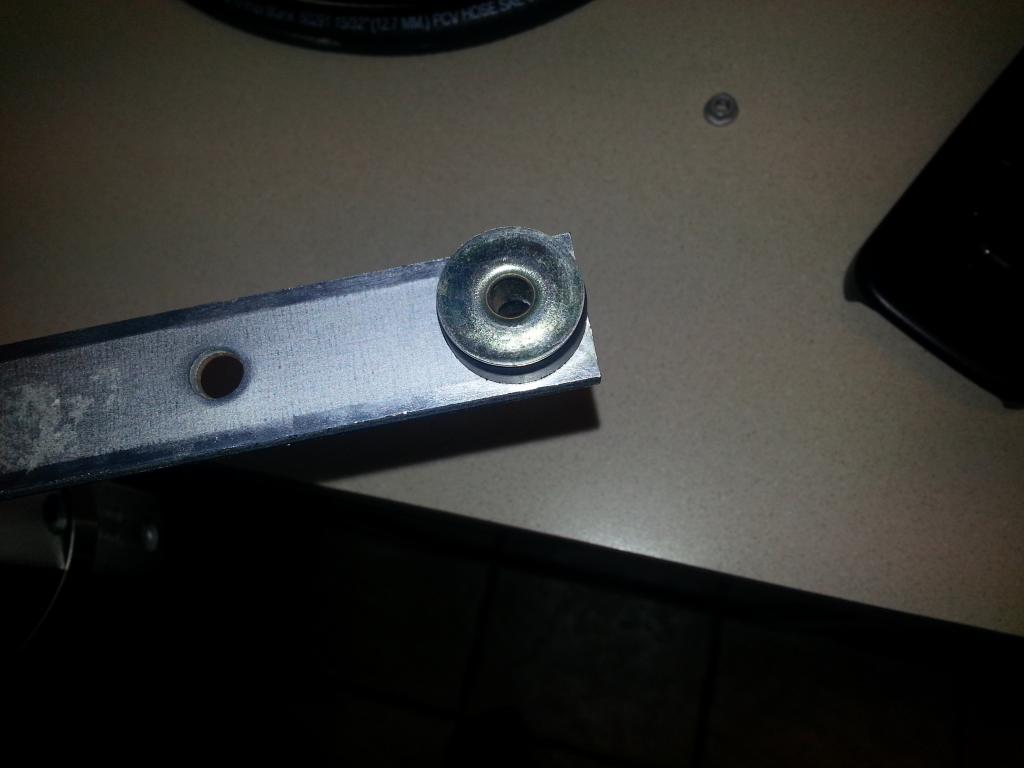
1 6" x 1 1/4" Stanley Angle Bracket from Lowes ($4.00)
1 H# 884633 Rubber Grommet for Angle Bracket from Lowes ($1.00)
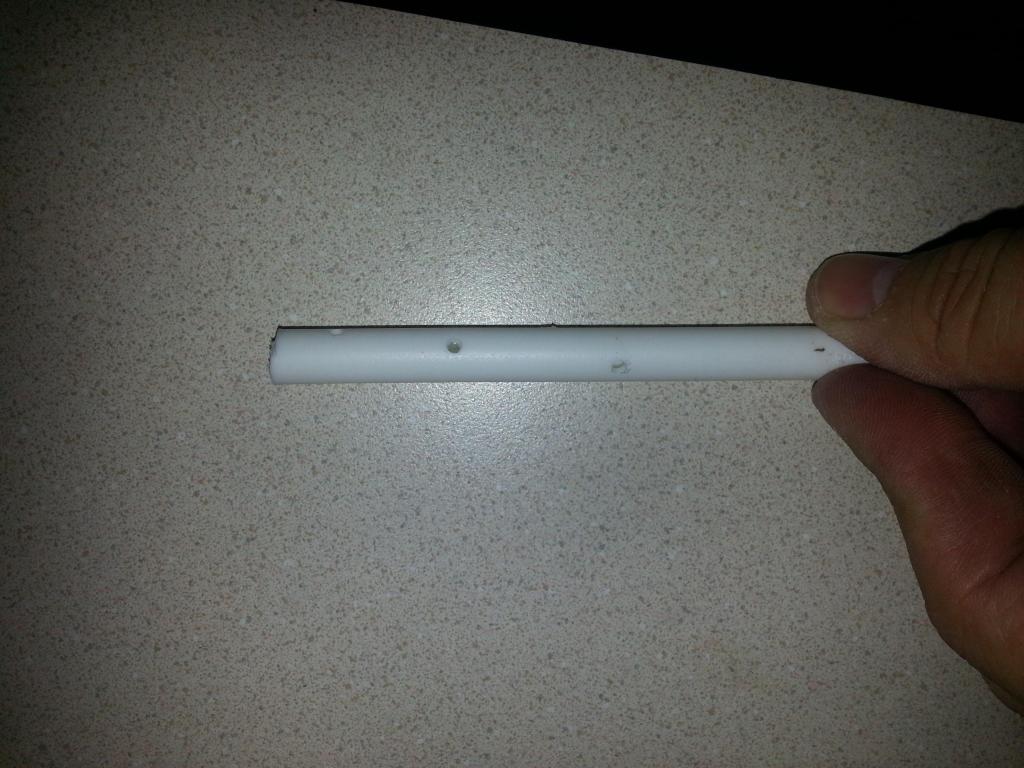
1 1/4 x 5 ft Hot/Cold PVC water tube from Lowes ($2.00)
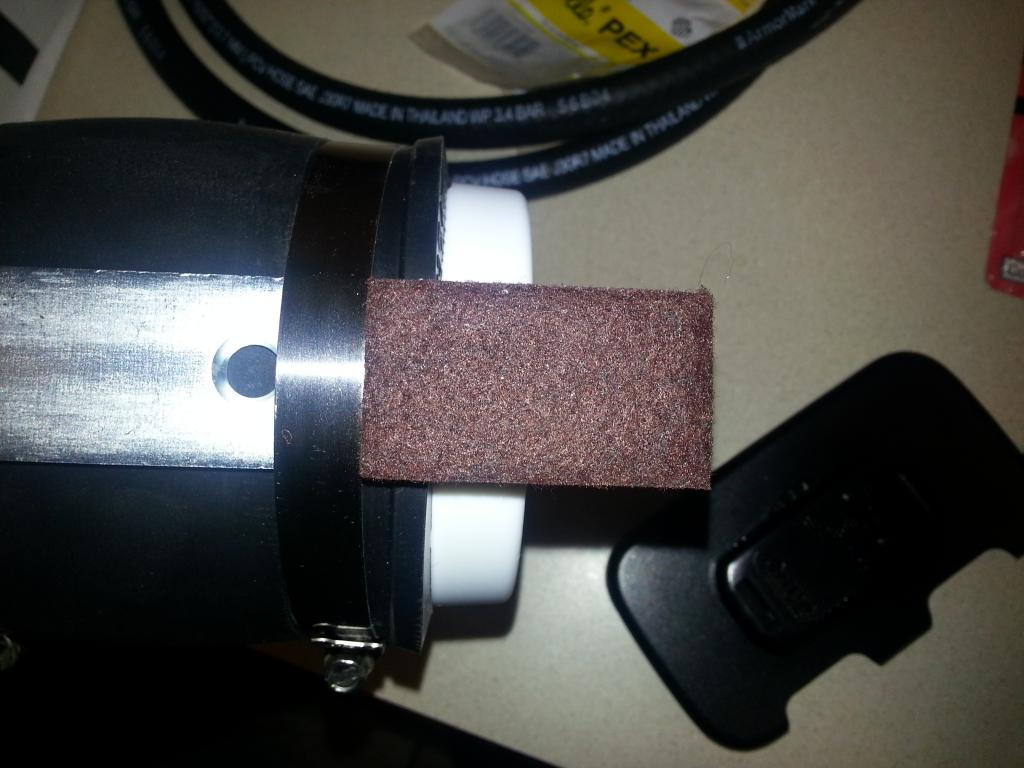
1 Copper Scotch Scour Pads from Target ($2.00)
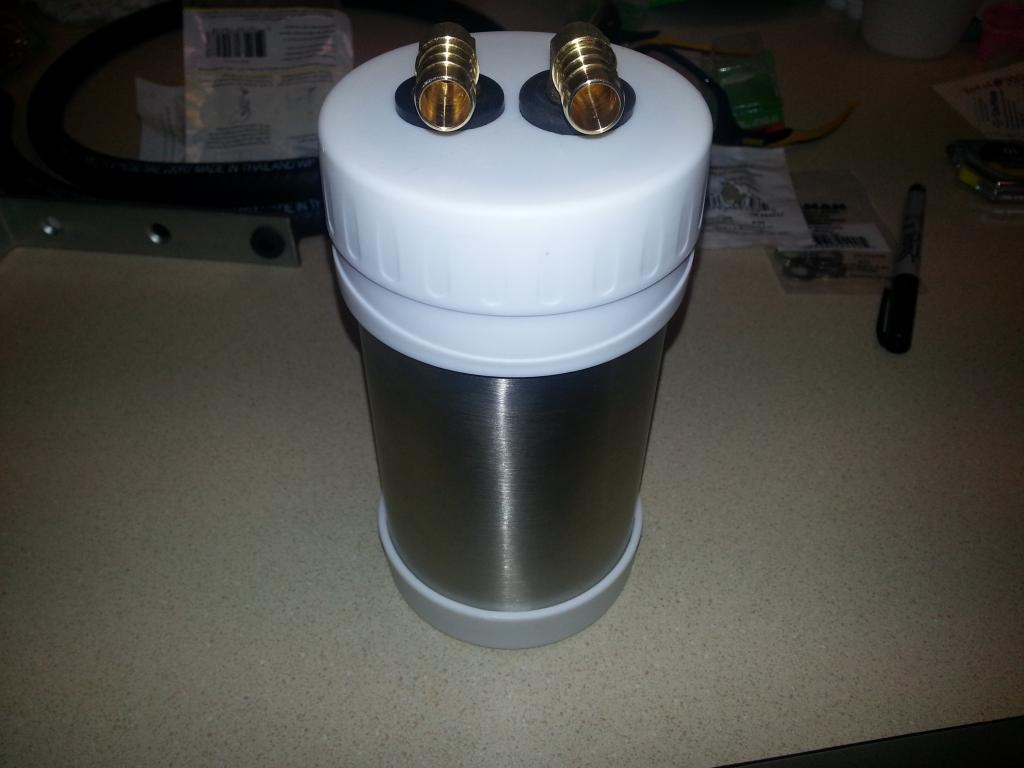
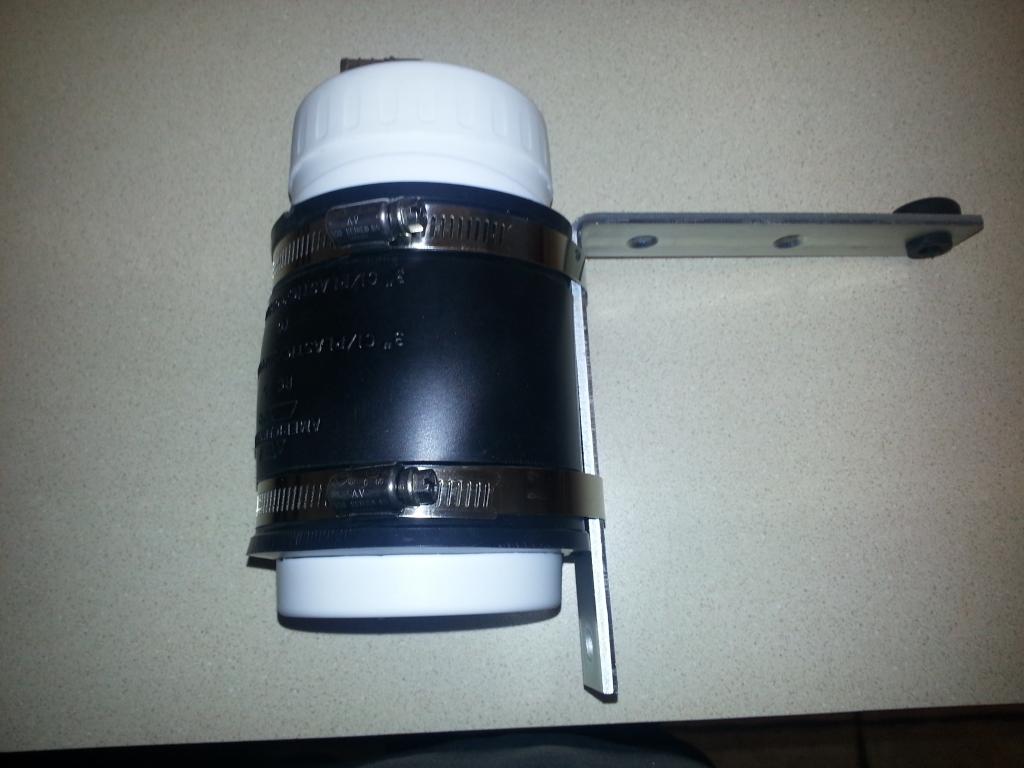
1 Stainless Steel Thermos from Crate N Barrel ($12.00) (this has a screw on top with seal).
This can with-hold temps to 270 degrees. It also really holds a SEAL!
So, for about $37 I was able to create my own catch can.
Now, this is not a 'show car' so it served my purpose -- I wanted something simple.
So, here are the steps I took:
First, I measured 1/4 inch from the sided and, using the PCV grommets, measure a 'pilot hole' point:
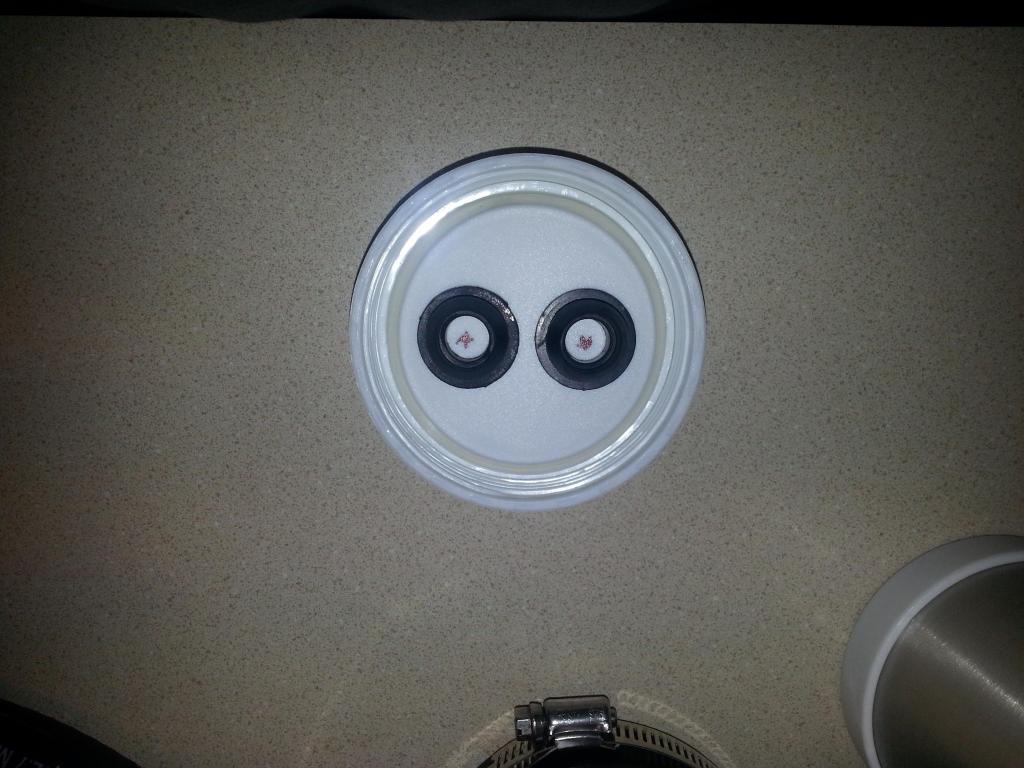
I then drilled the pilot with a 1/8" bit and then drilled the hole larger using 11/32 bit. Once that was drilled,
I opened and cleaned out the hole until the grommet fit nice and snug:
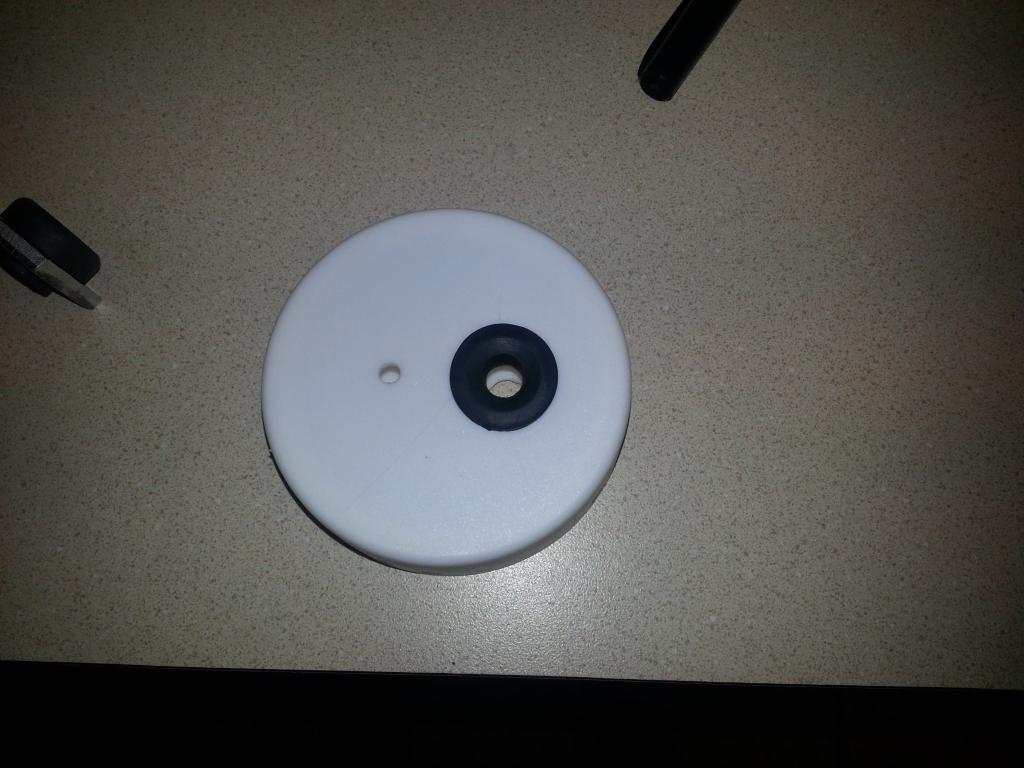
Once that was done, I put in the first elbow:
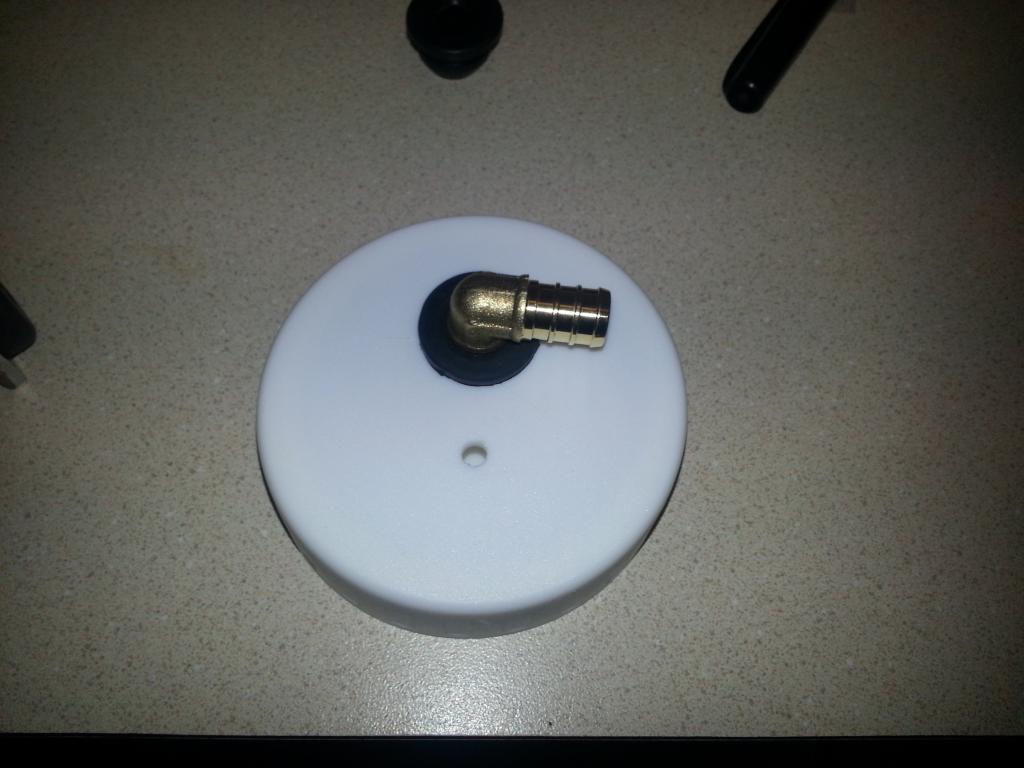
Once I confirmed that worked, I did the second one and then I test fitted the cap:
Next, I drilled out the outer end of the bracket for the 'bracket' grommet. I used the 11/32 drill for this also (noticed I used the stock grommet metal washer from stock airbox):
Once I did that, I used the 3" x 3" rubber coupler to attach the Thermos and bracket together:
Then, I took off the lid, put in the copper pad, and re-test fitted:

I then, added 'felt pad' to the lower part of the bracket so it could rest on the interior panel in the engine compartment (no rattling!):
Next, I had to create a 'tube' for the oil to drain. I cut the 1/4 hot/cold pvc line to 4 1/2". I then drilled 1/16 holes in the side of the tube to allow oil to 'drip' as needed. I did this on the lower 3" of the tube -- NOTE: It goes on the 'red arrow' side elbow):
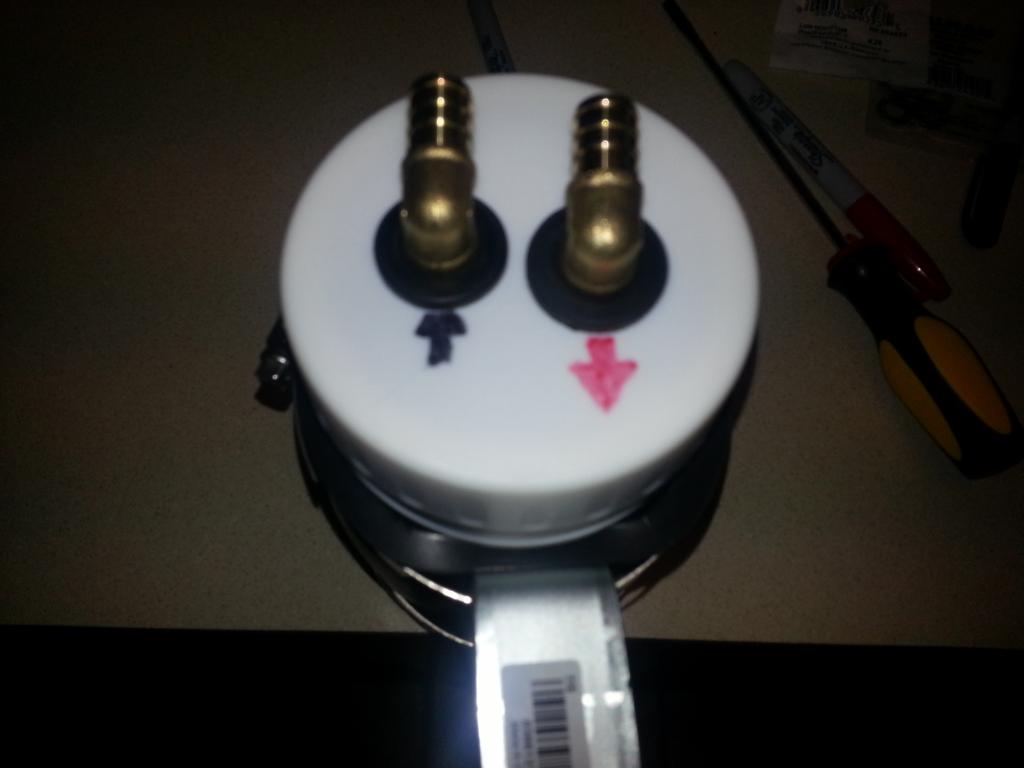
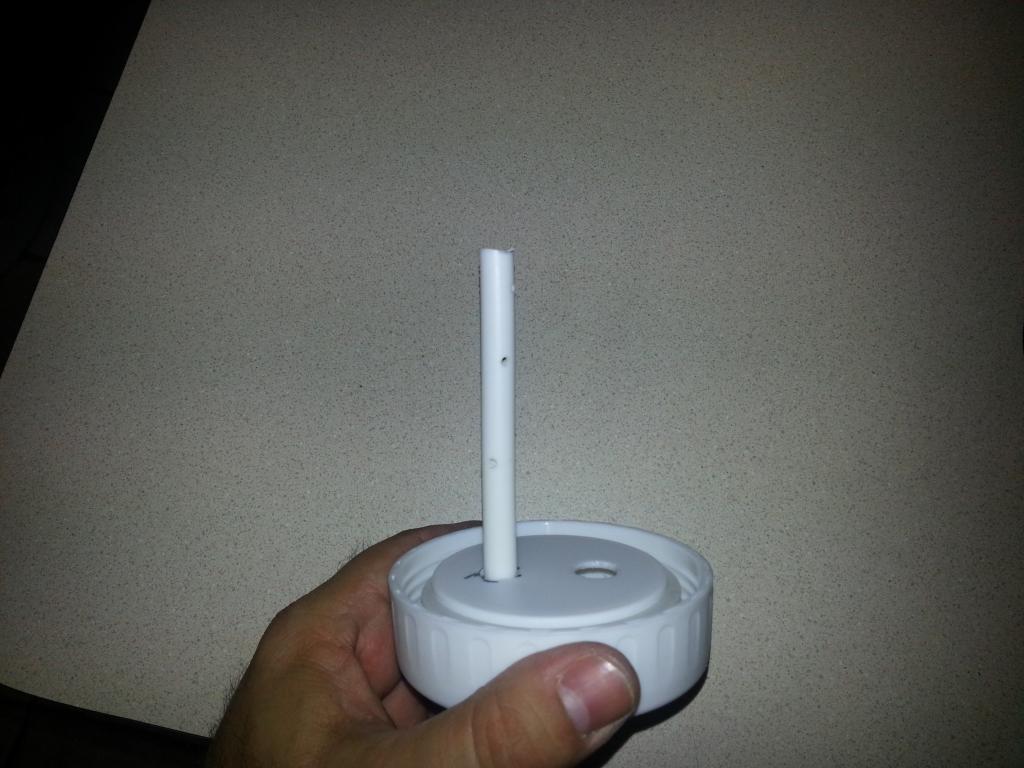
I then attached the lid and verified everything was right.
Next, under the hood, I located the line (for the L99 it runs from the Left Back Cover) and just cut the elbow from the line so I could slide the 3/8" fuel line:
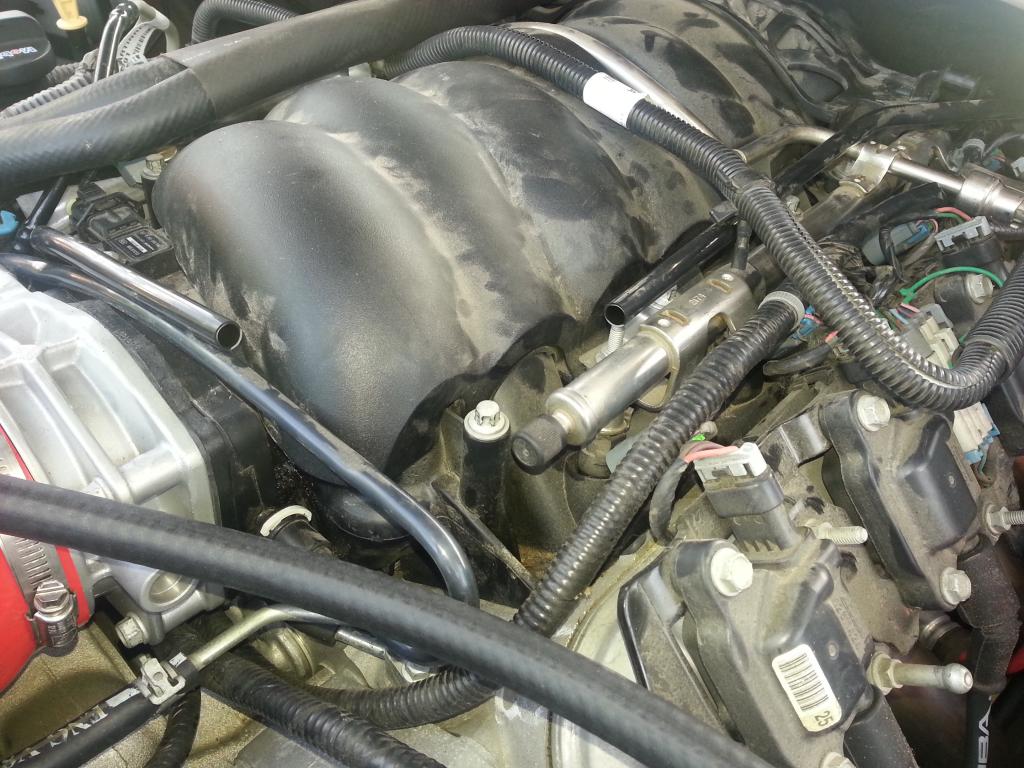
Now, attach the 3/8" fuel line from the real of the valve cover to the 'red' arrow I put on the lid and then attach the 3/8" fuel line to the black arrow and route it to attach to the line going into the intake:

Verify everything lines up and test run to verify no leaks!
Attach cover and take it for a drive!
I did notice the 'lid' of the thermos would sink a little due to the strong vacuum pull from the engine! So, I drilled a small hole (under the lid) and filled it with great stuff expanding foam (that will fill in any 'gaps' between the cap).
Overall, worked nice!
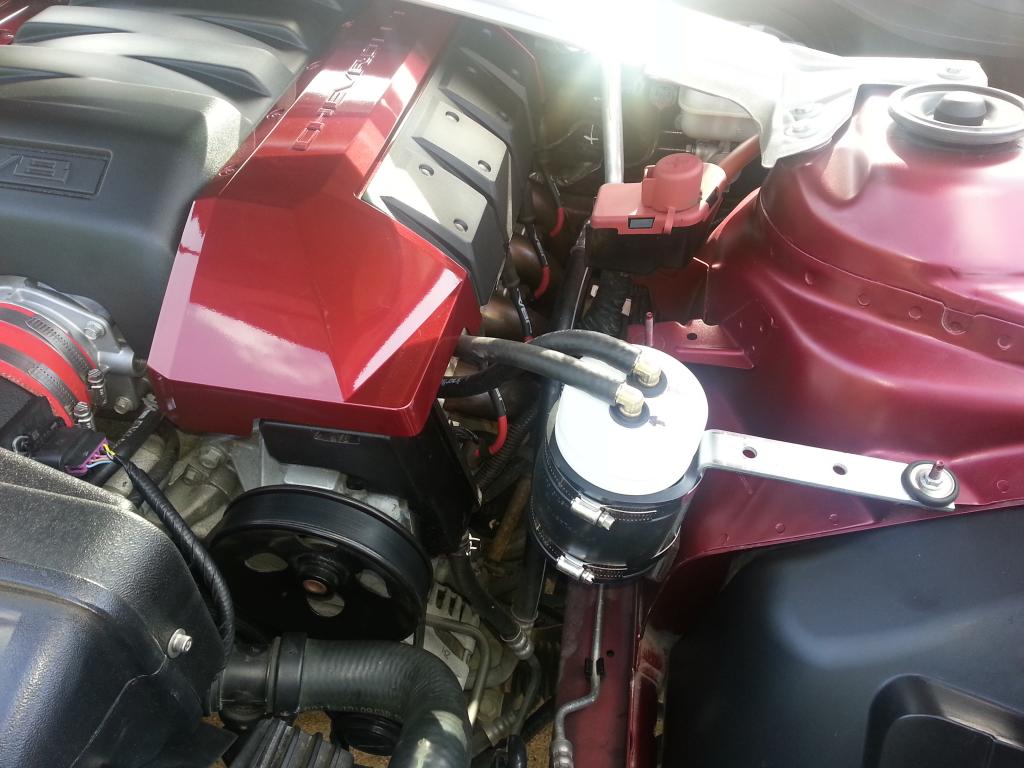
Final setup:

-Don