 10-23-2014, 02:53 PM
|
#8
|
|
LEXi is Sassy and Classy
Drives: 2012 Camaro 2LT RS Boston Acoustic
Join Date: Mar 2014
Location: Toronto, Ontario
Posts: 510
|
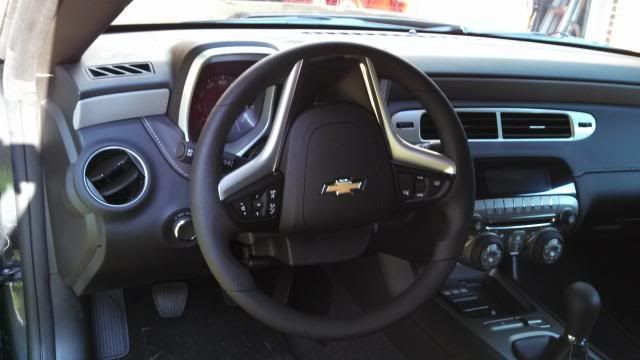
What's the difference between the two wheel?
Quote:
Originally Posted by JL_s

DIY: 2012-2013 Steering Wheel Replacement
Today I upgraded the steering wheel in 2013 Camaro to an OEM leather wrapped wheel. Hopefully this guide will help someone out there wanting to do the same thing. The tactile feel is so much nicer with the leather wheel and I would recommend upgrading to anyone without it.
Time: <1 hour
Tools required:
10 mm socket
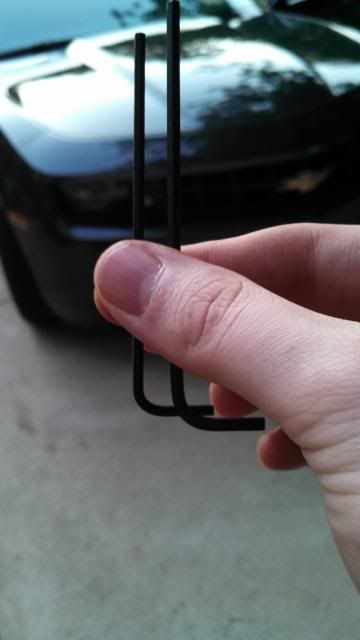
Allen wrench or similar tool 2-4 long to release airbag retaining clips
T50 Torx Bit
Torque Wrench
Common Sense
To start turn the steering wheel so that the bottom is pointing upwards enough to gain access to the two airbag release hole/slots in the back but at a slight angle so that when you pull the old wheel off, you know which way the clock spring will rotate. I tilted mine about 10 degrees to the left.
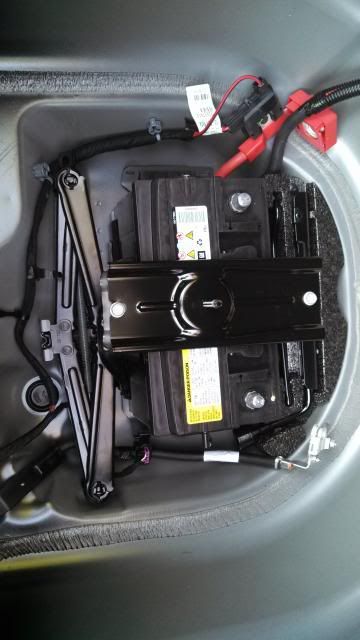
 Disconnect the battery in the trunk and wait 5 minutes. The service guide says to pull the airbag fuse and wait 2 minutes. I felt disconnecting the battery was safer.
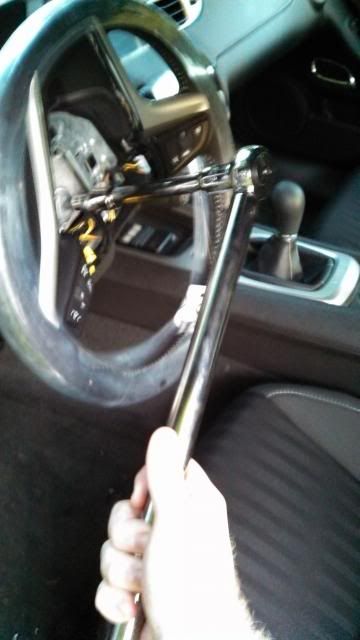
 Insert your air bag removal tool into one of the slots in the back of the steering wheel. Start with the exposed end (by the gauge cluster) pointed toward the middle of the steering wheel, find the release spring (it will feel mildly springy) and push the end Allen wrench away from the center of the wheel (left when doing the left side, right on the right side). You should be able to pop one side of the airbag out about 6mm. It should not take much force at all to do this. If it is not budging, keep trying to find and push over the airbag release spring.
 Once out, repeat this process for the other side. Now that the airbag is free gently remove it from the center of the wheel. Make sure not to put much tension on the two wires. With the back of the airbag exposed, remove the two yellow clips and set the airbag aside.
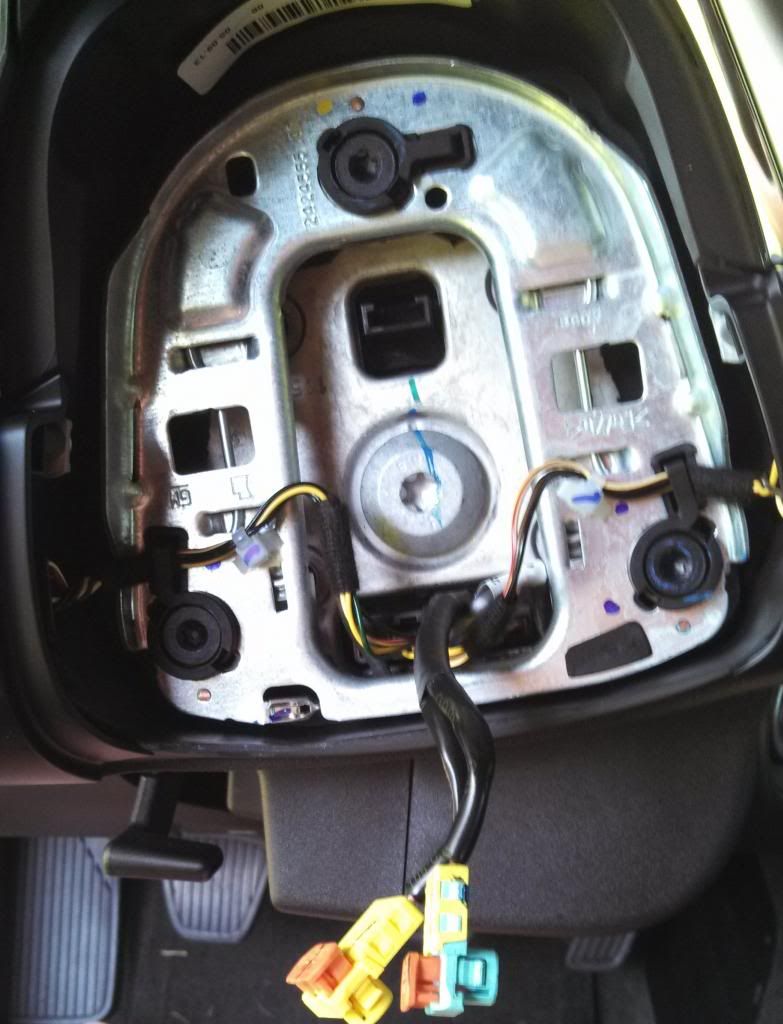 Unclip the steering wheel wire harness from the clock spring, and then remove the bolt holding the steering wheel in place using a T50 Torx bit. Pull the steering wheel off the splines while gently feeding the airbag wires trough the opening on the wheel. Take note of which way the clockspring rotates as the wheel comes off. If you tiled the wheel to one side, it will rotate that directions (hooray gravity).
Sorry I forgot to take a picture here, but you get the idea.
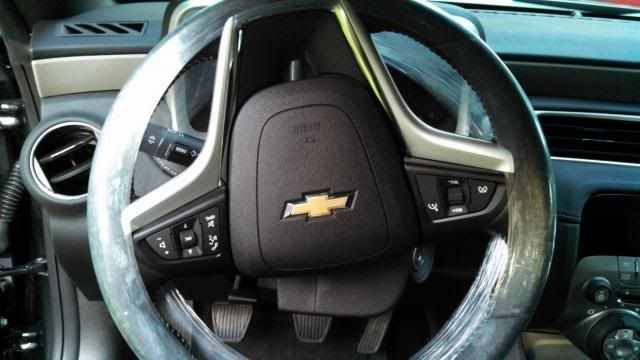
Grab your new wheel pass the airbag wires through the opening. Now, line up the cast in mark on the steering wheel with the tiny indent on the column to make sure your wheel goes on straight. Rotate the clockspring to orient it correctly and the new wheel should slip right on.
Unclip the steering wheel wire harness from the clock spring, and then remove the bolt holding the steering wheel in place using a T50 Torx bit. Pull the steering wheel off the splines while gently feeding the airbag wires trough the opening on the wheel. Take note of which way the clockspring rotates as the wheel comes off. If you tiled the wheel to one side, it will rotate that directions (hooray gravity).
Sorry I forgot to take a picture here, but you get the idea.
Grab your new wheel pass the airbag wires through the opening. Now, line up the cast in mark on the steering wheel with the tiny indent on the column to make sure your wheel goes on straight. Rotate the clockspring to orient it correctly and the new wheel should slip right on.
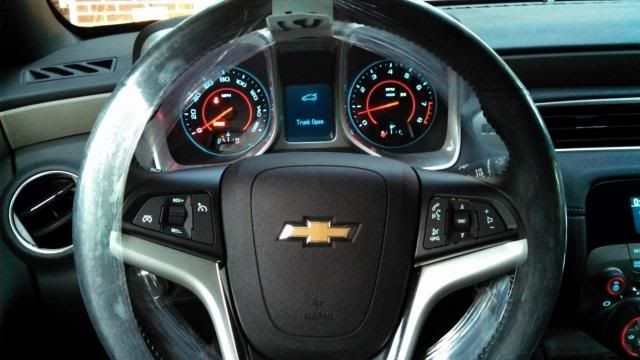
 Re-install the steering wheel bolt and torque to 22 ft-lb.
 Plug in the steering wheel wire harness to the clockspring, plug the two yellow wires back into your airbag, and pop the airbag back into place. It takes just a little more pressure than honking the horn to do this.
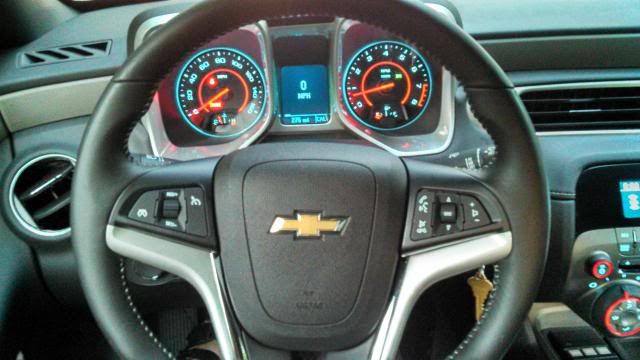
 Re attach the battery cables and test to make sure all steering wheel controls are working and that you didnt cause any codes/unintended features.
 Reassemble your trunk, remove plastic, and test drive. Do a full wheel lock to lock to ensure you have the clockspring in correctly. If not service stabilitrack will ensue, or so I hear. I did not test this myself.
 Enjoy, and comment if you have any questions, or if I missed something.
|
|

|

|