So I just got done installing a new clutch in my car and I have found a much easier way to remove and install the transmission. I took it out the hard way and after fighting with it for 3 hours couldn't get it installed, figure out this way during the install. On top of that I added a remote bleeder from Tick and did not realize the hose was screwed on to the fitting, so it leaked

had to pull the transmission again to tighten it up. I was able to pull it and install it in a day with a lot of breaks, taking pictures and keeping a list of what I did step by step. I am not doing a in depth write up for the entire clutch install because I already had it installed. This is accomplished by lowering the the engine cradle and allows for a lot more room for accessing bolts, your don't have to rotate to get the trans out or back in because of clearance issues.
#1 Remove exhaust - easy, loosen blots on clamps and un hook from hangers. Remove catalytic converters if your dont have headers. With headers all I had to do was remove the o2 sensors. I have removed the trans with both the stock system and long tubes. I was able to do this by myself, but 2 people is easier.
#2 Remove driveshaft - you will need a 18mm socket and 19 mm wrench to remove 3 bolts on tailshaft. Use 18 mm socket to remove 3 bolts where it connects to rear diff. Remove driveshaft support with 13mm socket 2 bolts

#3 support transmission with a transmission jack and remove transmission support held in place by 2 nuts and 4 bolts.
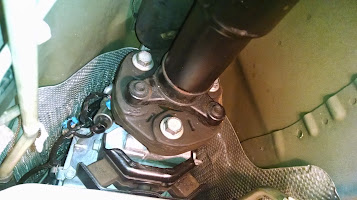
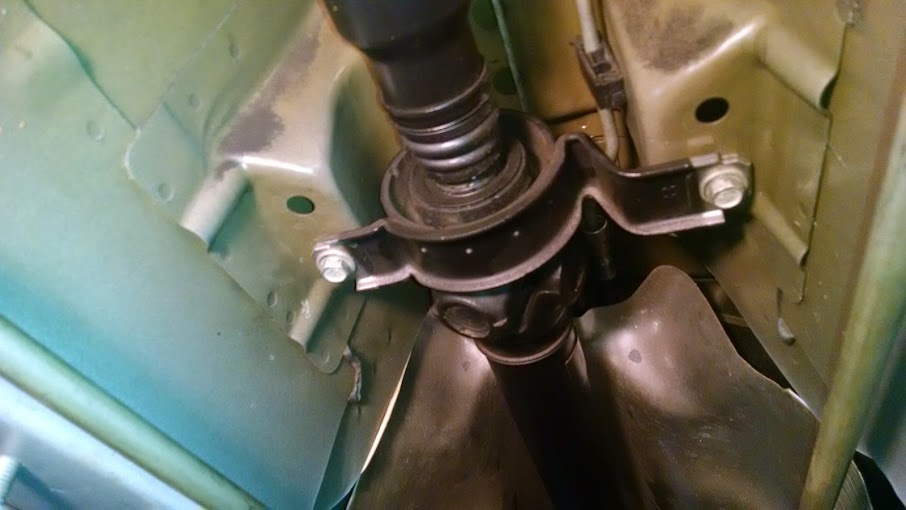
#4 Remove trim around shift assembly inside car. It just pops up. I used a flathead schrewdriver.
#5 Twist and slide down metal collar on shifter to push boot down and access the set screw. Remove set screw and twist and pull up on shift knob.
#6 Remove 4 bolts that secure shift assembly to tunnel. I believe they are 10mm.
#7 Lower transmission as far as it goes and began removing all the electrical connectors
#8 Disconnect coolant lines . I used a utility knife to remove retaining clips and then pull them apart. I placed a glove and rubber band on each end of the lines to keep fluid loss at a minimum.

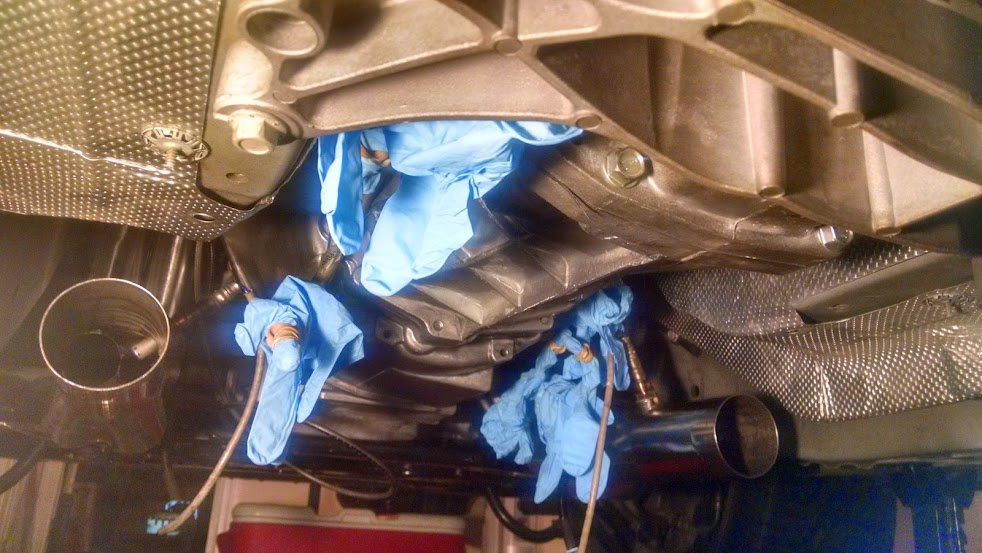
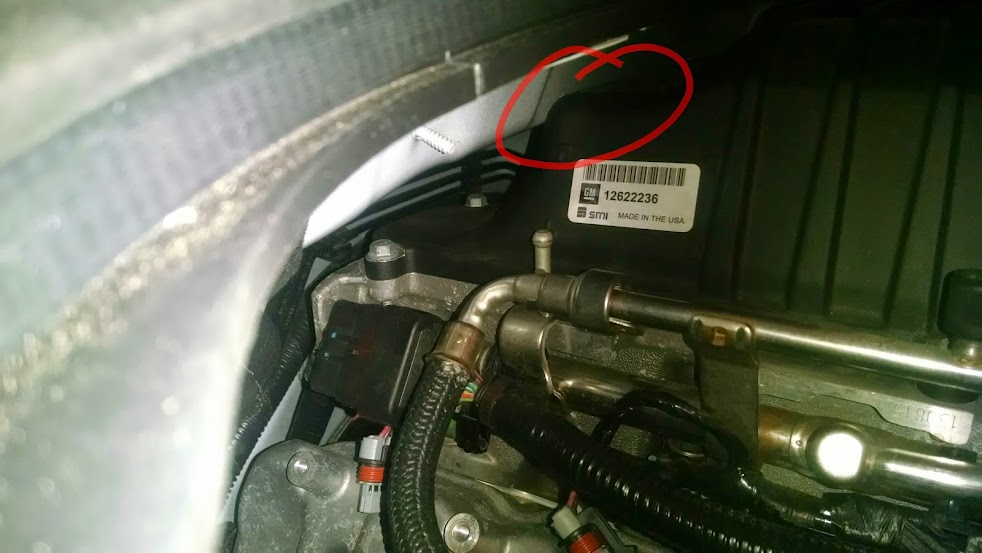
#9 Disconnect hydraulic line to slave cylinder. Same method as the coolant lines and gloved this as well. Sorry no pic, stole the pic from member h018871.

#10 This is the issue as the why you dont get the same clearance as the SS. The blower hat hits the firewall not allowing it drop any further resulting in terrible clearances. I really began questioning how I was going to get it back in and the bolts started. So this is where we start working on getting our extra clearances.
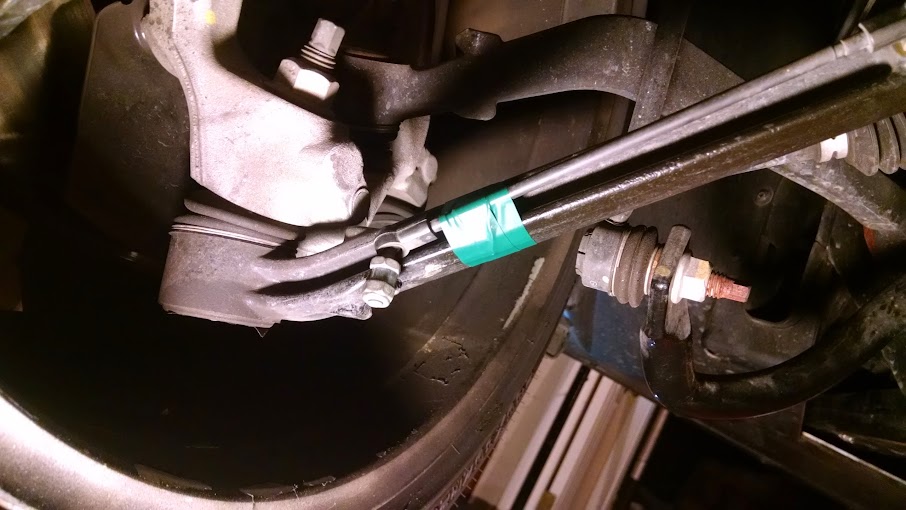
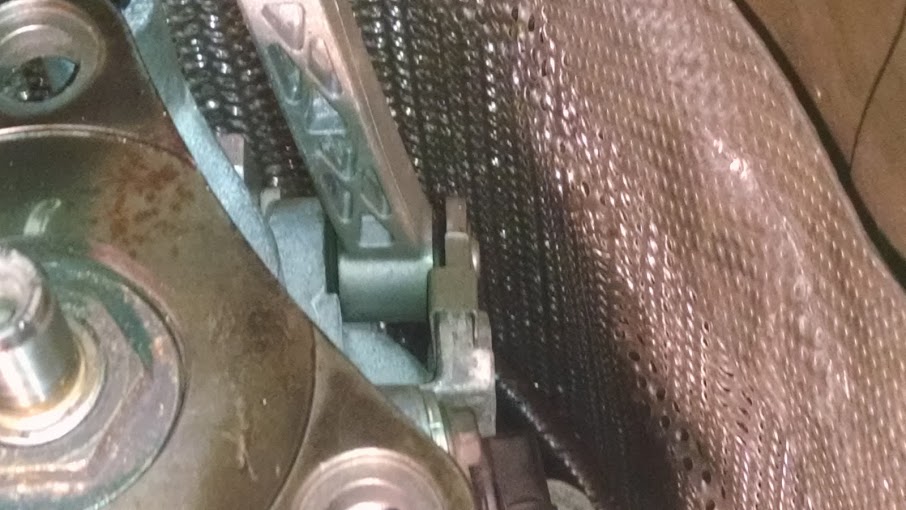
#11 Disconnect the rod that connects from the control arm to the mag ride sensor. I thought that it was all one unit and came down with the cradle and they broke. Below is the result. Taped them up out of the way until I can get it replaced.
#12 Unbolt the shock mounts. 24mm nut i believe
#13 Support the engine cradle with a jack.
#14 Remove the 2 21mm bolts for the engine cradle closest to the front of the car, get a good idea how long they are and thread them back in maybe half way.

#15 remove and dont reinstall the 21 & 24mm bolts at the rear of the engine cradle. 2 per side.

#16 Lower the jack supporting the engine cradle enough that where the last bolt (24mm) was is about 3" lower. The cradle will tip down towards the rear. Really wish I got a pic of that. Now you have a million times more room to get the bell housing bolts off and when removing the transmission yo dont have to rotate it anymore. Now you can just separate and lower the transmission.
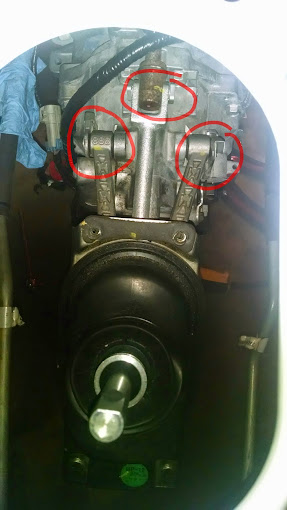
#17 Remove shift linkage assembly? You may not have to do this anymore with the extra clearance. I did it anyways and its not difficult. I found for me it was easier to access from up top reaching my hand through the tunnel. There are 3 pins that need to be removed. The one in the middle just use a flatblade screwdriver to remove 1 retaining clip and push pin out. The 2 on the outside use a flat blade again but if you look close at them they have a tab on one side, get your flat blade under there and pull up and rotate them. Once they are rotated out of the way they can be pushed out. Its actually real easy.
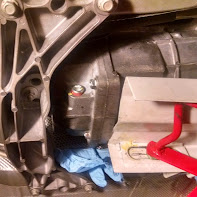
#18 Remove bellhousing bolts 15mm. I didn't need the 4' extension anymore but you could still use it.
#19 Separate transmission from engine. I actually used a 1" wood chisel and started at the bottom where a gap already exist and carefully separated the transmission working it on both sides until I got as far up as I could on both sides. Gave it a bit of a wiggle and it pretty much fell out.
I didn't keep up with installing the clutch since these notes and pictures came from having to remove the transmission again to tighten the remote bleeder line.
- Remove pressure plate
- Inspect flywheel, if hot spots are present or any irregularities remove it. Either replace it or get it resurfaced. I got mine resurfaced and the machine shop said he has done many dual mass flywheels and thinks its just a ploy to get you to buy a new flywheel. I'm still breaking in my clutch so I haven't driven it hard, but it is smooth as butter compared to before and no problems.
- replace pilot bearing
- Reinstall flywheel
- Reinstall pressure plate and bolts finger tight
- Align clutch with pilot bearing. Visibly check to make sure it is aligned.
- Tighten all pressure plate bolts to 11 lb/ft
- Tighten all pressure plate bolts to 26 ib/ft
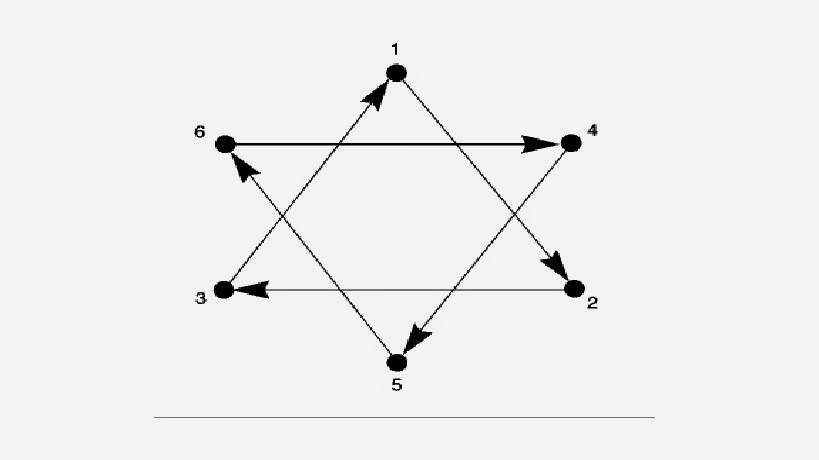
- Tighten bolts 1, 2, & 3 in sequence to 41lb/ft
- Tighten bolts 4, 5, & 6 in sequence to 52 lb/ft
- Reinstall transmission and the rest of the steps in reverse order.