NON RS -> RS HEADLIGHT GUIDE
Hey everyone, this is my first DIY!
I will try and keep it short and sweet.
This DIY is to take your regular Non-RS (halogen) headlamps and switch them out with the RS (Halo/HID) headlamps.
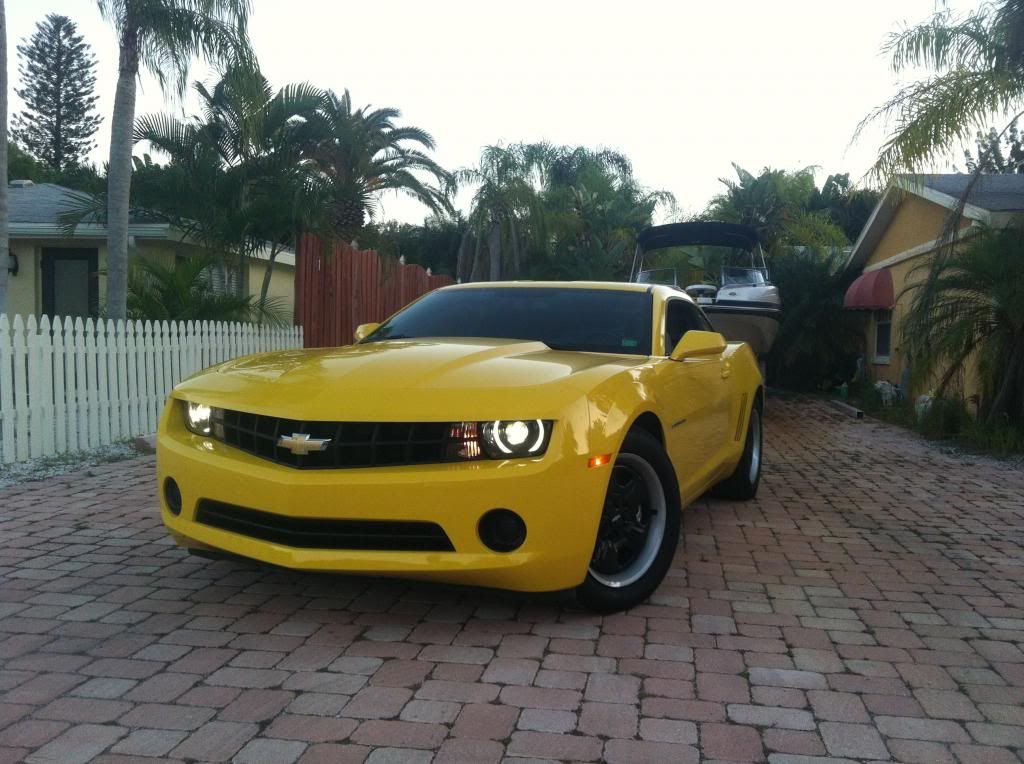
FINISHED PRODUCT:
 Tools Required:
10mm socket wrench
7mm socket wrench
(Sock wrench extension helps)
Flat head screwdriver
T-20 torque screwdriver
*Essential Item*
You must have a wiring harness to convert your Non-RS power supply into a RS power supply.
You can buy this wiring harness from
www.gen5diy.com
Plug and Play harness ($150)
http://www.gen5diy.com/PnP_harnesses...ight-harness-2
IF YOU WANT DRL HALOS (LIKE MINE) YOU MUST CUSTOM MAKE YOUR HARNESS. TALK TO GEN5DIY.COM FOR A CUSTOM HARNESS.
Quick Summary of what to do:
1) Remove front bumper
2) Remove stock halogen lights
3) Install wiring harness
4) Install new RS lights
5) TEST LIGHTS
6) Put front bumper back on
I used this video to take off the front bumper, you can use it too. You can see exactly how to take everything off and in what order to do it. This is not my video and I do not take any credit for it. It is simply an extra "helper"
Detailed Summary With Pictures:
If you have any questions about a step, or do not understand me, or you are stuck and need help. Feel free to ask questions and/or PM me. Good luck!
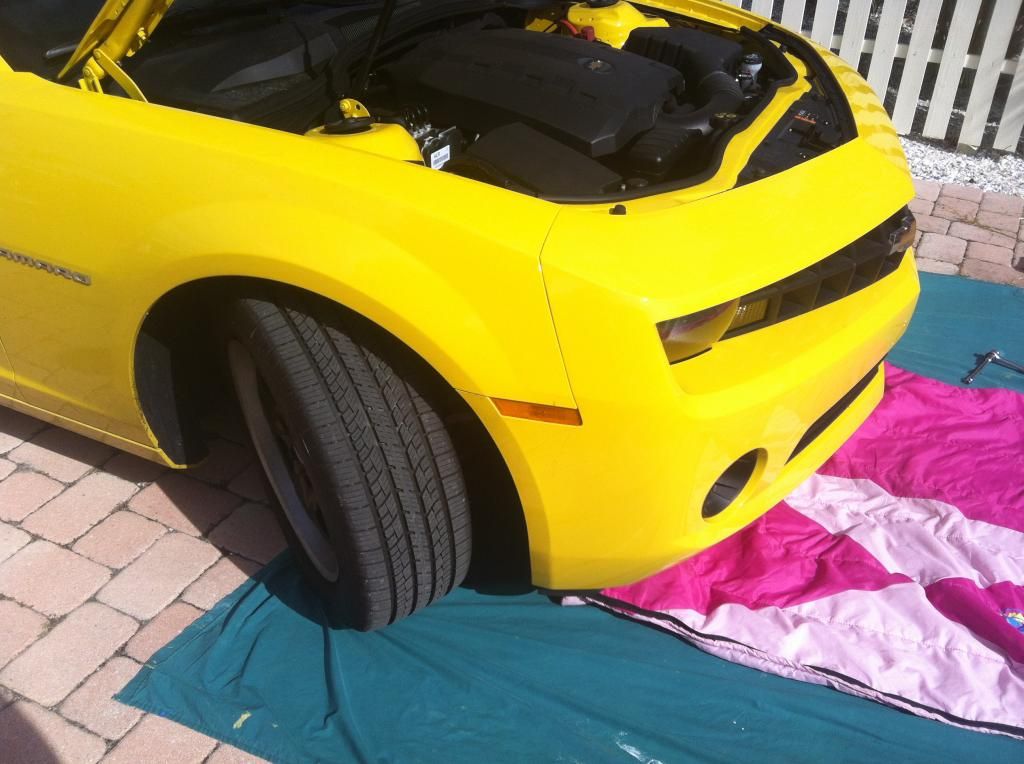
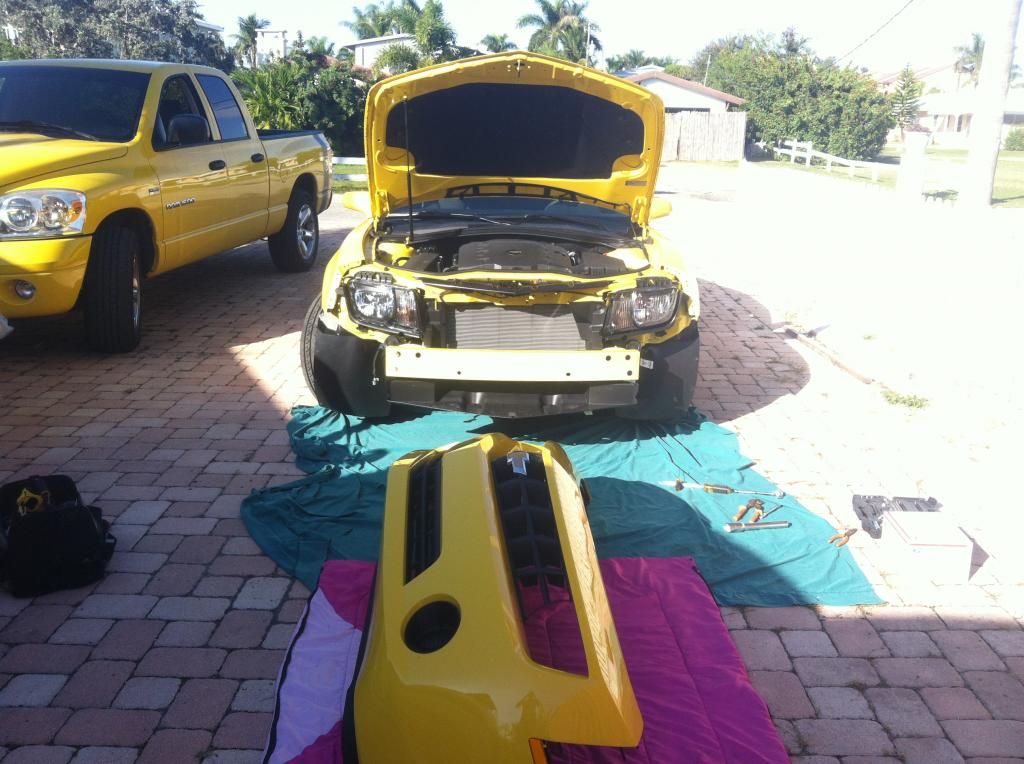
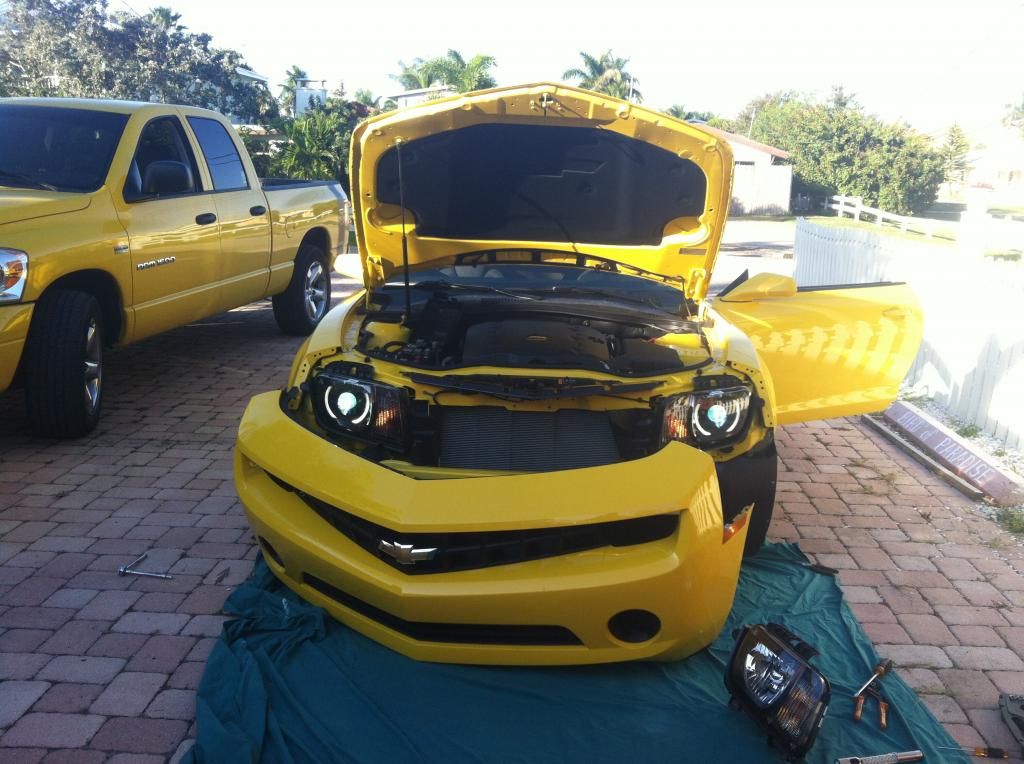
STEP 1: LAY BLANKET DOWN & POP HOOD
 STEP 2: TURN WHEEL TO FAR RIGHT/LEFT (Some people use a car-jack to lift it to make it easier, I did not want to mess around with a jack-lift so I switched between far left and far right to get the screws)
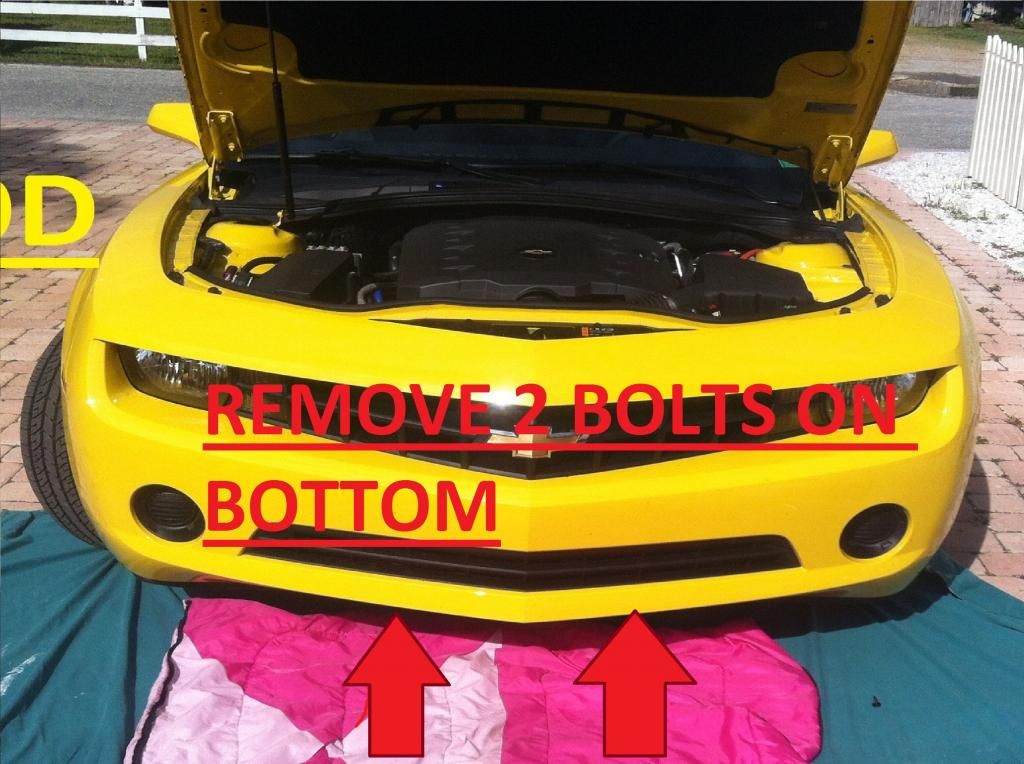
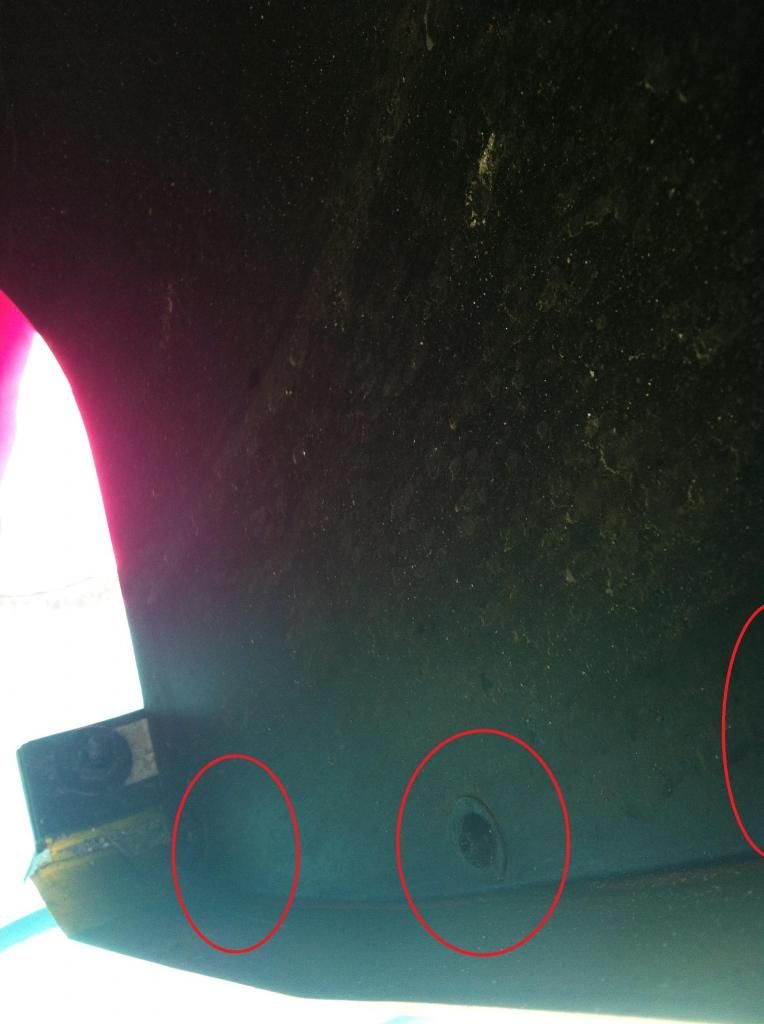
 STEP 3: REMOVE 2 BOLTS FROM BOTTOM OF BUMPER
 STEP 4: REMOVE 6 SNAP SCREW ON BLACK PART (TOP OF BUMPER)
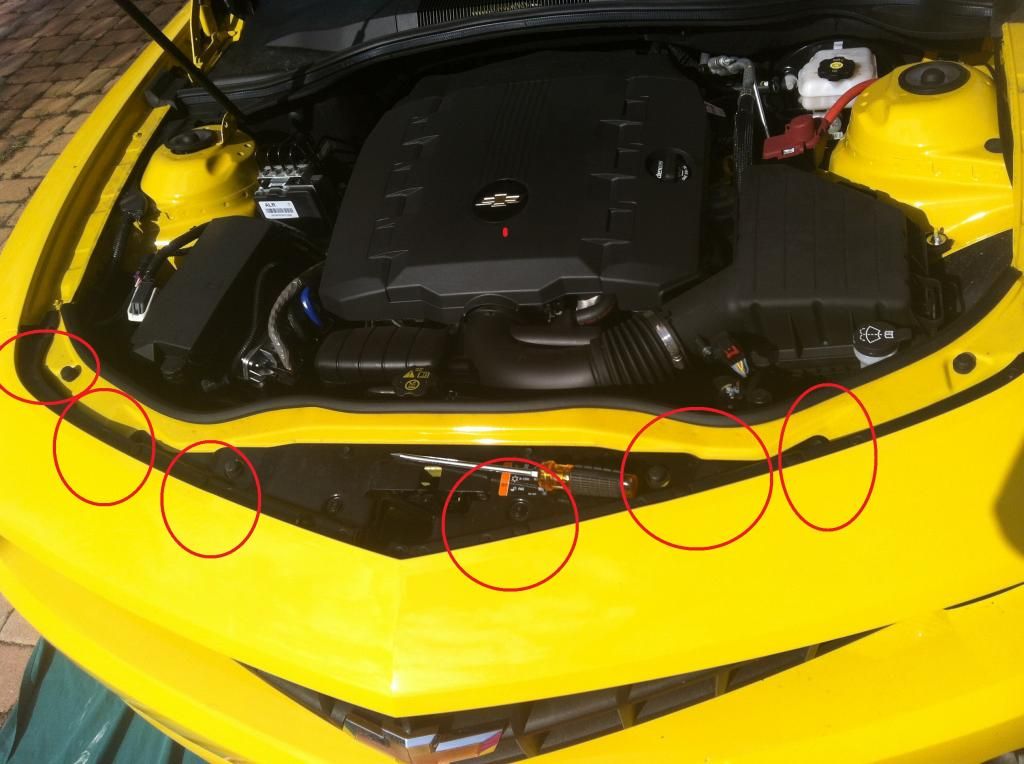
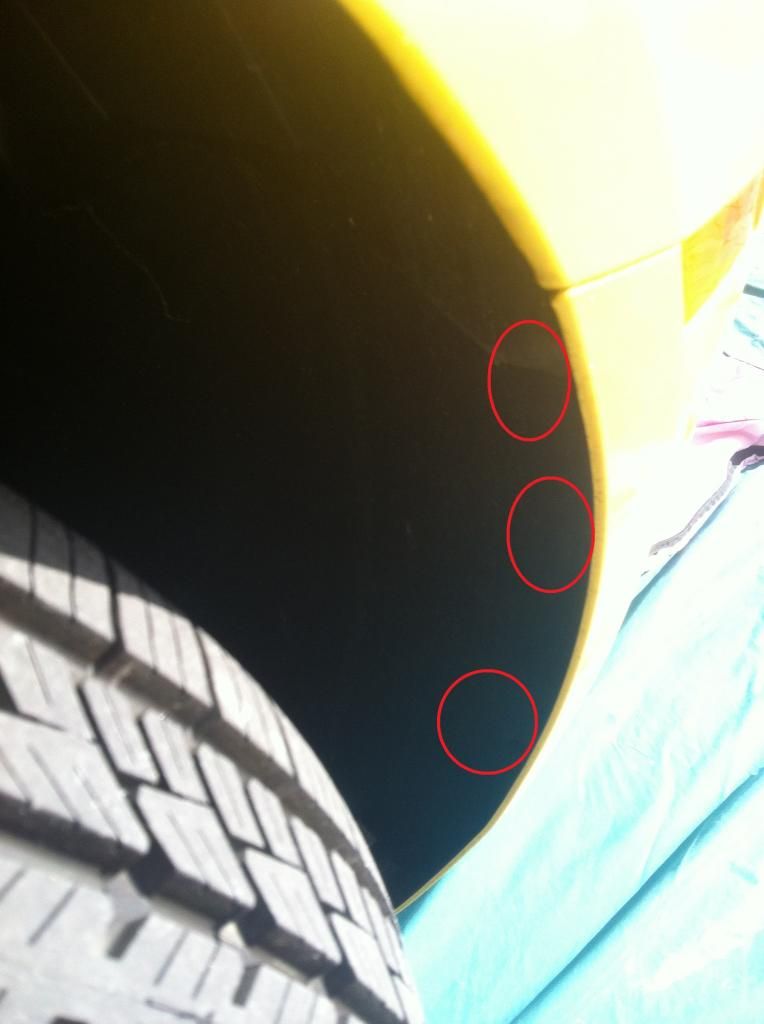
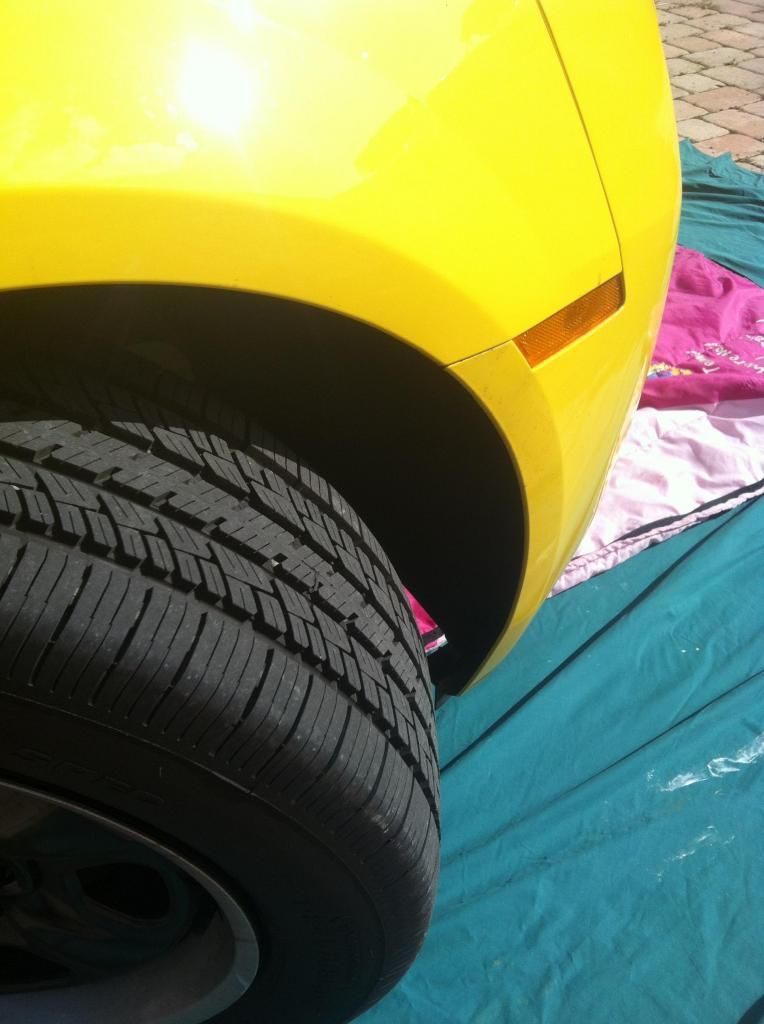
 STEP 5: REMOVE 3 TORQUE SCREWS IN WHEEL WELL (PLASTIC)
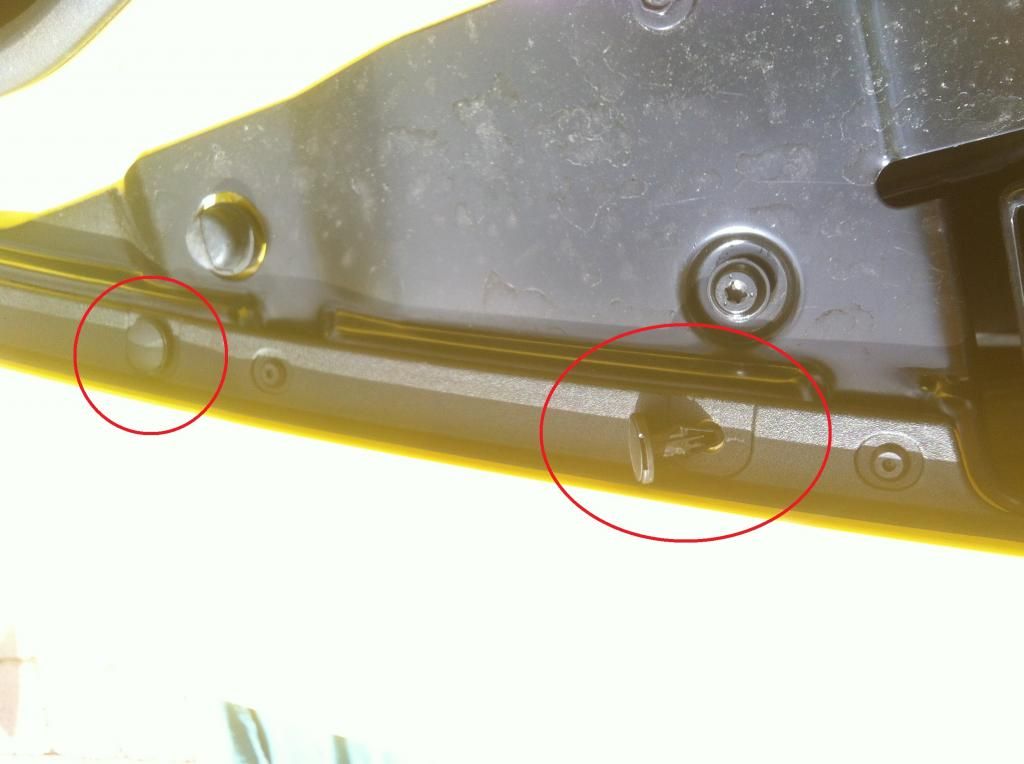
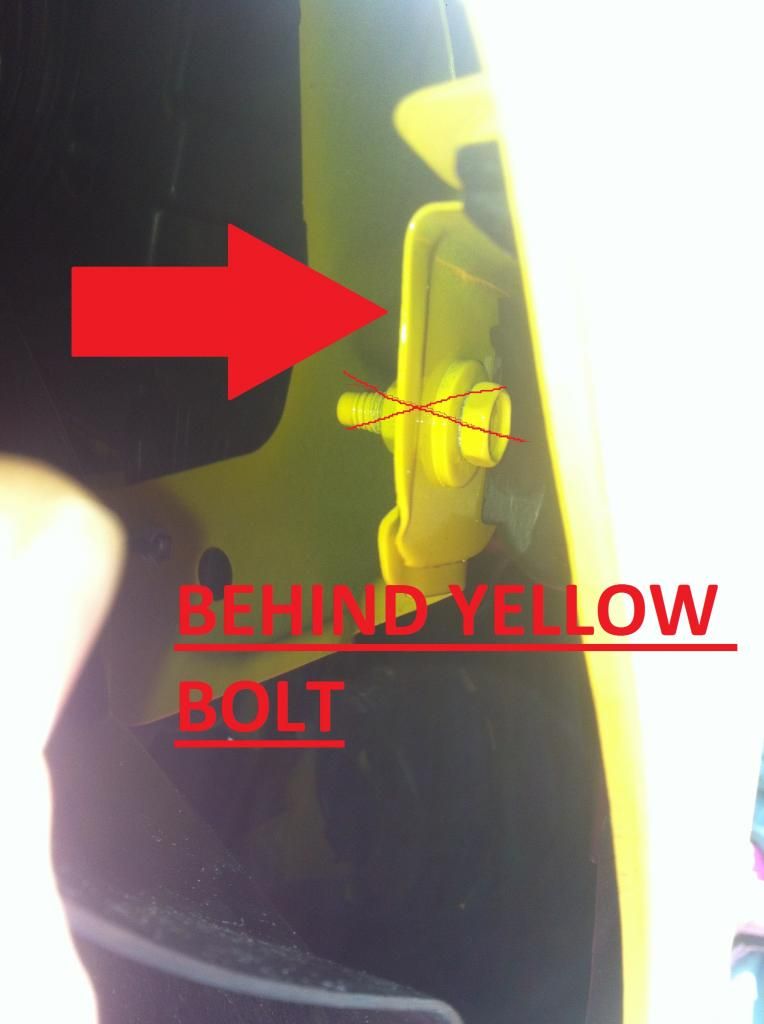
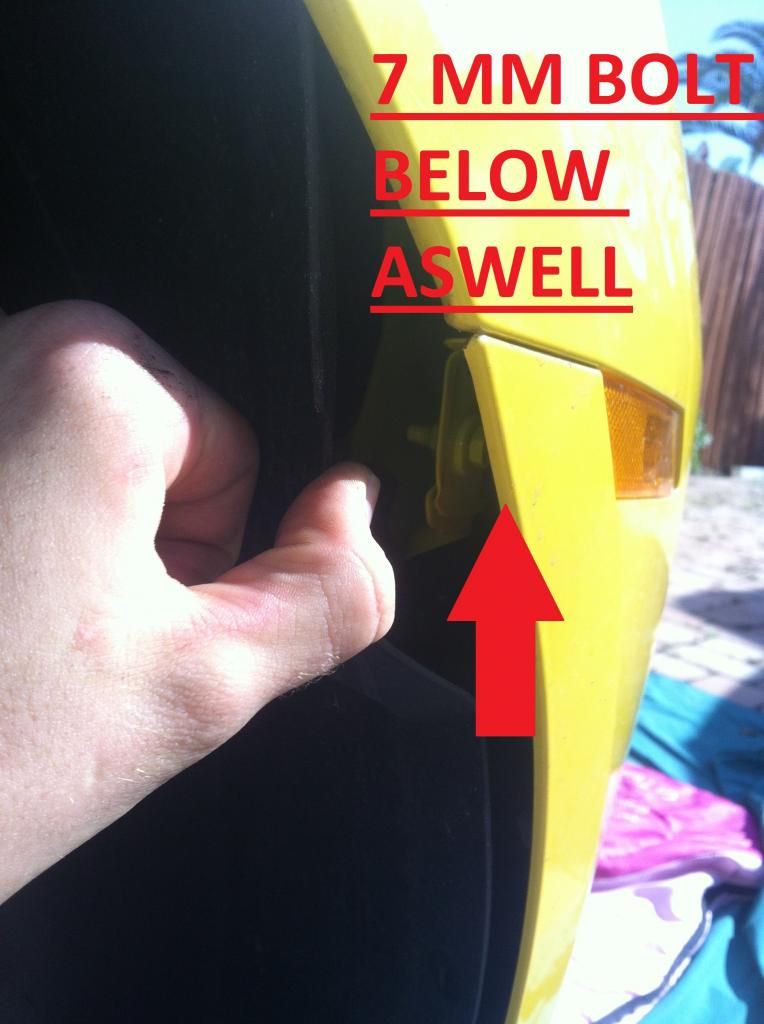
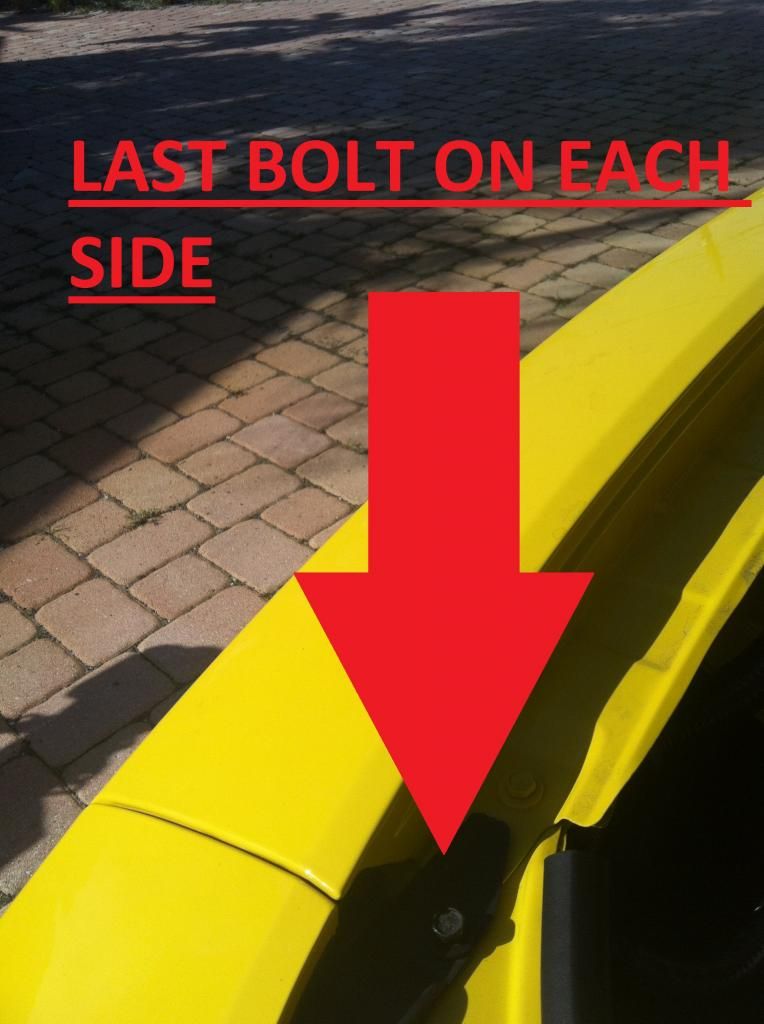
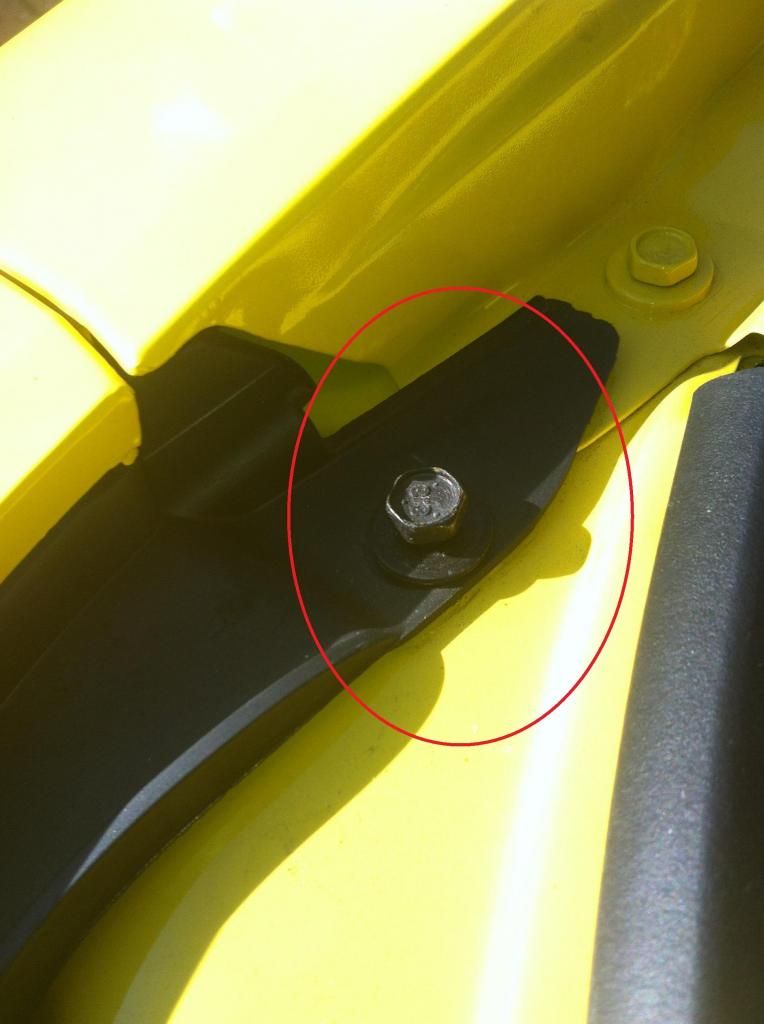
 STEP 6: REMOVE 2 BOLTS- 1 BEHIND THE YELLOW BOLT & 1 BELOW BLACK PART OF SIDEMARKER LIGHT (INSIDE WHEEL WELL)
 STEP 7: REMOVE 3 – 10MM BOLTS FAR IN WHEEL WELL (TOWARDS TOP OF BUMPER ON THE INSIDE)
I do not have pictures of this, but look around the wheel well and you will see these plastic "pop out" pins that hold the wheel well tight on the car. You can remove as many of these as you would like to move the wheel well more easily so you can get to the bolts easier.
 STEP 8: REMOVE 2 BOLTS ON EACH SIDE OF TOP OF BUMPER. WHEN THIS COMES OFF, IT IS FREE!
 STEP 9: REMOVE BUMPER BY UN-PLUGGING SIDEMARKET LIGHT WIRING HARNESS ADAPTER (FRONT LEFT OF CAR)
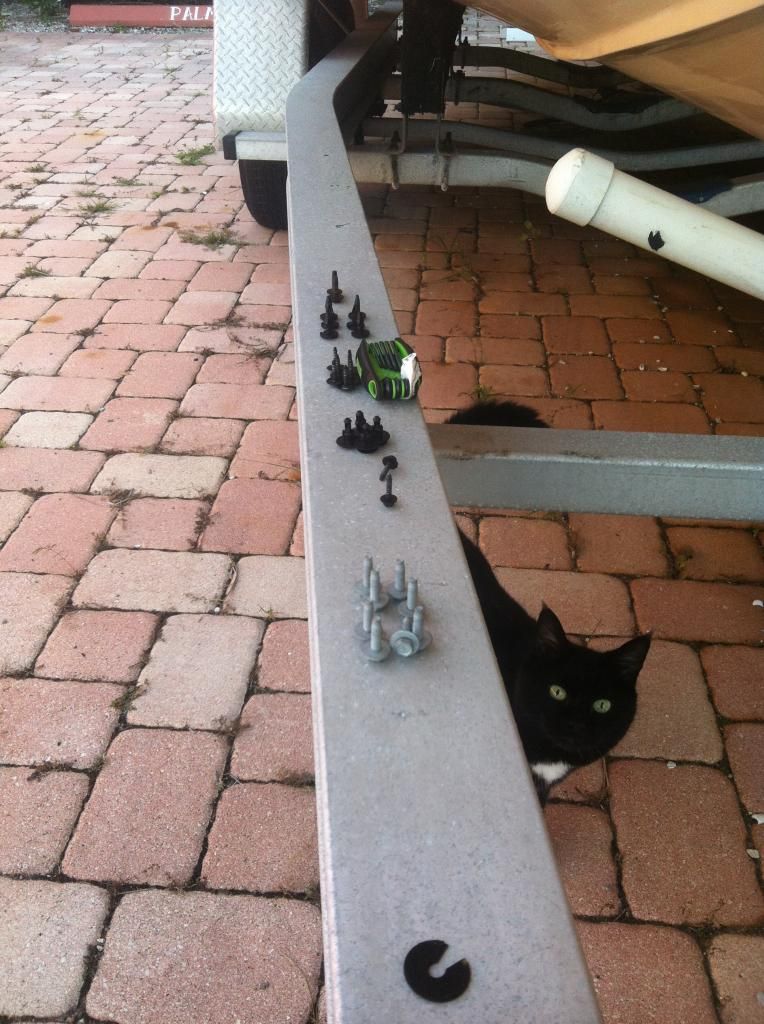
*IMPORTANT* MAKE SURE YOU PUT YOUR BUMPER ON A TOWEL/SHEET SO IT DOES NOT GET SCRATCHED!!!
STEP 9: REMOVE BUMPER BY UN-PLUGGING SIDEMARKET LIGHT WIRING HARNESS ADAPTER (FRONT LEFT OF CAR)
*IMPORTANT* MAKE SURE YOU PUT YOUR BUMPER ON A TOWEL/SHEET SO IT DOES NOT GET SCRATCHED!!!
 CAR WITH BUMPER OFF AND HALOGENS IN...
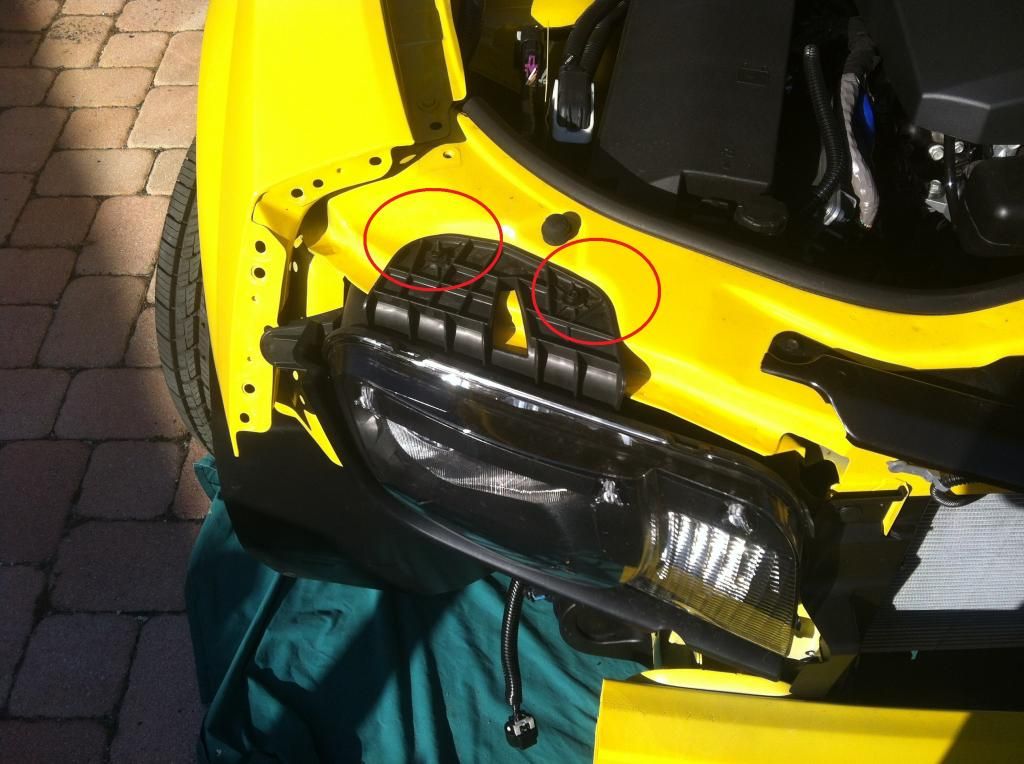
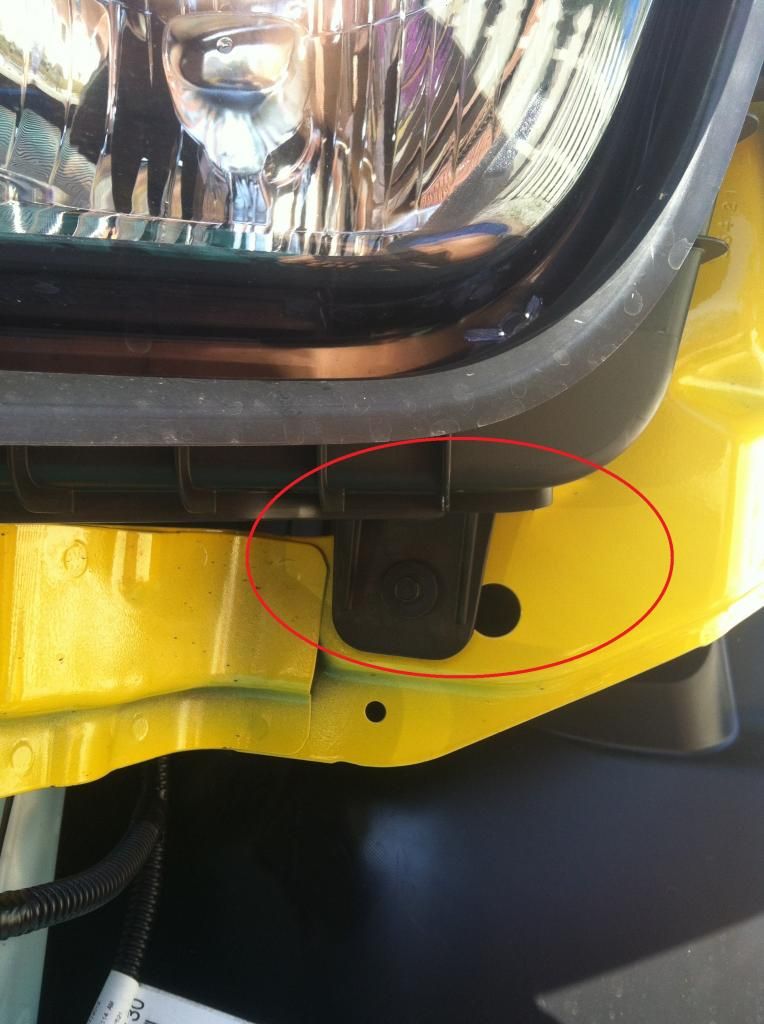
 STEP 10: REMOVE OLD HEADLIGHTS: TWO BOLTS ON TOP OF LIGHT AND TWO ON BOTTOM
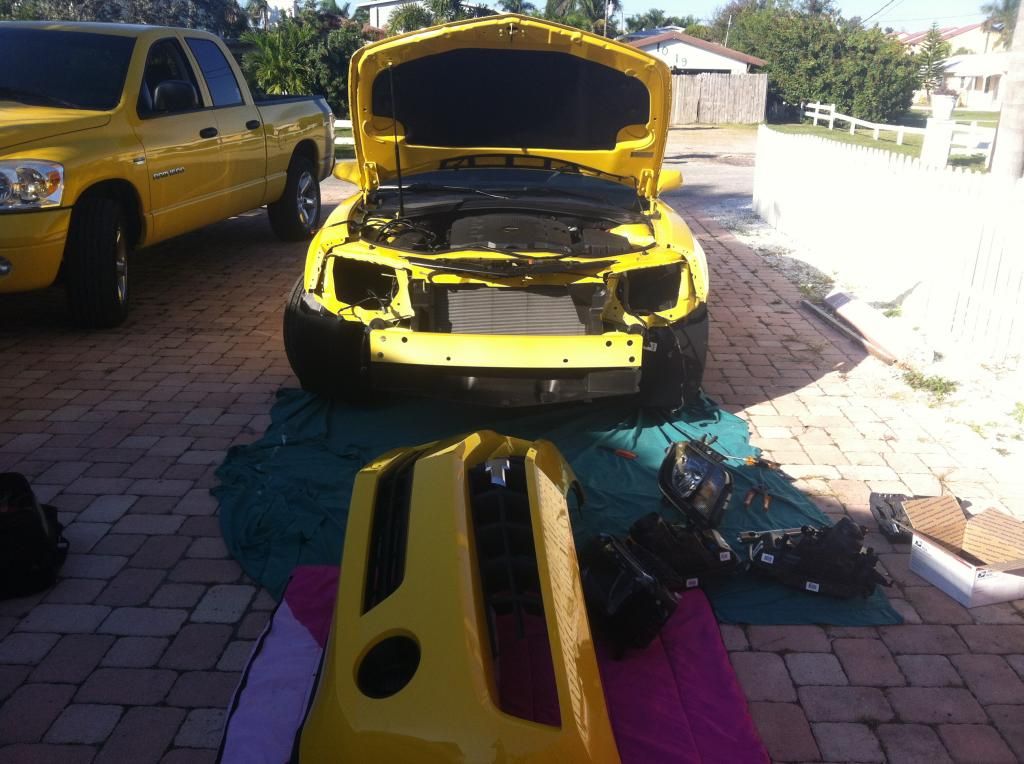
 CAR WITH FRONT BUMPER + HEADLIGHTS REMOVED
 STEP 11: INSTALL NEW “RS” HEADLIGHTS (SCREW IN 4 BOLTS)
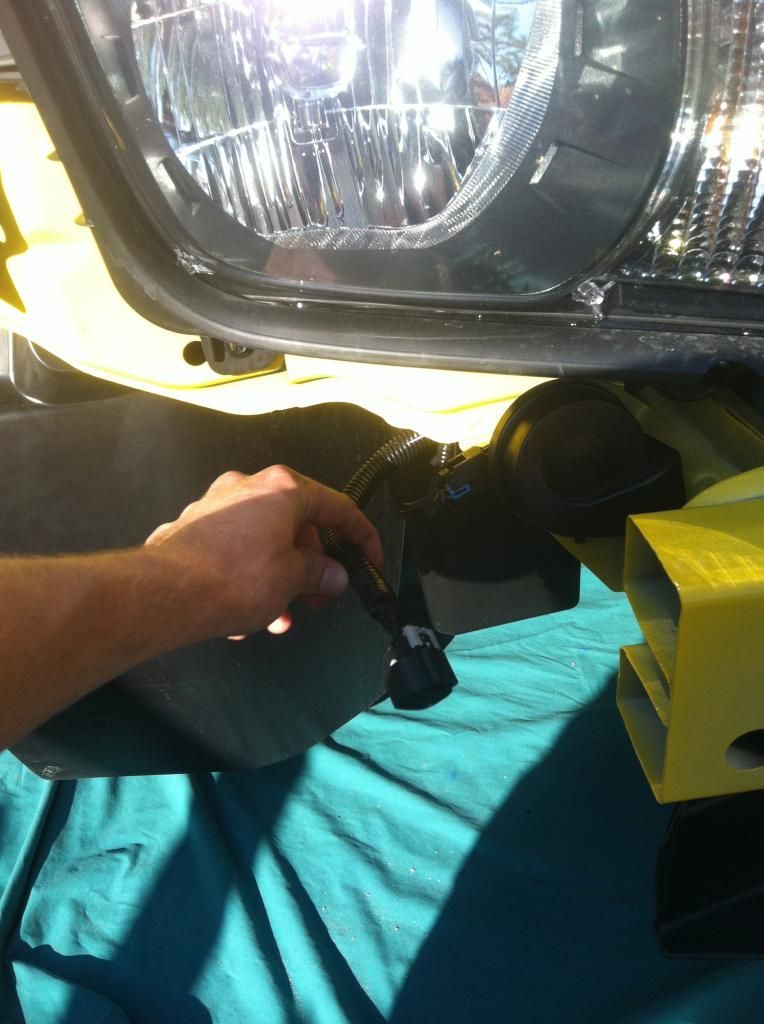
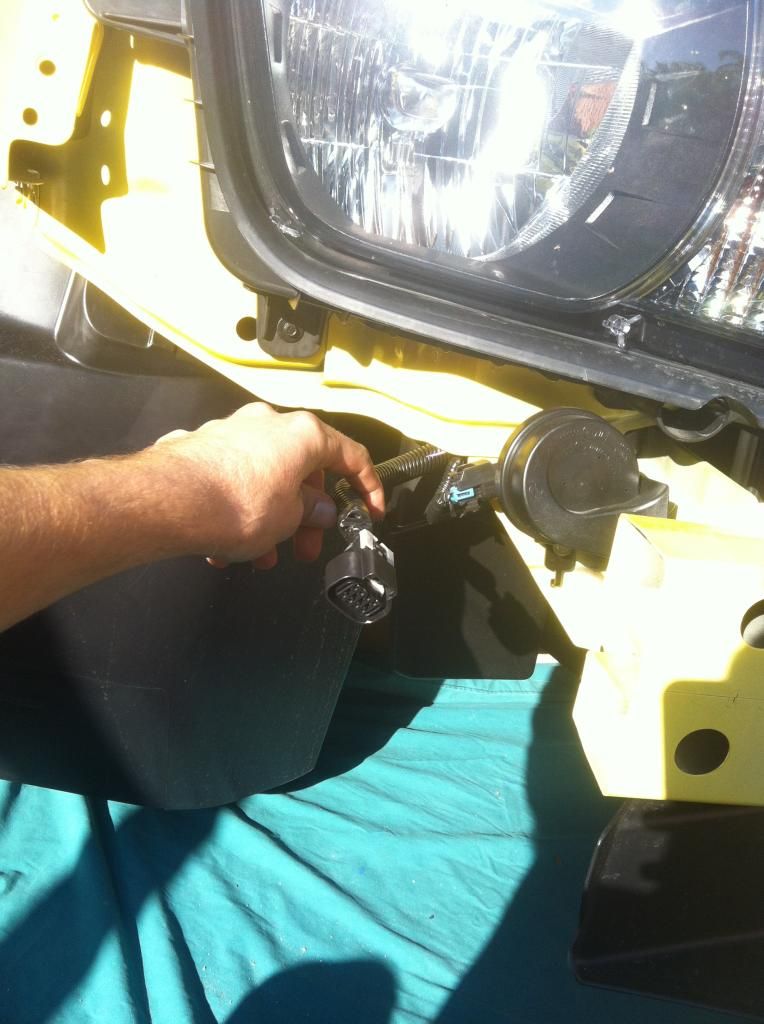
STEP 12: PLUG IN OLD AMBER LIGHT ADPATER
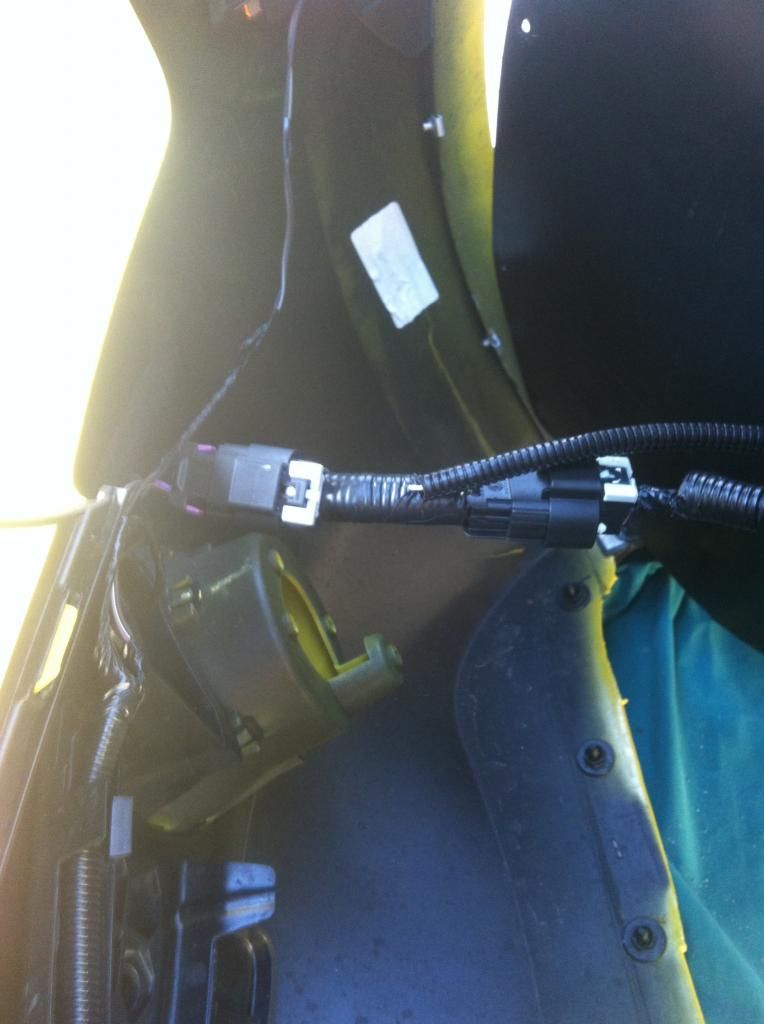
STEP 13: PLUG IN GEN5DIY HARNESS FROM OLD HALOGEN LIGHT POWER-> NEW HARNESS - > NEW RS HID LIGHT
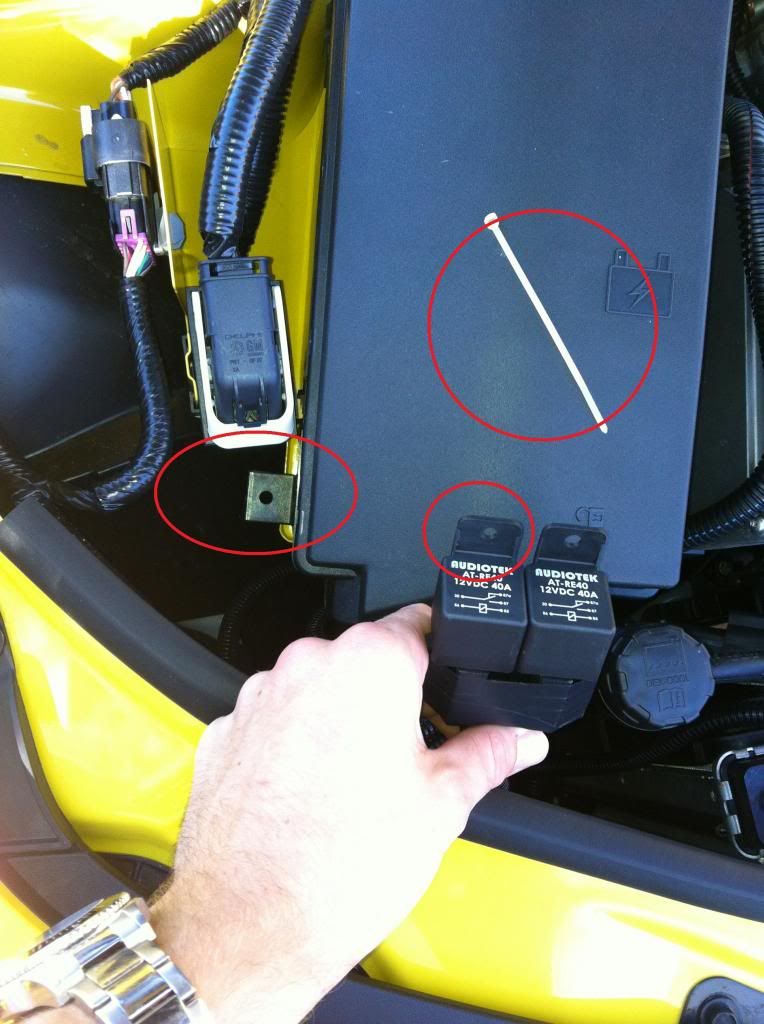
STEP 14: FOR DRL HALOS: PLUG IN ADAPTER BETWEEN FRONT BUMPER AND SIDEMARKER ADAPTER
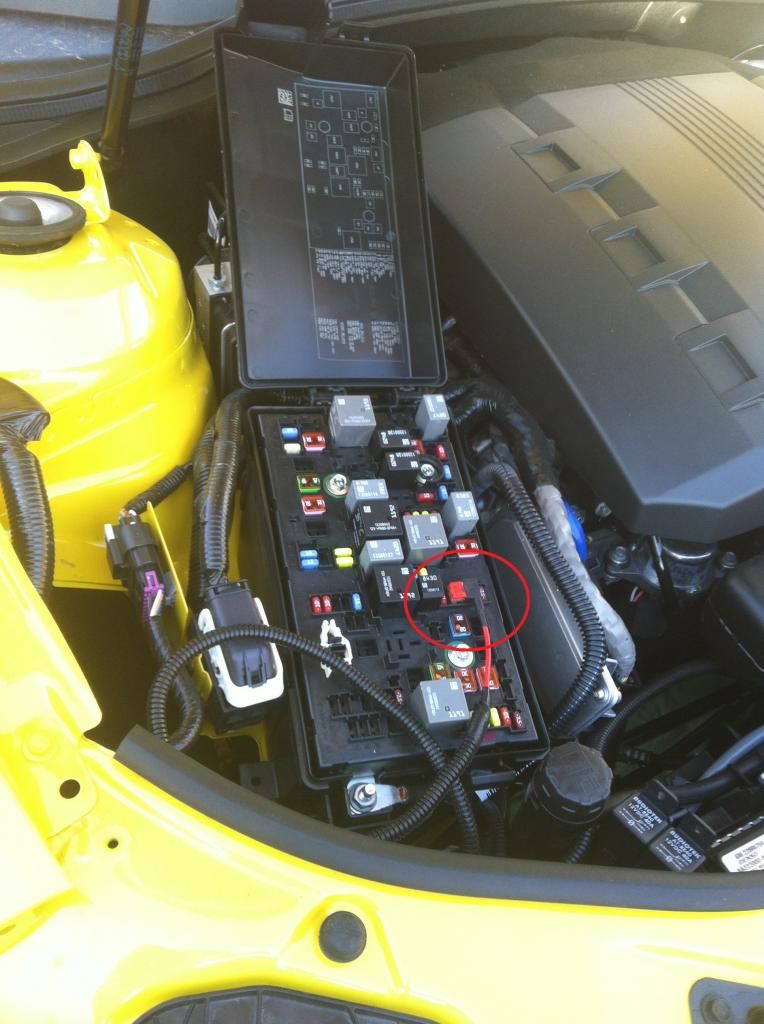
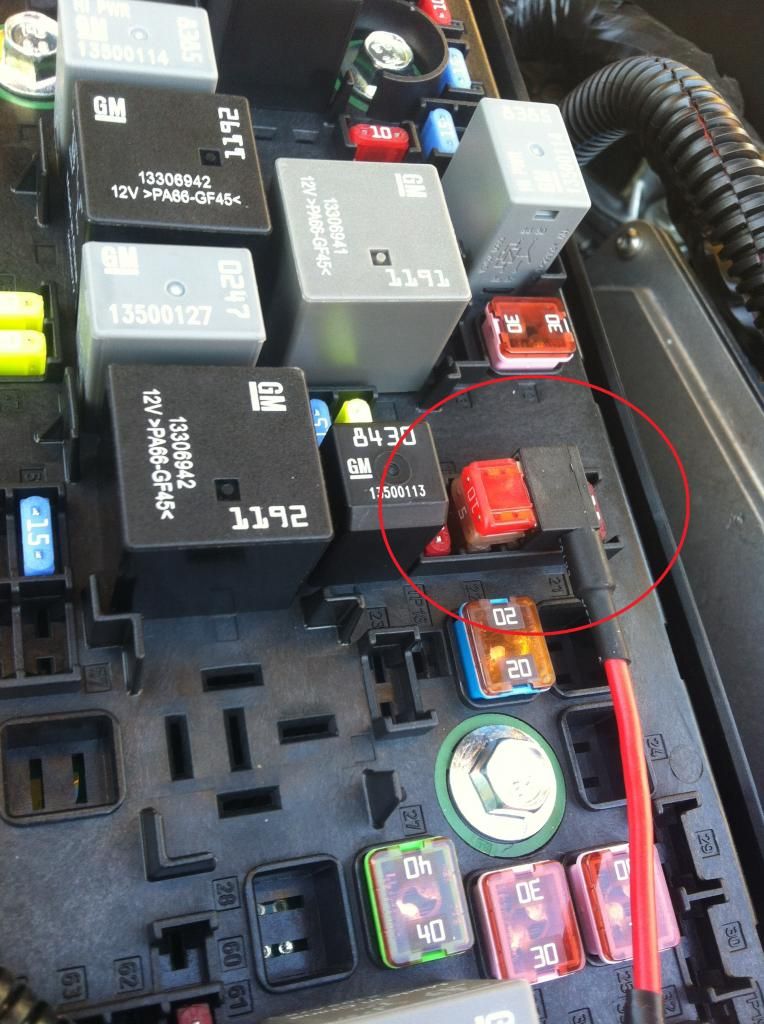
STEP 15: FOR DRL HALOS: PLUG IN “ADD A FUSE” 10 AMP TO THE 5 AMP IGNITION FUSE POSITION - SHOWN IN PICTURE
 STEP 16: TEST LIGHTS!!!
 IF LIGHTS WORK...... REINSTALL FRONT BUMPER BY GOING BACK 1 BY 1
ALL THE SCREWS...
IF LIGHTS WORK...... REINSTALL FRONT BUMPER BY GOING BACK 1 BY 1
ALL THE SCREWS...
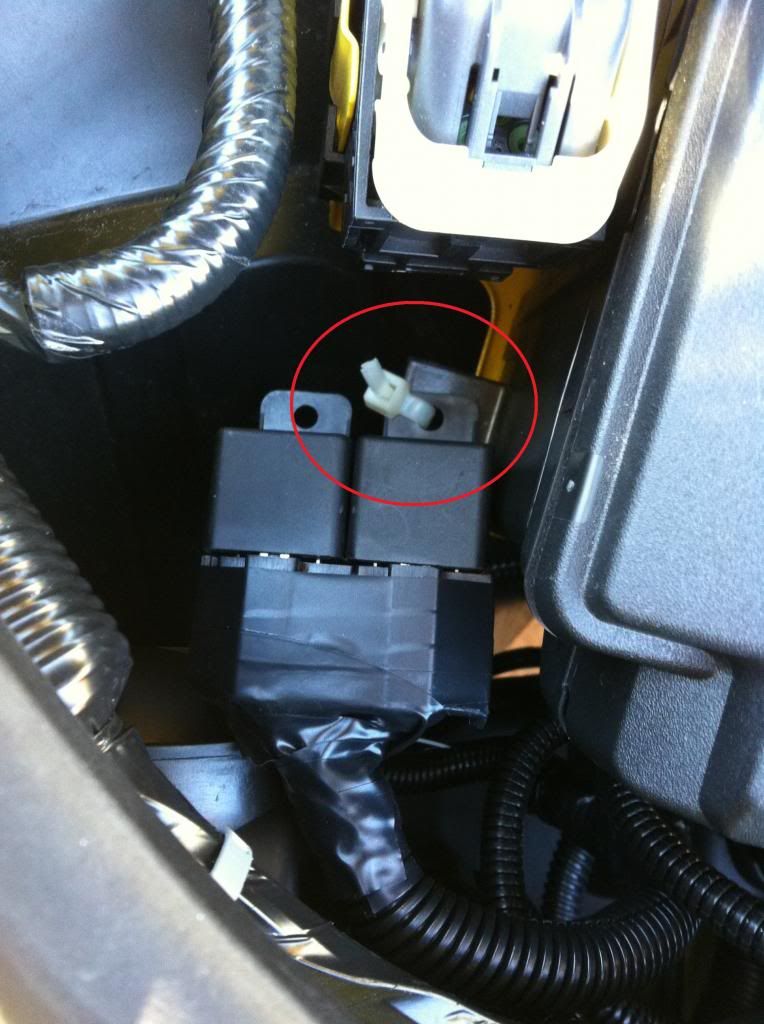
 STEP 17: MOUNT RELAY HARNESS ONTO FUSE BOX HOLE (I used a zip-tie)
Cut zip-tie to desired lenght...
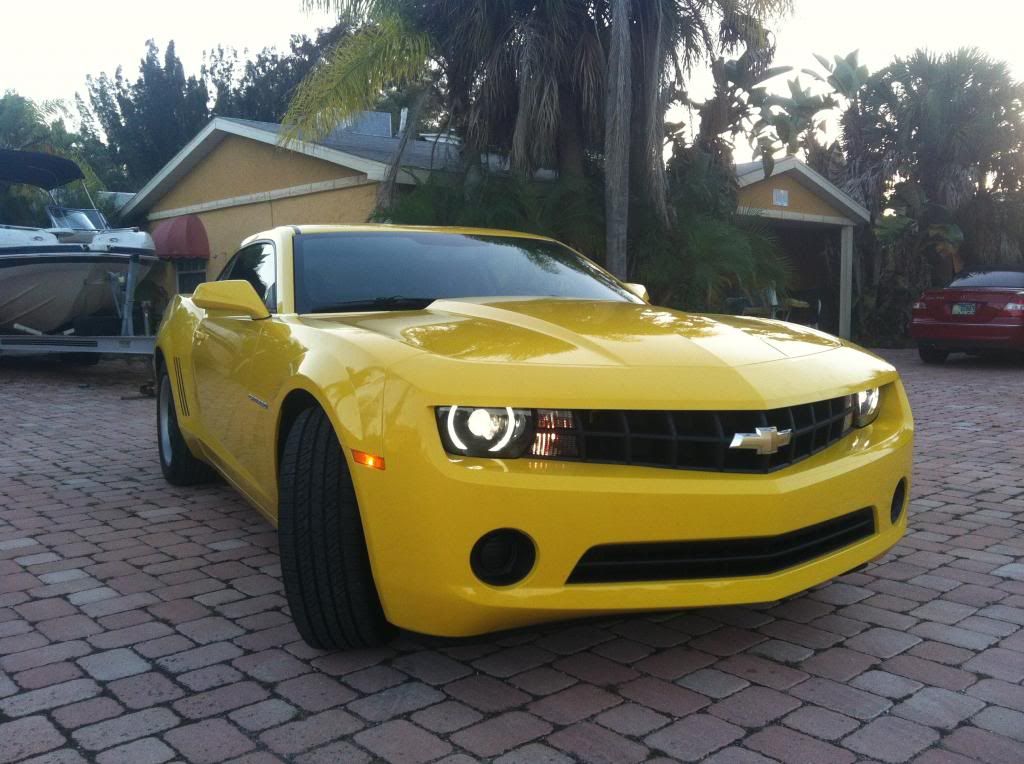
 FINISHED PRODUCT:
1ST PIC- DAYTIME “AUTO” DRL HALOS
2ND PIC- LIGHTS TURNED ON
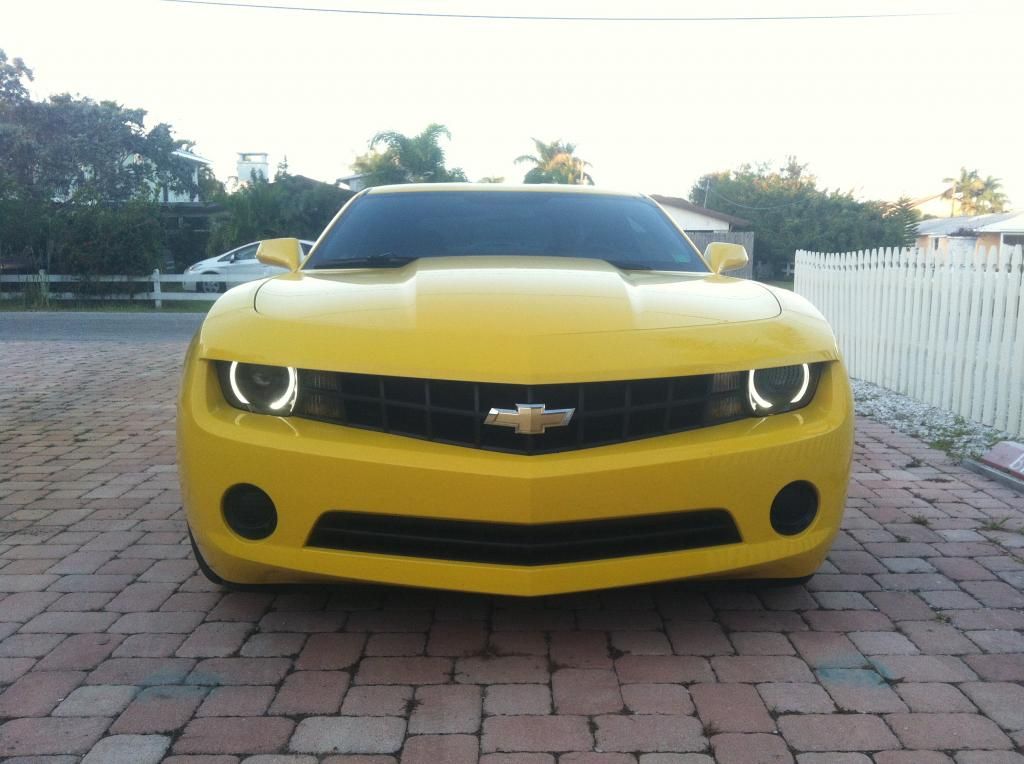
Me and my Car.. Just for fun :P