You are browsing camaro5 

|
 06-29-2011, 04:10 PM
|
#1 |
 
Drives: 2010 Camaro 2SS/RS L99 RJT Join Date: Sep 2009
Location: Knoxville
Posts: 211
|
DIY - ADM Scoop & Apex Washer Tank Installed with a CAI intake
Well I have waited until there was a good washer bottle replacement solution to install my ADM scoop so now I have finally installed my scoop using the Apex washer tank replacement kit.
It produced fantastic results! I have to admit my biggest fear was cutting the plastic behind the grill for proper placement of the scoop. So here are some of my tips and pictures during my installation. First of all as suggested by the folks at ADM I taped the plastic piece to be cut vertically at the edge of the reinforcements and then horizontally to the left using this as a guide to make the cuts straight. I did not however get a picture of the how I taped this onto the plastic. Sorry. Here is a picture of the plastic after the cut: 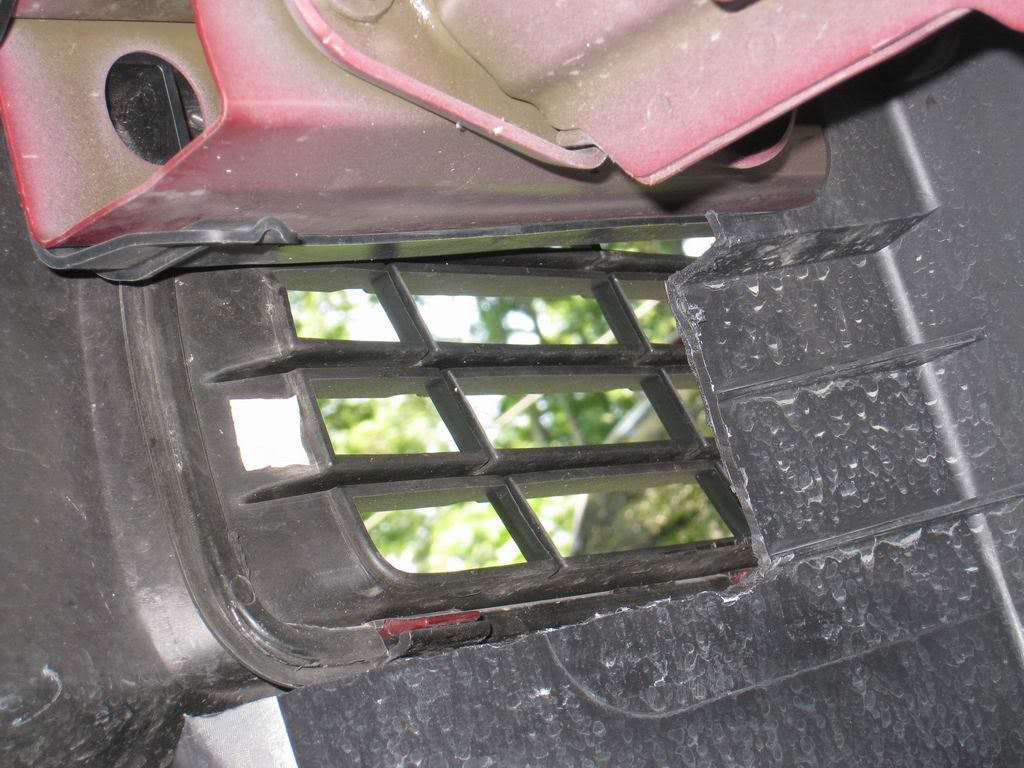 And here is the piece that came out: 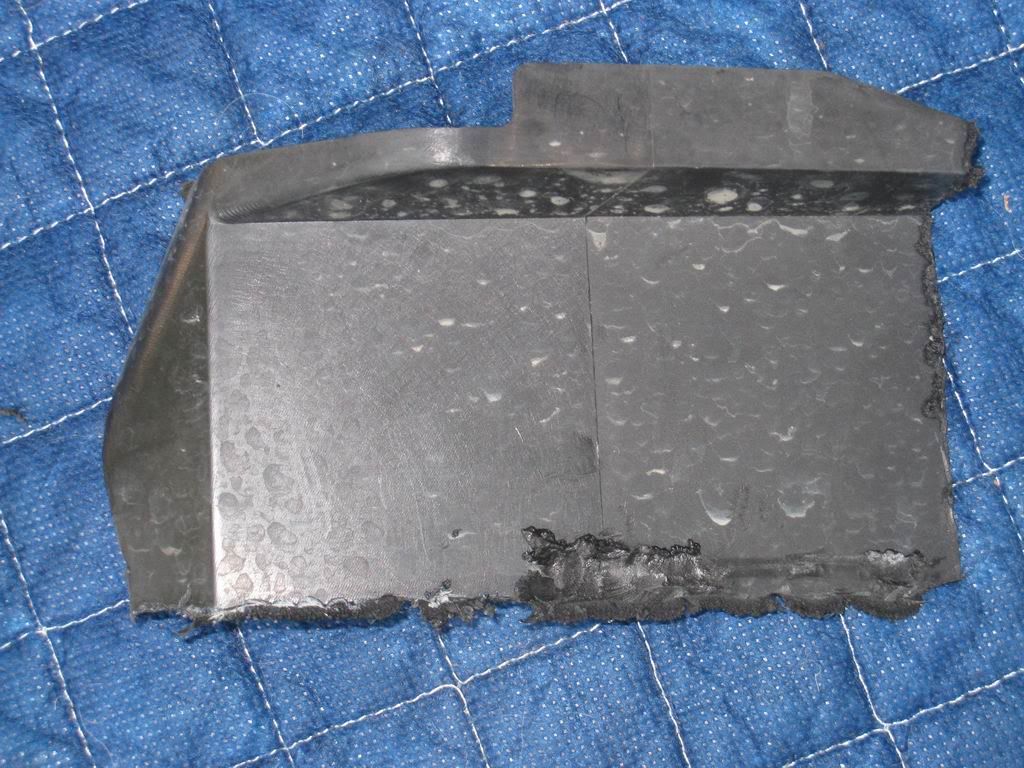 Here are a couple of suggestions for cutting this piece out. First I used a Dremel tool with a circular disk to make the vertical cut. Put the Dremel on its low speed setting, this will make it easier to guide the tool while you are cutting and it still has plenty of speed to cut through the plastic. You will have to use the round metal tip to make the horizontal cut because there is very limited room so I went with the round metal bit. It is more difficult to be careful making the cut straight so take your time and leave the tool on low. Next you will need to cut off an eraser sized piece of plastic on the washer pump for it to fit properly into the new washer tank. This is described in good detail with your instructions you get with the APEX kit. I used the round metal tip on the Dremel as well and used the low setting again. Just start at the top and work down the piece until you get it worn down. This was very quick and easy. Here is a picture of the circular blade, the metal blade (on the Dremel), and the washer pump after I removed the plastic piece: 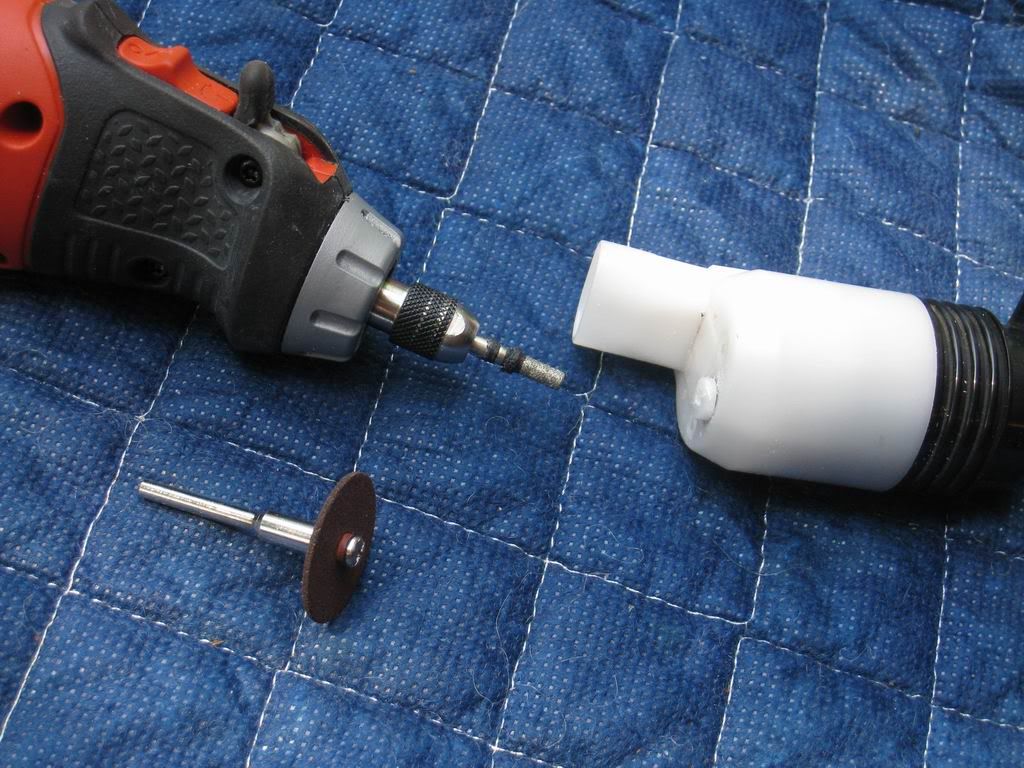 Next I used a conical stone grinder bit on the Dremel to clean up the opening where the scoop will go, I placed the scoop into the hole and found I needed to take off about 1/16" to 1/8" more off the bottom so the scoop would fit in better and was snug when in place. Here is the cleaned up opening:  Next is the installation of the washer bottle to the scoop. Place the washer bottle on the scoop far to the right and to the top to mark where to drill the holes for installation. Make sure you go as far to the right as possible because my washer bottle fit very snug up against the back of the DRL light on the inside of the bumper on final install it worked but could have been a little more to the right about a 1/2" more would have been just right. Drill some small holes first: 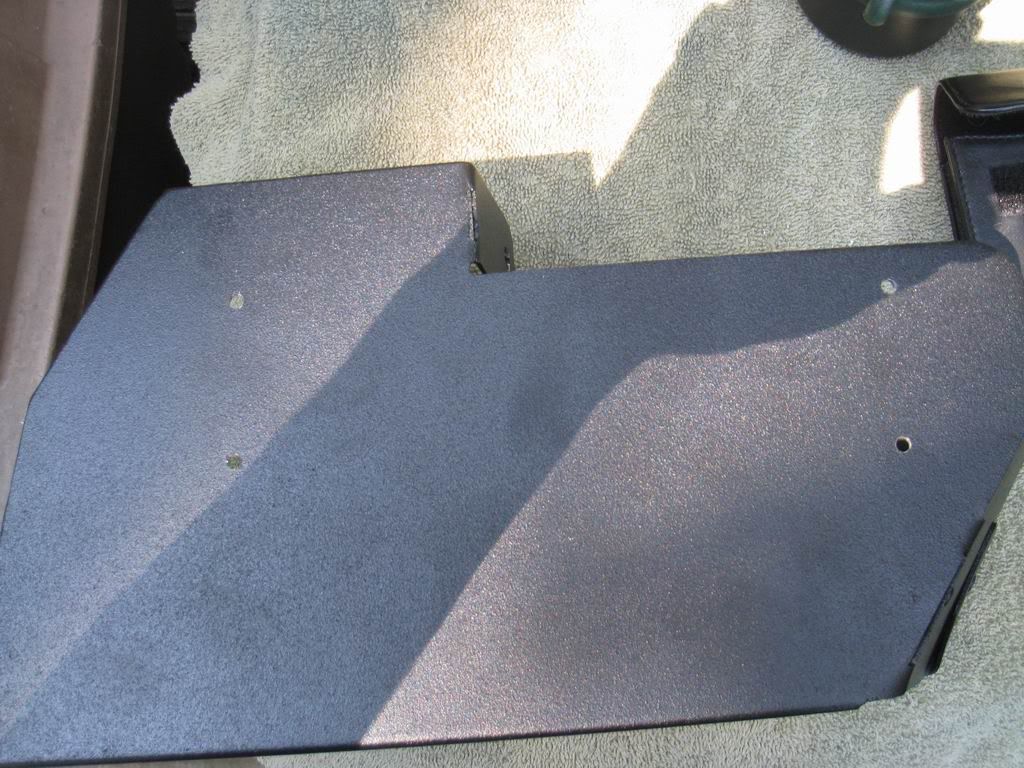 Then your 5/16" final holes:  Here is the washer bottle installed on scoop with washer pump installed into the bottle. 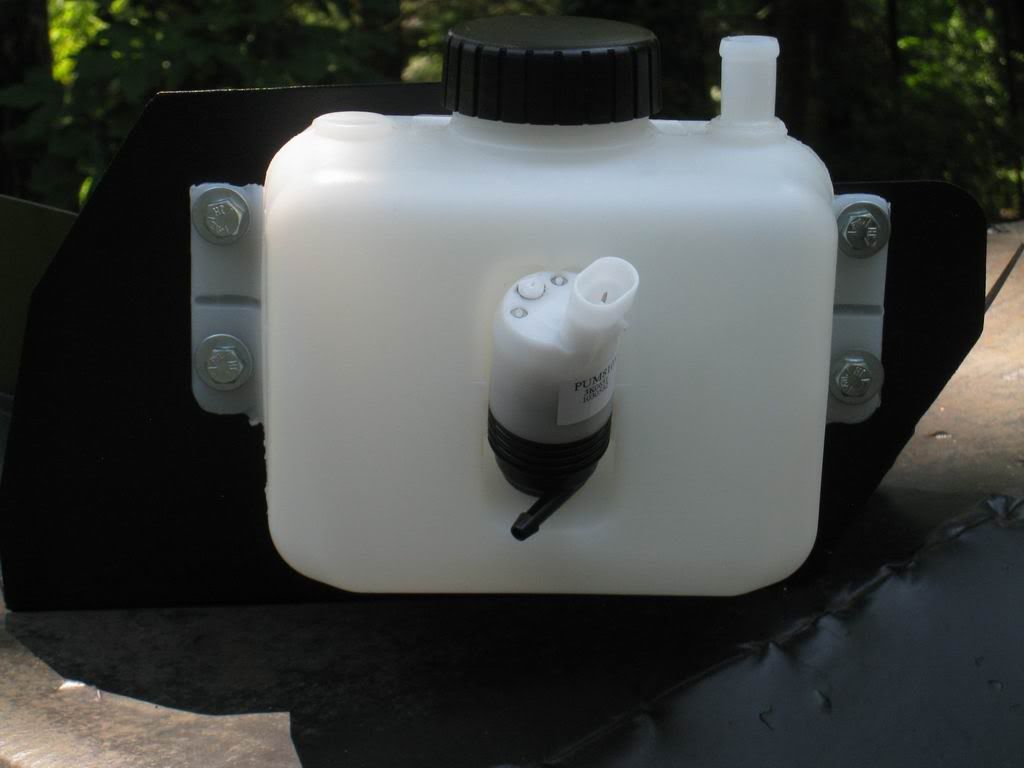 The inside:  Next I took off the CAI housing to install the filler piece, I went on the outside of the housing and went ahead and attached the hose so I could route it when I reinstalled the housing which worked out very well. I routed the hose along the bottom and then back to the front there will be space of about 1" in the front that you can fit the hose through when you get the housing back in place. Here is the housing with the filler installed: 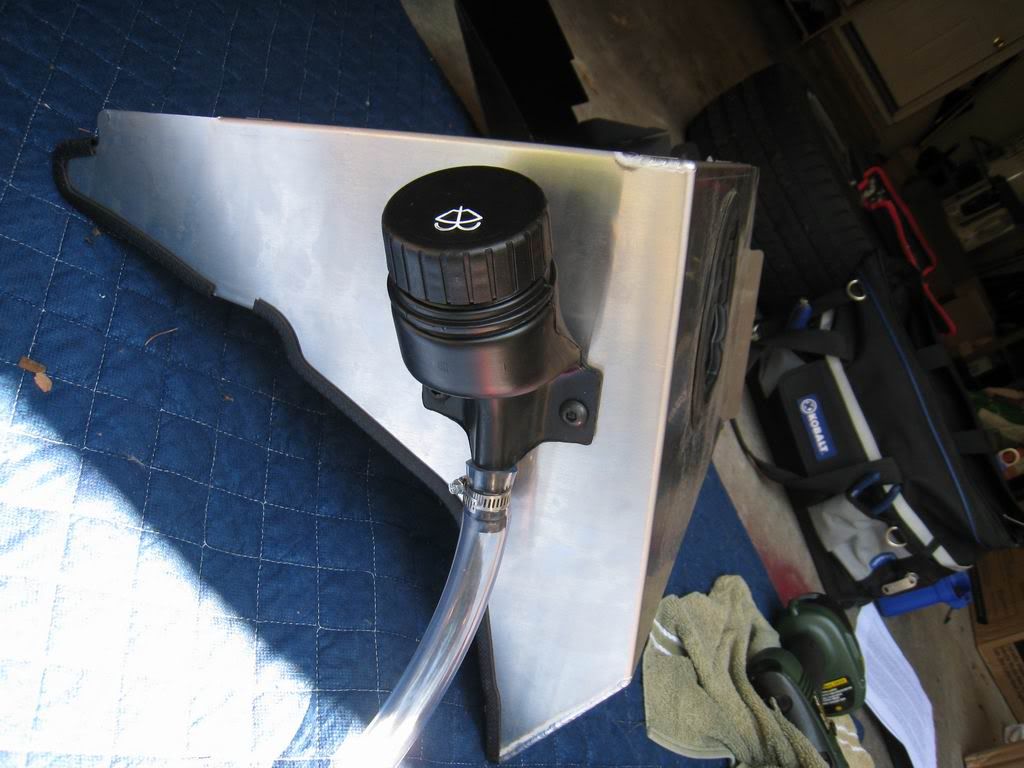 Install the scoop with bolt supplied on the top that will go through the front side of the horn mount. Install the bottom bolt which is one of the original washer bottle bolts. Replace the hose on the bottom pump that goes to the wiper blades. Finally plug in the wiring harness to the pump. Here is everything finished on the bottom side before I put the fender well back in place:  Fill the bottle and you are finished: 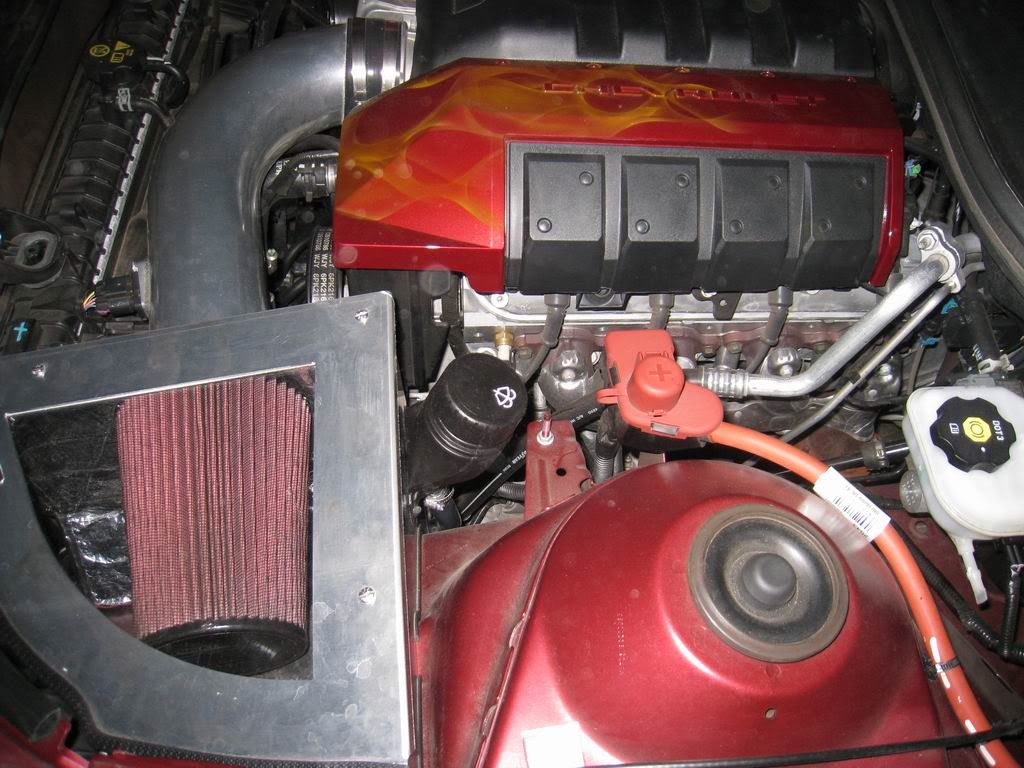 Three great products that work fantastic together!! Clutch
__________________
Solo Mach XL CatBack w/ J Pipe - Texas Speed LT Headers - 3M Nano-Carbon Polyester Tint 20% - 3M Crystalline 90% Tint on Windshield - Azentek Smart Mirror w/Back up Camera - CAI Intake - ADM Scoop - APEX Washer Tank Kit - PowderPro Ported & Polished TB
|

|

|
|
06-29-2011, 06:02 PM
|
#2 |
|
2SS

Drives: 2016 2SS, Red Garnet Tint Join Date: Nov 2008
Location: Imperial, CA
Posts: 1,343
|
I also added the ADM Race Air Scoop on my install. The differences for my setup is that I installed the Roto-Far CAI and for the washer bottle I used Roto-Fabs Windshield Washer Relocation Kit. Very Happy with the setup. It is also Great that other Vendors are coming out with kits for Us to do these Mods on our cars. Your setup looks Great.
Walt B.
__________________
2016 Camaro 2SS
2005 Dodge Magnum R/T (Yes it has a Hemi) 1987 Camaro RS (California Special) - For Sale Gen6, 2016 Camaro 2SS, Red Garnet Tint (with Silver Rally Stripes) Ordered: 2-12-2016 TPW: 3-7-2016 Built: 3-7-2016 VIN 1G1FH78G0157626 Delivered: 4-26-2016 |
|
|
|
|
06-29-2011, 06:09 PM
|
#3 | |
|
Drives: 2010 Camaro 2SS/RS L99 RJT Join Date: Sep 2009
Location: Knoxville
Posts: 211
|
Quote:
Love that color BTW!! Clutch
__________________
Solo Mach XL CatBack w/ J Pipe - Texas Speed LT Headers - 3M Nano-Carbon Polyester Tint 20% - 3M Crystalline 90% Tint on Windshield - Azentek Smart Mirror w/Back up Camera - CAI Intake - ADM Scoop - APEX Washer Tank Kit - PowderPro Ported & Polished TB
|
|
|
|
|
|
06-29-2011, 08:33 PM
|
#4 |
|
-Casey
Drives: '10 2SS/RS Black on Black Join Date: Jan 2011
Location: Little Rock, AR
Posts: 39
|
Do you think a hot knife would work well to cut the plastic? Seems difficult to maneuver the dremel in there...
|
|
|
|
|
06-29-2011, 08:44 PM
|
#5 | |
|
Drives: 2010 Camaro 2SS/RS L99 RJT Join Date: Sep 2009
Location: Knoxville
Posts: 211
|
Quote:
__________________
Solo Mach XL CatBack w/ J Pipe - Texas Speed LT Headers - 3M Nano-Carbon Polyester Tint 20% - 3M Crystalline 90% Tint on Windshield - Azentek Smart Mirror w/Back up Camera - CAI Intake - ADM Scoop - APEX Washer Tank Kit - PowderPro Ported & Polished TB
|
|
|
|
|
|
06-29-2011, 08:55 PM
|
#6 | |

Drives: Wagon Queen Family Truckster Join Date: Oct 2009
Location: Louisville, Ky
Posts: 1,476
|
Quote:
|
|
|
|
|
|
09-28-2011, 02:54 PM
|
#7 |
  
Drives: 2011 LS Join Date: Oct 2010
Location: Cincinnati
Posts: 943
|
I want to thank you for posting this; it was a nice reference for my install.
On cutting the horizontal, I used the hand held wand attachment and the disc, I had to cut it at a slight angle (up to down) but it worked out fine. I think you could probably just use the standard dremel alone to do it like this but with a little more of an angle cut. I didn't have the type of bit you used, and I tried a few other bit like cutters but they wanted to jump around a lot. Also, the new scoop I got from apex, already had the holes cut in for the washer bottle, so that made it even easier. Anyway, thanks for the post. 
|
|
|
|
|
10-13-2011, 09:45 PM
|
#8 |
 
|
I'm going this way.....like this post. better setup with the washer bottle tucked away down low. so I can by all the stuff thru apex? dremel tool with cut off disk works great on plastic. Been fabing for years as a mechanic. then you can clean up the cut with a scotch brite pad and die grinder. I think I would install a black hose from the fill cap to the bottle it would look more oem stock looking IMOP. otherwise love the DIY thanks
|
|
|
|
|
10-13-2011, 09:48 PM
|
#9 |
|
|
I got a question is it noticable from the front of the car when you look at the lower grill does can you notice opening for the scoop? very noticalbe? any pics would help thanks
|
|
|
|
|
10-14-2011, 06:49 AM
|
#10 | |
      
Drives: 2012 Camaro 2SS/RS Join Date: Jul 2010
Location: Cleveland, OH
Posts: 3,272
|
Quote:
__________________
 |
|
|
|
|
|
10-16-2011, 03:52 PM
|
#11 |
|
|
thanks for the pic.......yea it doesn't really look that noticable thanks
|
|
|
|
|
02-25-2012, 02:48 PM
|
#12 |
|
Bowtie, FOR LIFE!!!!

Drives: Camaro 2SS/RS SW/IOM Interrior Join Date: Jul 2009
Location: Where ever Uncle Sam Places me...
Posts: 512
|
installing mines today!! this os going to be a big help. any videos on the install?
__________________
2SS/RS Summit White M6
Current: 2011 SW 2SS/RS M6 Fast!!!  70 Chevelle SS (sold) Still kicking myself!  2010 CGM SS/RS A6 (RIP)  one pissed SS right there!!!! one pissed SS right there!!!! |
|
|
|
|
02-26-2012, 06:50 AM
|
#13 |
|
Bowtie, FOR LIFE!!!!
Drives: Camaro 2SS/RS SW/IOM Interrior Join Date: Jul 2009
Location: Where ever Uncle Sam Places me...
Posts: 512
|
Results:
Uhmmm yeah it is noticeable..wow!!!! The install was good and clean, the CAI just looks right down sexy as hell  , CAI inc makes a good intake! it dresses up the engine nicely. I do have one complaint: The fasteners on the Lid are a pita to close, no lie it took a least 1 hour to get them all to close shheessshh lol! Sound has improved! and throttle response is smooth and shifts cleans. I recommend the Scoop WW kit and CAI to anyone.. got mines from Chase at APEX-great guy to to business with! , CAI inc makes a good intake! it dresses up the engine nicely. I do have one complaint: The fasteners on the Lid are a pita to close, no lie it took a least 1 hour to get them all to close shheessshh lol! Sound has improved! and throttle response is smooth and shifts cleans. I recommend the Scoop WW kit and CAI to anyone.. got mines from Chase at APEX-great guy to to business with!
__________________
2SS/RS Summit White M6
Current: 2011 SW 2SS/RS M6 Fast!!! 70 Chevelle SS (sold) Still kicking myself! 2010 CGM SS/RS A6 (RIP) one pissed SS right there!!!! |
|
|
|
|
02-26-2012, 03:58 PM
|
#14 | |

Drives: 2000 Camaro SS Join Date: Feb 2010
Location: Louisville, Ky.
Posts: 25,179
|
Quote:

|
|
|
|
|
|
|
|
|
 |
|
|
 Similar Threads
|
||||
| Thread | Thread Starter | Forum | Replies | Last Post |
| Apex Motorsports Washer Fluid Tank Replacement Kit Now Available: $69.99! IN STOCK!!! | Apex Motorsports | V8 Bolt-Ons & Tunes | 68 | 08-10-2012 06:32 PM |
| Black CAI Inc. Intakes IN STOCK and ready to ship at Apex Motorsports! | Apex Motorsports | V8 Bolt-Ons & Tunes | 323 | 08-09-2012 05:21 PM |
| AmericanMuscle.com for us? | iFast | Off-topic Discussions | 12 | 07-17-2012 11:44 PM |
| ADM Intake Scoop Data at the track | ADM PERFORMANCE | Camaro V8 LS3 / L99 Engine, Exhaust, and Bolt-Ons | 31 | 01-22-2012 11:05 PM |
| Dynatech headers and ADM CAI installed.... | CamaroSS8491 | Camaro V8 LS3 / L99 Engine, Exhaust, and Bolt-Ons | 2 | 08-06-2010 04:27 PM |


