Camaro5 Chevy Camaro Forum / Camaro ZL1, SS and V6 Forums - Camaro5.com
 
Bigwormgraphix
Go Back   Camaro5 Chevy Camaro Forum / Camaro ZL1, SS and V6 Forums - Camaro5.com > Technical Camaro Topics > Cosmetic Maintenance: Washing, Waxing, Detailing, Bodywork, Protection


Reply
 
Thread Tools
Old 03-26-2014, 12:01 AM   #1
JimE


JimE's Avatar
 
Drives: 2013 2SS/RS/1LE
Join Date: Apr 2010
Location: St Louis, MO
Posts: 3,087
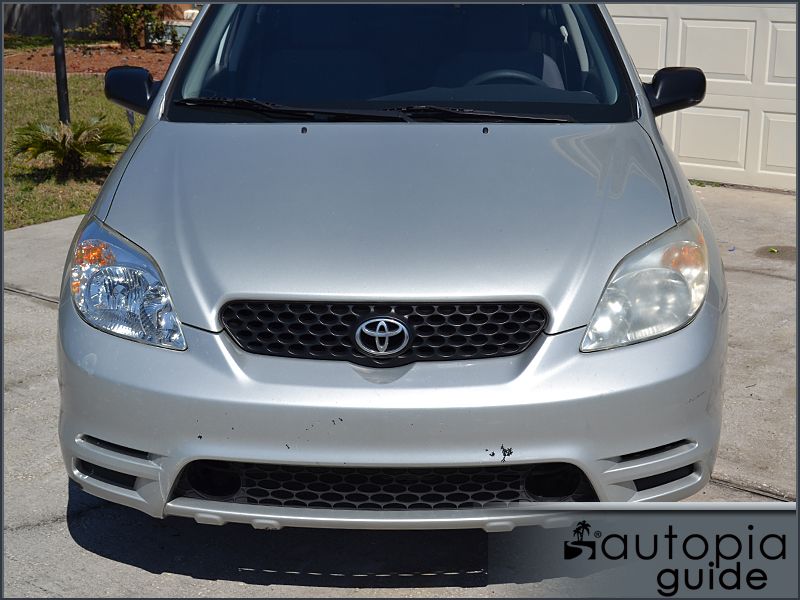
headlight lense polishing

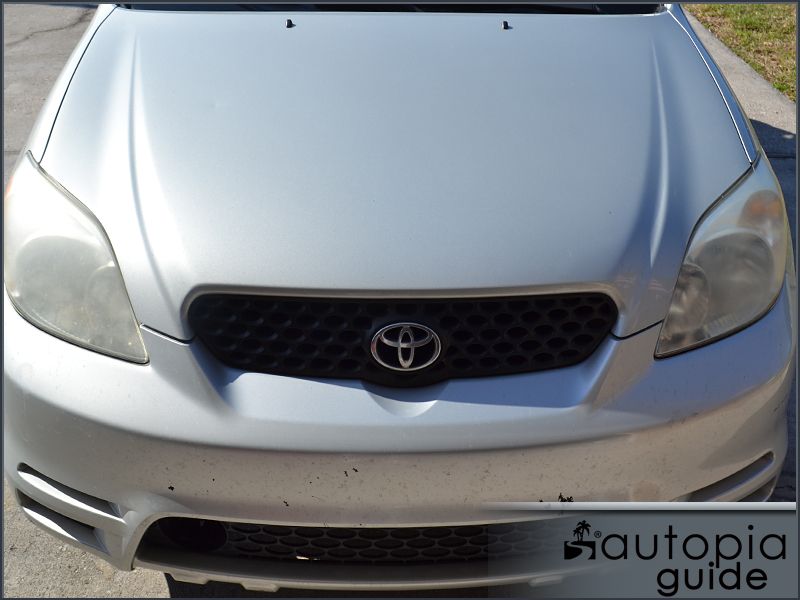
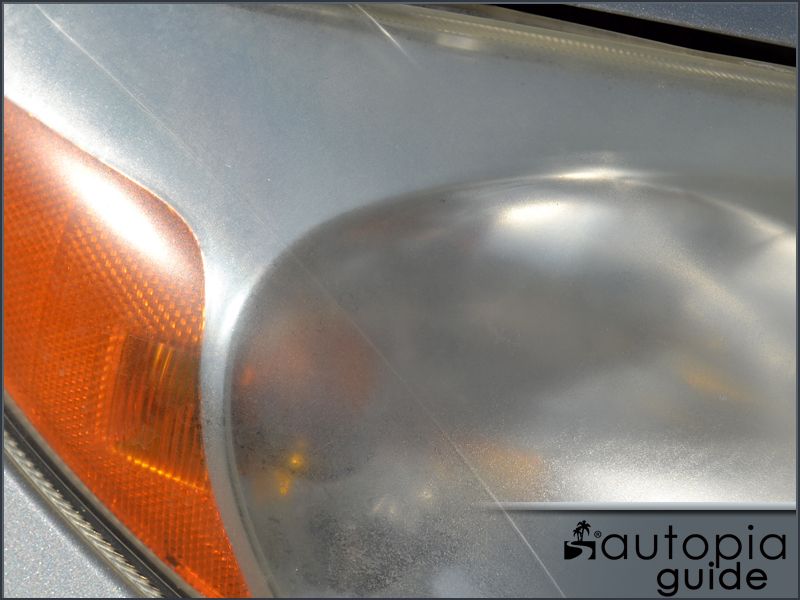
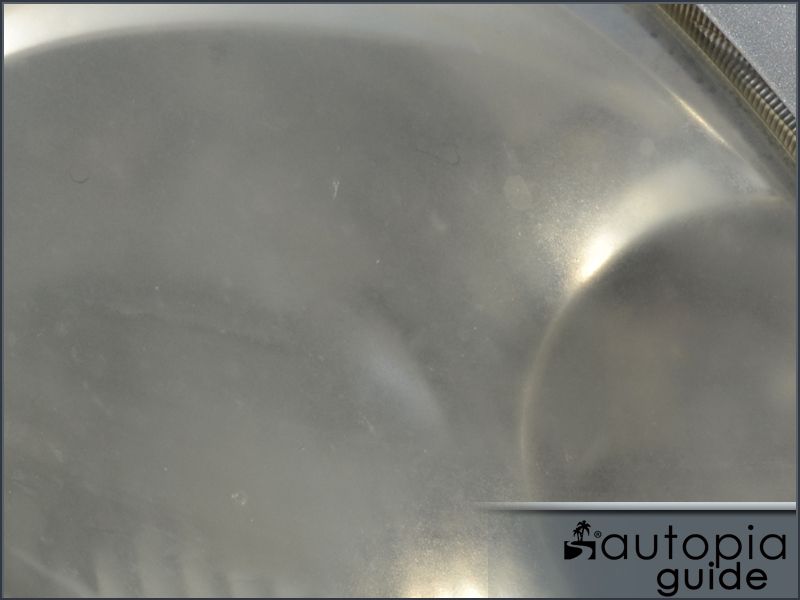
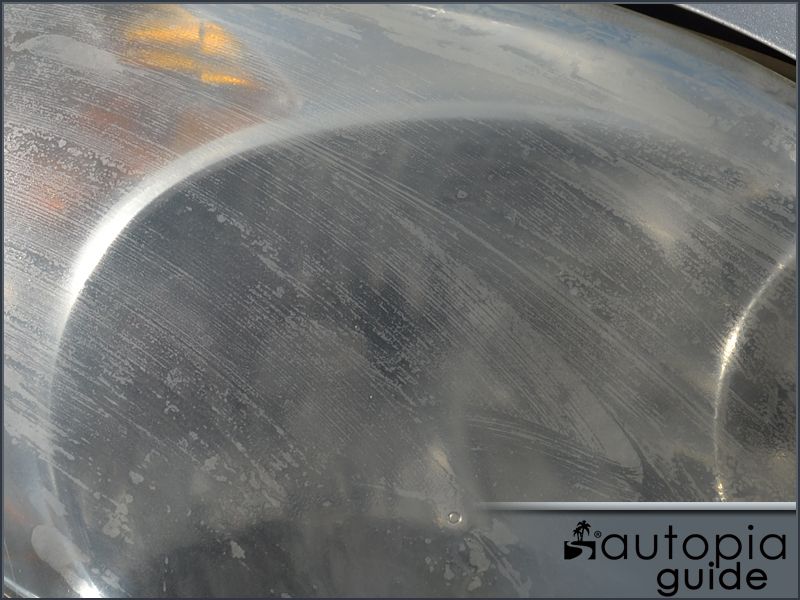
Anyone have any experience cleaning/polishing headlight lenses?

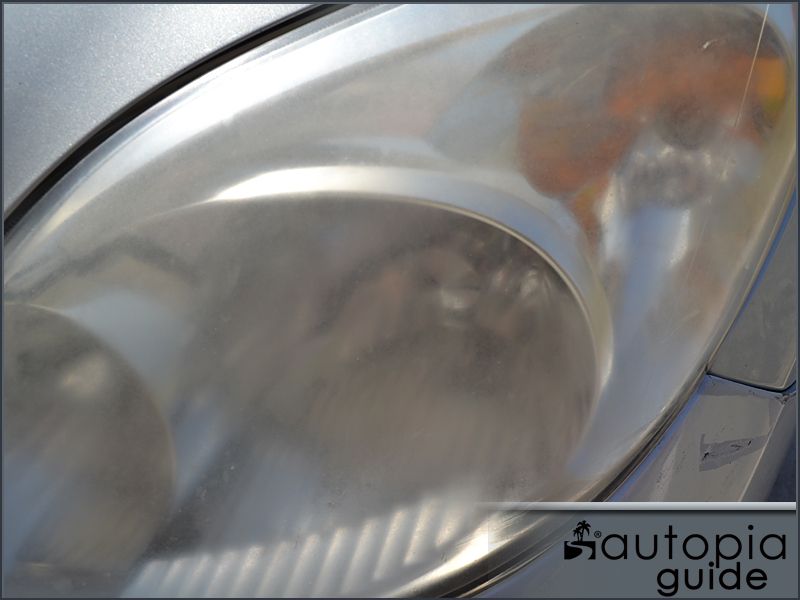
No, it's not an issue on my Camaro. But my DD is starting to get that faded, opaque look. I see numerous brands have kits available. I used to just use some metal polishing compound from time to time on one of our old cars. It made a huge difference, but nothing like a new lense.

I didn't have much luck with the one kit I tried using a couple years ago. I don't remember the brand, but it was mostly various grades of sand paper with a polishing liquid and then a sealer when you were finished. After 90 minutes and a tired and sore arm, I only managed to make them worse.

I know once you figure out the "trick" most anything is easy, but I'd like to avoid the huge learning curve. So something fairly quick and easy would be nice. Like the wipe on liquid advertised on TV would be awesome
JimE is offline   Reply With Quote
Old 03-26-2014, 12:38 AM   #2
JTruck

 
JTruck's Avatar
 
Drives: 2014 Camaro 1LT/RS
Join Date: Sep 2013
Location: Arizona
Posts: 1,693
I have used a cheap kit before on a previous car, and it worked great. After sanding did you polish it?

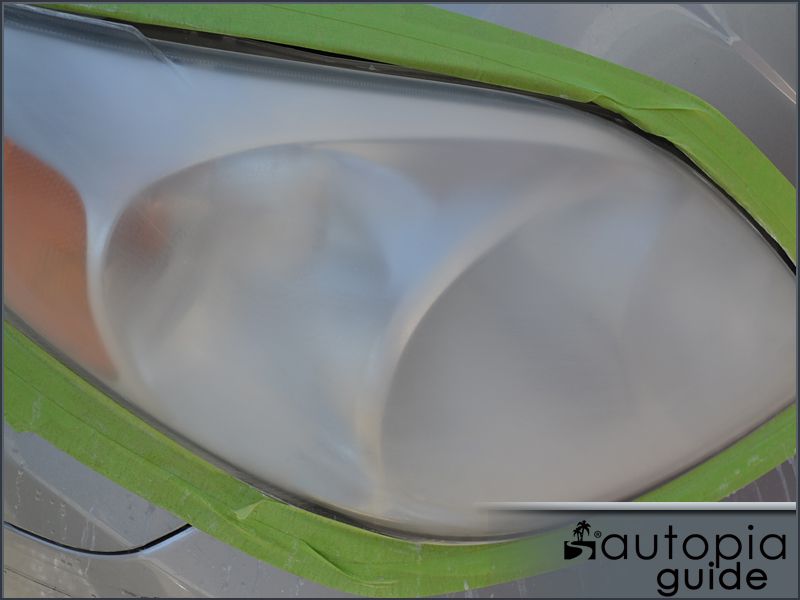
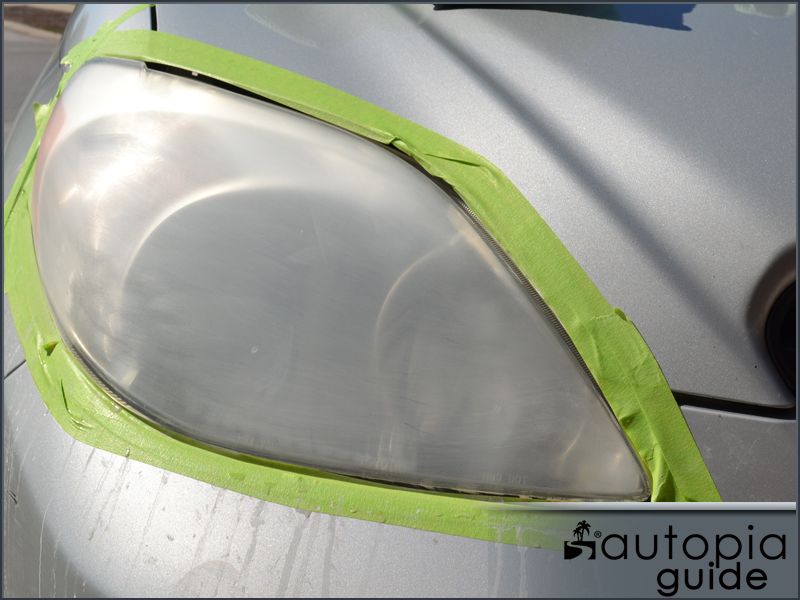
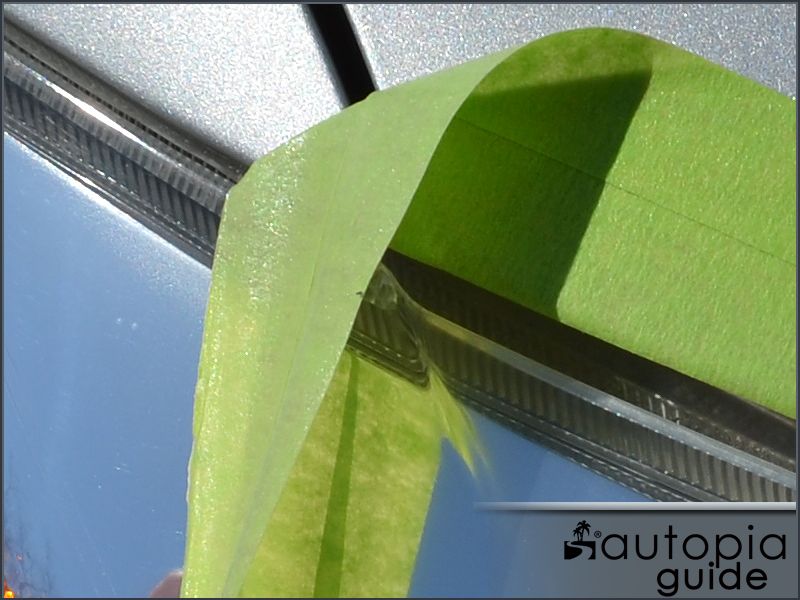
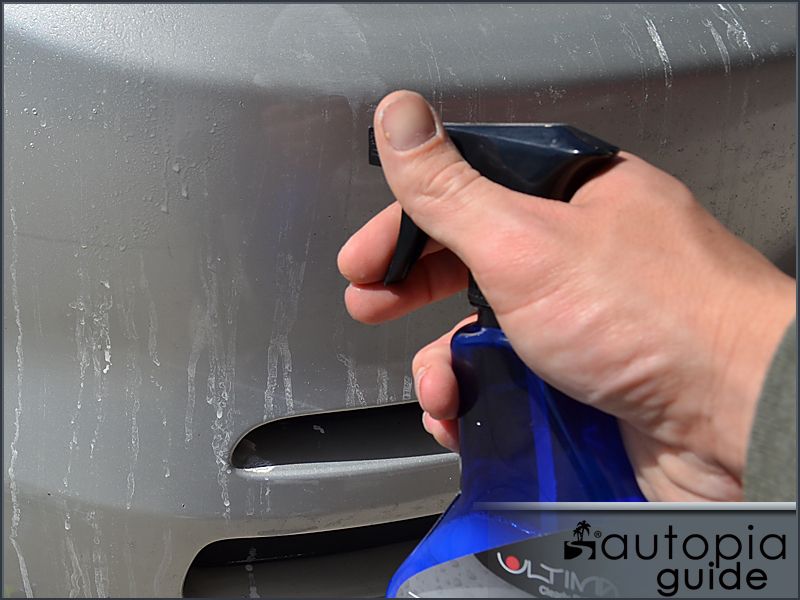
Typically all you need to do is tape off the lights, sand/compound, and then polish and seal for protection.
__________________
Detailing is an involuntary obsession.
JTruck is offline   Reply With Quote
Old 03-26-2014, 09:32 AM   #3
Adam's Polishes
 
Adam's Polishes's Avatar
 
Drives: The shiny ones.
Join Date: Mar 2010
Location: In the detail shop!
Posts: 5,979
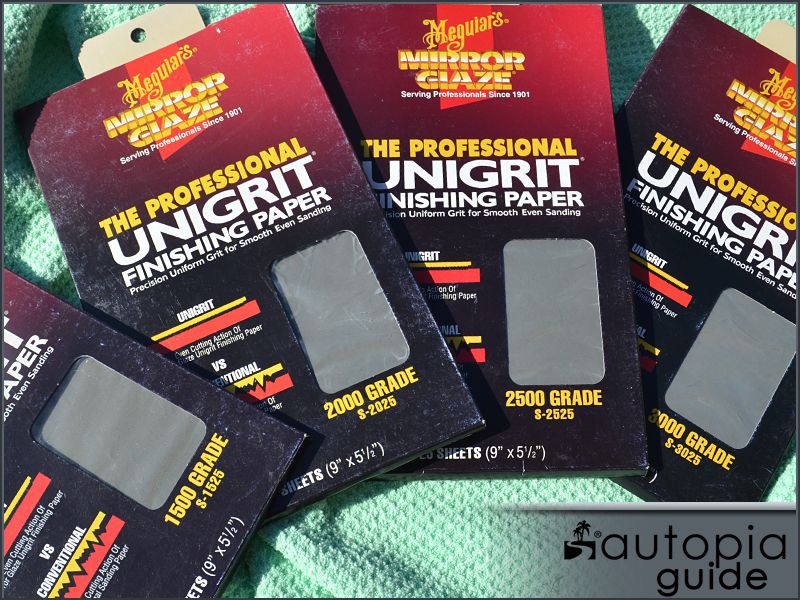
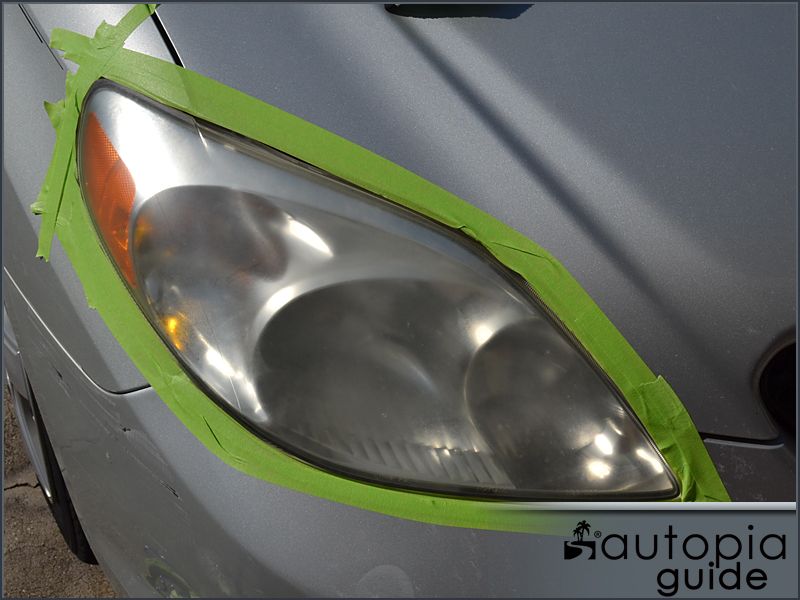
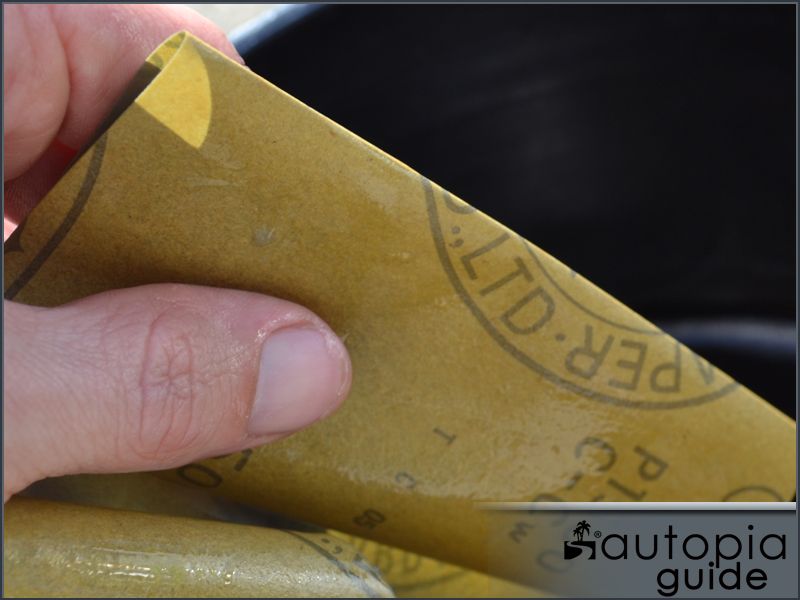
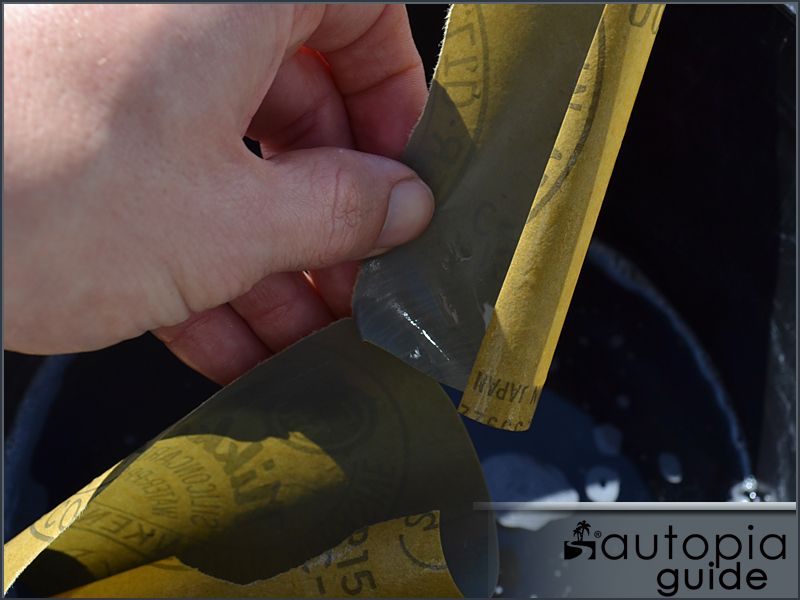
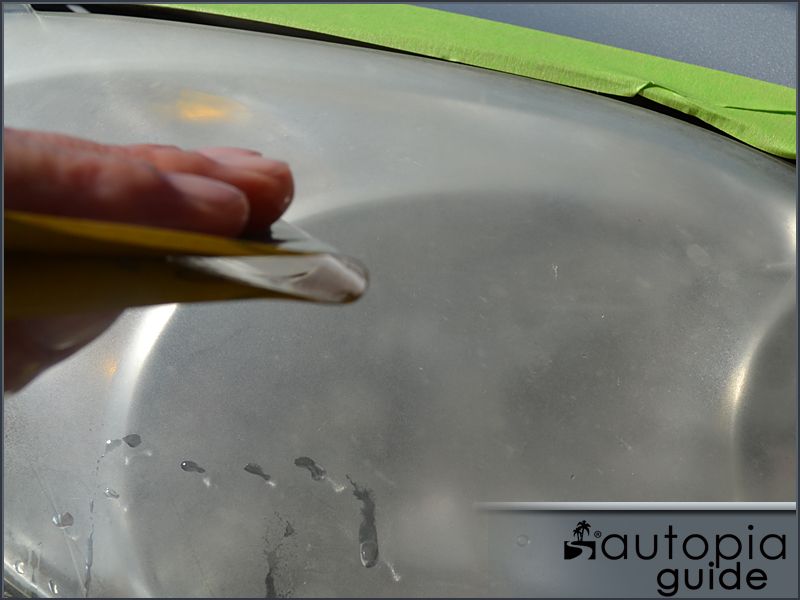
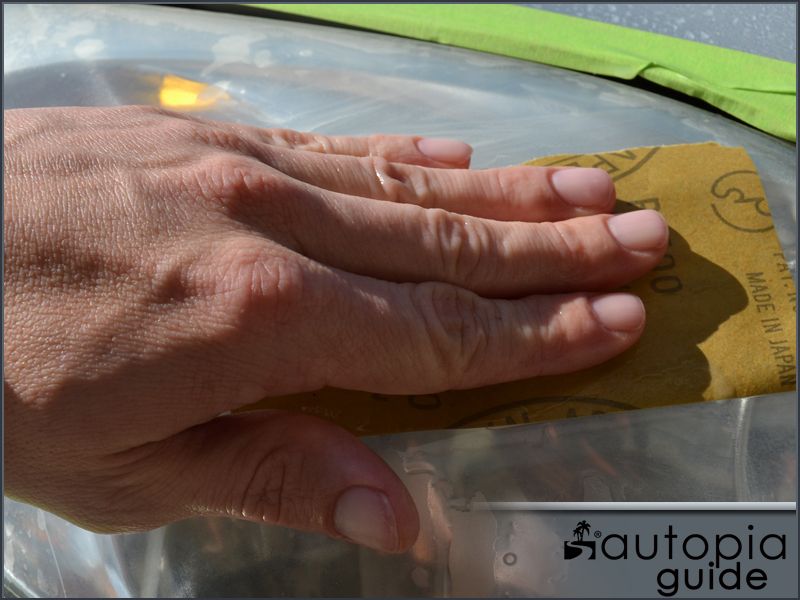
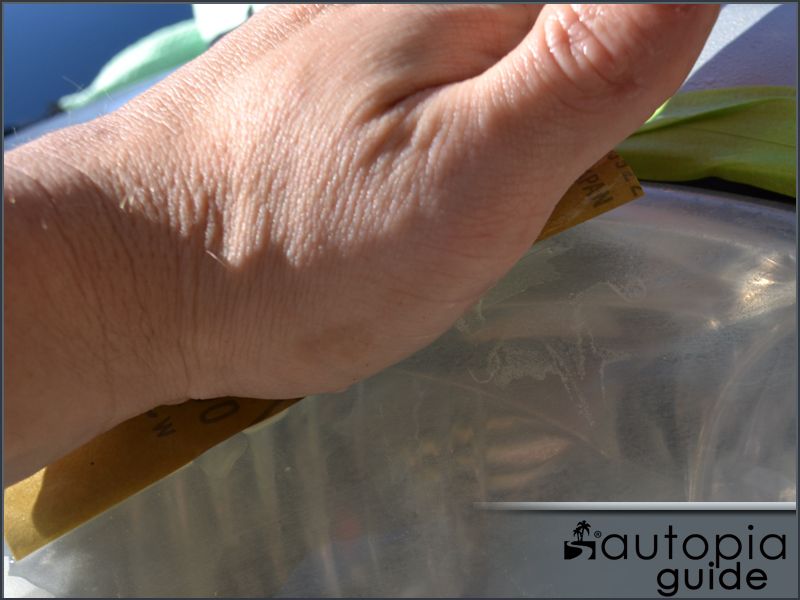
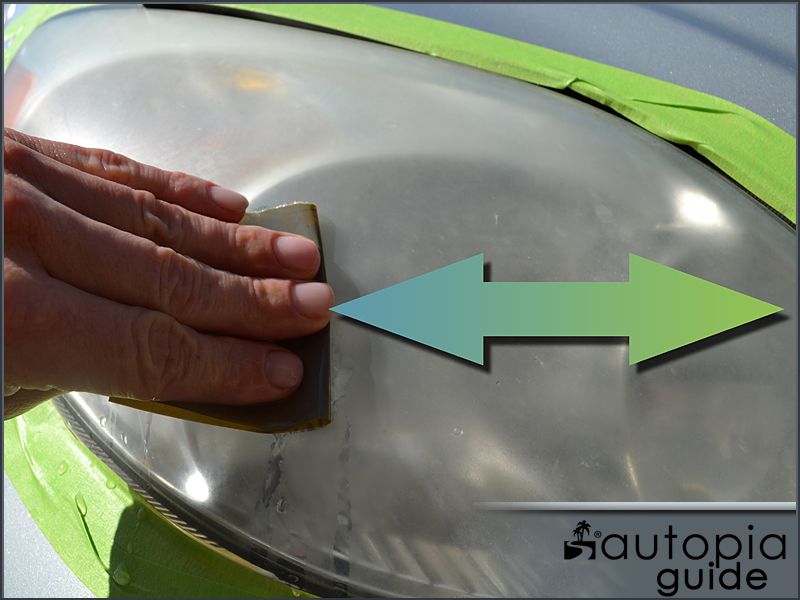
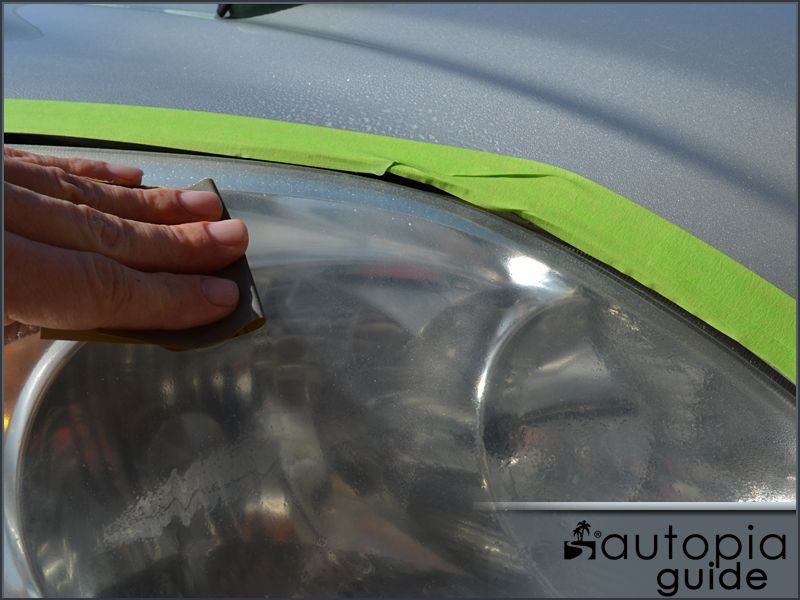
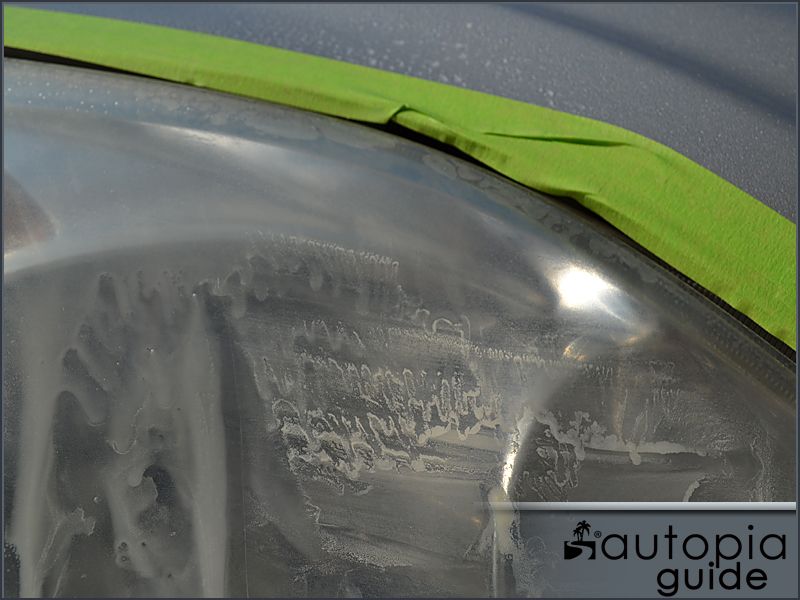
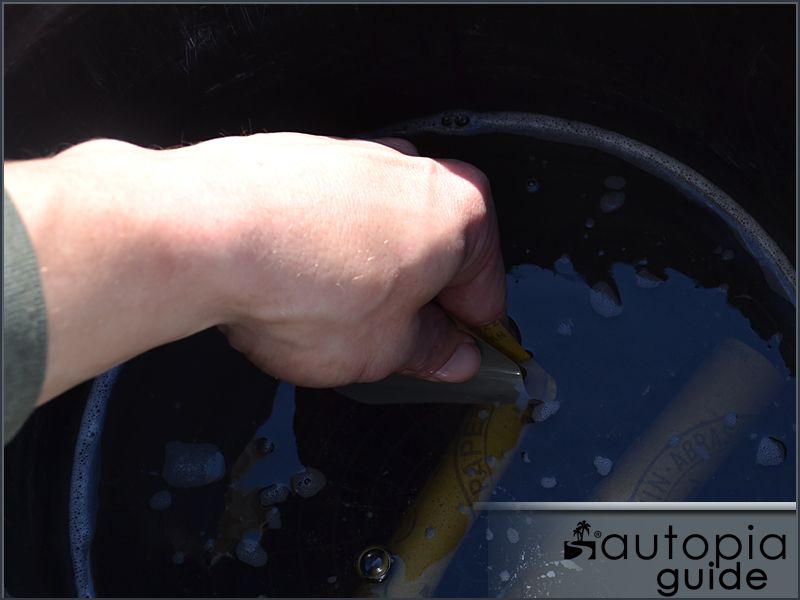
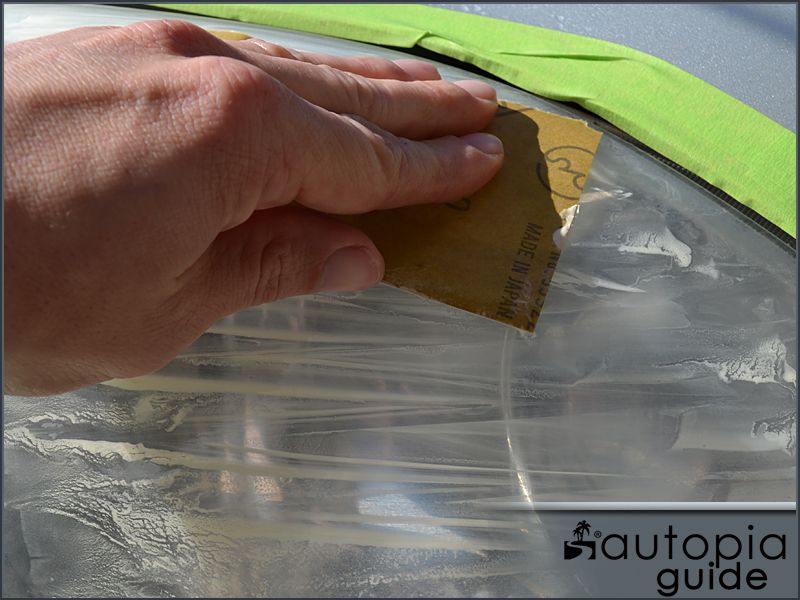
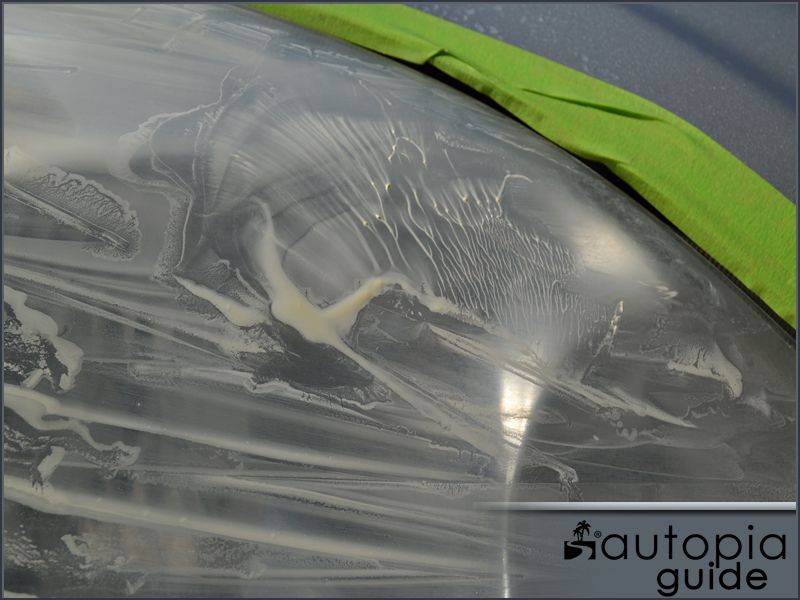
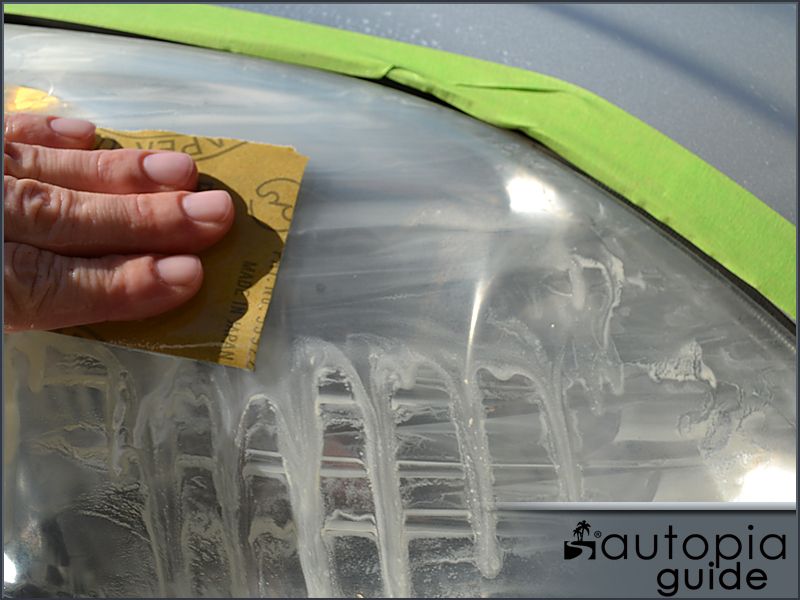
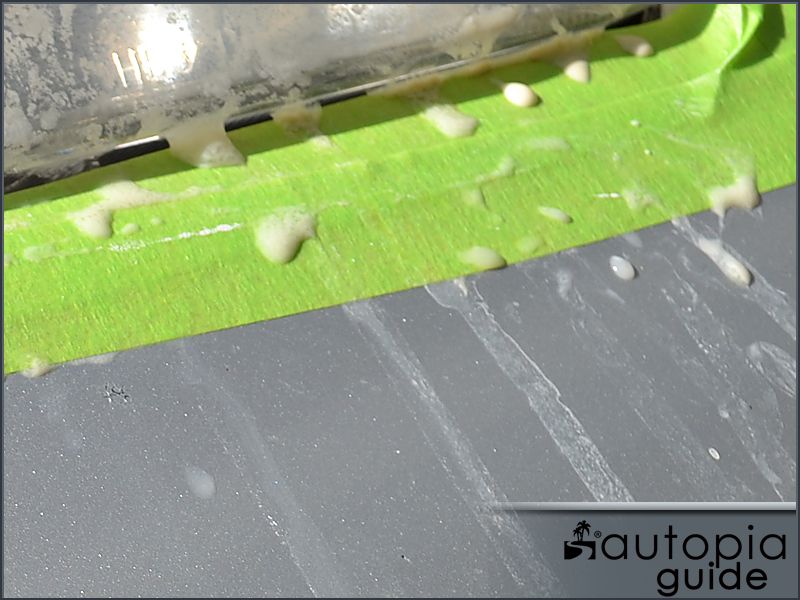
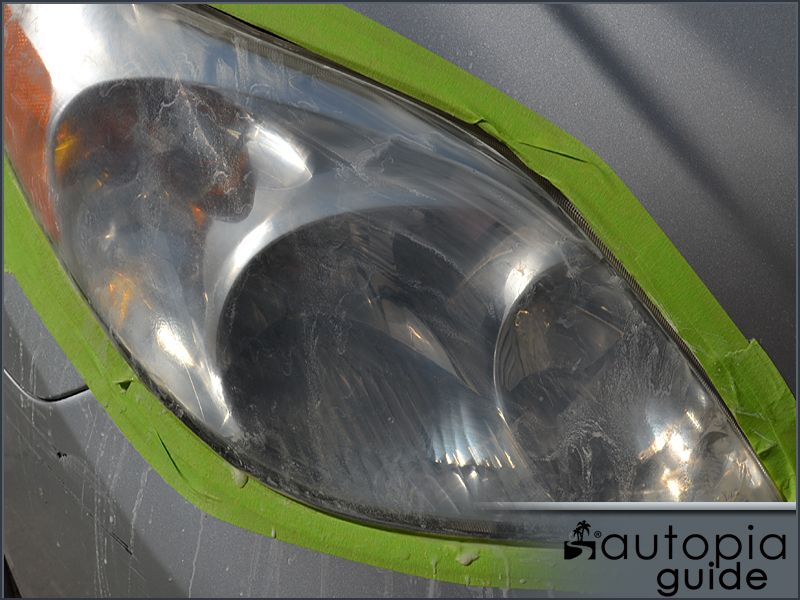
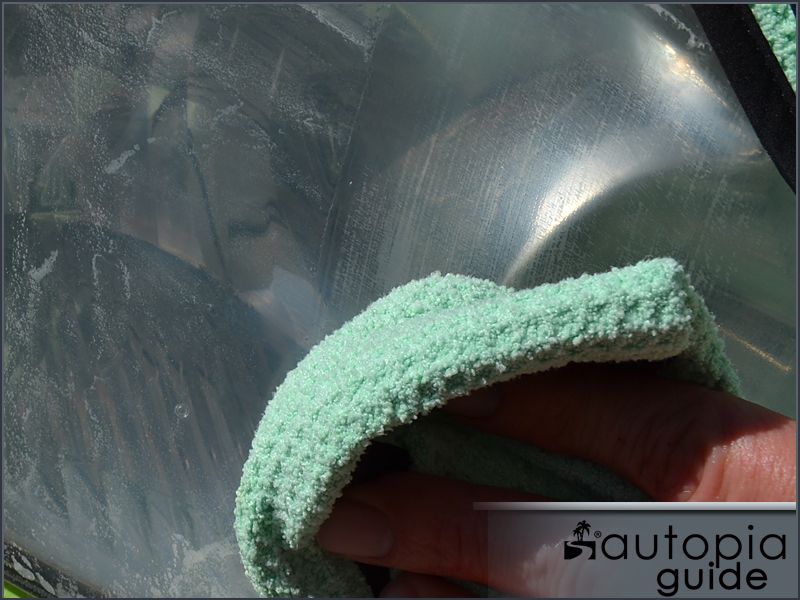
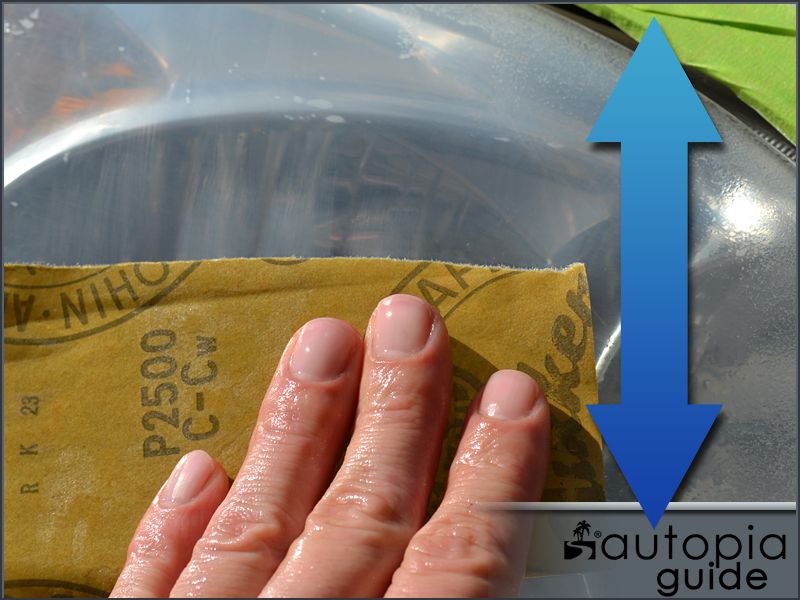
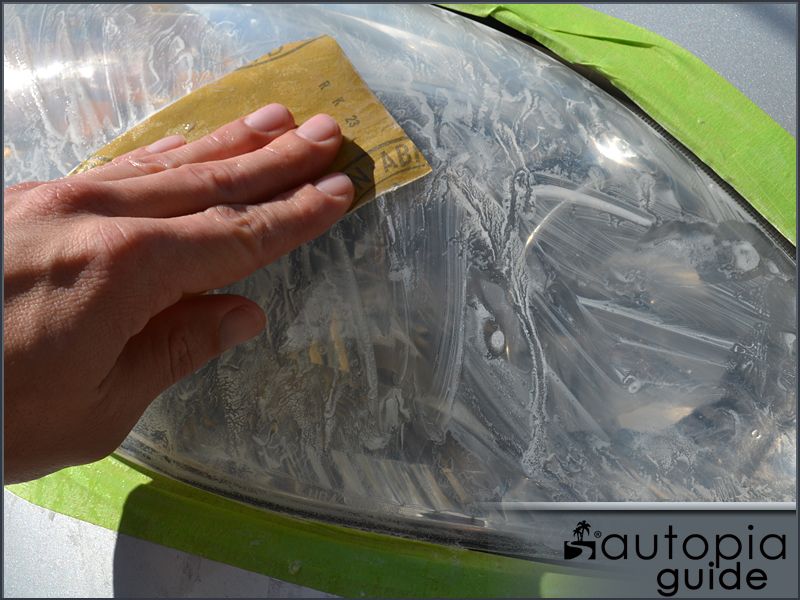
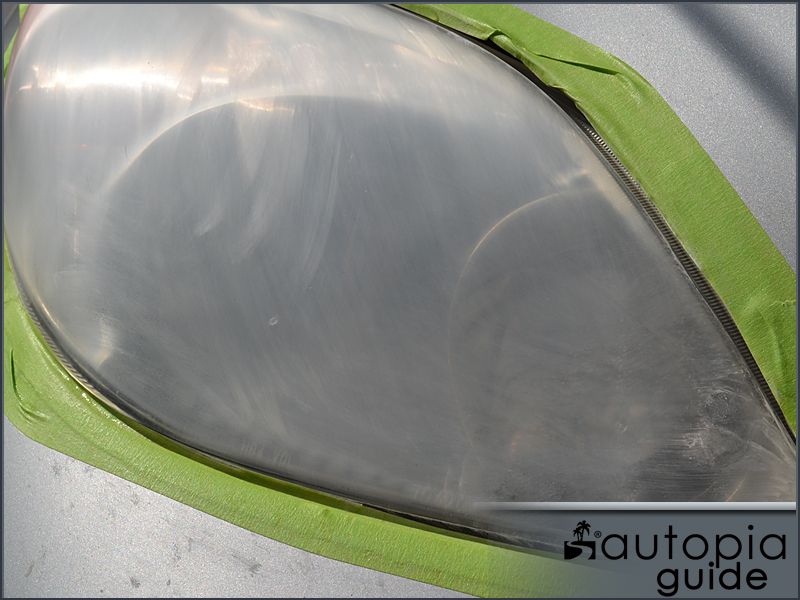
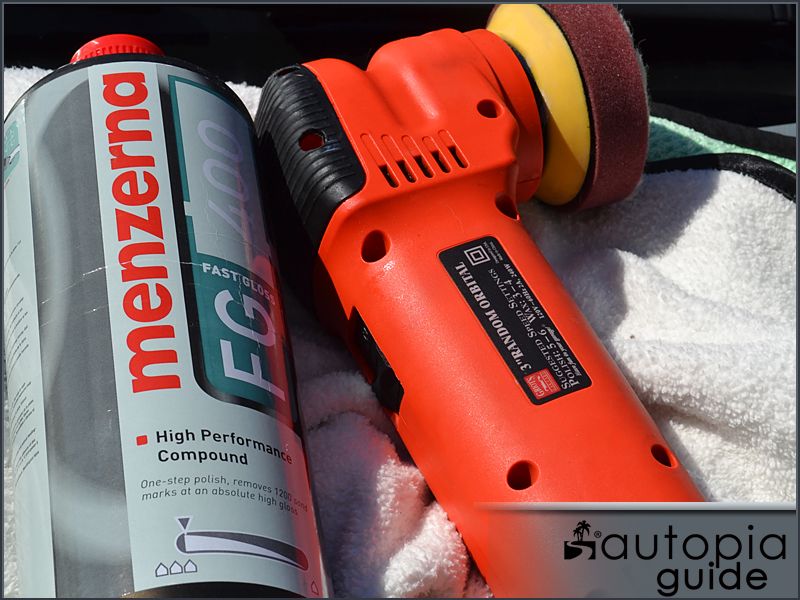
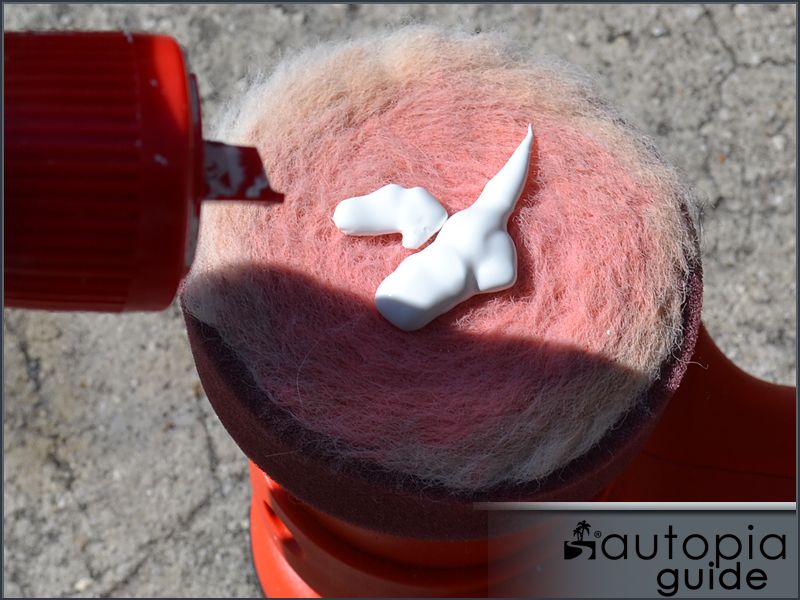
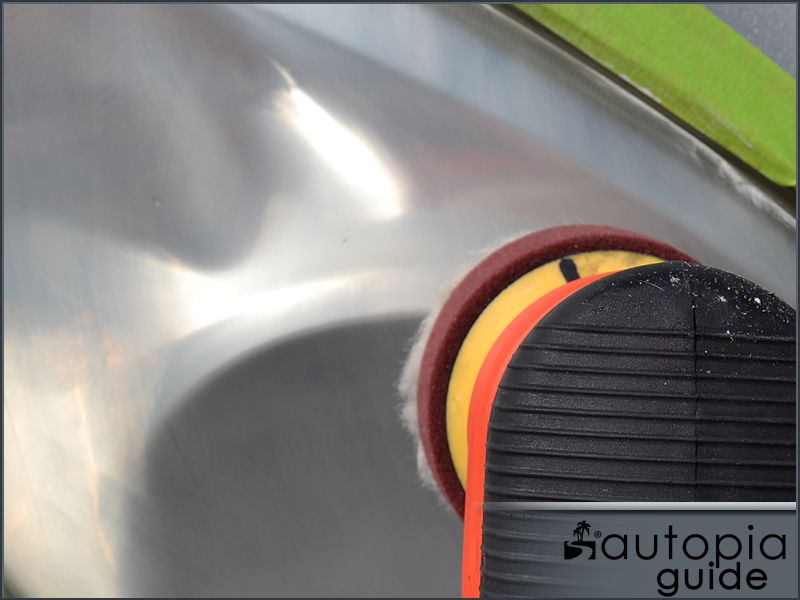
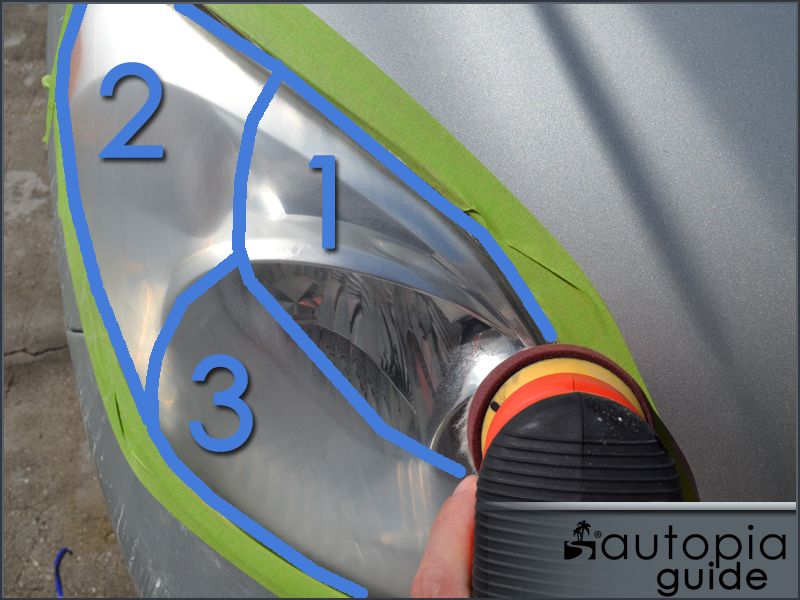
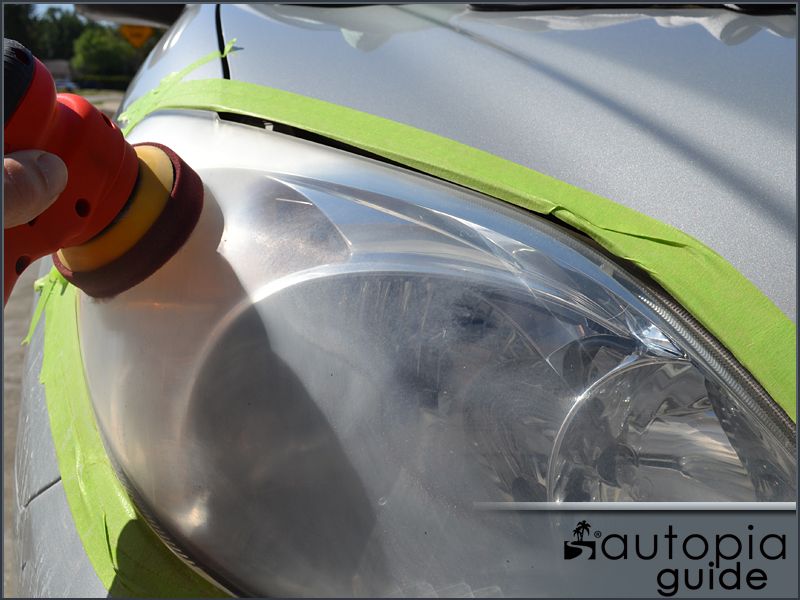
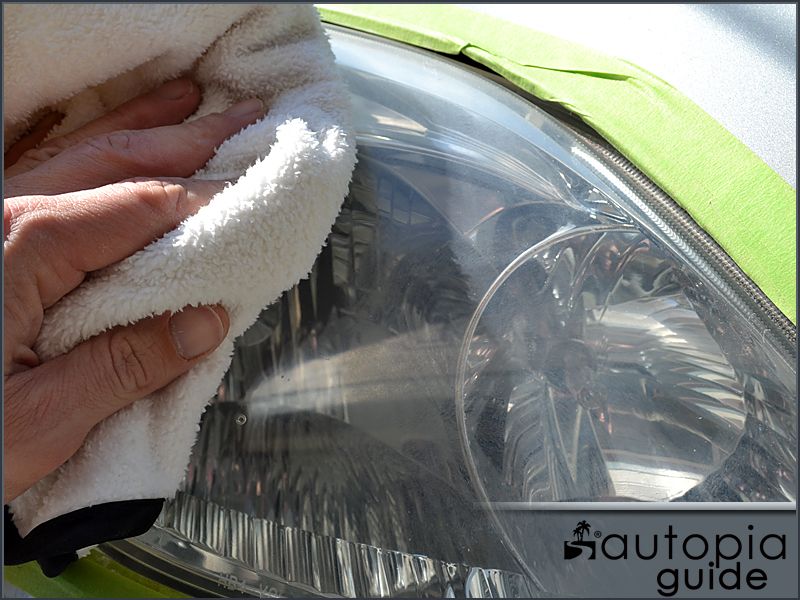
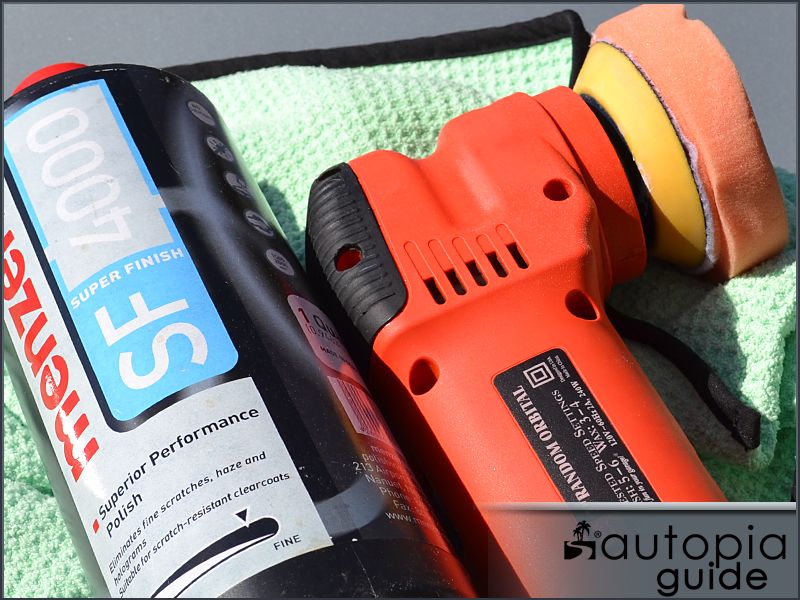
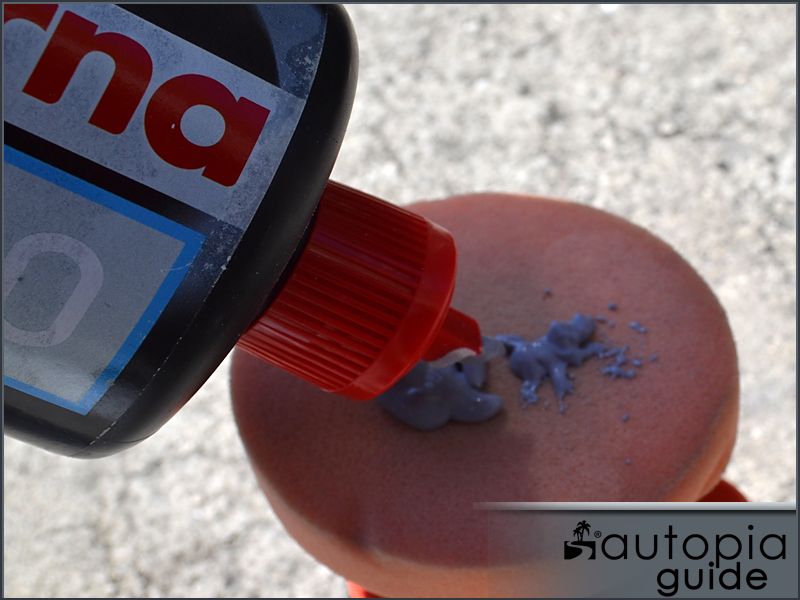
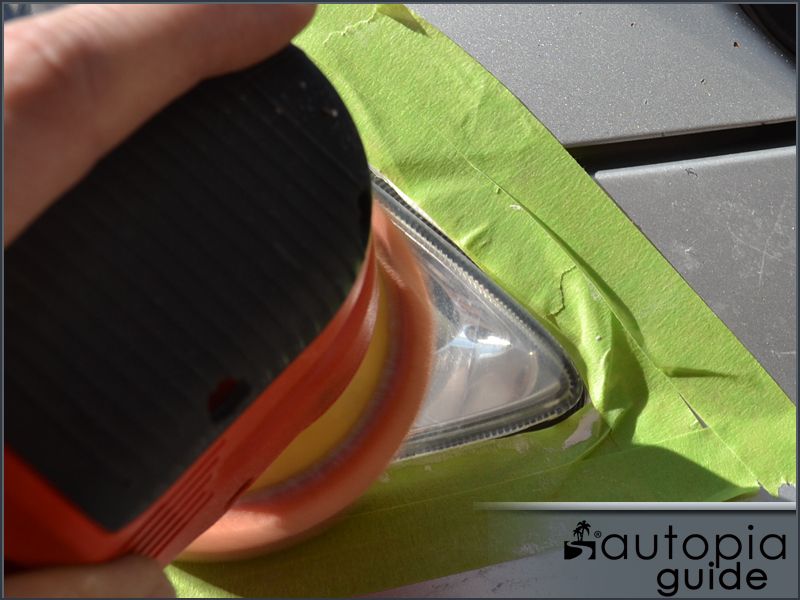
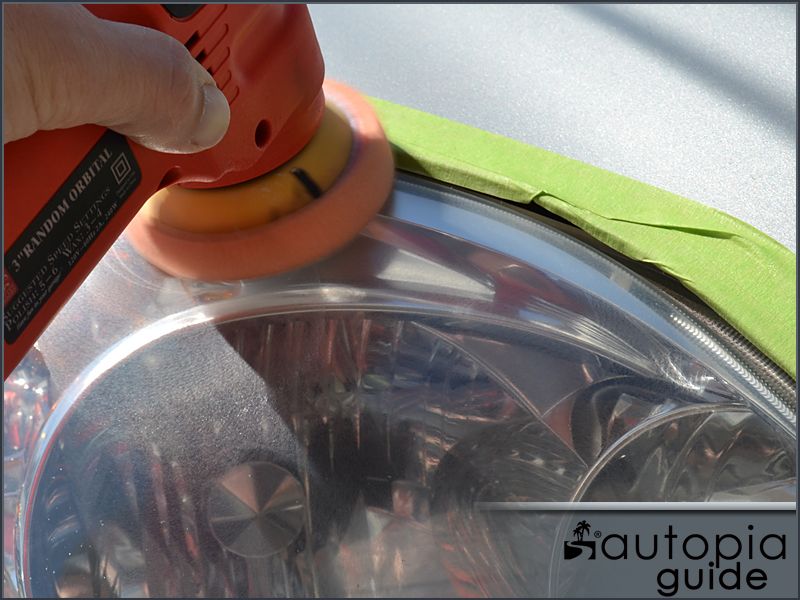
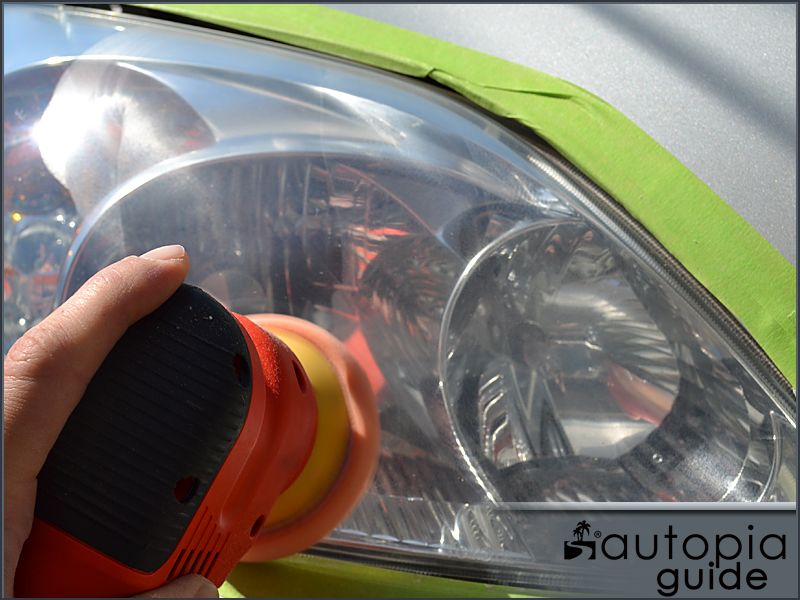
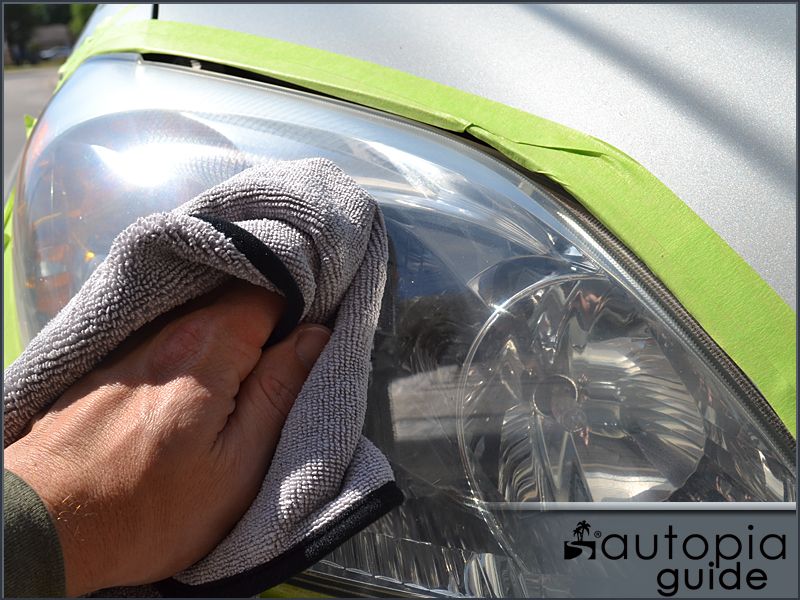
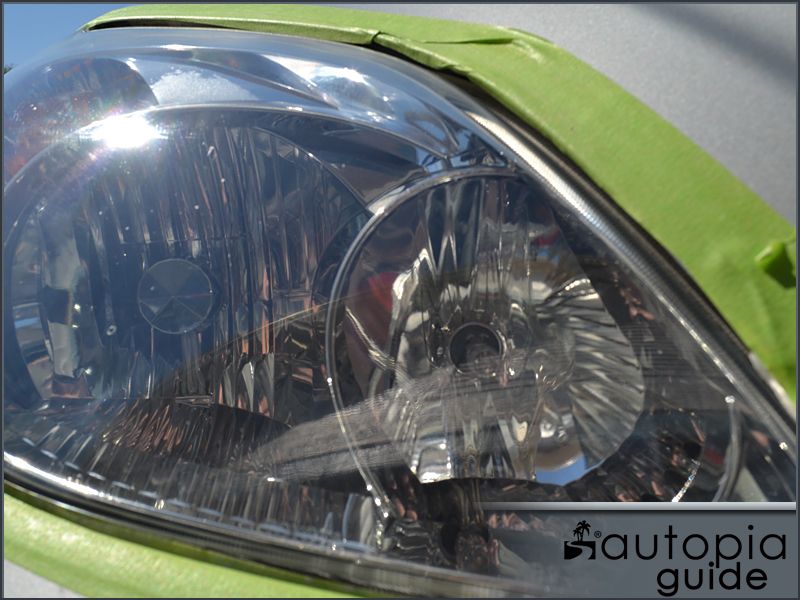
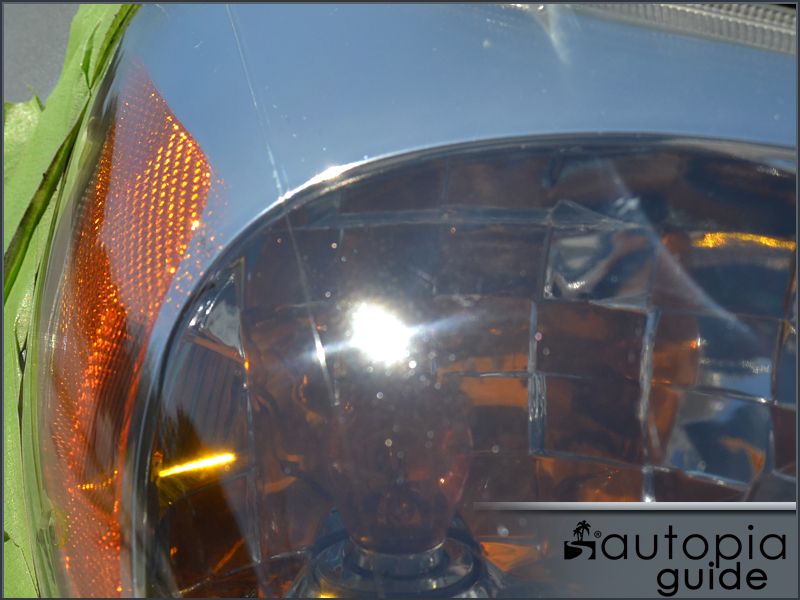
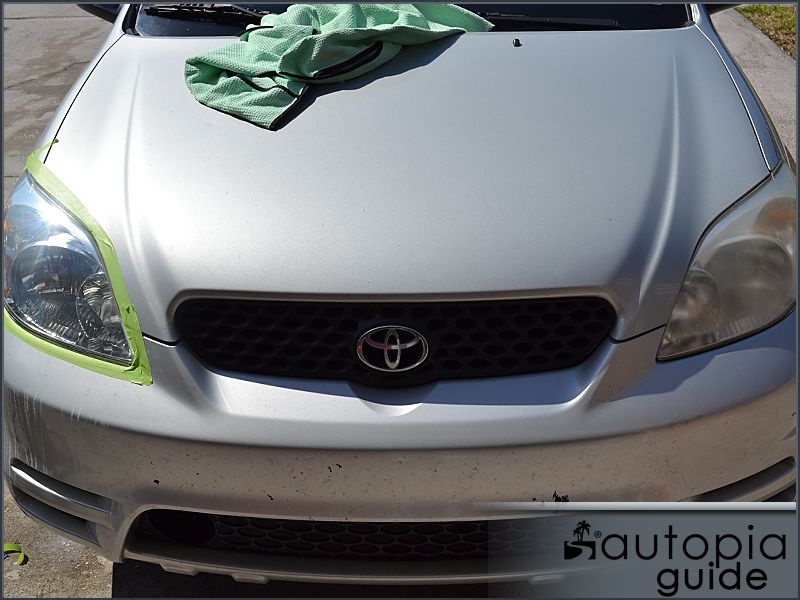
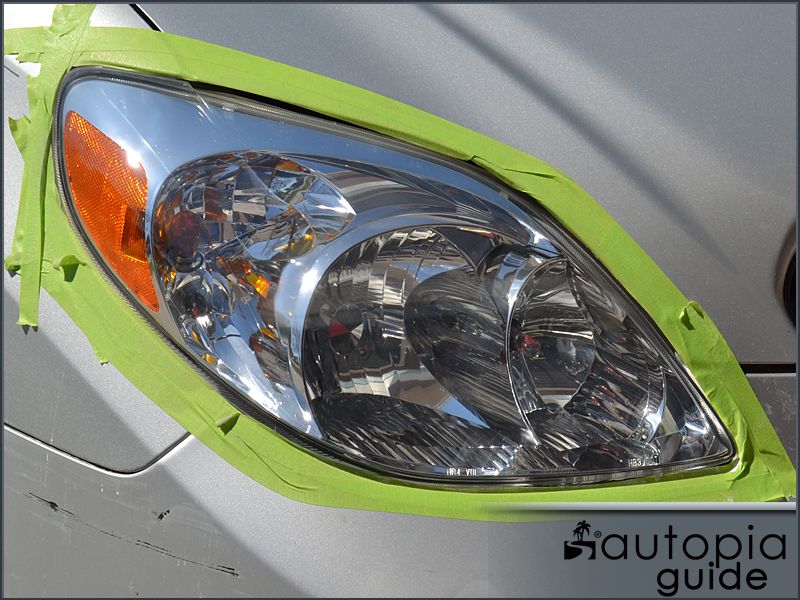
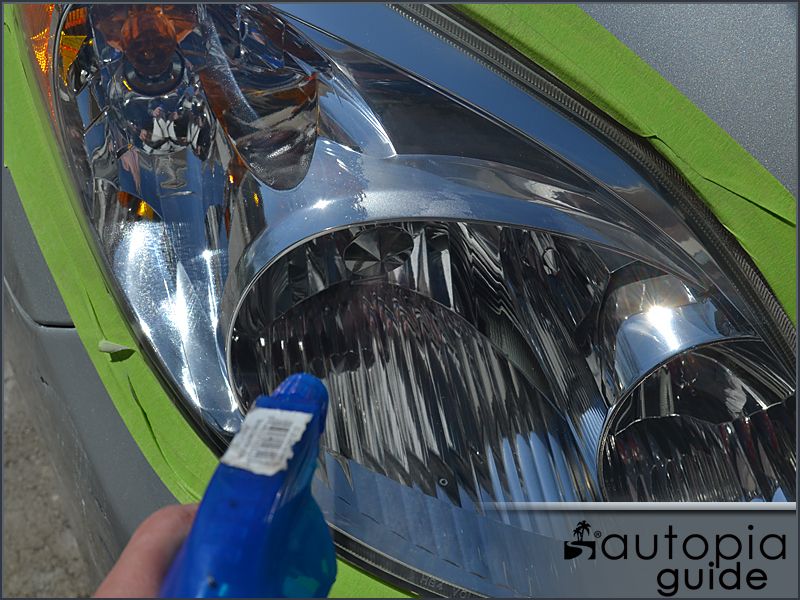
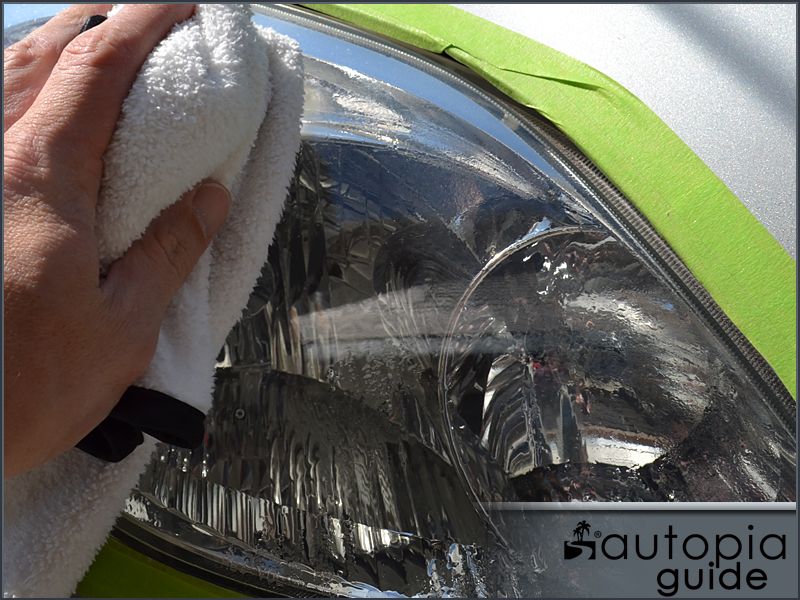
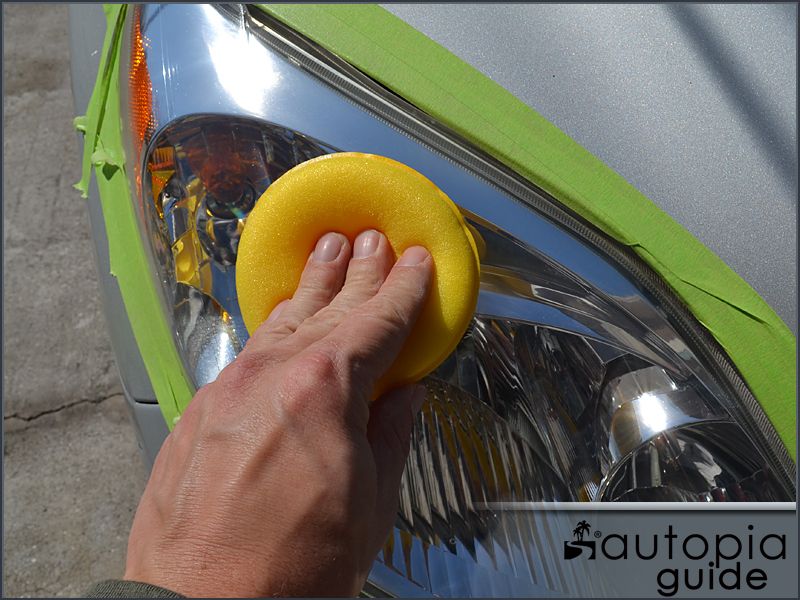
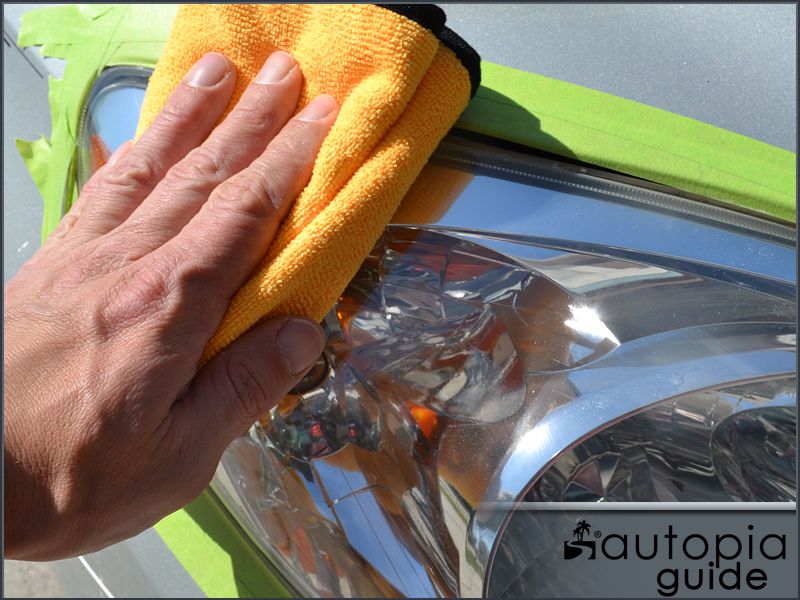
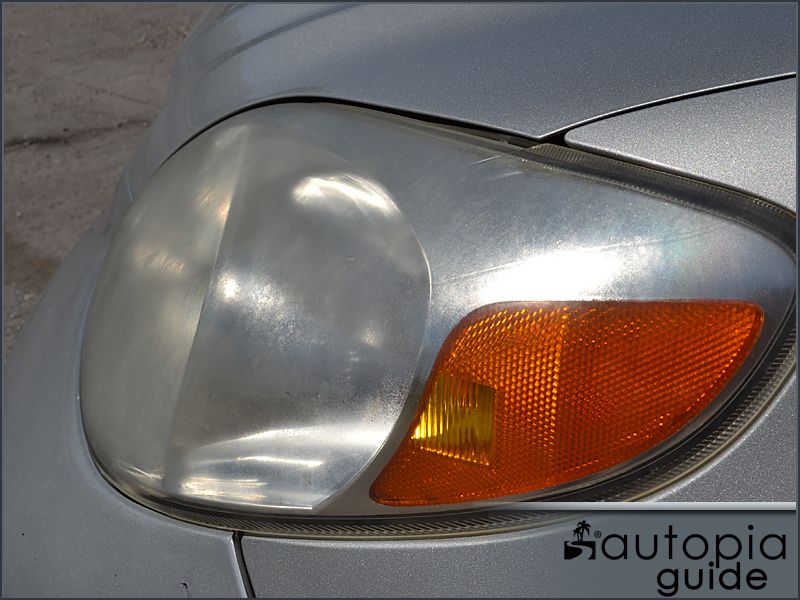
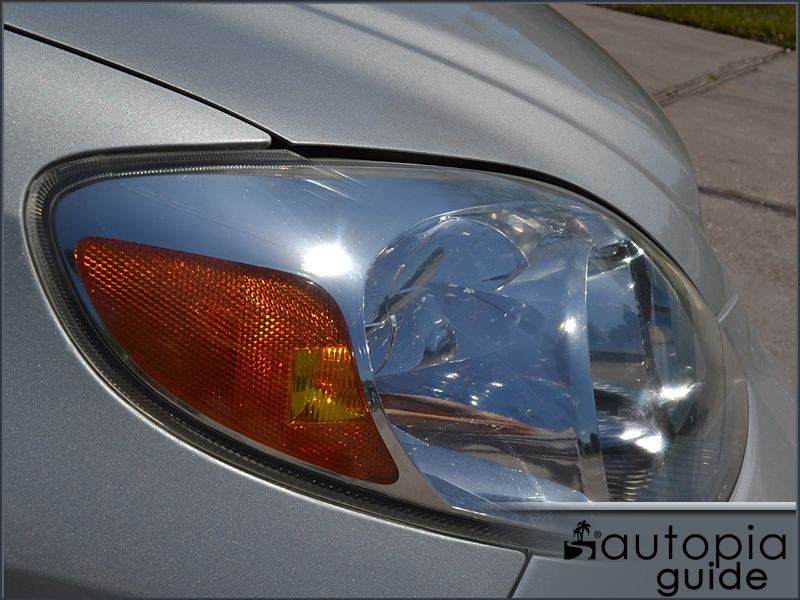
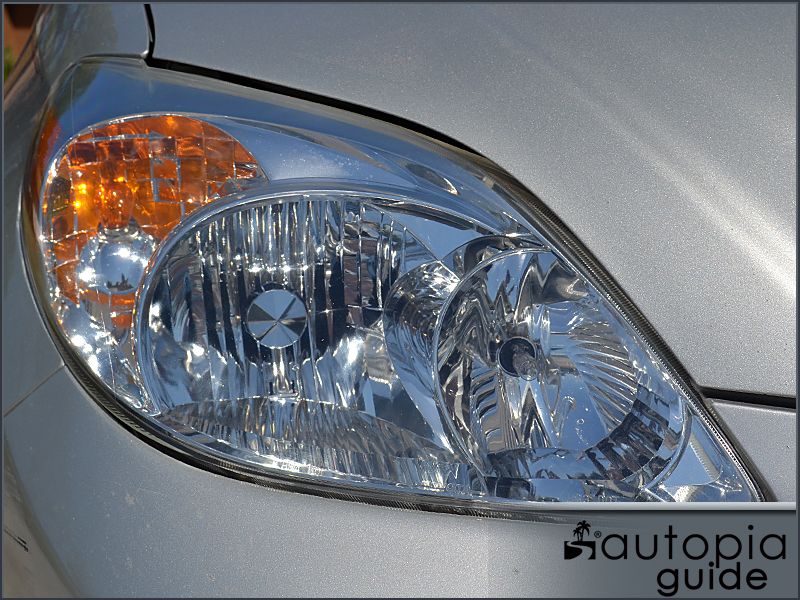
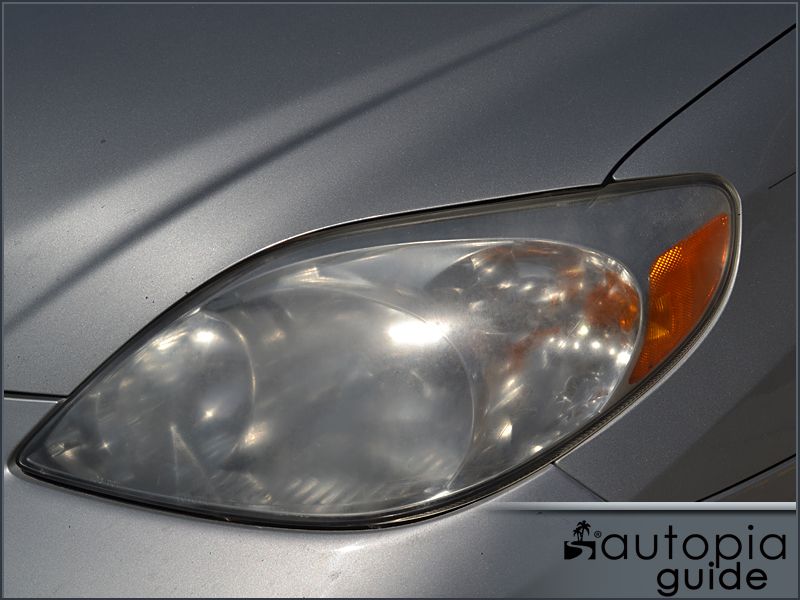
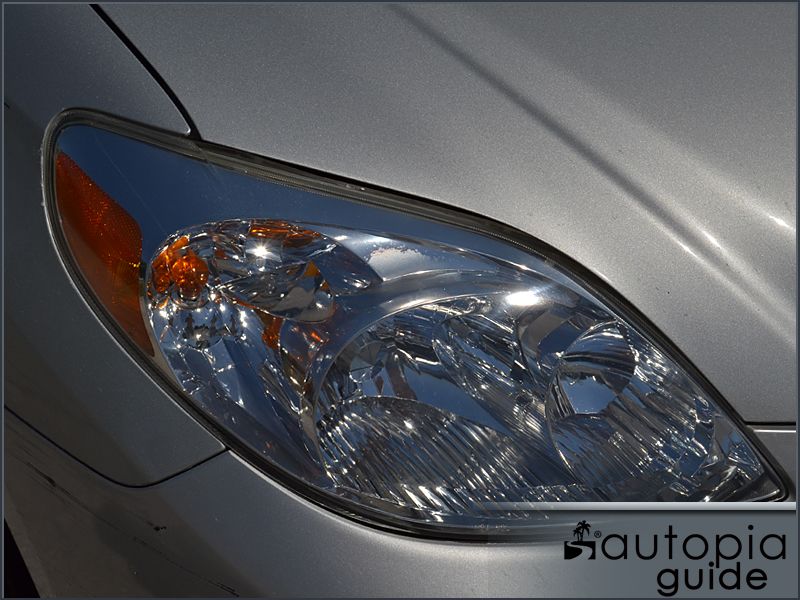
Polishing headlights is the same basic process as polishing paint, the same tools can be used. Polishes and pads will get you far, and depending on how bad they really are, wetsanding may need to come into play.

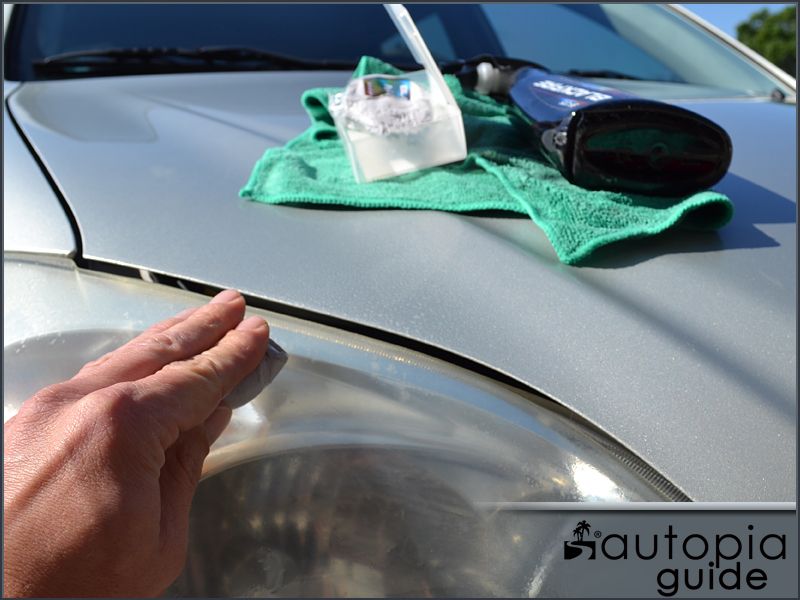
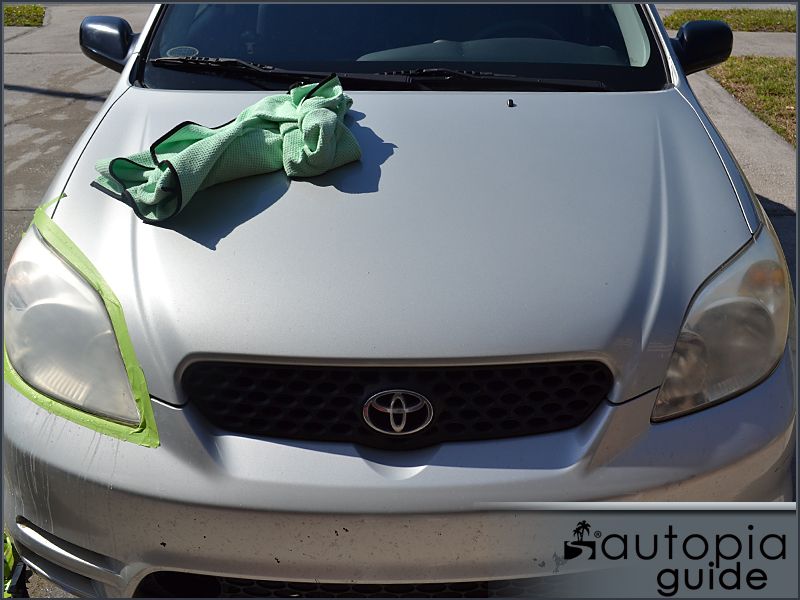
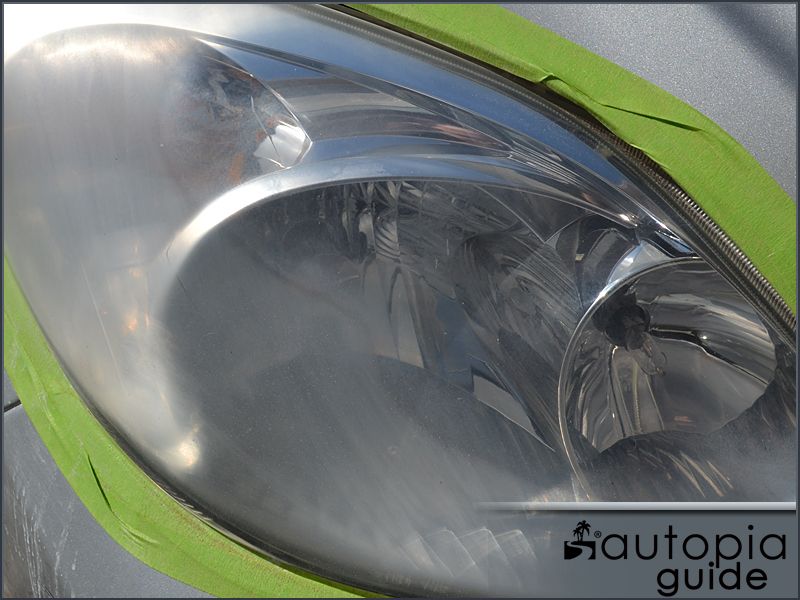
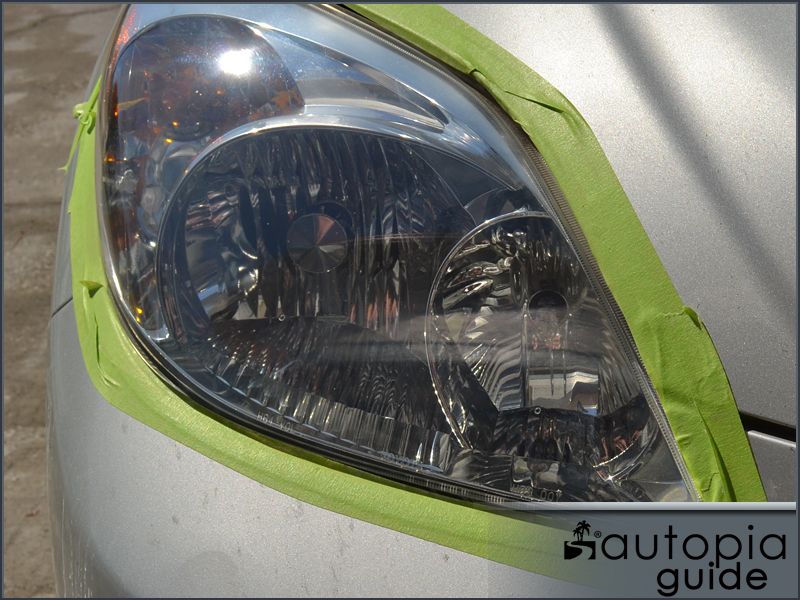
Always take the least aggressive approach first. No need to sand unless the polishing steps won't take care of the haze/oxidation.

The basic process is as follows:

  • Tape off everything around the lens (or pull the lens from the car, that's ideal)
  • Wet sand (if necessary) with 1000/1500/2000/3000 sandpaper as needed
  • Polish with 4" Focus pads on either an orbital or a cordless drill (much faster than a polisher) and paint polishes. I like our Paint Correcting Polish, followed by Paint Finishing Polish
  • Seal them up with Liquid Paint Sealant
  • Enjoy being able to see at night again!!
Every lens and scenario is different, and I've only had to sand 5-6 out of probably two dozen that I've done. Polishing usually takes care of most of them unless horribly neglected.


Adam's Polishes is offline   Reply With Quote
Old 03-26-2014, 10:50 AM   #4
Todd@Autopia
 
Todd@Autopia's Avatar
 
Drives: 2010 Mazdaspeed 3
Join Date: Mar 2012
Location: Orlando/Stuart, FL
Posts: 1,161
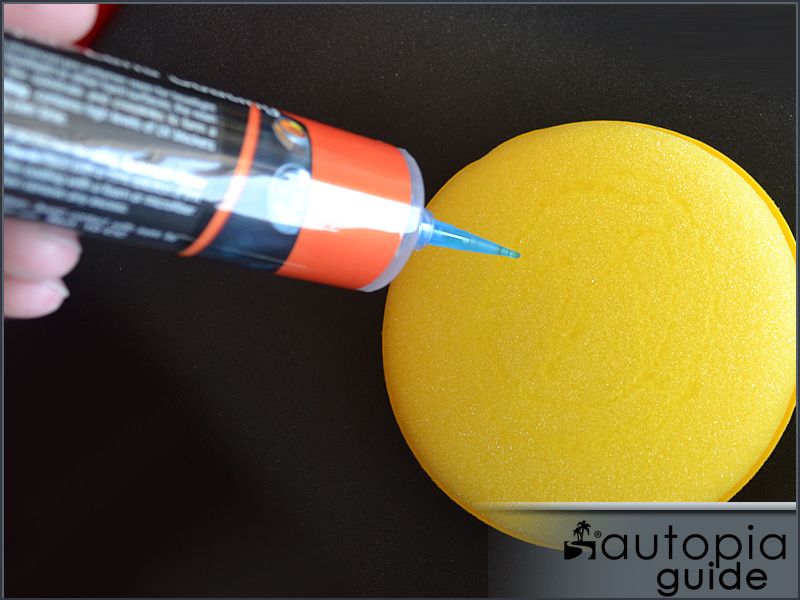
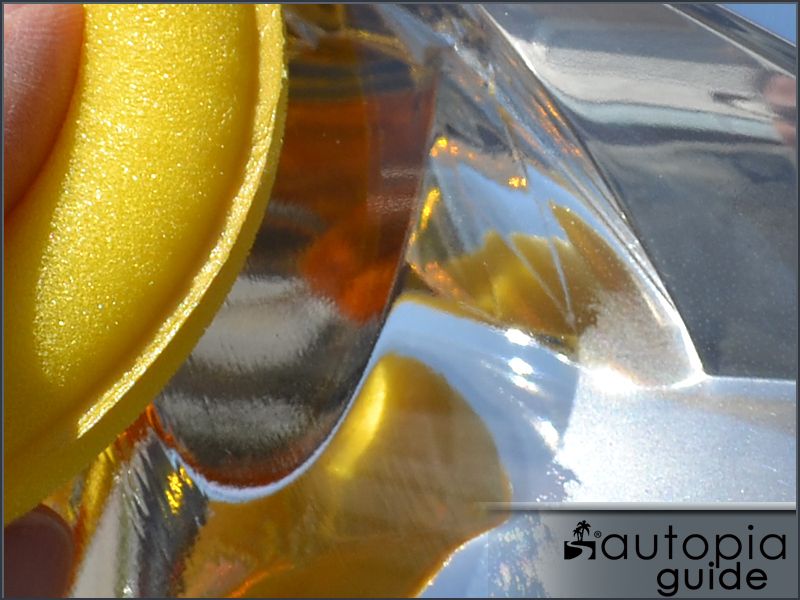
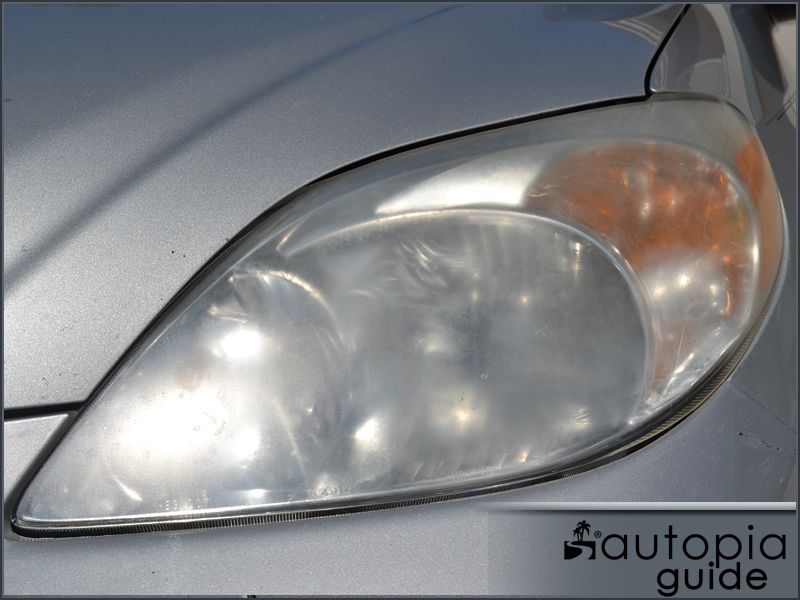
Detailer's Headlight Restoring Polish is an easy-to-use, amazing polish that has the strength of 3000-grade sandpaper but will finish out haze free. You will still need to use a drill or polisher. Here is an excellent reference thread for you: How to Restore Headlights in ONE Step


If you need something more aggressive/involved, this thread should help: Autopia Guide To Headlight Restoration

Copy N' Pasted:

Quote:
We have all seen, or perhaps we suffer from, faded and clouded headlights. For the better part of U.S. automotive history, tight governmental regulations required glass headlights of particular designs. Since the mid-1980's, car designers have been able to utilize aerodynamic headlight housings made of plastic, replacing the standard glass bulbs that were previously common. These housings will age and discolor over time. Yellowed and faded headlight housings are not just an eye sore but also a safety hazard. The light from the headlights is blocked and dispursed in the housing effecting the driver's nighttime vision and reducing the headlights visibility to oncoming traffic.

With some basic polishing knowledge and a little bit of patience you can restore crystal-clear clarity to most plastic lens in under an hour. There are some products on the retail market that claim to "restore" headlight housings in just minutes using a simple spray -the truth is restoring headlights requires removing the topical damage (weathered and oxidized plastic) from the housing, the polishing the plastic to a high-gloss (clear) shine. Autopia-CarCare.com sells many headlight light restoration kits. While the products are different, the concept is basically the same.

First, you will need to wash the headlight housing to remove any road dirt and soil from the surface. Second, it is often beneficial to deep clean/decontaminate the housing to remove any embedded bug guts or asphalt that could cause deep scratches as you work. Third, you will use abrasive mediums (polish or sandpaper & polish) to remove the oxidized layer of plastic from the headlight housing. Last, you will add some protection (wax, sealant, or specialized coating) to protect the headlight from further weathering and fading.


Step One: Start With A Good Wash

Start your headlight restoration by thoroughly washing the headlights and removing all dirt, grime, and debris. If you are working on your personal car then you can do this when you are washing your vehicle. If you are a mobile detailer, a bottle of waterless wash, such as BLACKFIRE Wet Diamond Waterless Wash, and a couple all purpose microfiber towels will come in handy.


The headlights on this 2003 Toyota Matrix have seen better days.


The headlights remain cloudy after a thorough washing.


Step Two: Deep Clean The Headlight Housing

While not necessary, using detailing clay or a similar decontamination method can save time in the long run. Asphalt, rocks, and bug remains can become lodged into the soft plastic of the housing and will become dislodged in the later steps, causing deep scratches and scares. Any paint safe detailing clay, such as BLACKFIRE Poly Clay II (pictured) will work.

Spray a lot of clay lubricant on the headlight housing and gently rub the clay bar back-and-forth over the surface. Continue working the clay bar back-and-forth until it glides smoothly and all texture has been removed.


You may see some yellowing appear on the surface as the clay bar removes the outer most oxidation. Simply add more lubricant and continue rubbing. When the surface feels smooth, wipe the housing dry with a microfiber towel to remove the clay lubricant.


The picture below illustrates the rock, asphalt debris, and bug remains that had become embedded in 80,000 miles of driving.


Step Three -A: Removing Severe Oxidation

If the headlight housing you are working on are just beginning to become cloudy then you might be able to skip this step and move to Step Three B (next section down). If the headlight housings have become uniformly faded and headlight illumination is reduced you will likely need to begin the headlight restoration process by using fine grades of sandpaper.

If you have never sanded an automotive surface before, do not worry. Sanding, whilst it may seem intimidating, is quite easy. It is the process of removing the sanding scratches that can be difficult. By following the guide lines below you will get excellent results the first time.
  • Use the sandpaper according to the manufacturers recommendations- This often means allowing the paper to soak in a soap-solution for 3-5 minutes prior to use
  • Use plenty of water/soap lubricant when sanding
  • Sand in a cross-hatch pattern and check results frequently
  • Use fine-grade, high-quality sandpaper
  • Clean sandpaper frequently by dunking into a bucket of water/soap solution to rinse away grit and material
  • Protect any adjacent body panels by masking them off with painter's tape


Meguiar's offers a series of Unigrit Sandpaper that ranges from (coarse) 1000 grit to (ultra-fine) 3000 grit. Meguiar's Unigrit Sandpaper is constructed using an unique process that makes each sheet very consistent and reduces the effort needed to polish away the sanding scratches. Even better, you can allow the sandpaper to submerged in water for weeks without fear of it disintegrating!

While Meguiar's offers the Unigrit paper in various levels of coarseness, in most cases you will only need the 1500 grade and 2500 grade papers to restore even the worst headlight housing.


For the best results allow Meguiar's Unigrit Sandpaper to soak at least five minutes prior to use. Add a few drops of soap solution such as Poorboy's World Super Slick & Suds to 3-5 gallons of water.


One sheet of each grade (1500 and 2500) of paper will be more then enough to do two headlight housing. Add one sheet of each grade to the bucket of water and allow to soak for at least 5 minutes.


Recommended: Mask Surrounding Areas

While you are waiting for the sandpaper to soak and soften, it is a good idea to mask area areas of bodywork that may become damaged when sanding or polishing the headlight housings. A few minutes of preparation can save a costly repair (at worst) or a headache (at a minimum). The headlight housing's plastic is considerably thick and can easily withstand very aggressive sanding multiple times; paint is very thin (about a sheet of paper in thickness) and can become easily damaged by mistake.

3M makes a range of Professional Masking Tape that is low-tac and idea for masking large areas. Use a thinner tape, either 3M 36mm or 3M 18mm (pictured) to mask away any adjacent body panels.


Crease the sanding sheet into thirds by folding tightly and tear in order to have three ideally sized pieces.


When sanding automotive paint it is ideal to wrap the sandpaper around a soft backing sponge/sanding block. The small size and continuous curve of most headlight housing designs requires sanding by hand, without the use of a sanding block. There are three ways to hold your sandpaper.

-Folded- by folding the paper in half and using your fingers to apply pressure. This is idea for sanding in tight spots and convex's.


-Under the fingers- Using your fingers can create high/low spots when sanding although this isn't too much of a problem on headlight housing. The most comfortable way to hold the paper with the most control.


-Palm- Using the palm to even out the pressure is an old body shop trick. Use the technique for your last couple passes to ensure an uniform sanded surface if possible.


Cross-Hatch Sanding

When sanding with two or more grades of sandpaper it is often ideal to use a cross-hatch sanding technique. Start sanding with the coarser grit in one direct (example: left-to-right/right-to-left) so that all of the sanding marks run in one direction. For the next grit, move the paper in an opposing direction (example: up-to-down/down-to-up). Continue sanding until all of the previous marks (left-to-right) have been remove and replaced with the fine (up-to-down) marks.

Use plenty of water/soap solution and rinse the sandpaper frequently! Fill a spray bottle with water/soap solution (a few drops of soap is plenty) and keep the surface well lubricated during sanding. Listen and feel for any grit that becomes trapped under the sandpaper. Immediately stop sanding, rinse the sandpaper in the bucket solution, and continue. Any grit or asphalt that becomes lodged under the paper can create deep scratches that will be very difficult to remove.

Start sanding with the 1500 grade Meguiar's Unigrit Sandpaper moving left-to-right and right-left. Use just enough pressure to hold the paper to the headlight housing.


Use a lot of water/soap solution to lubricate the surface. In the picture below, a film of water/soap solution has been sprayed on, so much in fact that the headlight housing almost appears clear.


The surface will become milky-yellow as the sandpaper abrades away the oxidized plastic.


Frequently rinse the sandpaper in the water/soap bucket.


Continue sanding until the residue is no longer milky-yellow in appearance and the oxidation has been remove. Take your time and make sure to sand all areas.


The residue running off the headlight housing is now white in appearance, indicating that the oxidation has been completely removed.


Because water or any liquid will create the illusion that the headlight housing is clear (this is how many of those wonder/miracle sprays work) you can inspect for any areas that you may have missed. As you wipe the residue from the headlight housing and it dries the appearance will become cloudy again (from the sanding scratches).


Wipe the headlight housing clean and dry with a soft microfiber towel. If you a professional headlight restorer you may consider a quality drying towel such as a Cobra Guzzler as it will quickly dry the housing so you can move to the next step.


While hard to see in the picture below because of the sun glare, the sanded headlight (passenger side/left on screen) has a much whiter and uniform appearance.


The un-restored headlight is cloudy and has a yellow tint.


The sanded headlamp housing has an almost frosted appearance from the sanding.


The next process when restoring the headlight housings is to refine the 1500 grade sanding scratches with a finer grade. Using Meguiar's 2500 grit Unigrit Sandpaper will leave a finer scratch pattern that will save time when polishing as well as make the polishing easier.

Following the same basic procedures above (frequently rinsing the paper, firm pressure, using lots of water/soap solution, unidirectional strokes) sand the headlight using the finer 2500 grade sandpaper. The only difference is that you will be moving the paper in an up-and-down motion so you can see when you have removed all of the coarser marks.


Wipe the headlight housing clean and inspect frequently. Continue working until all of the left-to-right marks (coarser grit) have been removed.


Wipe the headlight completely dry. It is now ready for polishing.


Note: If you do not have access to a machine polisher and plan on polishing by hand you should finish with an even finer grade of sandpaper such as Meguiar's 3000 grit Unigrit Sandpaper or 3M's 5000 grit Trizact Sanding Disc.


Step Three -B: Polishing The Headight Housing to Restore Clarity

The next step in restoring your headlight housing is to use ultra-fine abrasives in the forum of liquid polishes to remove sanding marks and restore clarity to the lens. In most cases, with the exception of the 3M Headlight Restoration Kit -39084 (reviewed here), you will need a dedicated machine polisher, polishing pads, and polishes.

Todd's Note: There are many types of polishers, from random orbital DA's to rotary polishers that will work equally well when polishing headlights. The plastic tends to be rather soft and will polish easily. I personally like using a small stroke random orbital as it allows me to get polish all of the small areas and complex shapes of today's headlight housing while applying pressure and achieving fast results. I wrote the following recommendations based on personal preferences to design an easy-to-use combination that delivers professional results -quickly.

The Griot's Garage 3 Inch Random Orbital Polisher is a great choice for anybody who is interested in restoring headlights. The light-weight compact design makes it easy to maneuver this machine over the most complex headlight housing designs. The short (3/16") stroke and high speed allow even the tightest lines to be polished. When teamed up with the proper products this polisher will quickly remove 2500 grade (or finer) sanding marks and leave the headlight housing looking brand new.

Machine Polishing Guidelines:
  • Polish the headlight in sections, focusing on one area at a time
  • Use a small amount of polish on the pad -more is less
  • Use firm pressure and move the polisher in overlapping passes over the section
  • Continue polishing until the polish begins to look clear and/or the headlight has become clear
  • Inspect in bright/direct light and re-polish any areas that are needed
  • Remove residue with a soft microfiber towel to avoid scratching/dulling the lens cover
  • Use speed 5 to 6

In addition to the polisher, you will need the proper polish and pad selection to get fast results with little effort. Menzerna FG400 is a new generation of fast-cutting compounds that quickly removes severe damage from hard paint systems. When paired with a Meguiar's Easy Buff Knitted Wool 3 inch Pad, it will quickly restore work on plastic to restore the shine.


Add a small amount of Menzerna FG400 to the knitted wool pad.


Place to polisher -pad side down- on the headlight. Set the machine to speed 5 or 6 for maximum polishing effect.


Polish a small section at a time, moving the polisher slowly across the surface, and using firm pressure. For the best results, polish most headlight housings in 2 to 3 equally sized sections. Polish using slow arm movements and firm pressure in overlapping passes until the polish begins to look clear.


The combination of machine polishing power from the Griot's 3 Inch Random Orbital and the Menzerna FG400/Meguiars Knitted Wool Pad work to quickly restore clarity. Even if you have never used a machine polisher before, the process couldn't be easier. Add more polish and continue polishing the next section.


Wipe away all residue with a soft microfiber towel that will not create any scratches such as an Acrtic White Microfiber Cloth.


With in minutes the restored headlight emerges from the veil of sanding scratches.


The aggressive polish and pad combination will leave behind a very faint (micro) haze on the surface that will be almost impossible for most people to see. If you are a professional headlight restorer you job here could be considered done (and will certainly look better then the job the local yoo-hoo does with a rotary buffer and a dirty wool pad). You can see some of the haze in reflection of the sun (pictured below).


To refine the haze you will need to polish the surface with a fine polish and polishing pad. Menzerna SF4000 has enough power to remove the haze quickly while burnishing the plastic like jeweler's rouge to leave behind an incredibly clear surface. Menzerna SF4000 matches up ideally with Griot Garage's 3 Inch Orange Polishing Foam Pad to take the headlight housing to just-molded level of clarity.


Again add a small amount of polish to the polishing pad. Less is really more.


Following the same guidelines as the previously step, polish slowly a section at a time. Keep firm pressure on the machine, not so much the pad stops rotating, and move the polisher in overlapping passes until the polish residue appears to become clear.


Wipe away residues with an ultra soft microfiber towel such as the previously mentioned Arctic White Microfiber Towel or a Supreme 530 Microfiber Towel.


The result will be a clear, like-new appearance from your headlight housing with minimal micro-haze.


When compared to the un-restored healight housing, the results are fairly dramatic.


Step Four: Protect

It is imperative that that headlight housings receive protection after restoration or all of your work will go for naught. The headlight housings will still be exposed to the same UV light that caused them to oxidize in the first place. Without any protection they will begin to yellow and become cloudy in a matter of months.

Just like with automotive paint, there are a number of different options when selecting a protectant for your headlights -waxes, sealants, and coatings. If you choose a wax, go with something that has a high level of UV absorption and long lasting durability such as Collinite 845 IW. If you choose to go with a synthetic sealant, Detailer's Poli-Coat Paint Sealant is an excellent choice. The key is to reapply often for maximum protection.

For a more hand's-off and permanant solution to your headlight yellowing woes, consider a coating system designed specifically for plastic surfaces. Optimum Opti-Lens Permanent Headlight Coating is an advanced acrylic and co-polymer resin that provides extreme protection for restored (and new) headlights.


Inside the folded cardboard box is a syringe with 10cc's of Opti-Lens, an applicator tip, a soft poly-foam applicator and a Gold-Plush Microfiber Towel.


Start by wiping the surface with a 15% dilution of Isopropyl Alcohol to remove any polishing or body oil residues. The lens cover must be completely clean for proper application.


Next, remove the black screw on cap from the Opti-Lens syringe and replace it with the blue applicator nozzle. Apply pressure to the plunger to squeeze out a small amount of Opti-Lens onto the supplied applicator.


Wipe Opti-Lens over the headlight housing. It will create a wet film (visible underneath the applicator in the picture below).


Continue to spread the Opti-Lens coating over the headlight to level any wet streaks or spots. The product will appear to melt into the lens cover.


Allow to set for 3 to 5 minutes, then wipe away any streaks with the supplied Gold Plush Microfiber Towel. Avoid exposure to moisture for 6 hours and washing for at least 24 hours.


Remove tape and use a quality detail spray, such as Ultima Detail Spray Plus, to clean any residues and wet-sanding runoff.


End Results

The end results are nothing short of outstanding. The headlight housing looks almost brand new.

Compared to the un-restored side...


The atheistic difference is huge, with the restored headlight looking like-new. Like deep wrinkles across a forehead, faded and clouded headlight housings can make a vehicle look old beyond its years. More importantly, the restored headlight provides much better nighttime vision, for both the driver and for the driver of other cars.

Todd@Autopia is offline   Reply With Quote
Old 03-26-2014, 11:25 AM   #5
Devryn17
Suffers Fools Poorly
 
Devryn17's Avatar
 
Drives: 2010 SS/RS, CGM w/ Silver Stripes.
Join Date: May 2011
Location: Coolidge, AZ
Posts: 1,117
Seriously, Meguar's "Plastx," a mothers ball, and a drill with a decent speed will work just fine. Takes 5 mins a side max.
__________________
2010 2SS/RS, CGM w/ silver stripes. Hurst Shifter, long tube headers, full exhaust, CAI, tune. SAE 407 RWHP/402 RWTQ

Momma didn't bronze my shoes, but when I turned 16 I inherited a lead foot.
Devryn17 is offline   Reply With Quote
Old 03-26-2014, 09:05 PM   #6
JimE


JimE's Avatar
 
Drives: 2013 2SS/RS/1LE
Join Date: Apr 2010
Location: St Louis, MO
Posts: 3,087
Thanks for the information guys.

Time to do a little reading.
JimE is offline   Reply With Quote
Old 03-27-2014, 10:48 AM   #7
DylanVK
 
Drives: a few
Join Date: Mar 2014
Location: Colorado
Posts: 507
Good info already here... I'll add my little side note:

DO IT RIGHT OR DO IT TWICE!

Theres tons of things on the market that claim quick and easy fixes to faded lens problems. Usually they're full of oils and things that make it look better for a short time.

Removing the oxidized material - with cutting polishes (or sandpaper when needed) and then restoring protection might take more time, but it ensures you won't be fixing it again in a few weeks.
__________________

1967 C/10 PROJECT TRUCK | DETAILING EXPERT | CRAFT BEER ENTHUSIAST
DylanVK is offline   Reply With Quote
Old 03-27-2014, 11:47 AM   #8
Devryn17
Suffers Fools Poorly
 
Devryn17's Avatar
 
Drives: 2010 SS/RS, CGM w/ Silver Stripes.
Join Date: May 2011
Location: Coolidge, AZ
Posts: 1,117
Quote:
Originally Posted by DylanVK View Post
Good info already here... I'll add my little side note:

DO IT RIGHT OR DO IT TWICE!

Theres tons of things on the market that claim quick and easy fixes to faded lens problems. Usually they're full of oils and things that make it look better for a short time.

Removing the oxidized material - with cutting polishes (or sandpaper when needed) and then restoring protection might take more time, but it ensures you won't be fixing it again in a few weeks.
This is true...The PlastX only worked for a month or two. That being said, for a daily driver that's going to be covered in road grime all the time anyway, I'd rather spend 5 minutes every couple of months (and maybe $10 a year on the product), than a few hours and $50 on the product.
__________________
2010 2SS/RS, CGM w/ silver stripes. Hurst Shifter, long tube headers, full exhaust, CAI, tune. SAE 407 RWHP/402 RWTQ

Momma didn't bronze my shoes, but when I turned 16 I inherited a lead foot.
Devryn17 is offline   Reply With Quote
Old 03-27-2014, 02:52 PM   #9
camaro2ssblack
 
camaro2ssblack's Avatar
 
Drives: 2010 Camaro 2SS - Black on Black
Join Date: Aug 2010
Location: Jackson, TN
Posts: 731
Just did this a few months ago, mine are holding up great so far.

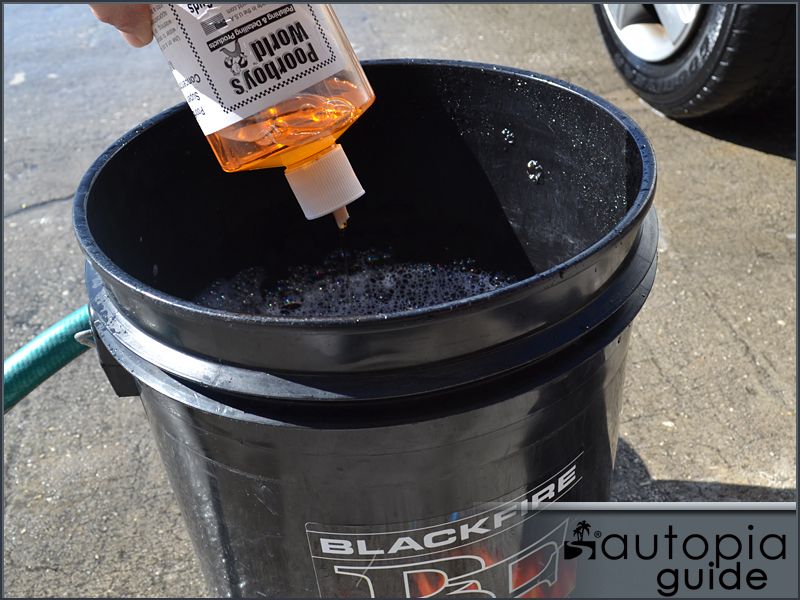
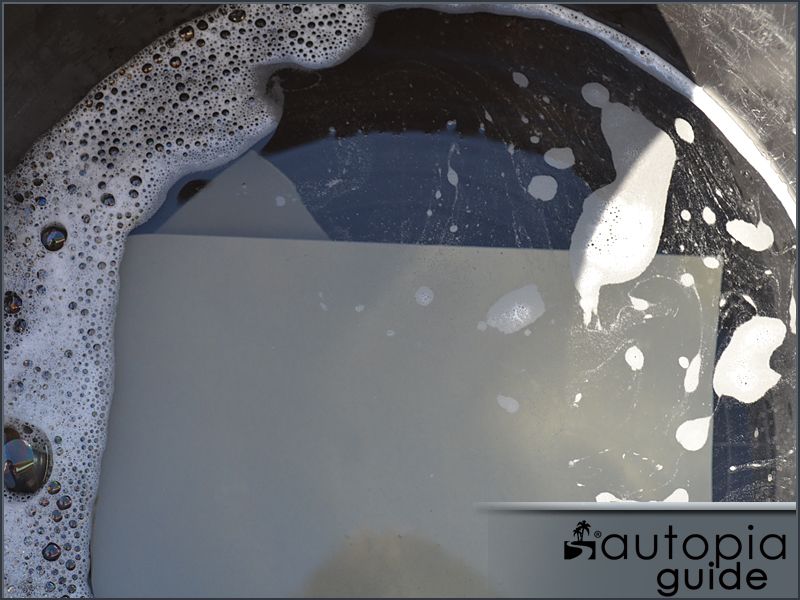
Products and process:

- Cleaned with Adams APC and a mf towel
- Taped up and clayed with Adams clay and ONR as clay lube.
- Wet sanded with 800 grit, then 1000 grit, then 2000 grit and a sanding block
- Polished with Optimum Hyper Compound on a 3" LC wool pad and a cordless drill
- Sealed with two coats of Blackfire wet diamond for now as I plan on coating the car after I complete the entire detail over the next several weeks.


__________________
camaro2ssblack is offline   Reply With Quote
Old 03-27-2014, 03:18 PM   #10
Normagene


Normagene's Avatar
 
Drives: 2013 Ashen Gray M6 ZL1
Join Date: Sep 2012
Location: South Eastern, Mass
Posts: 2,615
A little dab of toothpaste works really well. Toothpaste is a very mild abrasive and gets the job done without having to spend any extra cash.
Normagene is offline   Reply With Quote
Old 03-27-2014, 04:04 PM   #11
JTruck

 
JTruck's Avatar
 
Drives: 2014 Camaro 1LT/RS
Join Date: Sep 2013
Location: Arizona
Posts: 1,693
Quote:
Originally Posted by Normagene View Post
A little dab of toothpaste works really well. Toothpaste is a very mild abrasive and gets the job done without having to spend any extra cash.
Never understood this, nor seen it work. From what I have seen, it just makes them worse. You still need to polish.
__________________
Detailing is an involuntary obsession.
JTruck is offline   Reply With Quote
Old 03-27-2014, 04:17 PM   #12
trm2
 
Drives: Model S, Vette, Volt & Equinox
Join Date: Feb 2013
Location: Ohio
Posts: 335
What everyone else said. But if you don't want to do it yourself, you can go to your local SAMs Club and have it done. $30 and a 6 year guarantee.

But it isn't all that bad to do.
trm2 is offline   Reply With Quote
Old 03-27-2014, 11:03 PM   #13
Normagene


Normagene's Avatar
 
Drives: 2013 Ashen Gray M6 ZL1
Join Date: Sep 2012
Location: South Eastern, Mass
Posts: 2,615
Quote:
Originally Posted by JTruck View Post
Never understood this, nor seen it work. From what I have seen, it just makes them worse. You still need to polish.

I saw it on a video, but I've never tried it myself.
Normagene is offline   Reply With Quote
Old 03-28-2014, 10:01 AM   #14
CamaroDreams07


CamaroDreams07's Avatar
 
Drives: Slow V6
Join Date: Jun 2009
Location: East Lansing, MI
Posts: 9,361
Quote:
Originally Posted by JTruck View Post
Never understood this, nor seen it work. From what I have seen, it just makes them worse. You still need to polish.
It can technically work because a toothpaste does contain abrasives. It technically is a polish. But it also contains a bunch of other crap you don't want.

Now, does it make even a shred of sense to go scouring the medicine cabinet for car care products? Nope.
Cracks me up when I see these. Ive seen toothpaste, peanut butter, apples, and onions as recommended detailing products. Not saying any of them can't work but there are actual car products that work a whole lot better.

Sent from my HTC One using Tapatalk
__________________
[B]
CamaroDreams07 is offline   Reply With Quote
 
Reply


Posting Rules
You may not post new threads
You may not post replies
You may not post attachments
You may not edit your posts

BB code is On
Smilies are On
[IMG] code is On
HTML code is Off

Forum Jump


All times are GMT -5. The time now is 06:54 PM.


Powered by vBulletin® Version 3.8.9 Beta 4
Copyright ©2000 - 2025, vBulletin Solutions, Inc.