You are browsing camaro5 

|
 08-10-2009, 05:01 PM
|
#29 |
 
|
plate
easy to do and looks good

|

|

|
|
08-12-2009, 11:36 PM
|
#30 |
|
NY5THGEN

Drives: 2010 Camaro 2LT/RS/A6/SIM/IO Join Date: Aug 2009
Location: FAST LANE
Posts: 858
|
Hey guys I saw this yesterday and decided to give it a go since I got stopped once already. I used zip ties and weather stripping...
 I noticed the bottom of my bumper was different from the ones pictured as the 1ss and 2ss have 3 lines going across and the ls, 1lt, 2lt has 1. Same technique just had to tweek it. So for the ls 1lt and 2lt guys this ones for you.  weather stripping on the back where the frame contacts the bumper.  zip zip  side shot  since "no tools" were required of course I over looked having a screwdriver so a penny had to do  and here she goes... 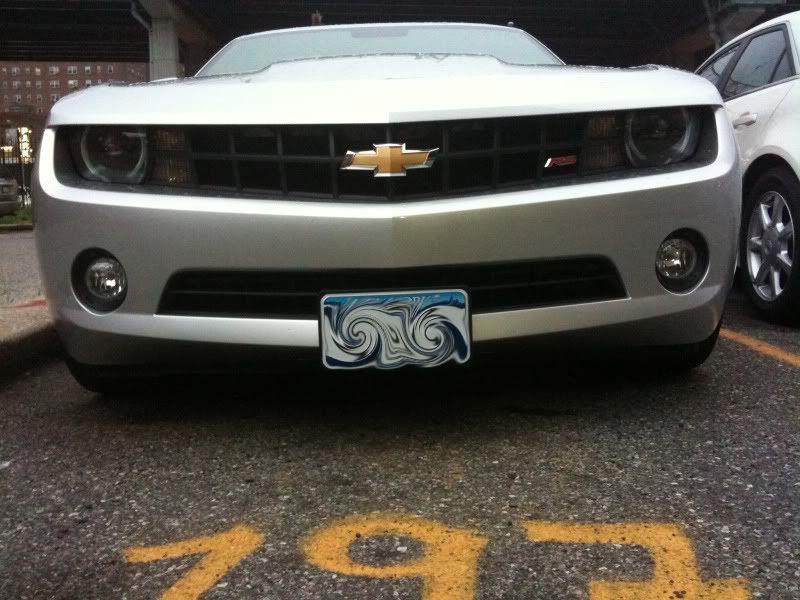
Last edited by DON_RAFA; 08-14-2009 at 04:52 PM. Reason: correction. |
|
|
|
|
08-13-2009, 06:00 AM
|
#31 |
    
Drives: "Bmblbee" 2010 RY 2SS/RS. VIN 12043 Join Date: Oct 2008
Location: Waldorf, Maryland
Posts: 1,266
|
Good work! I'm glad I resisted getting one of those $160 "hide-away" plate holders just to keep from drilling holes in the car.
__________________
 |
|
|
|
|
08-23-2009, 04:55 PM
|
#32 |
|
Florida C5

Drives: 2010 Camaro 2SS Vortech L99 IOM Join Date: Jul 2009
Location: Tequesta, FL
Posts: 2,608
 |
How long have these options been used.
 Concerned about movement in the wind, doing the speed limit of course, and grinding on the grill or spoiler. Even the tubing can leave a mark over time. I guess to remove for show, you cut ties and restrap. Lets all keep going, it is becoming more reefined each day!  I am going to go and stare at mine for a while, on the right track! 
|
|
|
|
|
08-27-2009, 08:56 PM
|
#33 |
 
Drives: 2010 2LT & 07 Jeep Rubicon Join Date: Jul 2009
Location: Austin, TX
Posts: 12
|
Installed today.. on a 2LT - worked marvelously and NO HOLES!
 Thanks for posting. Thanks for posting.
|
|
|
|
|
10-10-2009, 03:04 PM
|
#34 |
|
Howdy! Pete here...

Drives: 2017 50th Anniv 2SS, A8, NPP, MRC Join Date: Jul 2009
Location: Schertz, TX
Posts: 1,380
|
Here's another inexpensive variation
I live in Texas and just mounted my front bracket. I used an approach that is slightly different from the others posted here.
I kept the GM-provided mounting plate right side up. Seems to fit nice and snug. Looks great too! Here are the steps I followed, and some pics: 1. Purchased some black 8" zip ties and some clear all-purpose vinyl tubing at my local auto parts store. The pics show the dimensions of everything. 2. Drilled two holes in GM mounting plate near pre-drilled, deep-set holes (see pics for locations of new holes relative to pre-drilled holes). 3. Cut two sections of the all-purpose clear vinyl tubing about 3" long each. 4. Threaded one 8" zip tie through the one of the two holes I drilled (pointy end first, front-to-back). I did these one at a time. 5. Slipped one of the 3" vinyl tubing pieces onto the zip tie behind the mounting plate, then used fingers to thread the zip tie under a horizontal grill strut, around a vertical grill strut, then back over the same horizontal grill strut and then from back-to-front through the pre-drilled deep-set hole and zip the tie shut (but didn't tighten all the way yet--needed to leave some slack to do the other side). 6. Next, used fingers to position the clear tubing so it will protect the grill struts behind the plate after fully tightening. 7. Repeated for other hole that I drilled, except once I had both pieces of clear tubing exactly where I wanted them, I tightened both zip ties down (I was careful to do this slowly so I could push the "knot" of each zip tie down into the deep-set holes). 8. Finally, checked to see that teh moutning plate was very snug, but not too tight against the nose of the car. Don't want any vibrations, but also don't want to scratch the paint! 9. That's it! Pretty simple, cost under $10.00, and best of all...NO DRILLING INTO BUMPER! Cheers! Here are the pics:
__________________
PnCRedJwl2SS
2017 50th Anniversary Edition, A8, NPP, MRC, w/Sunroof and Glow-tie! ___________________________________________  ___________________________________________ Ordered from GM Delivered to dealership and home 9-16-16 This car is a beast! Last edited by PnCRedJwl2SS; 10-16-2009 at 10:29 AM. |
|
|
|
|
10-26-2009, 04:45 AM
|
#35 |
|
I'm baaaaaaaaaack
Drives: 2003 Saturn Vue "Toy Car" Join Date: Sep 2009
Location: Jacksonville, NC
Posts: 247
  |
not bad... so glad i dont have to have front plates
|
|
|
|
|
11-06-2009, 01:43 PM
|
#36 |

Drives: 2LT/BB 3.6 V6 6-M Jun'09 #A9100242 Join Date: Jul 2009
Location: New York
Posts: 542
|
Mounting a manual show and go license plate bracket in 15 minutes or less.
The motorized bracket looks kinda cool, but I see further problems along the road with the motor and the spoiler by the bracket bouncing back against it. So instead I settle with the manual one. It was fast and easy to install. These bracket mostly fit any spoiler with a flat or oval surface even with the bevel tip spoiler nose of the 2010 Camaro. For those who like the presentably center look, I took a few step by step pics to help you if you decided to get the manual one. (Note: heavy plate cover need longer nuts and bolts for better securing )
|
|
|
|
|
11-06-2009, 02:23 PM
|
#37 | |
 
Drives: 2010 CAMARO ABM 2LT Join Date: May 2009
Location: wylie texas
Posts: 419
|
Quote:

__________________
 |
|
|
|
|
|
11-06-2009, 02:46 PM
|
#38 | |
        
Drives: 2010 Camaro 2LT/RS ABM Join Date: Sep 2009
Location: Sugar Land, TX
Posts: 13,075
|
Great Idea...thanks for posting
__________________
2LT, RS, AT6 ABM, Gray Leather
Quote:
1100 Order accepted at dealer: 9/15/2009 - NPGV41. 2000 Order accepted by GM: 9/29/2009 3000 Accepted By Production Control: 9/30/2009 - TPW 10/26/09 3100 Sequenced:10/12/09 3300 Scheduled For Production:10/13/09 3400 Broadcast:10/22/09 3800 Produced:10/27/09 4000 Available To Ship:10/28/09 4200 Shipped:10/29/09 5000 Delivered To The Dealer:11/09/09 6000 Delivered To Customer:11/12/09 |
|
|
|
|
|
11-06-2009, 04:02 PM
|
#39 |
|
SS/RS
Drives: 2010 SS/RS IOM w/blk stripes A6 Join Date: Jun 2009
Location: Eastern Washington
Posts: 816
|
This is the plate mount I used. Works great. Have yet to be stopped, but just in case "gee officer, I just washed the car and I forgot to pull it back out".
|
|
|
|
|
11-07-2009, 12:55 AM
|
#40 | |
|
Howdy! Pete here...
Drives: 2017 50th Anniv 2SS, A8, NPP, MRC Join Date: Jul 2009
Location: Schertz, TX
Posts: 1,380
|
Quote:
__________________
PnCRedJwl2SS
2017 50th Anniversary Edition, A8, NPP, MRC, w/Sunroof and Glow-tie! ___________________________________________ ___________________________________________ Ordered from GM Delivered to dealership and home 9-16-16 This car is a beast! |
|
|
|
|
|
11-07-2009, 01:00 AM
|
#41 |
      
|
I wish I seen this before I spent $100.00 on my front license plate holder, I am very happy with the one I bought, but these ones on here look great to.
Last edited by 2010 SSRS; 11-07-2009 at 11:28 AM. |
|
|
|
|
07-26-2010, 02:29 PM
|
#42 | |

|
Quote:
Cheers!
__________________
Mods: CAI Inc. Cold Air Intake, 35% Tint, 3M Clear Bra
 |
|
|
|
|
|
|
|
|
 |
| Thread Tools | |
|
|


