You are browsing camaro5 

|
 09-25-2017, 10:59 PM
|
#1583 |
|
'It's an experiment'

Drives: [COTW 2/09/15] '11 GPI LSA SC Z/LE Join Date: May 2014
Location: Dallas TX
Posts: 8,709
|
Alright! Full power/heated Recaros are on the way!
Found a great deal on a set of 1LE SS Recaros from a member! Minus a 6L90, that pretty much completes most of the performance mods for road course work! I was able to sit in Ftrustys Z/28 yesterday, and I loved them... Can't wait! -Don
__________________
747 RWHP 794 RWTQ
"Horsepower sells cars, torque wins races." - Enzo Ferrari See My Build: http://www.camaro5.com/forums/showthread.php?t=385577 Last edited by hammdo; 09-26-2017 at 07:37 PM. |

|

|
|
09-30-2017, 07:58 PM
|
#1584 |
|
'It's an experiment'
Drives: [COTW 2/09/15] '11 GPI LSA SC Z/LE Join Date: May 2014
Location: Dallas TX
Posts: 8,709
|
6th Gen brake air dams for tracking
While I'm waiting for the Recaros, I started on the Gen 6 brake air dams. Using the ABS plastic I had, I created a template of the radius arm, then created 'pads' to drill and tap for the screws. Here is what that looks like with the 'normal' brake dam:
 Next, I installed the 'abs' plastic holder on the radius arm using 'big' zip ties: 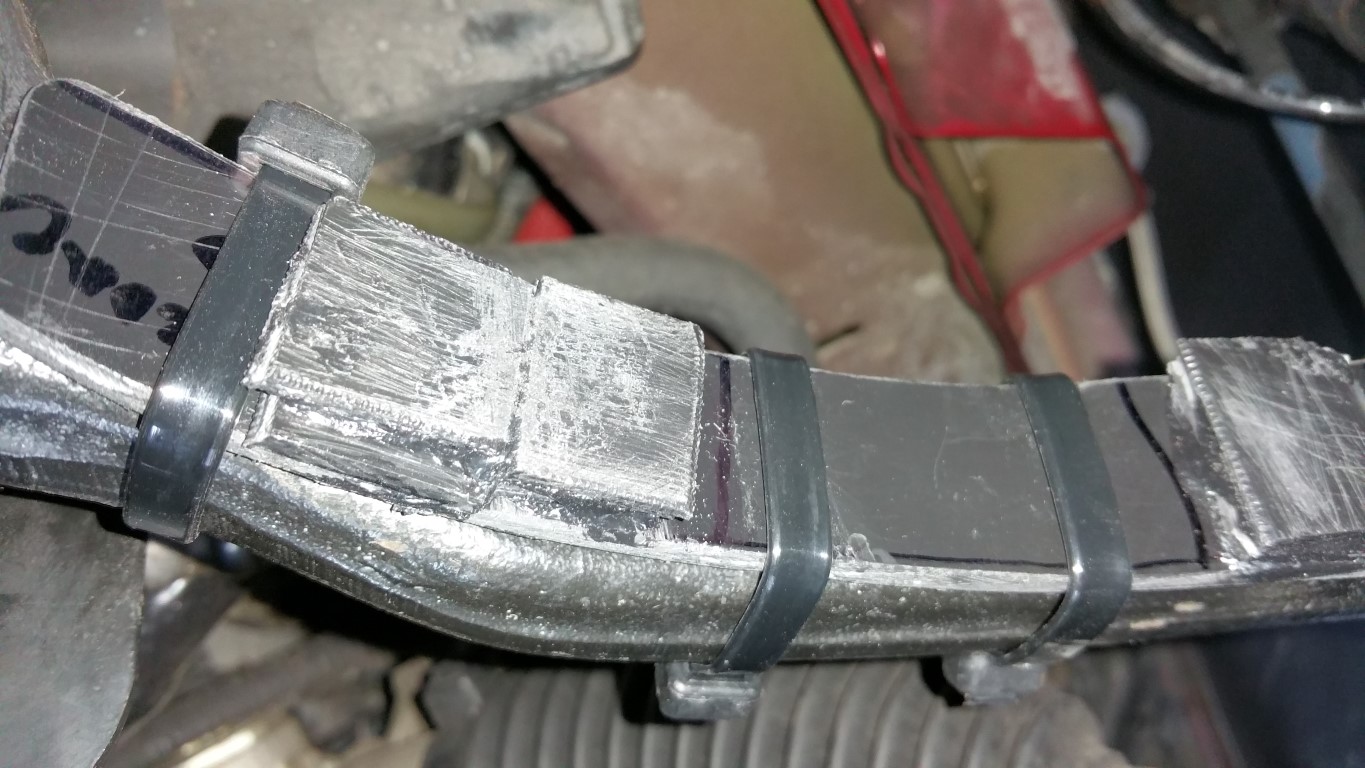 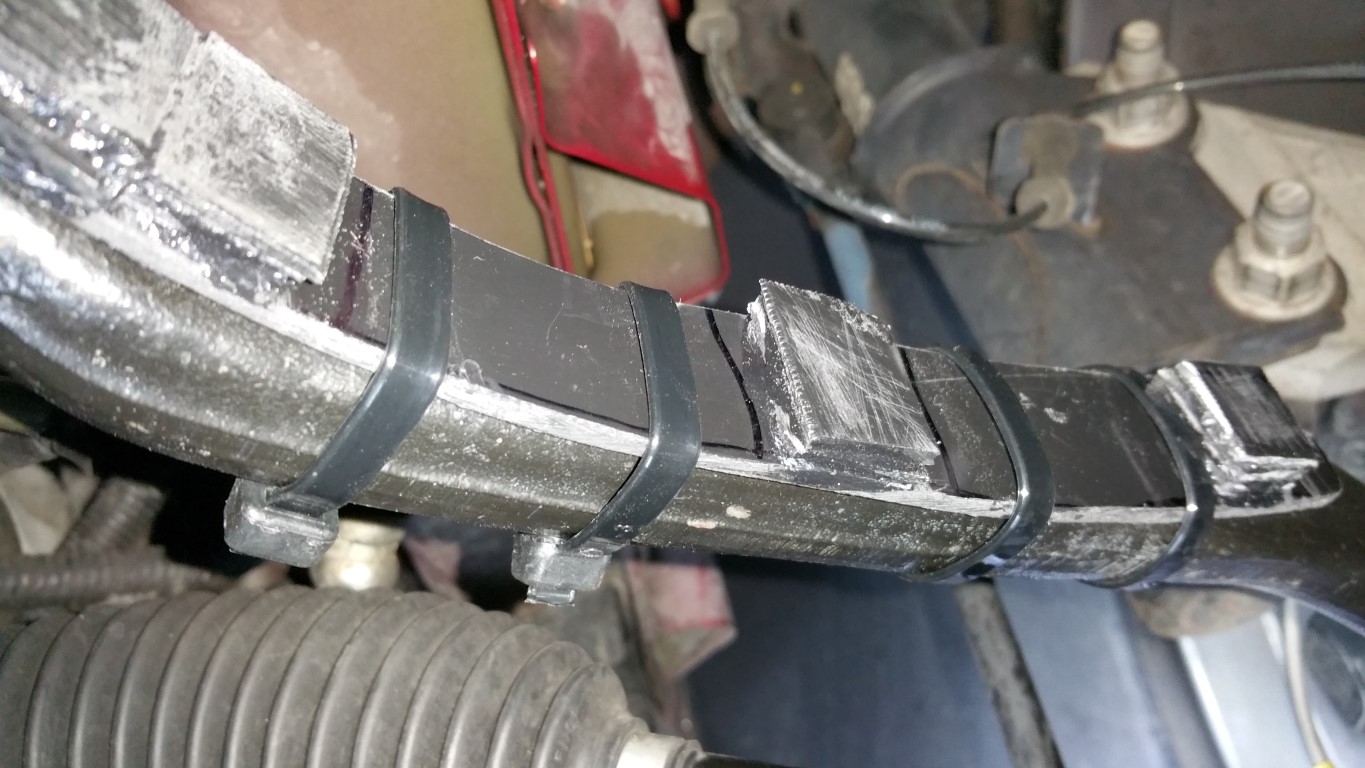 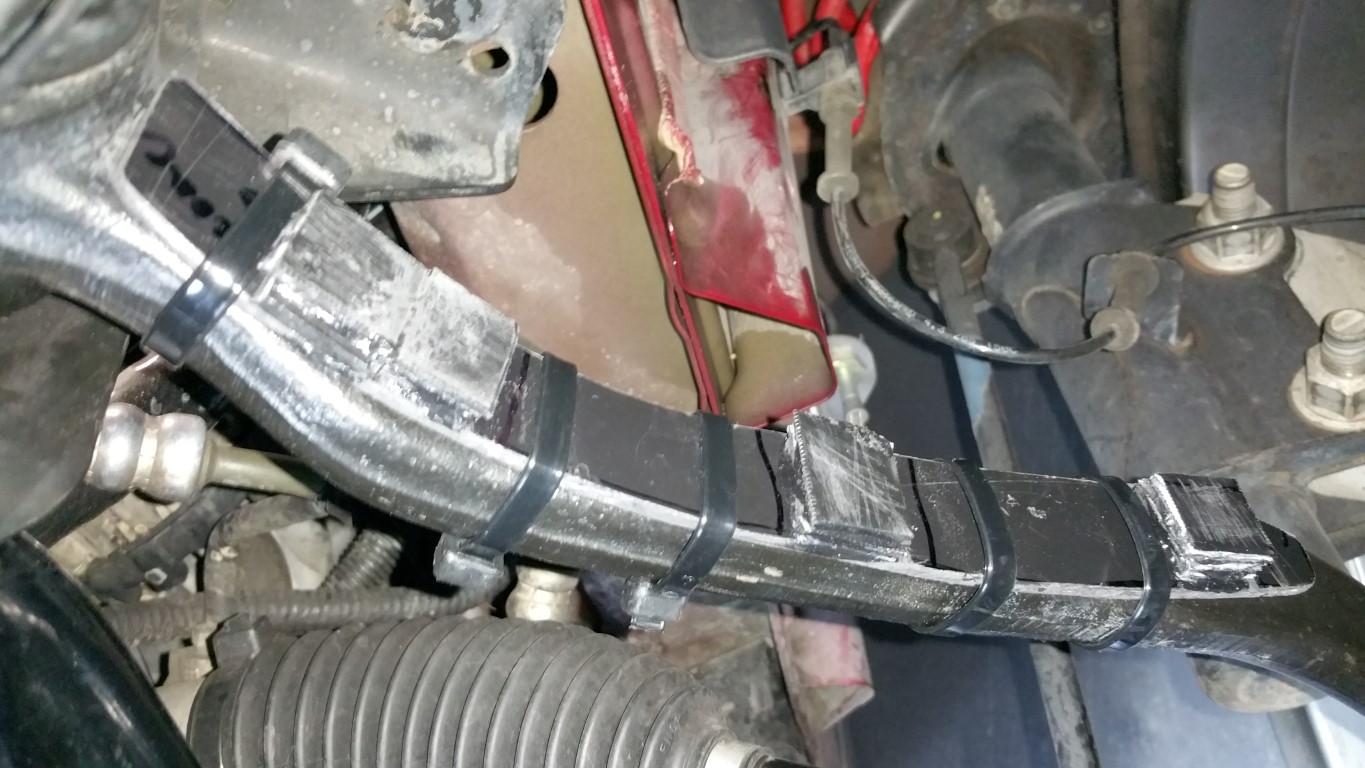 Then, did a trial fit -- the normal air dam is clear but, I found I had to trim off the 'harness' holder the 6th gen uses when I need to install the track air dam: 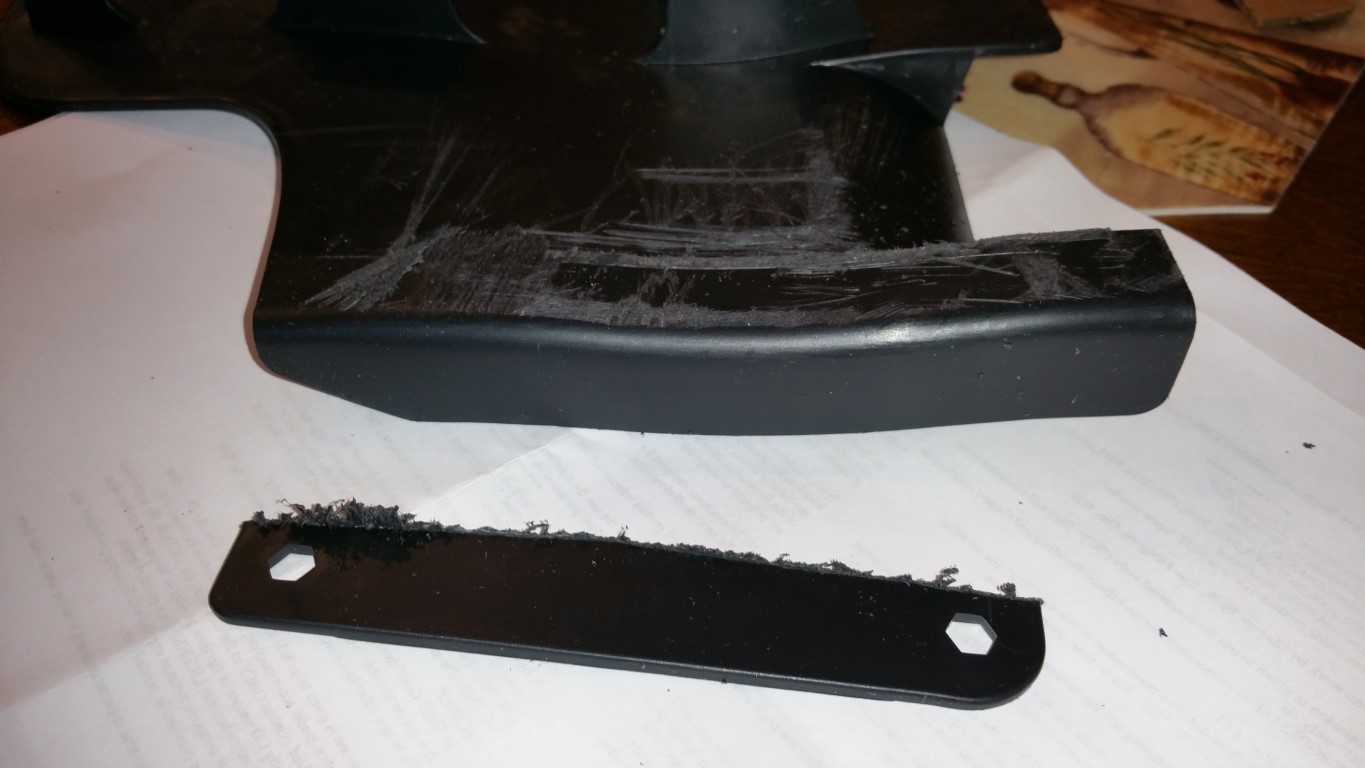 So the trial fit on the driver's side looks good, I'll need to take the wheel off and drill the holes first for the track air dam -- that is the one I need the clearances for, so with that in position, it will ensure both will fit and clear. I'll create the 'passengers' side mount, then, drill the holes and do a test drive... more coming... -Don
__________________
747 RWHP 794 RWTQ
"Horsepower sells cars, torque wins races." - Enzo Ferrari See My Build: http://www.camaro5.com/forums/showthread.php?t=385577 Last edited by hammdo; 10-01-2017 at 03:22 PM. |
|
|
|
|
10-01-2017, 02:18 PM
|
#1585 |
|
'It's an experiment'
Drives: [COTW 2/09/15] '11 GPI LSA SC Z/LE Join Date: May 2014
Location: Dallas TX
Posts: 8,709
|
6th Gen brake air dams for tracking continued
Completed the 'track' setup (minus the brake shield). I fitted the track duct left, right, up, down to make sure nothing was binding. I also layed the 'abs/speed' sensor 'horizontal' in order to remove any doubt about rubbing.
Here it is!: 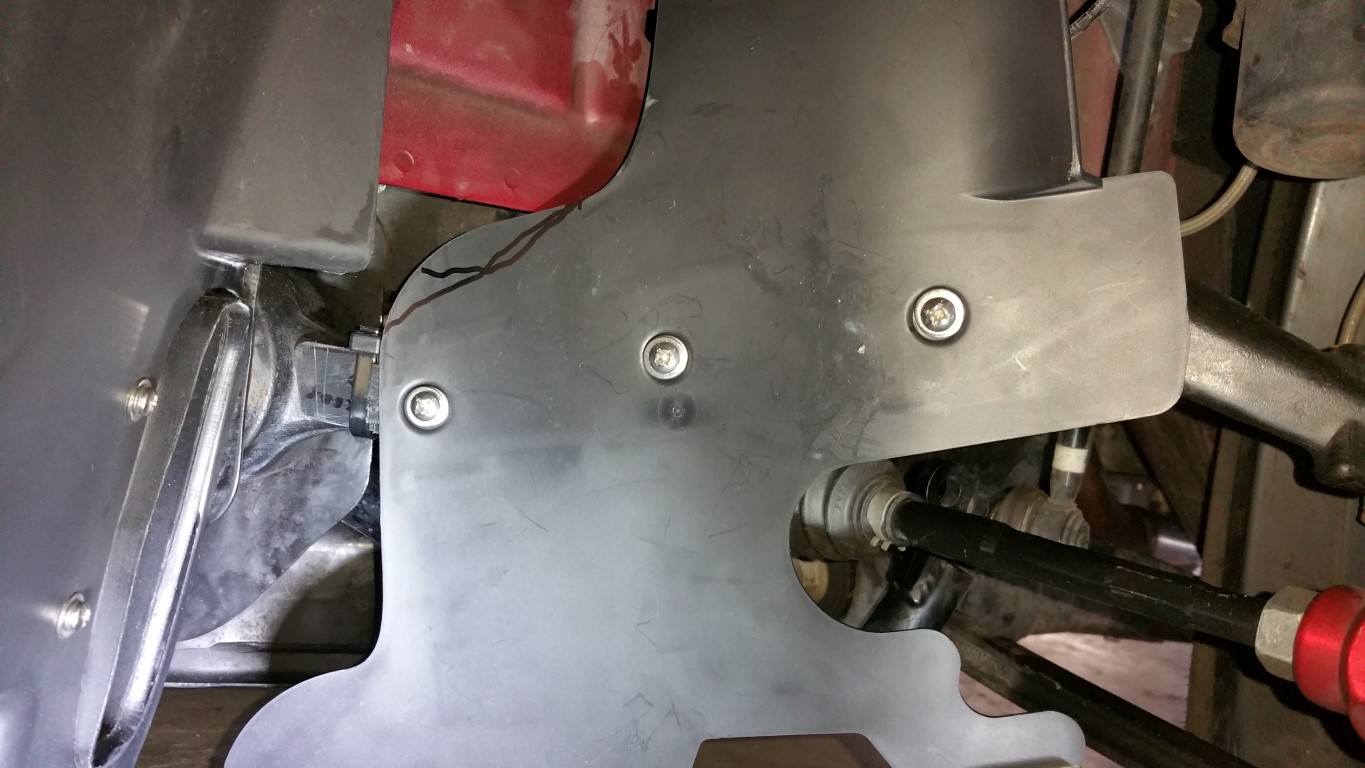 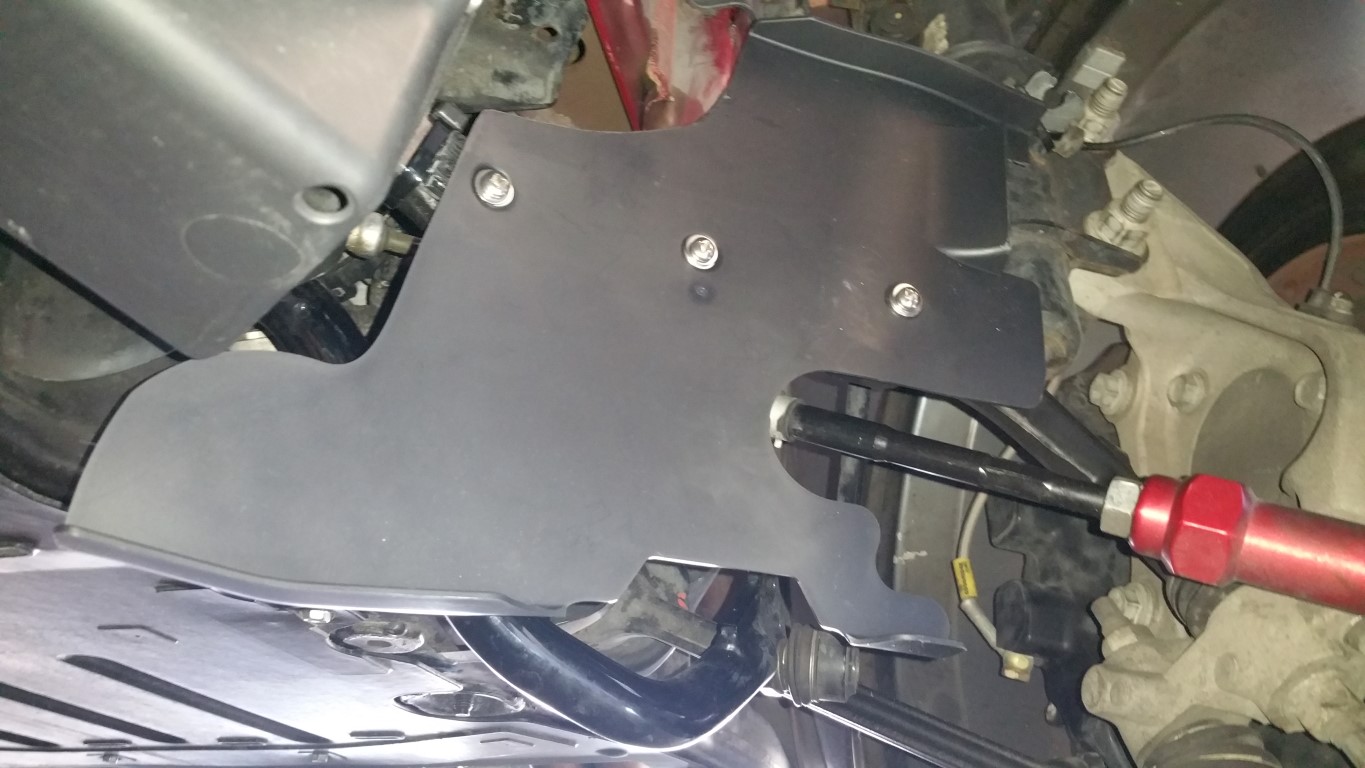  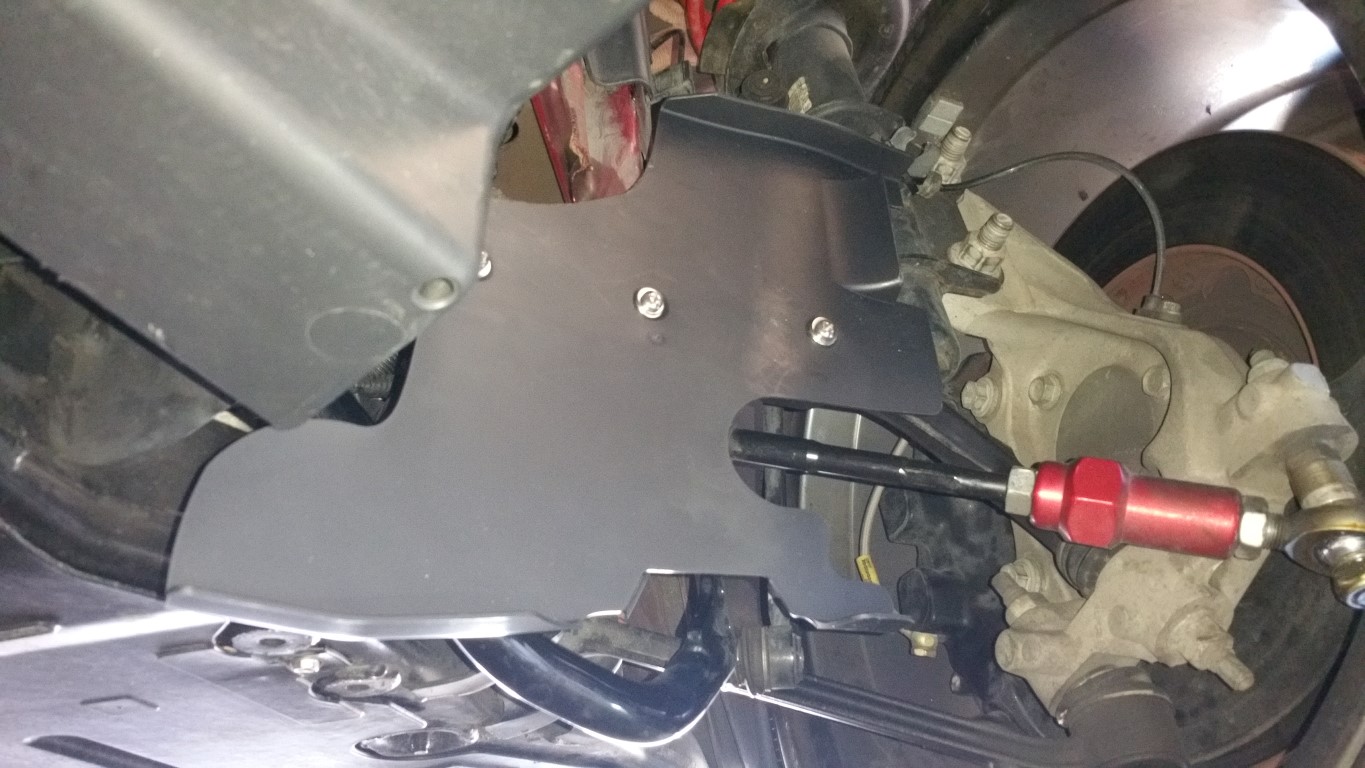 Clearance for bump steer kit (has really BIG ends on it): 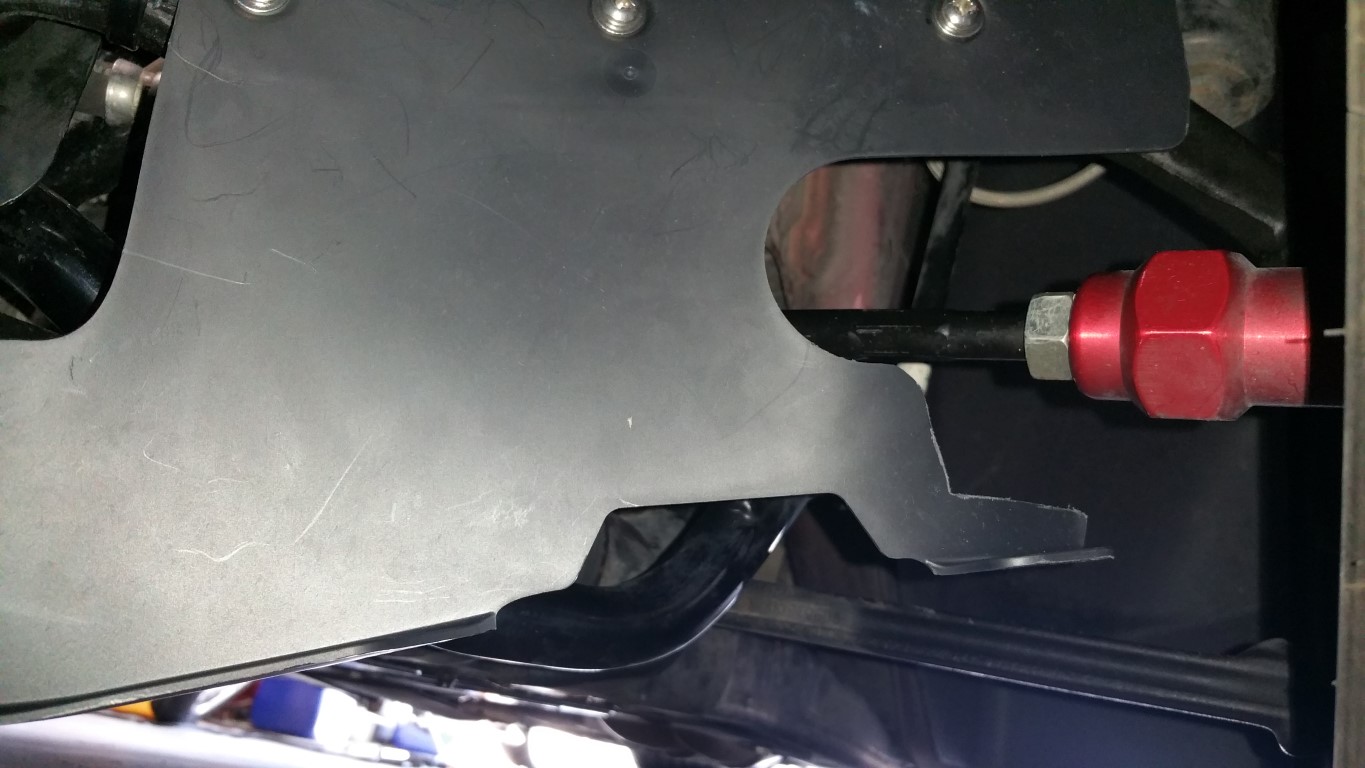 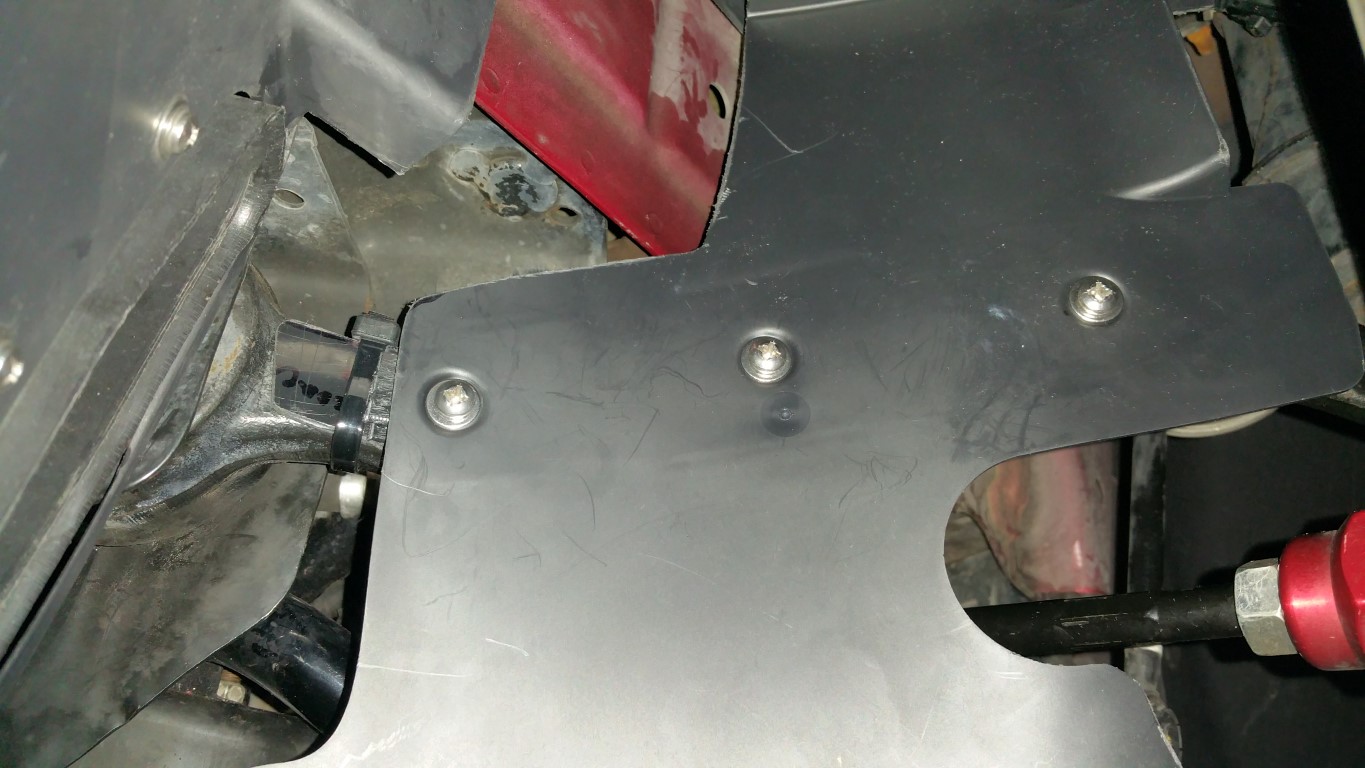 The nice thing is, I can now just 'turn the wheel' and remove/install as needed. I don't have to jack up the car and take the tire off (once I do the splash shield). worked out nicely... Next, I'll do the passenger's side and then a final test drive. Once I know the track version is set, I'll take them off and install the 'daily' driver versions... BTW, those are stainless #12 1/2" length screws from Lowes with a #12 stainless washer (both in separate packages - 5 screws per pack -- wish it was 6 so I didn't have to by 2) and a 24 pack of washers (didn't know if I would need to use 2 or more). -Don
__________________
747 RWHP 794 RWTQ
"Horsepower sells cars, torque wins races." - Enzo Ferrari See My Build: http://www.camaro5.com/forums/showthread.php?t=385577 Last edited by hammdo; 10-01-2017 at 03:29 PM. |
|
|
|
|
10-01-2017, 02:38 PM
|
#1586 |
        
Drives: '14 1LE Join Date: Nov 2013
Location: NJ
Posts: 2,438
|
Impressive - any interest in sharing templates others could use to do the same?
What is the disadvantage of keeping the track version installed permanently? |
|
|
|
|
10-01-2017, 02:51 PM
|
#1587 |
|
'It's an experiment'
Drives: [COTW 2/09/15] '11 GPI LSA SC Z/LE Join Date: May 2014
Location: Dallas TX
Posts: 8,709
|
Track version? BUMPS and pot holes.. these hang about 1.5" below the belly pan and 1/2" below the sway bar -- so, it will hit something.
The template is super easy, just use cardboard, and trace the radius arm, trim to shape -- that is it! VERY simple. Then I cut more abs to make the screw pads, use Oatey ABS cement (black) you get from Lowes or Home Depot (JB Weld would work also), then just sand both sides of the pads, and 'stack/glue' them! I make one set of pads 'wider' so I had some room to setup the other two. It really is that easy. The cardboard template is 'reversable' -- once you done one side turn it over and then you have the other side precut... Nothing more that tracing the radius arm and cutting/filing to shape... ABS is more forgiving and is 'malleable' to the radius arm so, I can also use a heat gun to form it as needed, but, one sheet and screw pads was all I needed... Thanks for asking! -Don
__________________
747 RWHP 794 RWTQ
"Horsepower sells cars, torque wins races." - Enzo Ferrari See My Build: http://www.camaro5.com/forums/showthread.php?t=385577 Last edited by hammdo; 10-01-2017 at 11:12 PM. |
|
|
|
|
10-01-2017, 03:03 PM
|
#1588 |
|
Drives: '14 1LE Join Date: Nov 2013
Location: NJ
Posts: 2,438
|
Thanks, great feedback.
I will have the OE Z/28 brake ducts, so I wonder how much that low-hanging part contributes to total brake cooling. I might consider trimming that lower part (or making it detachable/adjustable) to retain the key brake cooling advantage while avoid the bump and pothole issues with daily driving. |
|
|
|
|
10-01-2017, 03:08 PM
|
#1589 |
|
'It's an experiment'
Drives: [COTW 2/09/15] '11 GPI LSA SC Z/LE Join Date: May 2014
Location: Dallas TX
Posts: 8,709
|
6th Gen brake air dams for tracking continued
Here is a pic of the cardboard template:
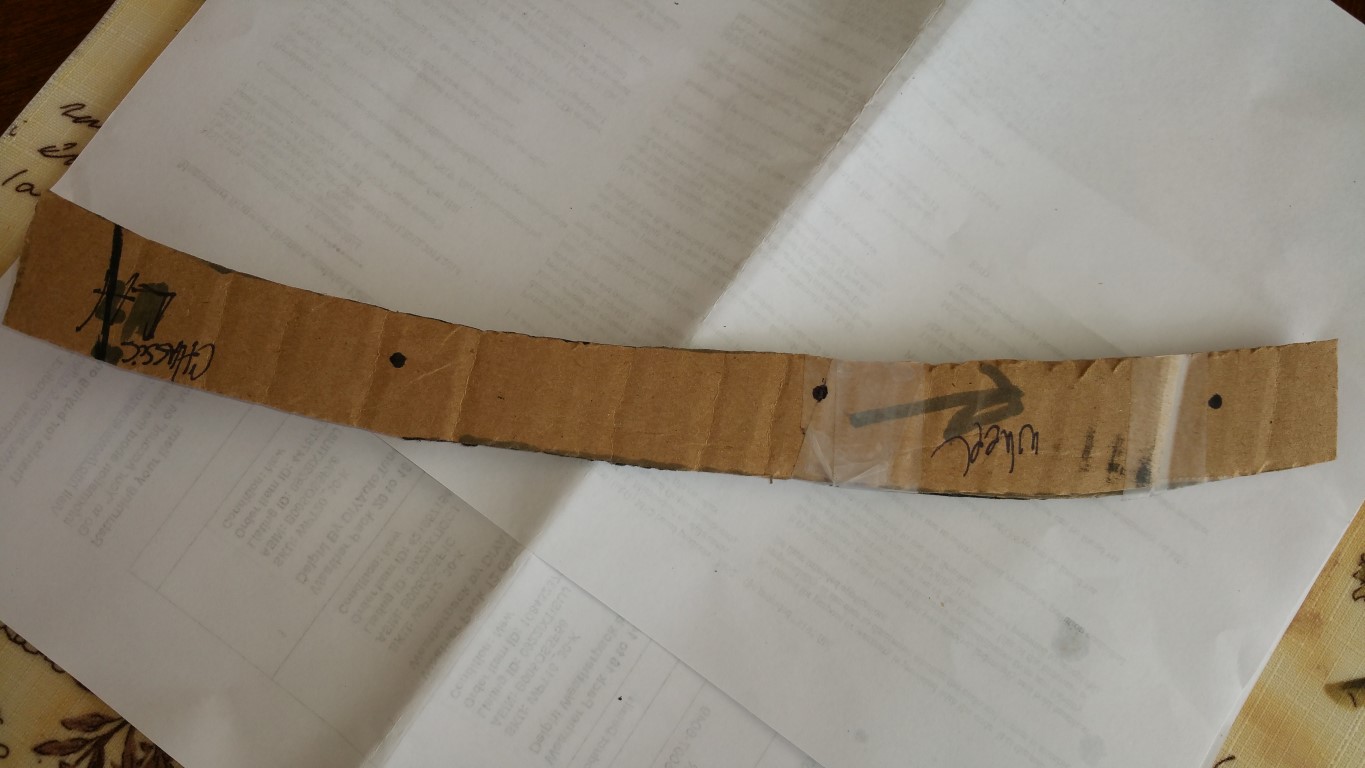 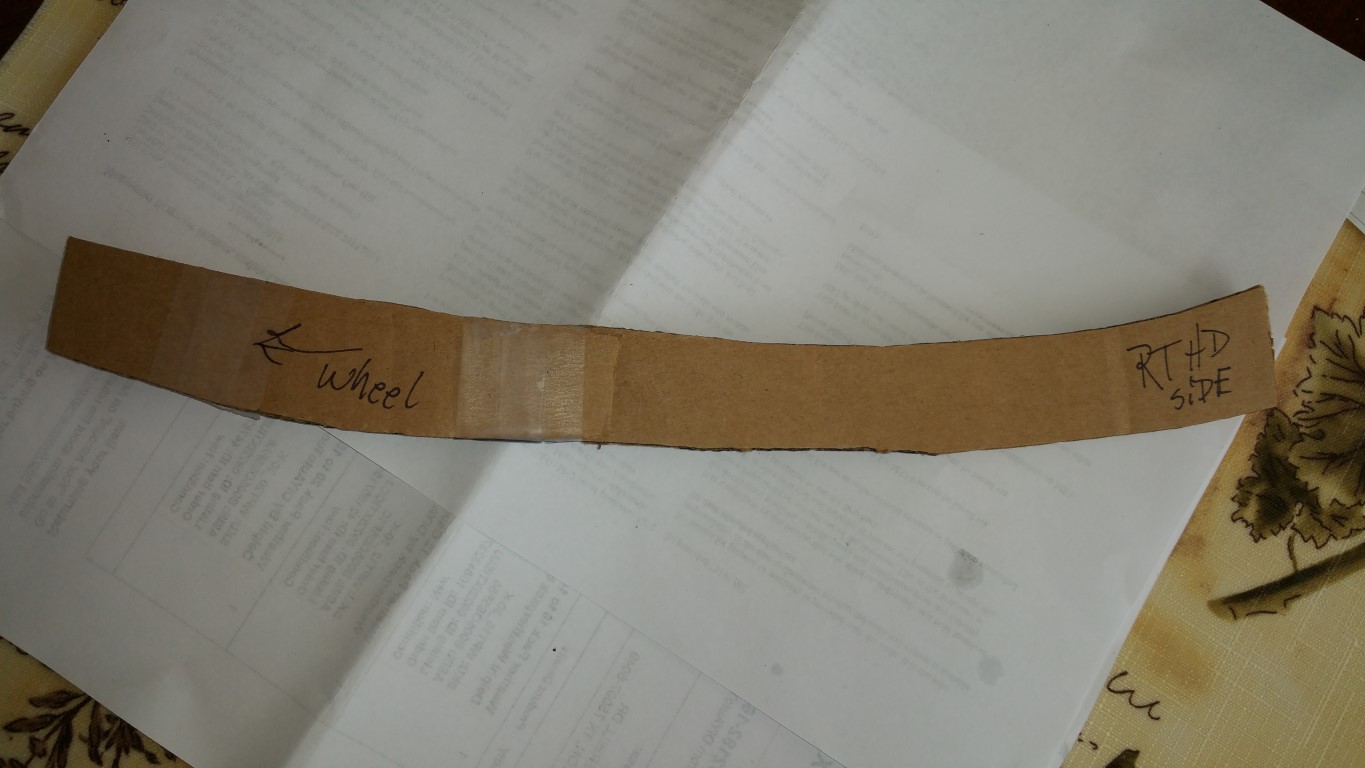 as you can see, very easy. I basically setup the driver's side until I was finished, then, used it as a guide for the passenger's side -- since I already worked out how it needed to fit, it was 'repeat' on the other side and trim as necessary. There is so much you can do with abs and its strong as heck too -- easy to fix/re-create if it ever breaks (really cold weather is the only thing I'm familiar with that can break abs) That was it! I'm building a box for a 'secondary' trans cooler that I'll be using a 'NACA' scoop to help cool it. Using ABS and aluminum for that -- having custom hoses made (like my oil cooler ones). That is a later winter project, but, just goes to show what you can do with ABS... -Don
__________________
747 RWHP 794 RWTQ
"Horsepower sells cars, torque wins races." - Enzo Ferrari See My Build: http://www.camaro5.com/forums/showthread.php?t=385577 |
|
|
|
|
10-01-2017, 03:10 PM
|
#1590 |
|
'It's an experiment'
Drives: [COTW 2/09/15] '11 GPI LSA SC Z/LE Join Date: May 2014
Location: Dallas TX
Posts: 8,709
|
I thought about that and I figured I could always extend or add ABS where I might need directing. With the ABS Cement or JB Weld, you can manipulate all you want -- and with a heat gun, form abs curves, bends, etc. anyway needed. VERY versatile...
-Don
__________________
747 RWHP 794 RWTQ
"Horsepower sells cars, torque wins races." - Enzo Ferrari See My Build: http://www.camaro5.com/forums/showthread.php?t=385577 |
|
|
|
|
10-01-2017, 03:13 PM
|
#1591 |
|
'It's an experiment'
Drives: [COTW 2/09/15] '11 GPI LSA SC Z/LE Join Date: May 2014
Location: Dallas TX
Posts: 8,709
|
For the lower part, you could just 'groove' a slide slot and then have an 'anchor' to allow it to move up and down -- that would work also -- good idea...
-Don
__________________
747 RWHP 794 RWTQ
"Horsepower sells cars, torque wins races." - Enzo Ferrari See My Build: http://www.camaro5.com/forums/showthread.php?t=385577 Last edited by hammdo; 10-01-2017 at 03:33 PM. |
|
|
|
|
10-01-2017, 03:17 PM
|
#1592 | |
|
Drives: '14 1LE Join Date: Nov 2013
Location: NJ
Posts: 2,438
|
Quote:
In the meantime I'm enjoying living vicariously through your thread! |
|
|
|
|
|
10-01-2017, 03:20 PM
|
#1593 |
|
'It's an experiment'
Drives: [COTW 2/09/15] '11 GPI LSA SC Z/LE Join Date: May 2014
Location: Dallas TX
Posts: 8,709
|
LOL, the ideas that come to my head sometimes have me pilling up things -- just for that time when I 'do' get to it.
My wife is on me to 'get rid' of some of these boxes -- she's a trouper and knows how I am -- you should have seem my office area with the 'pile' of parts for the forged engine. Now, I have 'other' items I need to get to ;o)... If only I could find a couple of week just for 'fun' stuff ;o) As they say, 'time to get too it!' -Don
__________________
747 RWHP 794 RWTQ
"Horsepower sells cars, torque wins races." - Enzo Ferrari See My Build: http://www.camaro5.com/forums/showthread.php?t=385577 Last edited by hammdo; 10-29-2017 at 07:50 PM. |
|
|
|
|
10-01-2017, 07:21 PM
|
#1594 |
|
'It's an experiment'
Drives: [COTW 2/09/15] '11 GPI LSA SC Z/LE Join Date: May 2014
Location: Dallas TX
Posts: 8,709
|
6th Gen brake air dams for tracking continued
OK, pics of the right side setup for the track air dams:
Prep for right side: 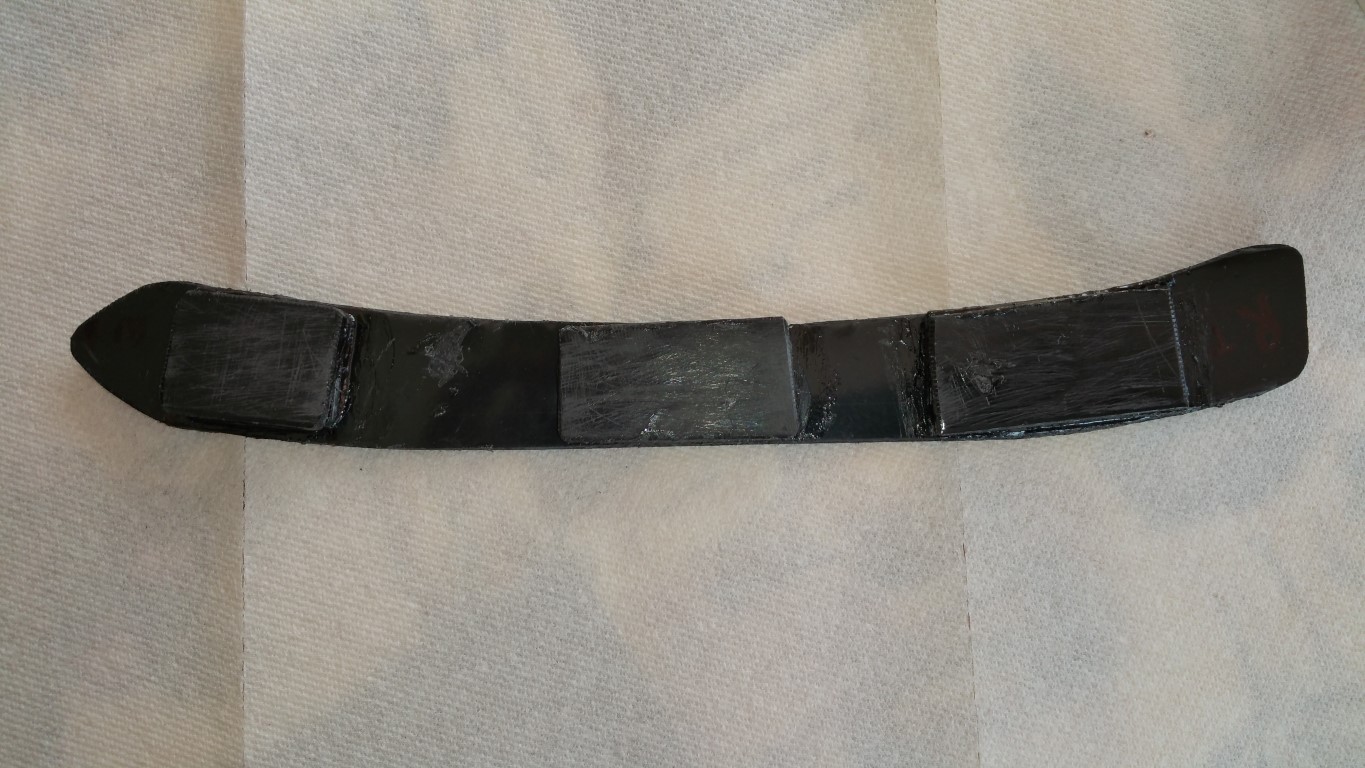 Trimmed and ready to go: 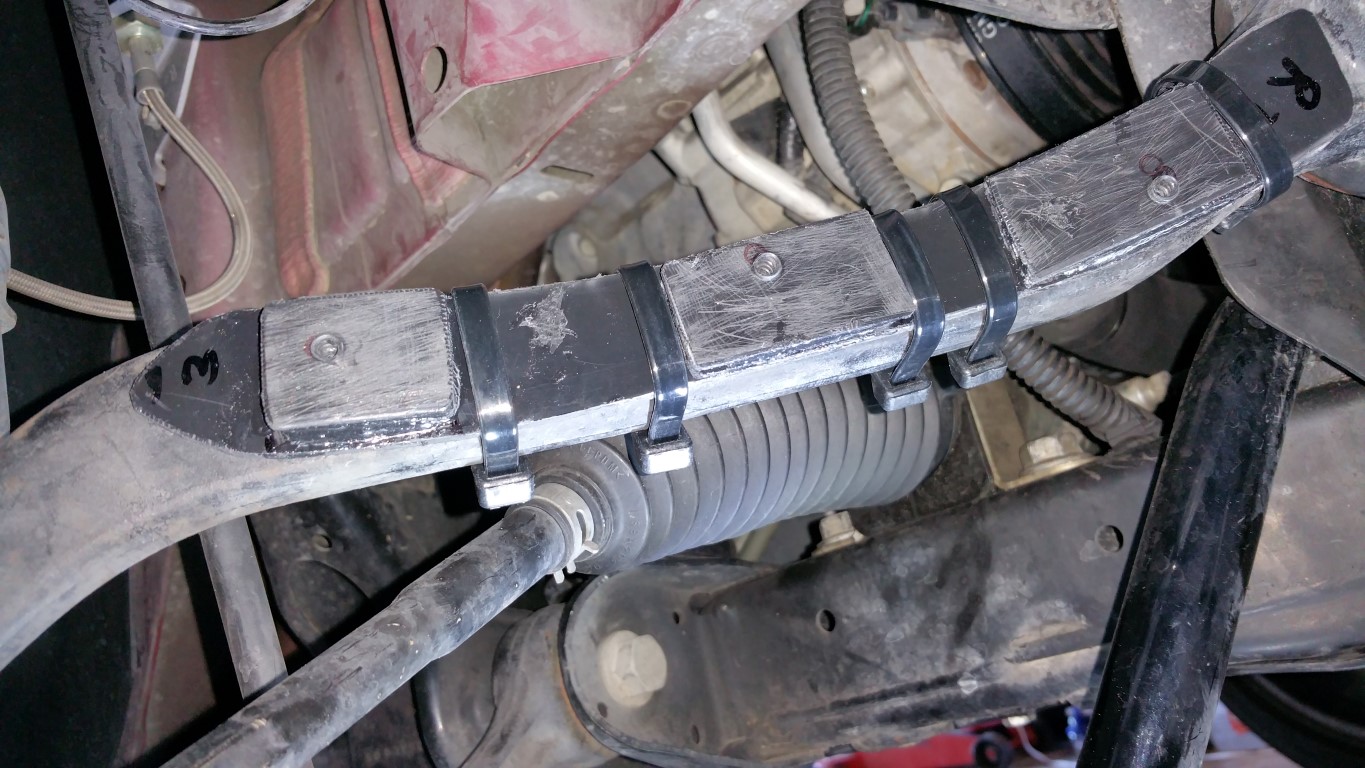 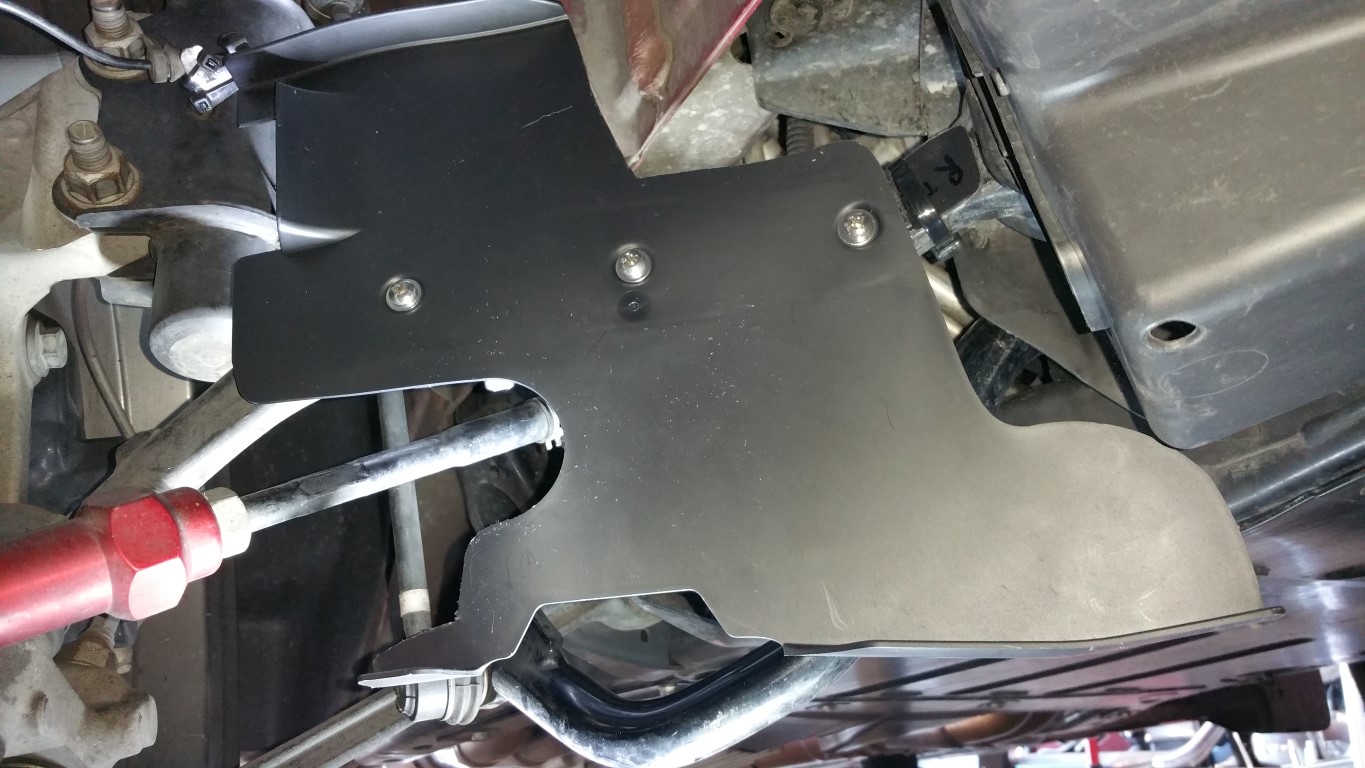 Wide Shot: If you look closely at the right side, you'll see the ski-ramp! The ZL1 setup has it on both sides: 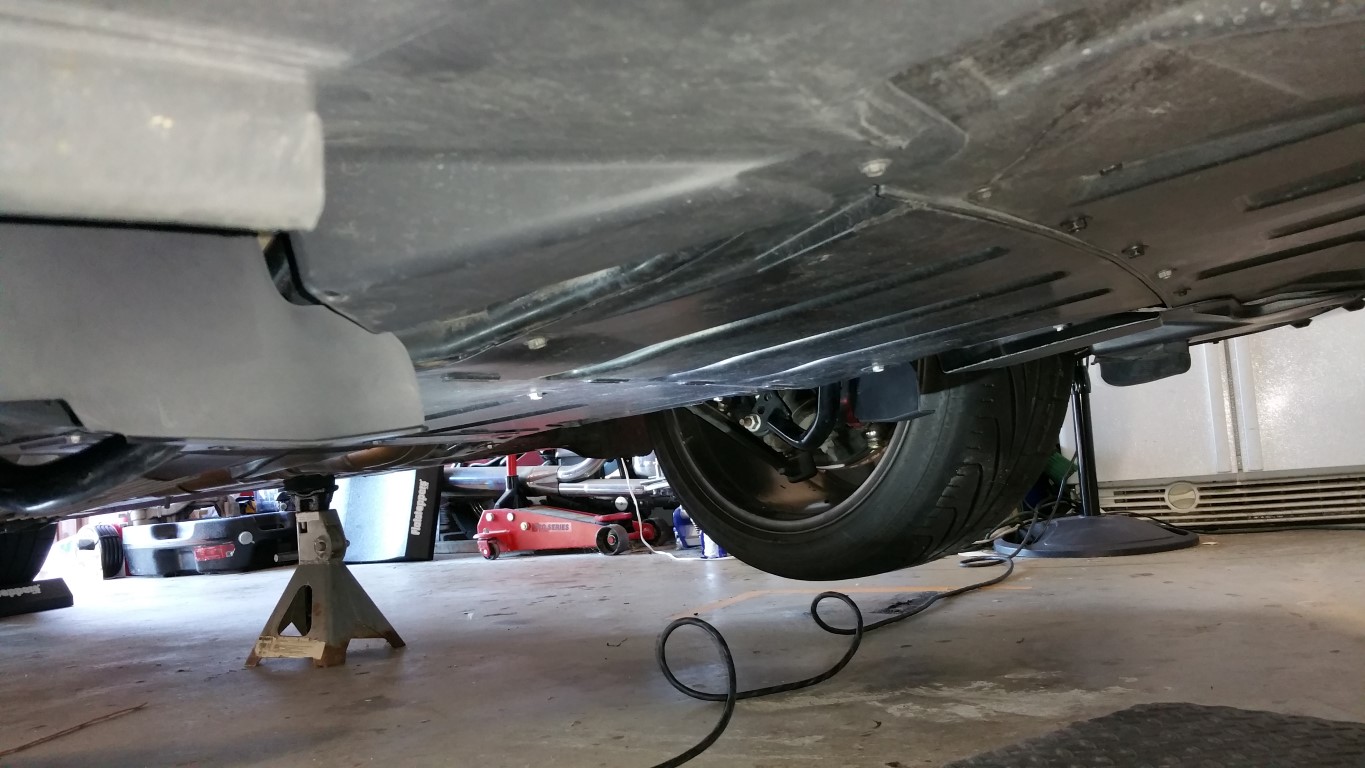 Now, the test drive -- I'll need to be careful since 'track' and 'highway' roads are very different... just a shakedown -- then, the 'daily' air dams go on! -Don
__________________
747 RWHP 794 RWTQ
"Horsepower sells cars, torque wins races." - Enzo Ferrari See My Build: http://www.camaro5.com/forums/showthread.php?t=385577 |
|
|
|
|
10-01-2017, 09:56 PM
|
#1595 |
|
'It's an experiment'
Drives: [COTW 2/09/15] '11 GPI LSA SC Z/LE Join Date: May 2014
Location: Dallas TX
Posts: 8,709
|
6th Gen brake air dams for tracking continued
OK, now that those are in, I installed the 'daily' driver version -- trimmed in just 2 areas (close to the frame) and they popped right on!
I do use just a little bit of blue loctite -- just to play it safe... 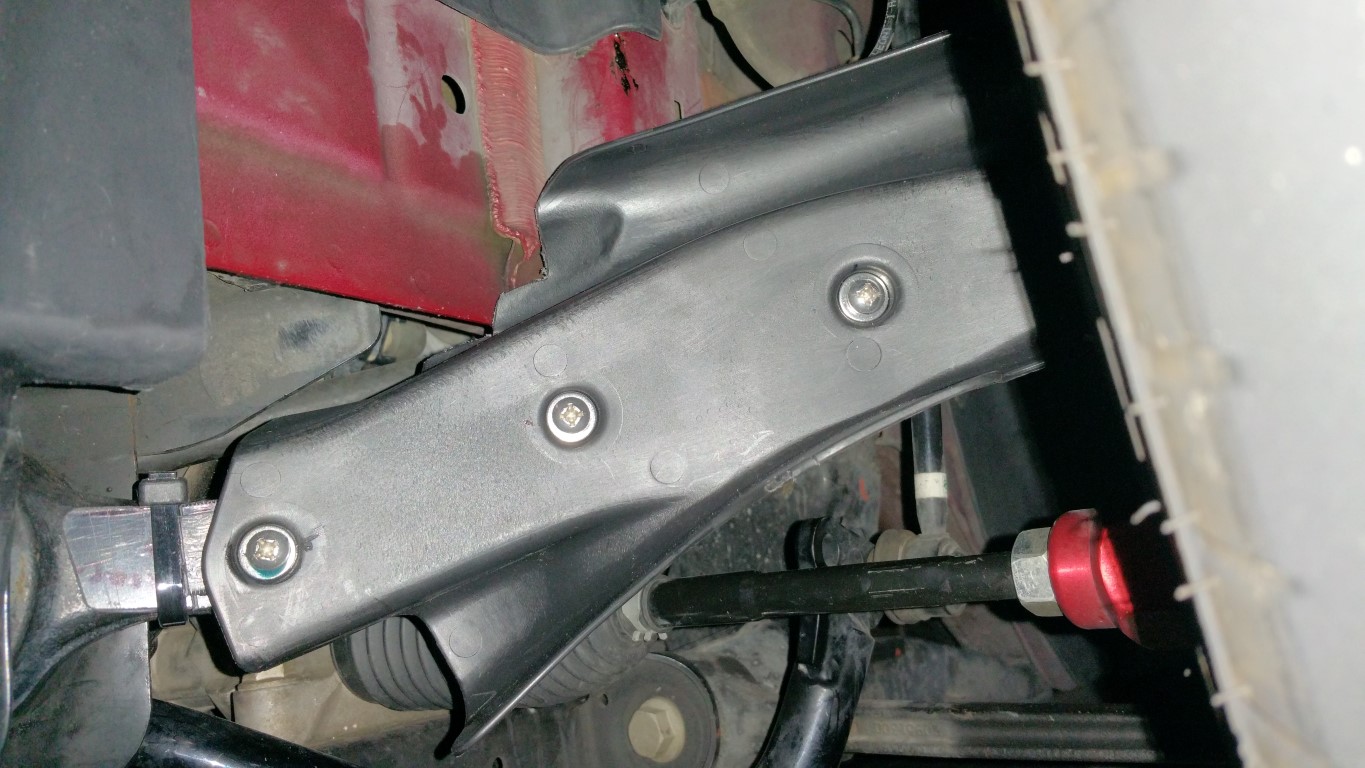 I did find a small coolant leak from the steam-line. I took off the tb and intake hose and sure enough, that is where its coming from. I discovered the spring clamp does not have enough tension to keep the hose tight (I can twist it and pull it easily). Looks like a fatigued clamp (its new) so I'll take a pic of the line and then pick up a couple of spring clamps tomorrow and replace this one (I'll double it to be safe). I'll take a pic. I knew there was a leak as I keep the engine bay spotless -- and discovered a baked on substance on the pulleys -- pretty clear there was a leak. I'll clean it all up after I'm sure its fixed... -Don
__________________
747 RWHP 794 RWTQ
"Horsepower sells cars, torque wins races." - Enzo Ferrari See My Build: http://www.camaro5.com/forums/showthread.php?t=385577 |
|
|
|
|
10-02-2017, 04:38 PM
|
#1596 |
|
'It's an experiment'
Drives: [COTW 2/09/15] '11 GPI LSA SC Z/LE Join Date: May 2014
Location: Dallas TX
Posts: 8,709
|
Fixed the leaking steam vent -- double clamped it and burped the coolant -- took about an hour to do all the updates -- ran it and coolant @ 90° ambient idling was 186° after 15 minutes. Will need to test drive to confirm no leaks. Then, drop the belly pan, clean up everything...
Was a fatigued clamp! -Don
__________________
747 RWHP 794 RWTQ
"Horsepower sells cars, torque wins races." - Enzo Ferrari See My Build: http://www.camaro5.com/forums/showthread.php?t=385577 |
|
|
|
|
|
|
|
 |
|
|


