You are browsing camaro5 

|
 09-15-2015, 02:11 PM
|
#491 |
|
'It's an experiment'

Drives: [COTW 2/09/15] '11 GPI LSA SC Z/LE Join Date: May 2014
Location: Dallas TX
Posts: 8,709
|
Not a problem. I figured it was over a year since I did those and not covered. I put carbon fiber ones in from ADM. I Saw the updated ones so glad that was changed. Since the cradle was out, there was no reason not to just replace them. It's all good...
Can't wait to get my CSF radiator in! It's due today from you... -Don
__________________
747 RWHP 794 RWTQ
"Horsepower sells cars, torque wins races." - Enzo Ferrari See My Build: http://www.camaro5.com/forums/showthread.php?t=385577 Last edited by hammdo; 09-15-2015 at 10:30 PM. |

|

|
|
09-15-2015, 10:22 PM
|
#492 |
|
'It's an experiment'
Drives: [COTW 2/09/15] '11 GPI LSA SC Z/LE Join Date: May 2014
Location: Dallas TX
Posts: 8,709
|
Well, my CSF Radiator came in from JDP today! Woot! So, basically drained, and removed the hoses, transmission lines (don't forget to plug them), DRAINED the transmission fluid out of the old radiator so I know at a minimum, how much to put back, then did the swap over:
Here is the box it came in (nicely packed!): .jpg) Prepping the car for r-n-r: .jpg) Removed the Might Mouse Catch Can -- noting the line orientation: .jpg) Capping the Transmission lines to prevent leaking while working. Note the towel on the ac belt to prevent any leakage on it: .jpg) Remove upper and lower hoses, CAI intake hose, un-plugged the fans and unbolted the fans. Removed the fans and then unbolted the radiator, condenser. You have to lift condenser in order to get the radiator out. Once those are done, carefully lift the radiator out. You'll need to transfer the hose, rubber guides, and transmission lines. This radiator has line clamps that hold the transmission line -- very nice. There were clips already in the radiator so woot! extras if I every loose any!. For the hoses I used heater hose grease to ease them on and off should I need to: 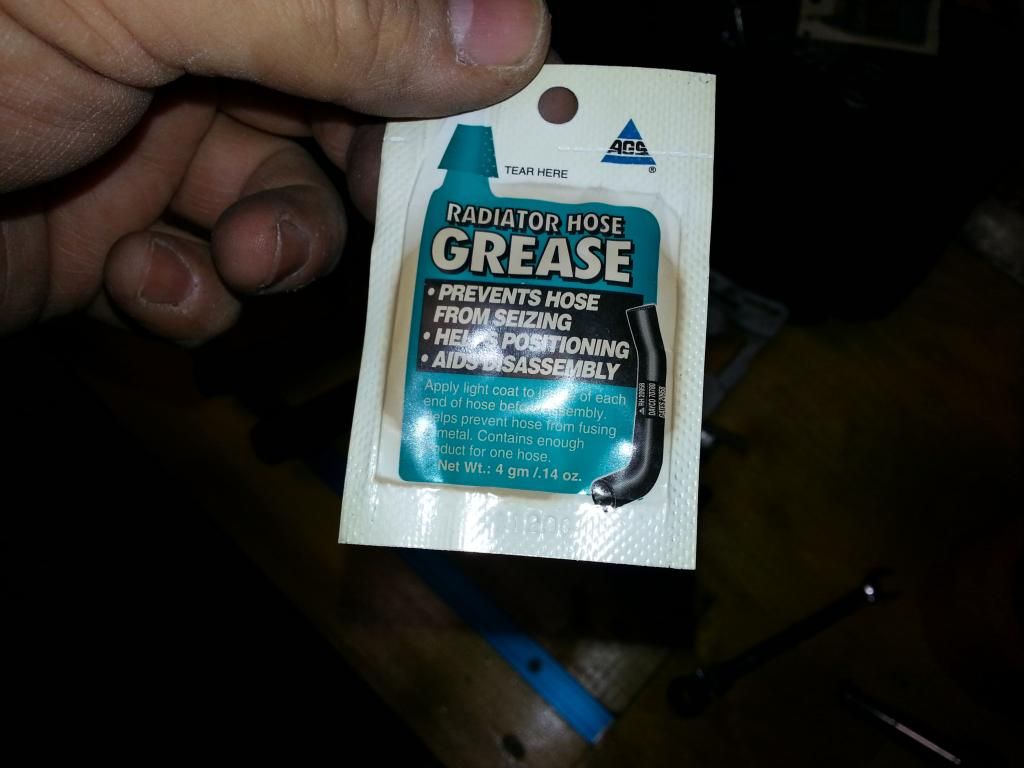 Radiators side by side: .jpg) This is the transmission fluid drained from the radiator (I reused it as there are not many miles since I did the last one): .jpg) The radiator ready to install: .jpg) Lines and lower hoses: .jpg) It takes a bit more work to do the radiator/condenser by yourself, but I got it all in!: .jpg) Shot from the bottom: .jpg) Filled with 65% distilled water, 35% Concentrated Dexcool, and Water Wetter. Burped/purged the air. Here is a chart to help: 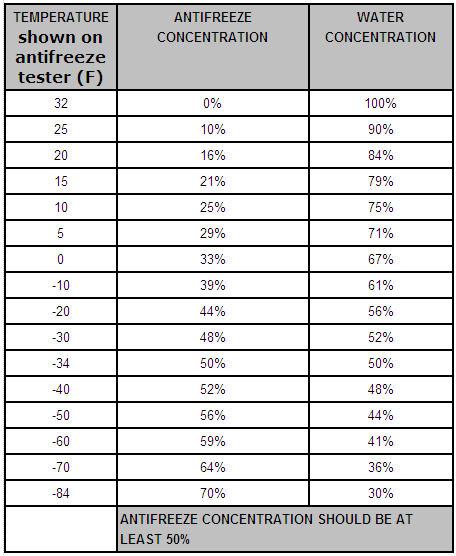 One of the things I did was keep the car 'up' in the front so the air pockets would rise to the top faster -- took about 10 minutes to get most of the air out. I took it out for a drive -- 178* @ 70+ mph -- very nice. Oil and Trans temps are perfect. Now, I'll still need to purge one more time (thus the drive cycle) and that should do it! Will keep everyone posted, but nice to see (it was 95* today so -- not bad @ all)... -Don
__________________
747 RWHP 794 RWTQ
"Horsepower sells cars, torque wins races." - Enzo Ferrari See My Build: http://www.camaro5.com/forums/showthread.php?t=385577 Last edited by hammdo; 05-20-2016 at 11:38 AM. |
|
|
|
|
09-16-2015, 02:58 PM
|
#493 |
|
'It's an experiment'
Drives: [COTW 2/09/15] '11 GPI LSA SC Z/LE Join Date: May 2014
Location: Dallas TX
Posts: 8,709
|
Well, the radiator is doing its job, but that dissipated heat has to go somewhere @ idle -- and it does, the CAI. I checked the temps of the CAI. While moving its Ambient, but, @ idle sitting, its gains 50* -- yep 50*! OUCH, I used the AeroForce gauges to verify -- it sure does. So its 95* outside and I'm at 145* on the IAT. I could also see the timing being pulled as it crept up in temps...
So, that means I need to add a heat barrier around the CAI to keep the heat off of that thing... I knew there would be a cause and effect (it HAS to go somewhere) -- and this is it... That is the next mod... Hum.... -Don
__________________
747 RWHP 794 RWTQ
"Horsepower sells cars, torque wins races." - Enzo Ferrari See My Build: http://www.camaro5.com/forums/showthread.php?t=385577 |
|
|
|
|
09-16-2015, 11:52 PM
|
#494 |
|
'It's an experiment'
Drives: [COTW 2/09/15] '11 GPI LSA SC Z/LE Join Date: May 2014
Location: Dallas TX
Posts: 8,709
|
Also to aid in engine compartment cooling, I'm looking into getting a set of hex vent holders with no drip tray for summer use -- that will open up more room for heat to escape out of the hood...
-Don
__________________
747 RWHP 794 RWTQ
"Horsepower sells cars, torque wins races." - Enzo Ferrari See My Build: http://www.camaro5.com/forums/showthread.php?t=385577 |
|
|
|
|
09-18-2015, 10:39 AM
|
#495 |
|
'It's an experiment'
Drives: [COTW 2/09/15] '11 GPI LSA SC Z/LE Join Date: May 2014
Location: Dallas TX
Posts: 8,709
|
Well, after scoping out the IAT temps at idle, it is not unusual for temps to get that high. The primary concern is what are they when moving, and those are ambient.
Since the car is not under power at idle, very little if any timing is really pulled. So, to assist in recovery once moving, insulating the inside may help. I believe CAI Inc. does this. Also, opening the hood vents up will keep the engine bay temps in check. Those are my next experiments... -Don
__________________
747 RWHP 794 RWTQ
"Horsepower sells cars, torque wins races." - Enzo Ferrari See My Build: http://www.camaro5.com/forums/showthread.php?t=385577 |
|
|
|
|
09-22-2015, 10:05 PM
|
#496 |
|
'It's an experiment'
Drives: [COTW 2/09/15] '11 GPI LSA SC Z/LE Join Date: May 2014
Location: Dallas TX
Posts: 8,709
|
So tonight I updated my ADM CAI to utilize a heat shield covering. After taking apart the CAI, I created templates so I could cut out the Cool-it Thermo Tec:
Templates: .jpg) .jpg) .jpg) Once I had those, I used them and a black sharpie to mark out each section. Then, using scissors and a razor, cut out the shielding. I made sure the 'templates' were a bit smaller as the shielding does 'spread out' when you roll out the shielding to give a good 'bonding' to the surface. Here are the templates cutout and installed on the ADM CAI: .jpg) .jpg) .jpg) Now, I installed the two sides together: .jpg) Installed the air filter and MAF: .jpg) Now the lid and washer-bottle lid: .jpg) Took it out for a spin. Temps while moving stayed within a * or 2 of Ambient (it was 91*). The shielding does not weigh much @ all so that was a nice feature. When stopped @ a light, temps rose much more slowly (since very little air is moving) but recovered much quicker once I began moving -- It took MUCH longer to recover before. Now, the temps climbed slower: this I believe is where the shielding helped. Once I get the Hex Vent splash covers (with no slash trays), I'm betting the temps will be better controlled: when its HOT outside. As for the radiator, that is working flawlessly! Temps are 200* or less @ idle ( after a good drive) and when moving about 181* to 185* (when its 90*+ outside). One more test (Hex Vent splash shield -- those should be here Wednesday or Thursday) and I'll know where I'm @! Find the shielding here: http://www.amazon.com/gp/product/B00...ilpage_o02_s00 -Don
__________________
747 RWHP 794 RWTQ
"Horsepower sells cars, torque wins races." - Enzo Ferrari See My Build: http://www.camaro5.com/forums/showthread.php?t=385577 Last edited by hammdo; 09-22-2015 at 10:19 PM. |
|
|
|
|
09-24-2015, 12:08 AM
|
#497 |
|
'It's an experiment'
Drives: [COTW 2/09/15] '11 GPI LSA SC Z/LE Join Date: May 2014
Location: Dallas TX
Posts: 8,709
|
So tonight, I removed the drip trays from the Hex Vents (new holders coming so I'll put those on them) and went out and tested the temps.
Here are the drip pans off the vents: .jpg) .jpg) .jpg) CAI temps REALLY improved at idle and recovery was even quicker. So, allowing the heat to 'vent' without the drip pans did the trick. So Radiator, CAI update (shielding), and no drip pans took care of the temps. During the drive, one of the plug wires came off the coil -- knew it when it happened. Cleaned it and put it back on. Car ran good without it -- really surprised about that. But idle -- noticed it. So, all in all, temps are in great shape now -- oil is normal (212), trans temps 180 and below, and coolant temps are 190's @ idle, and high 170's/ low 180's during the drive (70 mph+). So, when it gets hot out, temps should be in the normal range (what the car should be factory) when its in the 100's (90's today).... -Don
__________________
747 RWHP 794 RWTQ
"Horsepower sells cars, torque wins races." - Enzo Ferrari See My Build: http://www.camaro5.com/forums/showthread.php?t=385577 |
|
|
|
|
09-24-2015, 12:15 AM
|
#498 |
|
'It's an experiment'
Drives: [COTW 2/09/15] '11 GPI LSA SC Z/LE Join Date: May 2014
Location: Dallas TX
Posts: 8,709
|
So, getting the Rotofab washer relo kit:
 Once this is installed, I'll 'plug' the opening in the ADM CAI -- this should give the CAI more intake air. Looks like a great place to move it too... -Don
__________________
747 RWHP 794 RWTQ
"Horsepower sells cars, torque wins races." - Enzo Ferrari See My Build: http://www.camaro5.com/forums/showthread.php?t=385577 Last edited by hammdo; 09-23-2017 at 12:29 AM. |
|
|
|
|
09-24-2015, 09:32 AM
|
#499 |
  
Drives: Silver SS/RS, Man 6 Join Date: Apr 2009
Location: DFW area, Texas
Posts: 884
|
[QUOTE=hammdo;8652737]So, getting the Rotofab washer relo kit:
Once this is installed, I'll 'plug' the opening in the ADM CAI -- this should give the CAI more intake air. Looks like a great place to move it too... Hey Don, why not buy the RACE version ADM lid that does not have the hole for the washer fluid tank cut into it? No plug needed. A much cleaner look and hopefully not at a steep price. Just a thought. Good Luck.
__________________
Silver 2SS/RS Man/6
CTS-V front 6-Piston Calipers, GM 3.91 Rear Gears |
|
|
|
|
09-24-2015, 11:36 AM
|
#500 |
|
'It's an experiment'
Drives: [COTW 2/09/15] '11 GPI LSA SC Z/LE Join Date: May 2014
Location: Dallas TX
Posts: 8,709
|
Yeah, I thought about that, but I have the shielding on this one (I still have more though). I may just do that and see -- not sure if Andy wanted to piece out just a lid.
Thanks! -Don
__________________
747 RWHP 794 RWTQ
"Horsepower sells cars, torque wins races." - Enzo Ferrari See My Build: http://www.camaro5.com/forums/showthread.php?t=385577 |
|
|
|
|
09-24-2015, 02:56 PM
|
#501 |
|
'It's an experiment'
Drives: [COTW 2/09/15] '11 GPI LSA SC Z/LE Join Date: May 2014
Location: Dallas TX
Posts: 8,709
|
And got this since I'm going to be in there anyway (rotofab big gulp for ZL1):
 And I'm fixing the (as in new) driver's side splash shield while I'm at it (grinding action did that by accident): 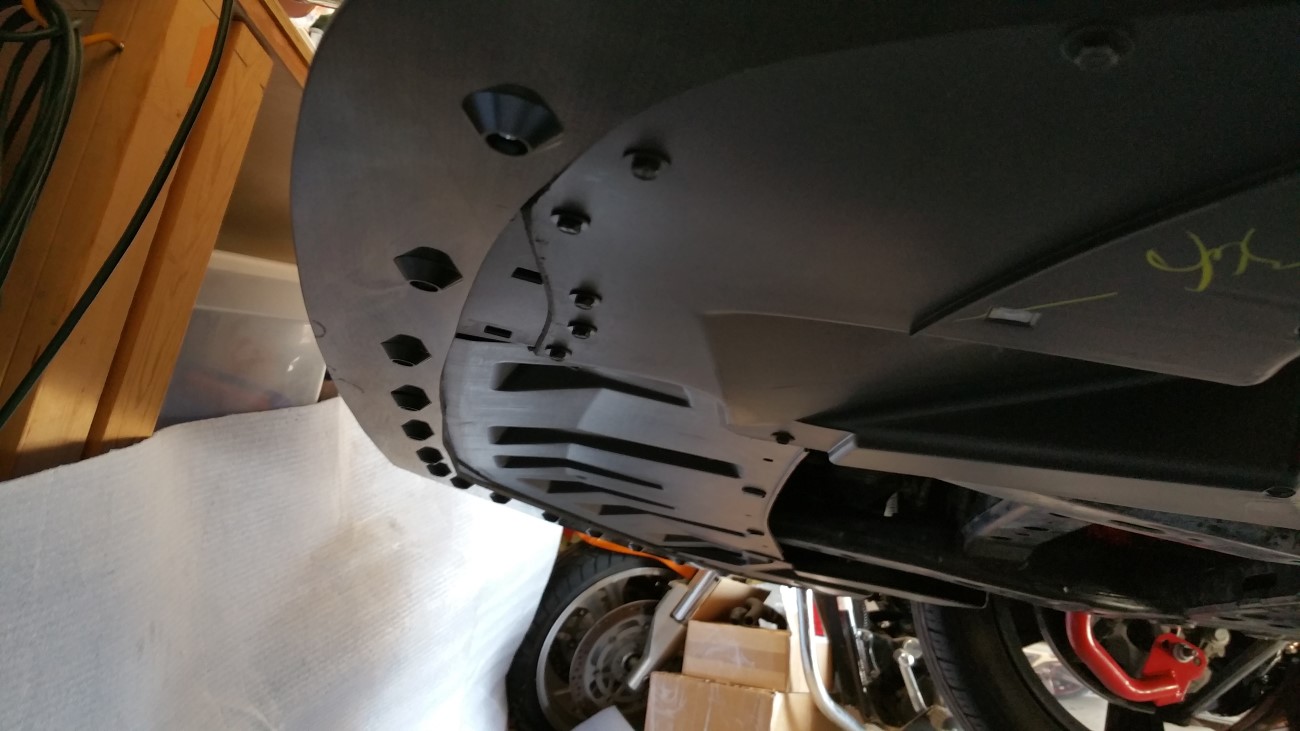 -Don
__________________
747 RWHP 794 RWTQ
"Horsepower sells cars, torque wins races." - Enzo Ferrari See My Build: http://www.camaro5.com/forums/showthread.php?t=385577 |
|
|
|
|
09-27-2015, 01:37 PM
|
#502 |
   
Drives: ZL1 Join Date: Sep 2011
Location: Phoenix
Posts: 1,524
|
Hey hammdo how snug does your intake fit against the fender? And does the air box connect to the cat to keep it from not moving
Sent from my iPhone using Tapatalk |
|
|
|
|
09-27-2015, 03:42 PM
|
#503 |
|
'It's an experiment'
Drives: [COTW 2/09/15] '11 GPI LSA SC Z/LE Join Date: May 2014
Location: Dallas TX
Posts: 8,709
|
Snug and does not move at all. Never had any issue with it. The one hold down keeps it in place just fine. It fits snug at the bottom along the frame and rests along the curve of the fender. Really a great CAI.
-Don
__________________
747 RWHP 794 RWTQ
"Horsepower sells cars, torque wins races." - Enzo Ferrari See My Build: http://www.camaro5.com/forums/showthread.php?t=385577 |
|
|
|
|
09-27-2015, 03:43 PM
|
#504 |
|
Drives: ZL1 Join Date: Sep 2011
Location: Phoenix
Posts: 1,524
|
Do you remember what held it to the car? Mine fees so flimsy I feel like I missed something
Sent from my iPhone using Tapatalk |
|
|
|
|
|
|
|
 |
|
|


